
I made this tart for the first time on a whim — I had a bar of dark chocolate sitting in my pantry and a bag of hazelnuts I'd bought for something I never ended up making. Three hours later I had something that looked genuinely beautiful sitting on my counter, and I stood there staring at it thinking, did I actually just do that? It's one of those desserts that feels way more impressive than the effort it requires, which is exactly the kind of recipe I keep coming back to.
What makes this one work is how the components contrast each other. The crust is short and buttery, the ganache is silky and dark, and the hazelnuts on top give you that crack of crunch in every bite. The ganache filling needs no baking at all — you just heat cream, pour it over chopped chocolate, stir in butter, and that's it. It sets up firm in the fridge and slices cleanly. I've made this version a handful of times now and it's become my go-to when I need a dessert that looks like I put in far more effort than I actually did. If you love no-bake chocolate desserts, my Chocolate Covered Cheesecake Strawberries follow that same logic — minimal effort, maximum impression.
My husband is the chocolate person in this house. He'll eat a basic brownie and be happy, but when I put this tart in front of him the first time, he actually stopped mid-bite to say something. That doesn't happen often. Zainab, who is eight and deeply suspicious of anything that isn't a cupcake, had two slices and asked if we could have it again "tomorrow, but also maybe tonight." So. It works on all ages.
One thing to set your expectations correctly: the ganache needs a full two hours in the fridge to set, and honestly it's better if you let it go overnight. I know that tests your patience but a warm, under-set ganache is just runny chocolate soup in a crust — not the same experience. Plan ahead, refrigerate overnight, and you'll get those clean glossy slices that make this tart so satisfying to serve.
Why You'll Love This Recipe
- The ganache filling needs zero baking: Once you've baked the crust, the rest is just hot cream over chopped chocolate and a good stir. No candy thermometer, no double boiler, no tempering — you just need a bowl, a spatula, and about five minutes. I've made ganache-based desserts for years and this is still the method I trust most because it's almost impossible to mess up if you follow the timing.
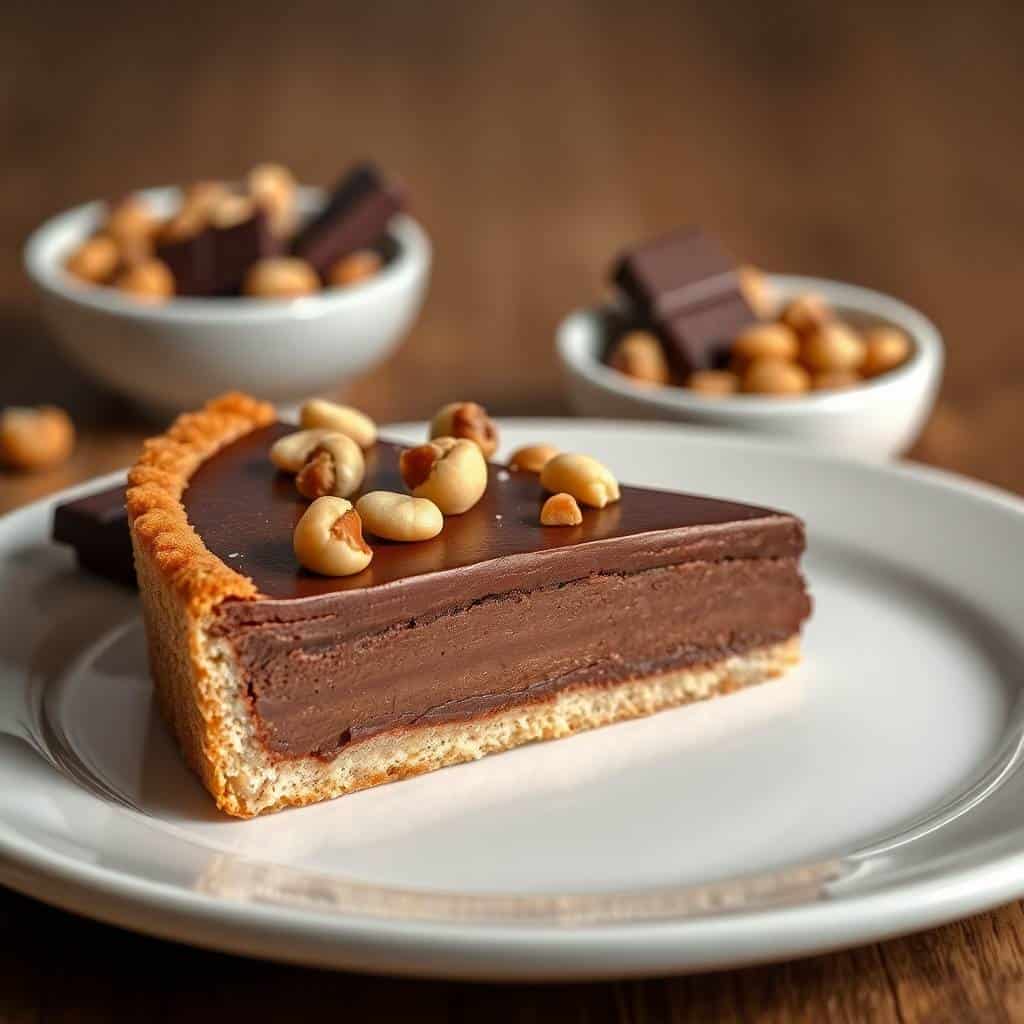
- It looks genuinely impressive: There's something about a glossy dark tart topped with rough-chopped toasted hazelnuts that looks like it came from a proper patisserie. When I set this on the table at a dinner last year, two people asked me where I'd bought it. That's the reaction you want. The trick is the quality of the chocolate — the glossier the ganache looks, the better the chocolate you used.
- Make it the day before and forget about it: The crust can be baked two days ahead. The assembled tart holds beautifully in the fridge for up to two days. When I'm hosting dinner I make this the night before, stick it in the fridge, and then I'm not scrambling with dessert the day of. It's genuinely stress-free when you plan it this way.
- The texture contrast is the whole point: Buttery snap from the crust, silky ganache that melts before you've even finished chewing, then a crunch of toasted hazelnut. Every forkful has all three things happening at once and it never gets boring through a whole slice. This is the kind of dessert that makes people slow down.
- It adapts easily to what you have: No hazelnuts? Use toasted almonds or pecans — the tart still works. No hazelnut paste? Skip it or blend roasted hazelnuts in a food processor until they're a rough paste. Prefer milk chocolate? It'll be sweeter and softer but still very good. The bones of this recipe are flexible enough that you can make it with what's already in your kitchen.
Ingredients
- 1 ½ cups all-purpose flour
- ½ cup powdered sugar
- ¼ teaspoon salt
- ½ cup unsalted butter, cold and cubed
- 1 large egg yolk
- 1–2 tablespoon cold water
- 1 cup heavy cream
- 8 oz (about 225g) dark chocolate, 60–70% cacao, finely chopped (use a bar, not chips)
- ½ cup hazelnut paste or finely ground roasted hazelnuts
- 2 tablespoon unsalted butter, softened
- 1 teaspoon vanilla extract
- Pinch of flaky sea salt (optional but worth it)
- Toasted hazelnuts, roughly chopped, for topping
- Chocolate shavings, for topping (optional)
A note on the chocolate: Use a proper baking bar, not chocolate chips. Chips have stabilizers that stop them from melting into a smooth, glossy ganache — I learned that one the hard way on my first attempt, which came out grainy and dull. A bar from Aldi, Trader Joe's, or any grocery store baking aisle works fine. You don't need fancy single-origin chocolate, just something in the 60–70% range.
On hazelnut paste: If you can't find hazelnut paste (sometimes labeled "hazelnut butter" near the nut butters), just toast your hazelnuts, rub off the skins, and blend them in a small food processor until they come together into a paste. Takes about 3 minutes of blending. Alternatively, grind them very finely — the texture will be slightly different but the flavor is the same.
Directions
- Step 1: Make the crust dough — In a bowl, combine the flour, powdered sugar, and salt. Add the cold cubed butter and use your fingertips (or a pastry cutter) to work it in until the mixture looks like coarse breadcrumbs with some pea-sized butter pieces still visible. Add the egg yolk and cold water one tablespoon at a time, mixing just until the dough barely holds together. Don't overwork it — a few dry patches are fine because you're pressing it in, not rolling it out. If you have a food processor, pulse everything in short bursts instead; it's faster but not necessary.
- Step 2: Press and chill the crust — Press the dough evenly into the bottom and up the sides of a 9-inch tart pan (with a removable base if you have one). Aim for an even thickness — thicker in some spots than others means uneven baking. Prick the base all over with a fork to prevent puffing, then refrigerate for 30 minutes. This rest is important — it relaxes the gluten and stops the crust from shrinking badly during baking.
- Step 3: Blind bake the crust — Preheat your oven to 350°F (175°C). Line the chilled crust with parchment paper and fill with pie weights or dried beans, making sure to press them into the edges. Bake for 15 minutes, then carefully remove the weights and parchment. Return to the oven for another 10 minutes until the crust is fully golden and dry to the touch. Let it cool completely before you do anything else — ganache poured into a warm crust sets unevenly and the crust can go soggy underneath.
- Step 4: Toast the hazelnuts — Spread your topping hazelnuts in a single layer on a baking sheet and roast at 350°F for 8 to 10 minutes until the skins are cracking and the kitchen smells nutty. Tip them onto a clean kitchen towel and rub vigorously to remove as much of the papery skin as you can — some will stay on and that's fine. Let them cool, then roughly chop. You want visible chunks, not dust.
- Step 5: Make the ganache filling — Place your finely chopped chocolate in a heatproof bowl. Heat the heavy cream in a small saucepan over medium heat until it just begins to simmer — look for small bubbles around the edges. Don't let it boil. Pour the hot cream over the chocolate and let it sit completely undisturbed for 2 full minutes. Then stir slowly from the center outward in small circles until the chocolate is fully melted and the mixture is smooth and glossy. Add the hazelnut paste, softened butter, vanilla extract, and a pinch of sea salt. Stir until everything is incorporated and silky.
- Step 6: Assemble the tart — Pour the warm ganache filling directly into the cooled crust. Smooth the top gently — the ganache will naturally self-level if it's still warm. Scatter the chopped toasted hazelnuts over the top, and add chocolate shavings if you're using them. Refrigerate for at least 2 hours until firm, or overnight for the cleanest slices. Before serving, let the tart sit at room temperature for 15 to 20 minutes — cold ganache straight from the fridge loses some of that silky quality.
Tips for Success
- Keep the butter cold the whole time: I mean genuinely cold — straight from the fridge, cubed, and worked in fast. The first tart I made I let the butter sit on the counter too long before I started and the crust came out dense and crumbly in the wrong way. If your kitchen is warm and the dough starts feeling greasy, put it back in the fridge for 15 minutes before pressing it into the pan. Cold butter = flaky, tender crust.
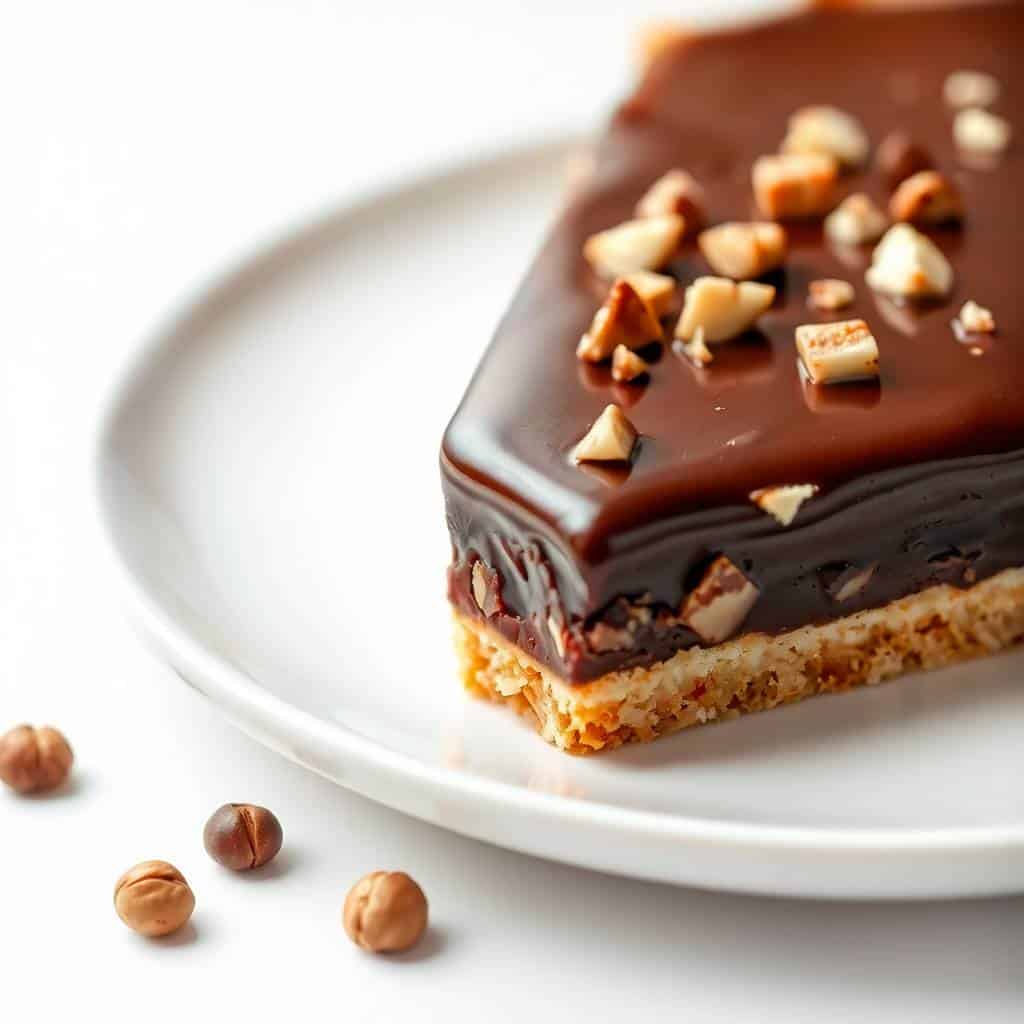
- Don't skip the 2-minute rest before stirring the ganache: I know it feels like nothing is happening when you pour the cream over the chocolate and just leave it there. But that rest time is melting the chocolate from the outside in, and if you stir too early you disrupt that process and end up with lumps you have to fight. Wait the full two minutes, then stir slowly from the center. It takes maybe 90 seconds of stirring and the ganache comes together beautifully.
- Always toast the hazelnuts even if the recipe says "optional": It's not optional. Raw hazelnuts have a bitter, papery flavor that doesn't do much for this tart. Eight minutes in the oven transforms them — they get deeper, nuttier, warmer in flavor. That contrast against the dark ganache is what makes this tart special. Takes almost no time and makes an enormous difference.
- Give the tart the full overnight in the fridge if you can: Two hours is the minimum and it will technically be set, but overnight is genuinely better. The ganache firms up completely, the flavors deepen, and the slices come out perfectly clean. I always make this tart the evening before I need it, which also means zero day-of stress. If you're serving it for a dinner, it's already done.
- Pull the tart from the fridge before you're ready to serve it: I set mine out 15 to 20 minutes before slicing. Ganache that's been in the cold fridge for hours is dense and slightly waxy — not bad, but not what this tart is supposed to be. At room temperature it softens into something genuinely silky. That little window of waiting time matters more than you'd think.
Variations
- Add espresso to the ganache: Stir 1 teaspoon of instant espresso powder into the hot cream before pouring it over the chocolate. You won't taste coffee exactly — what it does is push the chocolate flavor deeper and more intense. My husband likes this version best. It's a small change that makes the tart taste more complex without doing much extra work.
- Raspberry jam under the ganache: Spread a thin layer of raspberry preserves over the cooled crust before pouring in the ganache. The jam sets slightly under the chocolate and gives you a tart, fruity layer that cuts through the richness in the best way. This is actually how I'd describe a more classic French-style tart — the combination of raspberry and dark chocolate is timeless and it works incredibly well here.
- Orange zest ganache: Stir the finely grated zest of one orange into the warm ganache after the chocolate has melted. The citrus cuts through the fat of the cream and butter and gives the whole tart a brighter, fresher edge. If you're making this for guests who find pure dark chocolate a bit intense, the orange version tends to win people over immediately.
- Swap the hazelnuts for pecans or almonds: If hazelnuts aren't available where you are, toasted pecans work beautifully — they're slightly sweeter and butterier. Toasted sliced almonds give you more delicate crunch and a cleaner look on top. I make this version when I can't get to a store that carries hazelnuts and it's still very good. If you want a completely nut-free tart, skip the topping entirely and finish with a light dusting of cocoa powder instead.
- Mini tartlets for parties: Divide the dough and filling between individual mini tart pans instead of one large one. They bake in about 10 to 12 minutes rather than 25, and you get individual servings that people can lift straight off the plate. I made these for a small gathering last winter and they disappeared faster than anything else on the dessert table — people like having their own whole thing rather than a slice.
Serving and Storage
Serving
Pull the tart from the refrigerator 15 to 20 minutes before you plan to serve it — this gives the ganache time to soften from fridge-firm to silky. For the cleanest slices, use a sharp knife dipped in hot water and wiped dry between each cut. The tart serves 8 to 10 people comfortably. I like it as-is, maybe with a small spoonful of lightly whipped cream on the side, but a scoop of vanilla ice cream alongside a warm slice is not a bad idea either. If you want a simple finishing touch, a few extra whole toasted hazelnuts and a very light dusting of cocoa powder on top is all it needs to look intentional and elegant. This tart is substantial enough to be the whole dessert — you don't need anything else on the table alongside it. If you want something lighter to follow, my Crispy Air Fryer Apple Fries make a nice contrast — warm, fruity, quick to make.
Storage
Store the tart covered in the refrigerator for up to 5 days. The crust softens slightly after day two but the flavor holds up well. If you want to freeze it, wrap individual slices (or the whole tart) tightly in plastic wrap and then a layer of foil — it keeps for up to one month. Thaw overnight in the refrigerator, not at room temperature. Room-temperature thawing can make the ganache weep and turn greasy. Once thawed, let it sit out for 15 to 20 minutes before serving, same as usual.
Frequently Asked Questions
Can I use milk chocolate instead of dark chocolate?
You can, but the tart will taste noticeably sweeter and the ganache will set softer because milk chocolate has less cocoa solids. If you go that route, reduce the heavy cream slightly — use about ¾ cup instead of a full cup — so the filling sets firmly enough to slice. The hazelnut and chocolate combination still works well with milk chocolate, it's just a different, sweeter result. For the most impressive flavor, dark chocolate between 60 and 70% is what I'd stick with.
Can I make the crust without a food processor?
Absolutely — I don't always use a food processor for this. Just combine the flour, powdered sugar, and salt in a bowl, add the cold cubed butter, and use your fingertips to rub the butter into the flour until it looks like coarse breadcrumbs. Work quickly so the heat from your hands doesn't melt the butter. Add the egg yolk and cold water and mix until the dough just barely comes together, then press it straight into the pan. It takes maybe five extra minutes compared to a food processor and the result is identical.
Do I need a tart pan with a removable bottom?
It makes a real difference to the presentation — a removable base lets you lift the tart cleanly out of the pan so the sides stay intact. If you don't have one, a regular 9-inch pie dish works fine and the tart will taste exactly the same; you just serve it straight from the dish. A tart pan with a removable base is usually under $15 at any kitchen store or online, and it's genuinely useful if you plan to make tarts or quiches more than once.
Can I freeze this tart?
Yes — wrap it tightly in plastic wrap and then foil and it keeps in the freezer for up to one month. Thaw it overnight in the refrigerator. Don't try to thaw it at room temperature; the ganache can turn greasy and the texture suffers. Once it's thawed, let it sit out for 15 to 20 minutes before slicing as usual. I've frozen individual slices this way and they come back completely fine.
How far ahead can I make this tart?
The crust can be baked up to 2 days ahead and kept at room temperature, wrapped. The fully assembled tart keeps well in the fridge for 1 to 2 days before serving — and honestly the flavor is better the next day once the ganache has fully set and everything has had time to come together. Wait to add any cocoa powder dusting or fresh whole hazelnuts on top until right before you serve so they look their best.
HAZELNUT CHOCOLATE TART RECIPE
Ingredients
For the Crust:
- 1 ½ cups all-purpose flour
- ½ cup powdered sugar
- ¼ teaspoon salt
- ½ cup unsalted butter cold and cubed
- 1 large egg yolk
For the Filling:
- 1 cup heavy cream
- 8 oz dark chocolate chopped
- ½ cup hazelnut paste or finely ground hazelnuts
- 2 tablespoon unsalted butter softened
- 1 teaspoon vanilla extract
For Decoration (Optional):
- Toasted hazelnuts
- Chocolate shavings
Instructions
Prepare the Crust:
- Preheat oven to 350°F (175°C). In a bowl, combine flour, powdered sugar, and salt. Cut in butter until mixture resembles coarse crumbs. Add egg yolk and mix until dough forms. Press into tart pan. Bake 15–20 minutes until lightly golden. Cool completely.
Make the Filling:
- Heat heavy cream in a saucepan until simmering. Pour over chopped chocolate, stir until smooth. Add hazelnut paste, butter, and vanilla. Mix until fully combined.
Assemble the Tart:
- Pour chocolate-hazelnut mixture into cooled crust. Smooth the top and refrigerate for at least 2 hours until set.
Serve:
- Decorate with toasted hazelnuts or chocolate shavings before serving. Slice and enjoy!
Notes
- Make Ahead: Tart can be made a day in advance for easier serving.
- Nut Variations: Substitute hazelnuts with almonds or pecans if desired.
- Serving Suggestions: Serve chilled with a dollop of whipped cream or fresh berries.
- Storage Tips: Keep refrigerated in an airtight container for up to 3 days.





Comments
No Comments