
Saad asked me to make these again before the first batch had even finished cooling. That's how I knew I had something worth writing down. I'd been messing around with a basic chocolate chip cookie base, had a bag of Butterfingers left over from some snack stash my husband had bought at Costco, and I just started throwing things in. The result was chaotic and slightly sticky and absolutely gone within a day.
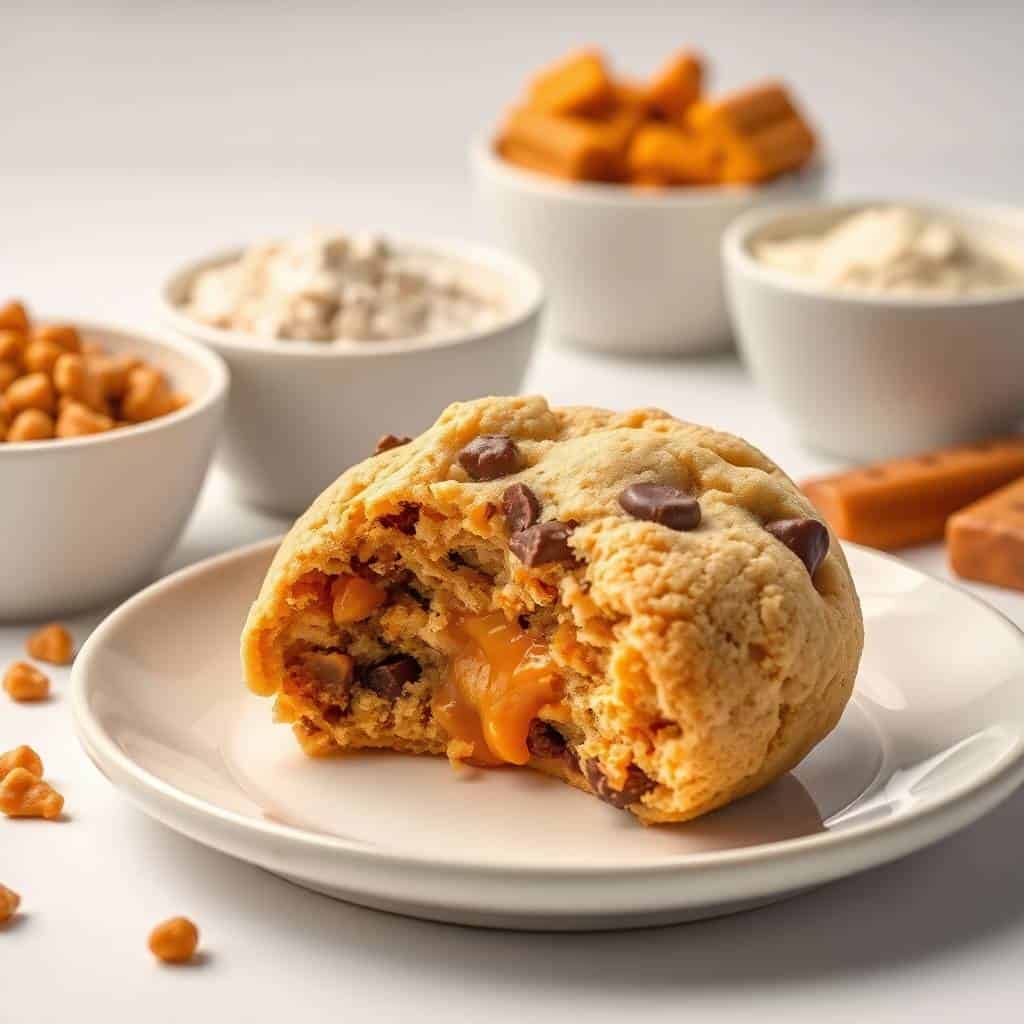
What makes these cookies work is the Butterfinger itself — it doesn't just melt away like chocolate chips do. It stays a little crunchy, a little crumbly, and it brings that peanut butter-chocolate thing into every single bite. Combined with soft caramel bits that get all gooey in the oven, you end up with a cookie that has actual texture contrast, not just a generic soft cookie with stuff folded in. I've made plenty of those. This is different.
My husband prefers these slightly warm, maybe 10 minutes out of the oven, with his evening tea. Saad eats them cold from the container the next morning, which honestly might be even better because the caramel firms up a bit and the whole thing holds together more. Either way, I make a full batch and it's gone in two days. I've started doubling it. If you're into caramel-heavy bakes, my Salted Caramel Butter Bars have that same gooey-sweet thing going on and are worth trying alongside these.
One thing I want to set expectations on: these cookies spread a little more than a standard drop cookie. That's the caramel doing its thing in the heat. Don't panic when they look thin at 10 minutes — they'll set up on the pan as they cool. Pull them out when the edges are just golden and trust the process. If you want thicker cookies, pop the dough in the fridge for 30 minutes before baking. It works.
Why You'll Love This Recipe
- No chilling required (unless you want it): I know a lot of cookie recipes make you refrigerate the dough for hours before you can bake. This one doesn't require that. You can mix the dough and go straight to the oven, which is how I usually do it on a weeknight when the kids are waiting. If you do have time to chill it, the cookies come out slightly thicker and puffier — but either way they're good.
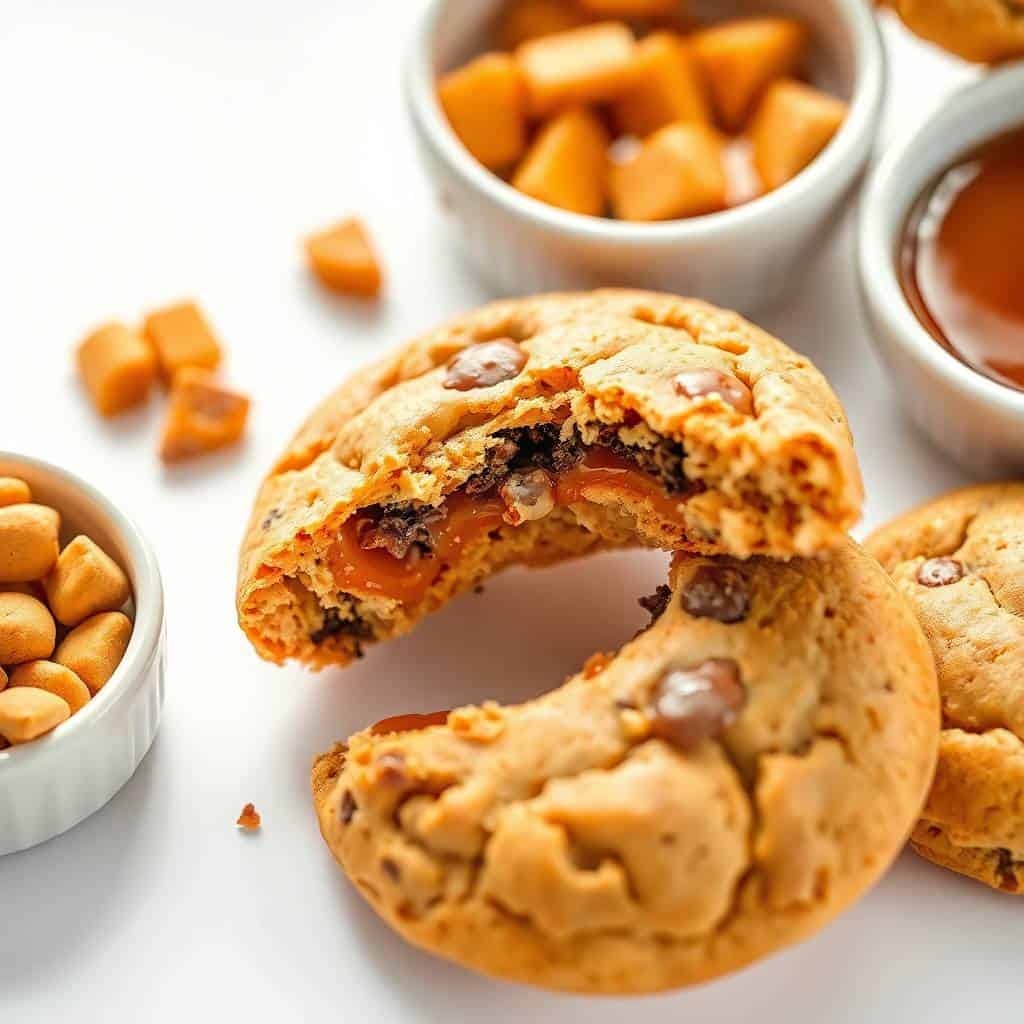
- Real texture contrast: A lot of cookies are just soft throughout, which is fine, but these have something more going on. The Butterfinger pieces stay slightly crispy even after baking, while the caramel bits go completely gooey. You get crunchy edges, a chewy center, and pockets of melted caramel all in one cookie. That's not an accident — it's just what happens when you combine these two things in a butter-heavy dough.
- Uses a candy bar most people have lying around: After Halloween, after kids' parties, after any event involving snacks — I always end up with Butterfingers nobody finished. This is exactly the recipe for that moment. You don't need a pristine candy bar. You can use the slightly melted, half-crushed ones from the bottom of the bag. They work just as well once they're chopped.
- One bowl dough, minimal cleanup: I don't have a stand mixer and I didn't use one for this. A hand mixer works fine, or if yours is buried in the back of a cabinet like mine sometimes is, a wooden spoon and some patience gets you there too. The dry ingredients come together fast and you're folding in the candy by hand at the end anyway. The cleanup after is one bowl, one whisk, and a spatula.
- They keep well and freeze even better: These cookies taste just as good on day three as day one, which is not something I can say about every cookie I've made. The caramel keeps the texture from going dry. I've also frozen the baked cookies and they thaw in about 20 minutes at room temperature with no noticeable change. Freezing the raw dough in scooped balls works too — just bake straight from frozen and add 2-3 extra minutes.
Ingredients
- 2 ½ cups all-purpose flour
- 1 teaspoon baking soda
- ½ teaspoon salt
- 1 cup unsalted butter, softened to room temperature
- ¾ cup brown sugar, packed
- ½ cup granulated sugar
- 2 large eggs, room temperature
- 2 teaspoons vanilla extract
- 1 cup crushed Butterfinger candy bars (about 4–5 fun-size bars)
- ½ cup caramel bits or soft caramels, chopped (Kraft caramel bits work well and are easy to find at Walmart or Target)
- Optional: flaky sea salt for sprinkling on top
Directions
- Step 1: Preheat the oven — Set your oven to 350°F (175°C). Line two baking sheets with parchment paper. I don't bother with silicone mats for these because the parchment makes cleanup easier when the caramel inevitably drips a little.
- Step 2: Mix the dry ingredients — In a medium bowl, whisk together the flour, baking soda, and salt. Set this aside. Getting this done first means you're not scrambling to measure while the butter mixture is sitting there waiting.
- Step 3: Cream the butter and sugars — In a large bowl, beat the softened butter with the brown sugar and granulated sugar until the mixture is lighter in color and fluffy, about 2–3 minutes. This step matters — creaming properly creates air pockets that give the cookies lift. Don't rush it.
- Step 4: Add the eggs and vanilla — Beat in the eggs one at a time, making sure each one is fully mixed in before adding the next. Add the vanilla and mix for another 30 seconds. The mixture should look smooth and glossy at this point.
- Step 5: Bring in the dry ingredients — Gradually add the flour mixture to the wet ingredients, stirring until just combined. Stop as soon as you don't see dry streaks. Overmixing at this stage makes cookies tough, and I've done it — you can tell because the cookies bake up dense and flat instead of chewy.
- Step 6: Fold in the candy — Add the crushed Butterfinger pieces and caramel bits and fold them in gently with a spatula or wooden spoon. Make sure they're distributed evenly, but don't keep stirring past that point.
- Step 7: Scoop and bake — Scoop tablespoon-sized portions of dough onto your prepared baking sheets, spacing them about 2 inches apart. Bake for 12–14 minutes, until the edges are just golden. The centers will still look slightly underdone — that's correct. They'll finish cooking on the hot pan.
- Step 8: Cool on the pan — Let the cookies sit on the baking sheet for 5 minutes before moving them. If you want, sprinkle a little flaky salt on top while they're still warm. Then transfer to a wire rack and let them cool the rest of the way — or eat one warm immediately, which is what I always do.
Tips for Success
- Butter temperature actually matters here: I used to just pull butter out of the fridge and go — don't do that. Cold butter doesn't cream properly with the sugar, and you'll end up with a dense dough that doesn't spread evenly. I leave mine out for 45 minutes to an hour before I start. It should be soft enough that you can press a finger into it easily, but not melted or greasy.
- Don't overbake: This is the one I mess up when I'm distracted. The cookies need to come out when the edges look set and golden but the centers still look a little soft and underdone. They carry-cook on the hot sheet for another 5 minutes after you pull them from the oven. If you wait until the centers look done in the oven, they'll be dry by the time they cool. Set a timer and check at 12 minutes.
- Chop the Butterfinger small but not to dust: I made the mistake once of using a food processor on the candy bars and it turned them into a powder that just dissolved into the dough. You lose all the crunch that way. Use a knife and aim for roughly ¼-inch pieces — small enough to distribute through the dough, big enough that you still get some texture when you bite in.
- Chill the dough if your kitchen is warm: In summer, or if your kitchen runs hot, the butter in the dough can start softening before the cookies even hit the oven. That's what causes excessive spreading. If your cookies are coming out too thin, refrigerate the dough for 30 minutes before scooping. It's not required in a cool kitchen, but it makes a noticeable difference when it's warm.
- Let each sheet pan cool between batches: If you put raw dough on a hot baking sheet, the butter starts melting immediately and the cookies spread before they even get in the oven. I rotate between two pans — one in the oven, one cooling on the counter — so by the time I need it again, it's had a few minutes to cool down.
Variations
- Add peanut butter to the dough: Fold in ¼ cup of creamy peanut butter when you're creaming the butter and sugars. It makes the peanut butter note from the Butterfinger more pronounced and the dough a little richer. I've done this when I wanted something closer to a peanut butter cookie base — my husband liked this version better, actually. If you go this route, check out my Peanut Butter Banana Cake too, because that combination works on a bigger scale as well.
- Add chocolate chips: Fold in ½ cup of semi-sweet or dark chocolate chips along with the Butterfinger. It tips these further into chocolate-forward territory. The bittersweet chips balance the sweetness of the caramel really well. I go back and forth on whether I prefer them with or without — depends on the day.
- Stuff the center with caramel: Take a piece of soft caramel (about the size of a marble), press it into the center of each dough ball, and seal the dough around it before baking. When you bite in, there's a completely molten caramel core. It's messier to assemble and the cookies look a little lumpy, but nobody complains once they taste it. Saad would choose this version every time if I let him.
- Swap caramel bits for toffee: If you can't find caramel bits at your store, Heath toffee bits are a great substitute and are usually easier to find in the baking aisle. They add a similar buttery sweetness but with more crunch and less gooeyness. The texture of the finished cookie is a little crispier throughout, which some people actually prefer.
- Gluten-free version: I've tried this once with a 1:1 gluten-free flour blend (Bob's Red Mill or King Arthur both work). The cookies spread slightly more and the texture isn't identical, but they're genuinely good — still chewy, still packed with candy. Just make sure your caramel bits are also gluten-free if that's a concern for you.
Serving and Storage
Serving
These are best eaten warm — either straight from the oven after a 5-minute rest, or reheated for 10 seconds in the microwave. The caramel gets soft again and everything loosens up. My husband has his with chai. I have mine with coffee. Cold milk is the classic pairing and genuinely works. If you're putting them out for guests, stacking them on a plate while still slightly warm means people will eat them before you even have a chance to sit down.
Storage
Keep baked cookies in an airtight container at room temperature for up to 5 days. They stay soft because of the brown sugar and caramel — they don't dry out the way some cookies do. For longer storage, freeze baked cookies in a zip-lock bag for up to 2 months. Thaw at room temperature for 20 minutes or warm in the microwave for 15 seconds. Raw dough can be refrigerated for up to 2 days, or frozen as scooped balls for up to 2 months — bake straight from frozen at 350°F and add 2–3 minutes to the bake time.

Frequently Asked Questions
Can I use caramel sauce instead of caramel bits?
No — caramel sauce is too liquid and will make the dough wet and the cookies spread badly. You need caramel bits (like Kraft brand) or soft caramels that you chop into small pieces. Both hold their shape better in the dough and melt into pockets during baking rather than running everywhere.
Can I freeze the cookie dough?
Yes, and I do this regularly. Scoop the dough into balls, freeze them on a tray until solid (about an hour), then transfer to a freezer bag. They keep for up to 2 months. Bake straight from frozen at 350°F — just add 2 to 3 minutes to the bake time and watch the edges for that golden color.
Why did my cookies spread too much?
A few things can cause this: butter that was too warm or melted, a hot baking sheet, or a kitchen that's running warm. Try chilling the dough for 30 minutes before baking, and make sure you're letting your baking sheets cool between batches. Also check that you measured the flour correctly — spooning and leveling rather than scooping directly from the bag gives a more accurate measurement.
Can I make these without a mixer?
I've done it both ways. A hand mixer is faster and gives you a fluffier cream on the butter and sugar, but a wooden spoon and some elbow grease work fine as long as your butter is properly softened. I'd say budget an extra 3–4 minutes of mixing by hand and make sure the butter is very soft before you start — that makes the biggest difference.
How do I know when the cookies are done if the centers still look underbaked?
That's exactly right — you pull them when the edges are set and golden and the centers still look a little soft and glossy. They'll firm up as they sit on the hot pan for 5 minutes. If you wait until the centers look fully baked in the oven, they'll be overbaked and dry once they cool. It feels wrong the first time, but trust the timing.

BUTTERFINGER CARAMEL CRUNCH COOKIES
Ingredients
- 2 ½ cups all-purpose flour
- 1 teaspoon baking soda
- ½ teaspoon salt
- 1 cup unsalted butter softened
- ¾ cup brown sugar
- ½ cup granulated sugar
- 2 large eggs
- 2 teaspoons vanilla extract
- 1 cup crushed Butterfinger candy bars
- ½ cup caramel bits or chopped soft caramel
Instructions
- Preheat Oven: Preheat the oven to 350°F (175°C). Line baking sheets with parchment paper or a silicone baking mat.
- Mix Dry Ingredients: In a medium bowl, whisk together flour, baking soda, and salt. Set aside.
- Make Cookie Dough: In a large bowl, beat together butter, brown sugar, and granulated sugar until creamy. Add eggs and vanilla extract, beating until combined. Gradually mix in dry ingredients until dough forms.
- Add Candy: Fold in crushed Butterfinger pieces and caramel bits evenly.
- Shape Cookies: Scoop tablespoon-sized portions of dough and place them 2 inches apart on the prepared baking sheets.
- Bake: Bake for 12–14 minutes, or until edges are lightly golden. Allow cookies to cool on the sheet for 5 minutes before transferring to a wire rack.
Notes
- Make Ahead: Dough can be stored in the fridge for up to 2 days before baking.
- Customizing: Substitute caramel bits with toffee pieces for a different crunch. Add chocolate chips for extra indulgence.
- Storage Tips: Store in an airtight container at room temperature for up to 1 week.
These cookies have become one of those things I make without really planning to — I spot the Butterfinger bars in the pantry and the next thing I know there's cookie dough on the counter. That's the best kind of baking, honestly. No big occasion, no elaborate setup, just something that comes together in under an hour and makes the whole house smell good.
What I keep coming back to is how different they feel from a standard chocolate chip cookie, even though the process is almost identical. The Butterfinger pieces don't just disappear into the dough — they hold their character. You still taste the peanut butter, still get a little crunch, and then the caramel does its thing alongside all of that. It's a lot going on in a small cookie, and it works.
If you're in a caramel-heavy baking mood this week, my Salted Caramel Butter Bars are worth making alongside these — they share that same gooey, buttery quality but in a bar form that's even easier to slice and pack up. And if you want something on the complete opposite end of the dessert spectrum that's still just as easy, the Chocolate Covered Cheesecake Strawberries take almost no time and look impressive for almost no effort.
Make a full batch. Don't halve it. You'll wish you hadn't. 🍪✨
If you liked these cookies, you'll probably like these too:





Comments
No Comments