
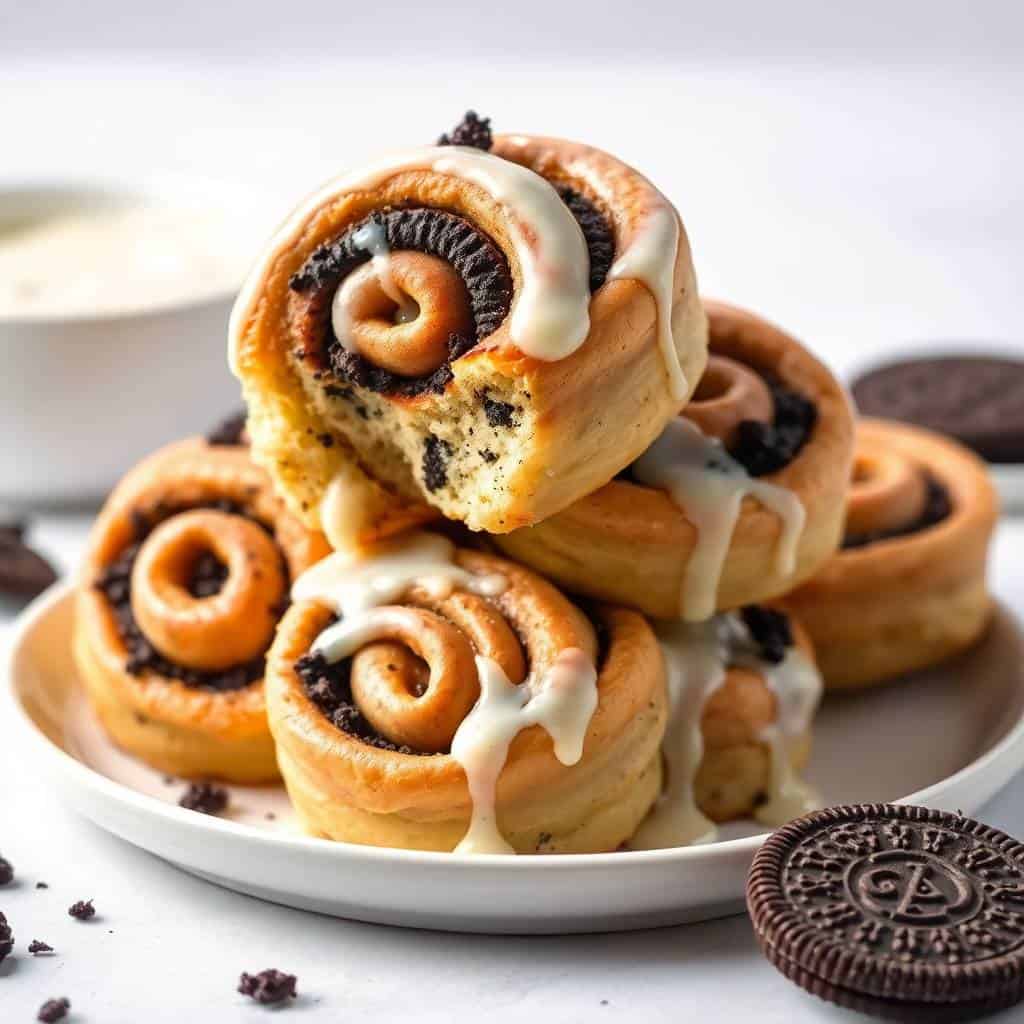
I made these on a Saturday morning because Zainab had been asking about Oreos all week and I had a tube of cinnamon roll dough sitting in the fridge doing nothing. I wasn't expecting much — it sounded like one of those ideas that's better in theory. But when I pulled them out of the oven and drizzled the icing over the top, I just stood there for a second. They looked genuinely good. And then Zainab took one bite and said "again tomorrow?" so that settled it.
What makes these work is that the Oreo filling doesn't just sit there — it softens into the dough while it bakes, and you get this almost fudgy, creamy chocolatey layer running through every roll alongside the cinnamon. The cream filling from the Oreos melts slightly, which sounds weird but is actually really good. I've since made these with homemade dough too (which I'll talk about in the directions), but the store-bought version is legitimately good and gets it done in under an hour start to finish. If you love cinnamon rolls and have been looking for a reason to bake them more often, this is it — if you're already a fan of my Cinnamon Roll Cake with Vanilla Glaze, you're going to be very happy here.
My husband thinks these are too sweet for breakfast, which, fair enough, these are basically dessert wearing breakfast clothes. But Zainab disagrees strongly, and Saad will eat them any time of day without complaint. I tend to make them on weekend mornings when I have a little extra time, or when there's a birthday coming up and I want to do something that feels special without spending three hours in the kitchen.
One thing to know going in: the homemade dough version takes longer because of the rise time, but it is noticeably softer and more pillowy than the tube version. If you're making these on a weekday morning, go with store-bought and no one will know. If you have time on a Sunday, make the dough from scratch. I'll give you both options in the directions below so you can choose based on your day.
Why You'll Love This Recipe
- The Oreo filling actually melts into the dough: I was worried the crushed cookies would just stay crunchy and weird inside, but they don't. The cream filling softens during baking and the cookie bits get this slightly fudgy texture that works really well with the cinnamon dough. It's not crunchy, it's not mushy — it hits somewhere in between that's genuinely good.
- You can make these with store-bought or homemade dough: I've done both and they both work. The tube dough from the refrigerator section at any grocery store — Pillsbury is what I usually grab at Walmart — gets these on the table in about 30 minutes. The homemade dough takes closer to two hours with the rise, but the texture is softer and more bread-like if you have the time for it.
- No fancy equipment required: I don't own a stand mixer and I made these just fine. You knead the dough by hand, roll it out with a regular rolling pin (or a wine bottle if you've lost your rolling pin like I have twice), and bake in a standard 9x13 dish. That's it. Nothing special needed.
- Kids can actually help with this one: Crushing the Oreos is genuinely fun — put them in a zip-lock bag and hand your kid a rolling pin. Zainab spent ten minutes happily smashing cookies while I dealt with the dough. She also helped sprinkle the filling, which meant the distribution was uneven but she was proud of it, and they still tasted great.
- They're easy to customize: Classic Oreos are the baseline, but I've made these with Golden Oreos when I wanted something lighter, and with double-stuffed Oreos when I wanted something more indulgent. You can swap the plain icing for cream cheese frosting if you want more tang. There's a lot of room to make this your own without breaking anything.
Ingredients
- For the Dough:
- 2 ¼ teaspoons active dry yeast
- 1 cup warm milk (about 110°F — warm to the touch but not hot)
- ¼ cup granulated sugar
- 1 large egg
- ¼ cup unsalted butter, melted
- 3 cups all-purpose flour
- ½ teaspoon salt
- For the Filling:
- ½ cup brown sugar
- 1 tablespoon ground cinnamon
- ¼ cup unsalted butter, softened
- 12 Oreo cookies, crushed (classic works great; double-stuffed if you want more cream)
- For the Icing:
- 1 cup powdered sugar
- 2–3 tablespoons milk
- ½ teaspoon vanilla extract
- Optional: extra crushed Oreos for sprinkling on top after baking
Directions
- Make the Dough: In a large bowl, combine the warm milk and yeast and let it sit for about 5 minutes until it looks a little foamy. That foam means the yeast is active — if nothing happens, your milk might have been too hot and killed it, so start over with cooler milk. Add the sugar, egg, melted butter, flour, and salt. Mix until a shaggy dough forms, then knead by hand on a floured surface for about 8 minutes until it's smooth and slightly springy. Cover the bowl with a clean dish towel and let it rise in a warm spot for 1 hour.
- Prepare the Filling: While the dough rises, mix together the brown sugar and cinnamon in a small bowl. Crush your Oreos — I do this by putting them in a zip-lock bag and rolling over them a few times. You want a mix of fine crumbs and slightly larger bits, not a dust. Set aside.
- Roll Out the Dough: Once the dough has doubled, punch it down and turn it onto a lightly floured surface. Roll it into a rectangle roughly 12x16 inches (30x40 cm). Try to keep it even thickness — about ¼ inch — so the rolls bake uniformly.
- Add the Filling: Spread the softened butter evenly across the whole surface of the dough, going almost to the edges. Sprinkle the cinnamon sugar mixture over the butter, then scatter the crushed Oreos on top. Don't pile too much filling near the edges or it'll spill out when you roll.
- Roll and Cut: Starting from one of the long edges, roll the dough tightly into a log. A tight roll means the layers hold together when you cut. Use a sharp knife or unflavored dental floss (the dental floss trick actually works really well) to cut the log into 8–10 rolls about 1½ inches thick each.
- Second Rise: Place the rolls cut-side up in a greased 9x13-inch baking dish, leaving a little space between each one. Cover and let them rise again for 30–40 minutes. They'll puff up and nearly touch each other — that's exactly what you want for soft, pillowy rolls.
- Bake: Preheat your oven to 350°F (175°C). Bake the rolls for 25–30 minutes until the tops are golden brown and the centers don't look raw when you gently press them. My oven runs a little hot so I start checking at the 22-minute mark.
- Make the Icing: Whisk together the powdered sugar, milk, and vanilla until smooth. Start with 2 tablespoons of milk and add more until it's drizzleable but not watery. If you accidentally add too much milk, just whisk in a bit more powdered sugar.
- Glaze and Serve: Drizzle the icing over the rolls while they're still warm. If you want extra Oreo crunch, sprinkle some additional crushed cookies over the icing right at the end. Serve warm.

Tips for Success
- Check your yeast before you commit: The first time I made homemade cinnamon rolls years ago, my dough never rose because my yeast was dead. Now I always proof it first — mix the yeast with the warm milk and wait 5 minutes. If it doesn't foam up at all, the yeast is old and you need fresh. A $3 mistake to catch before you've invested an hour.
- Don't overfill near the edges: I learned this the hard way — too much filling near the edge of the dough means it all spills out when you roll, and you end up with a mess on your baking dish and bare spots inside the rolls. Keep the filling about half an inch from the edges on the long sides.
- Use dental floss to cut the rolls cleanly: A knife drags and compresses the dough, which squishes the rolls flat. Slide a piece of unflavored dental floss under the log, cross the ends over the top, and pull. It cuts cleanly through without squishing and your rolls stay round. This genuinely changed how my cinnamon rolls look.
- Warm the icing slightly before drizzling: If your icing has been sitting and thickened up, microwave it for 10 seconds and stir. It drizzles much more smoothly when it's slightly warm and flows into the crevices between rolls instead of sitting in clumps on top.
- Sprinkle extra Oreos after baking, not before: If you put crushed Oreos on top of the rolls before they go in the oven, they burn. I know because I tried it. Sprinkle them on right after the icing goes on — they stay crunchy that way and you get a nice textural contrast with the soft roll underneath.
Variations
- Double-Stuffed Oreos: Swap the regular Oreos for double-stuffed ones and you get noticeably more cream filling melting into the dough. The rolls come out richer and more fudgy inside. My husband actually prefers this version even though he claims he doesn't like these for breakfast — he ate three.
- Cream Cheese Frosting Instead of Plain Icing: Beat 4 oz of softened cream cheese with ½ cup powdered sugar and 2 tablespoons of milk until smooth. Spread it over warm rolls instead of the plain icing. It's tangier and richer and honestly makes these taste more like a bakery pastry. This is how I'd serve them for a birthday brunch.
- Peanut Butter Swirl: Spread a thin layer of peanut butter on the dough before you add the butter and cinnamon sugar. The peanut butter melts into the filling and you get this nutty, chocolatey thing going on that works really well. Use creamy peanut butter, not natural — natural separates and gets greasy.
- Seasonal Oreo Flavors: The Red Velvet Bear Cookies on the blog use red velvet flavor, and similarly, red velvet Oreos work beautifully here for something a little festive. Peppermint Oreos at Christmas make these feel really special. Golden Oreos give you a completely different but equally good result — lighter and more vanilla-forward.
- Mini Rolls for Parties: Cut the log into thinner slices — about ¾ inch instead of 1½ inches — and you get 16-18 small rolls instead of 8-10 big ones. They bake faster (check at 20 minutes) and are perfect for putting out at a gathering where people want to try a bite without committing to a whole roll.
Serving and Storage
Serving
Serve these warm, straight from the oven if possible. The icing should still be slightly runny and the rolls pull apart easily when they're fresh. At my house we eat them as a weekend breakfast with coffee for the adults and milk for the kids. They also work as a dessert after a lighter dinner — I've served them after a bowl of Vegan Broccoli Cheddar Soup when I wanted something comforting and sweet to finish the meal. If you're serving a crowd, put out the extra crushed Oreos on the side and let people add their own — it keeps them crunchy longer that way.
Storage
Store any leftovers in an airtight container at room temperature for up to 2 days, or in the fridge for up to 4 days. To reheat, microwave individual rolls for 15–20 seconds — they come back to life surprisingly well. You can also reheat the whole tray covered with foil in a 325°F (160°C) oven for 10 minutes. To freeze, let the rolls cool completely first, then wrap individually in plastic wrap and place in a freezer bag. They keep well for up to 2 months. Thaw overnight in the fridge and reheat before serving.

Frequently Asked Questions
Can I make these ahead of time?
Yes, and this is actually how I prefer to do them for weekend mornings. Assemble the rolls through the cutting step, place them in your greased baking dish, cover tightly with plastic wrap, and refrigerate overnight. In the morning, take them out while the oven preheats — they'll puff up a bit as they come to room temperature — then bake as directed. Fresh icing in the morning and they taste just as good as same-day.
What flavor of Oreos works best?
Classic Oreos are the baseline and they work great. Double-stuffed give you more cream melting into the dough, which I actually prefer. Golden Oreos make a lighter, more vanilla-forward version. Seasonal flavors like peppermint or red velvet are fun for holidays. The one thing I'd avoid is Oreos with a very strong artificial flavor — some of the limited-edition ones can get a little strange when baked. Stick to familiar flavors and you'll be fine.
Can I use store-bought cinnamon roll dough instead of making it from scratch?
Absolutely. A tube of Pillsbury cinnamon roll dough (the refrigerated kind at any Walmart, Aldi, or grocery store) works perfectly and cuts the total time down to about 30 minutes. Open the tube, unroll each piece slightly, sprinkle the Oreo mixture, re-roll, and bake. It's a legitimate shortcut and not something to apologize for — I use it on weekday mornings all the time.
How do I reheat leftovers without drying them out?
The microwave works well for single rolls — 15 seconds is usually enough. If you do longer, they get rubbery. For reheating a whole tray, cover with foil and warm in a 325°F oven for about 10 minutes. The foil traps moisture and keeps them soft. I sometimes add a very thin drizzle of extra icing after reheating to freshen them up.
Can I freeze these cinnamon rolls?
Yes. Let them cool completely after baking, then wrap each roll individually in plastic wrap and put them all in a freezer-safe zip-lock bag. They freeze well for up to 2 months. To serve, thaw overnight in the refrigerator and reheat in the microwave or oven. I'd add fresh icing after reheating rather than freezing them with icing already on top — it drizzles much better when made fresh.

OREO-STUFFED CINNAMON ROLLS
Ingredients
For the Dough:
- 2 ¼ teaspoons active dry yeast
- 1 cup warm milk about 110°F
- ¼ cup granulated sugar
- 1 large egg
- ¼ cup unsalted butter melted
- 3 cups all-purpose flour
- ½ teaspoon salt
For the Filling:
- ½ cup brown sugar
- 1 tablespoon cinnamon
- ¼ cup unsalted butter softened
- 12 Oreo cookies crushed
For the Icing:
- 1 cup powdered sugar
- 2 –3 tablespoons milk
- ½ teaspoon vanilla extract
- Optional: extra crushed Oreos for topping
Instructions
Make the Dough:
- In a large bowl, mix warm milk and yeast. Let sit for 5 minutes. Add sugar, egg, melted butter, flour, and salt. Mix until dough forms. Knead until smooth. Cover and let rise for 1 hour.
Prepare the Filling:
- Mix brown sugar and cinnamon. Crush Oreos and set aside.
Assemble the Rolls:
- Roll out the dough into a rectangle. Spread softened butter on top. Sprinkle with cinnamon sugar and crushed Oreos. Roll tightly into a log and cut into 8–10 rolls.
Second Rise:
- Place rolls in a greased baking dish. Cover and let rise again for 30–40 minutes.
Bake:
- Preheat oven to 350°F (175°C). Bake rolls for 25–30 minutes until golden.
Make the Icing:
- Whisk powdered sugar, milk, and vanilla until smooth.
Glaze and Serve:
- Drizzle icing over warm rolls and top with extra crushed Oreos if desired.
Notes
- Make Ahead: Prepare the rolls the night before and refrigerate. Bake the next morning.
- Variations: Try with Golden Oreos or mix in chocolate chips for extra sweetness.
- Serving Suggestions: Perfect with a glass of milk or a hot coffee for a sweet start.
- Allergy-Friendly Options: Use plant-based milk and butter for a dairy-free version.
- Storage Tips: Store in an airtight container at room temperature for 2 days or refrigerate up to 4 days.





Comments
No Comments