
I made this bread for the first time on a rainy Thursday when I had nothing planned for dinner and a jar of Kalamata olives sitting in the fridge that needed using. I mixed everything in a bowl before bed, went to sleep, and woke up to a dough that had doubled and gone bubbly overnight. The whole house smelled incredible by the time it came out of the oven. That was maybe eight months ago and I've made it at least a dozen times since.
What I love about this recipe is how little I have to do. You stir the dough together — it takes maybe five minutes — and then time does the work. The long, slow rise builds a depth of flavor you just can't get from a quick bread. The Dutch oven traps steam and gives you that bakery-style crust that cracks when you tear into it. I don't have a fancy bread machine or a proofing drawer. I have a bowl, a wooden spoon, and an old Dutch oven I bought secondhand for $12.
My husband eats this with everything — alongside soup, with sliced cheese, torn into pieces and dipped in olive oil. Zainab loves it toasted with butter the next morning. I've served it on charcuterie boards when people come over, and every single time someone asks for the recipe and seems surprised when I tell them how simple it is. If you're looking for something to pair with a dinner spread, I sometimes put this out alongside my Lemon Herb Roasted Cornish Hens and it works beautifully.
One thing to know going in: this bread needs time, not effort. Plan to mix the dough the night before you want to bake it. The 12–18 hour rise is not optional — that's where the flavor comes from. If you try to rush it down to 4 or 5 hours, you'll get bread, but it won't have that same depth. I learned that the hard way the first time I tried to speed it up because I'd forgotten to start it early enough.
Why You'll Love This Recipe
- No kneading, no fuss: You literally stir the ingredients together with a spoon, cover the bowl, and walk away. The next day the dough has done all its own work while you slept. I've made this on weeknights after putting the kids to bed and had fresh bread ready for the next evening's dinner without any stress.
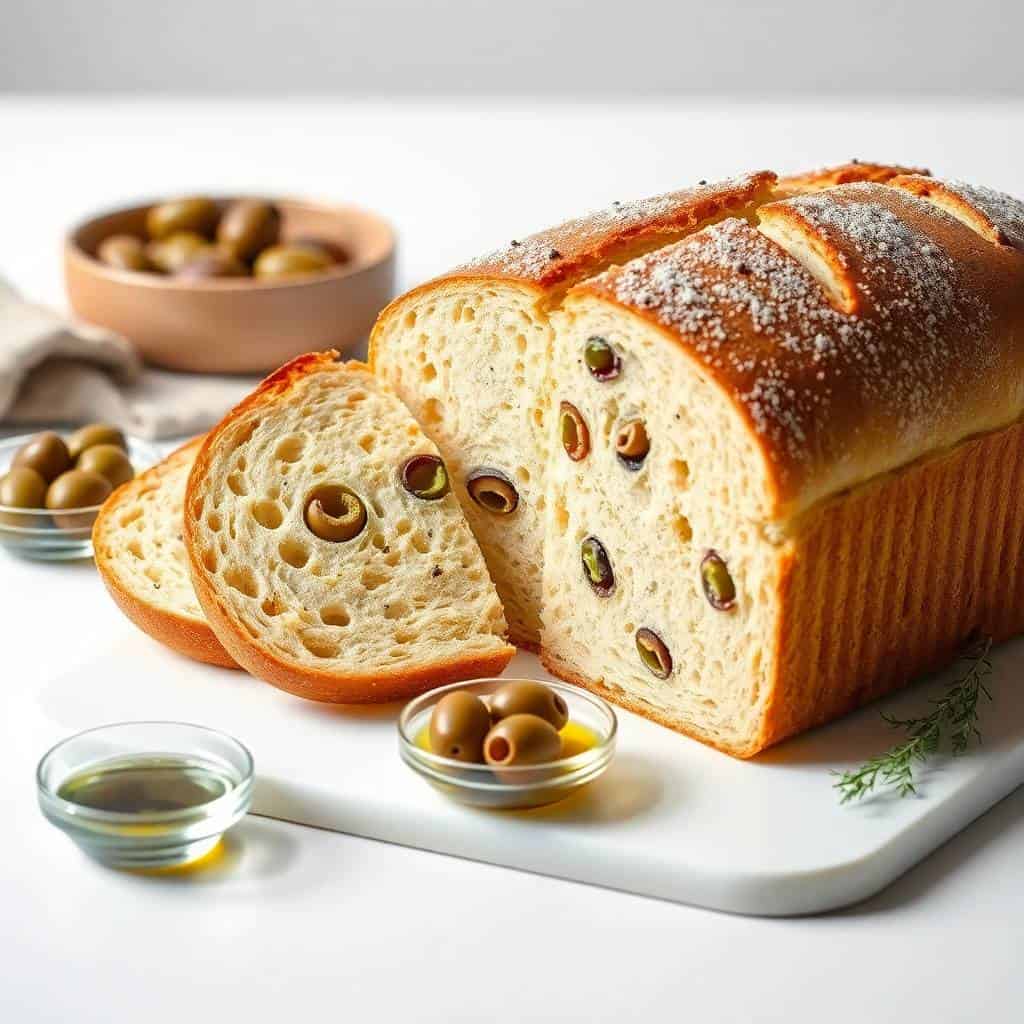
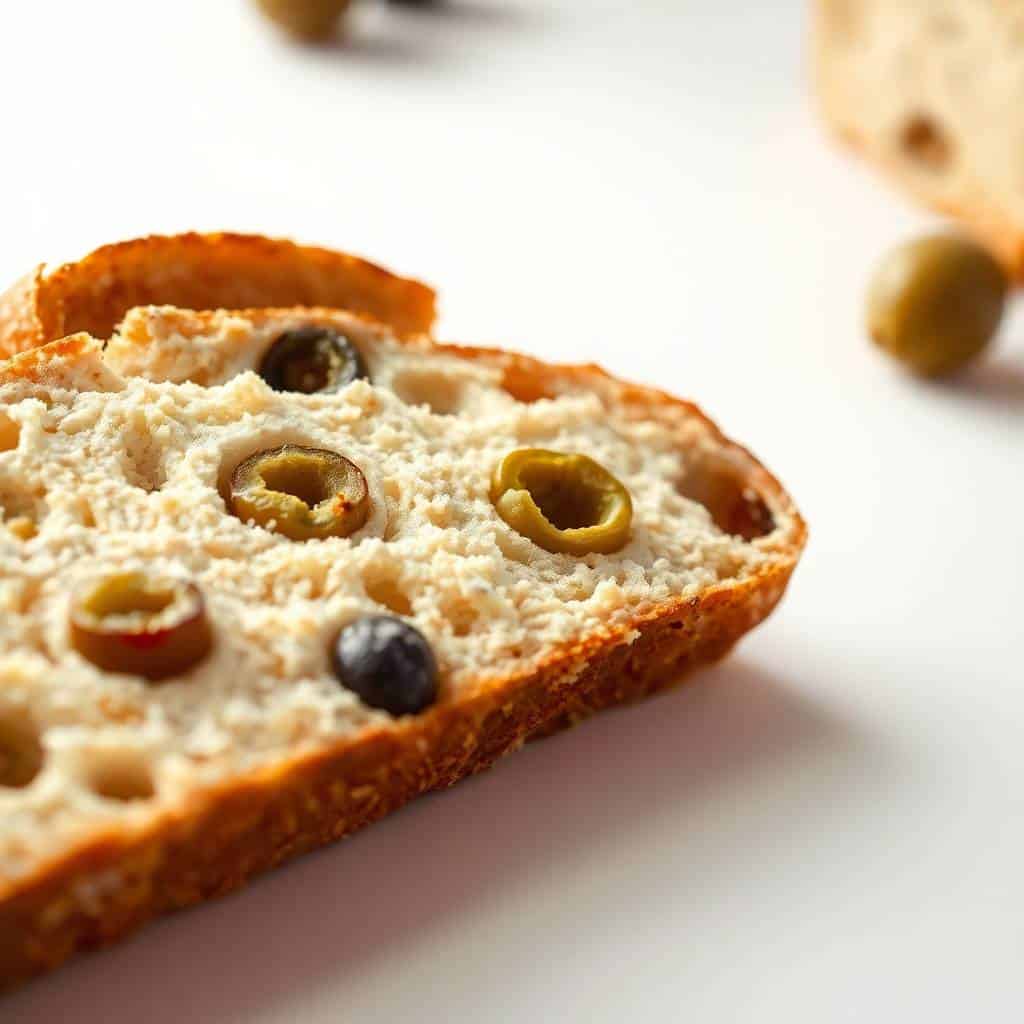
- That crust is the real thing: Baking in a preheated Dutch oven creates steam around the loaf, which is what gives artisan bread that crackly, golden exterior. I used to wonder how bakeries got that crust — it turns out the secret is just a covered pot and a very hot oven. The inside stays chewy and open-crumbed.
- The olives make it: Every slice has little pockets of salty, briny olive throughout. I use Kalamata most of the time because they're easy to find at Walmart or Aldi and they have a strong enough flavor to hold up through baking. Green olives work too if that's what you have — I've done both.
- Naturally dairy-free and vegan: There's no butter, no milk, no eggs in this dough. It's just flour, water, yeast, salt, olive oil, and olives. Which means it works for a lot of guests with dietary restrictions without me having to do anything special — it's just how the recipe is.
- It keeps and toasts well: Day-two olive bread, sliced and put in the toaster, is almost better than fresh. The crust crisps back up and the olive flavor seems to deepen a little. I make a full loaf knowing half of it will be breakfast toast for the next couple of days.
Ingredients
- 3 cups all-purpose flour
- 1½ teaspoons salt
- 1 teaspoon sugar
- 2¼ teaspoons active dry yeast (1 standard packet)
- 1 cup warm water (about 110°F / 45°C)
- 2 tablespoons olive oil
- 1 cup chopped pitted olives (Kalamata, green, or a mix — drained well)
- 1 teaspoon dried rosemary or oregano (optional, but I usually add it)
- Extra flour or cornmeal for dusting
Directions
- Activate the yeast: In a large bowl, combine the warm water, sugar, and yeast. Give it a quick stir and let it sit for 5–10 minutes until it looks foamy on top. If nothing happens after 10 minutes, your water was probably too hot or too cold — start again with fresh yeast. This step confirms your yeast is alive before you build the dough around it.
- Mix the dough: Add the flour, salt, olive oil, and herbs (if using) to the bowl and stir until a shaggy dough forms. Fold in the chopped olives. The dough will look rough and a little sticky — that's exactly right. Knead lightly for just 1–2 minutes until it mostly comes together; you're not trying to make it smooth. Over-working it at this stage is what makes the bread dense.
- First rise: Cover the bowl with a clean kitchen towel or plastic wrap and leave it somewhere at room temperature for 12–18 hours. I usually do this overnight. You'll know it's ready when the surface looks bubbly and the dough has roughly doubled in size.
- Shape the dough: Flour your hands and a clean surface lightly. Turn the dough out and gently shape it into a round loaf with just a few folds — think of it as tucking the edges underneath rather than pressing the air out. Handle it as little as possible. Place it on a sheet of parchment paper.
- Second rise + preheat: Cover the shaped loaf loosely with a towel and let it rest for 30–45 minutes. At the same time, place your Dutch oven (with the lid on) into the oven and preheat to 425°F (220°C). The pot needs to be screaming hot before the dough goes in — that heat shock is what creates the rise and the crust.
- Bake covered: Very carefully lift the parchment and lower the dough (parchment and all) into the hot Dutch oven. Put the lid on and bake for 30 minutes. Keep the lid on — the steam trapped inside is doing the work.
- Bake uncovered: Remove the lid and bake for another 10–15 minutes until the top is deep golden brown. Tap the bottom of the loaf — it should sound hollow. If it sounds dense, give it another 5 minutes.
- Cool before slicing: This is the hardest part. Let the bread cool on a wire rack for at least 30 minutes before you cut into it. I know it smells incredible and you want to go straight in, but cutting it too early makes the crumb gummy. Wait. It's worth it.
Tips for Success
- Drain your olives really well: The first time I made this I tipped the olives straight from the jar into the dough without draining and the bread came out with wet, dense patches where too much brine soaked in. Now I drain them, then give them a quick pat with a paper towel. It takes 30 seconds and makes a real difference to the crumb.
- Don't skip preheating the Dutch oven: I tried putting the dough into a cold pot once to save time and the bread came out flat with a pale, soft crust — nothing like what it should be. The hot pot is what creates that oven-spring and the crackly exterior. Put the pot in when you turn the oven on and give it a full 30 minutes to heat through.
- Use the parchment paper as a sling: Transferring sticky dough into a pot that's just come out of a 425°F oven is genuinely a little scary. The parchment paper is your safety net — shape the dough on it, let it rise on it, and then lower the whole thing (paper and all) straight into the pot. No fumbling, no burning yourself.
- The dough is supposed to be sticky: I get messages from readers saying their dough is too wet and asking if they should add more flour. Resist that urge. A wet, sticky dough is what gives you an open, airy crumb. Lightly flour your hands when you're shaping, but don't work more flour into the dough itself.
- Store in a paper bag, not plastic: Plastic traps moisture and turns the crust soft and a bit soggy by the next day. A paper bag at room temperature keeps the crust crisper for longer. If you're going past two days, wrap it in foil and freeze it — it thaws and toasts beautifully.
Variations
- Add feta and sun-dried tomatoes: This is my favorite variation for when I'm serving this to guests. Fold in ½ cup crumbled feta and ¼ cup chopped sun-dried tomatoes (drained from oil) along with the olives. The feta gets a little melty in pockets throughout the bread and the tomatoes add a sweet-savory depth. My husband asks for this version specifically.
- Rosemary garlic: Add 1 teaspoon of dried rosemary and 3–4 cloves of minced garlic to the dough when you mix it. The garlic mellows during the long bake and becomes almost sweet rather than sharp. This version is what I put out when I'm serving something like a pasta dinner — it makes the whole table smell like a restaurant.
- Whole wheat swap: Replace 1 cup of the all-purpose flour with whole wheat flour for a nuttier, slightly denser loaf. Don't go above 1 cup substitution or the bread gets too heavy. This version has a more rustic, earthy taste that works really well with soup — I make it alongside my Easy Cobb Salad Meal Prep spread when I want a heartier lunch.
- Olive focaccia instead of a loaf: Instead of shaping a round boule, spread the dough into a greased 9x13 pan after the first rise. Dimple the top with your fingers, drizzle generously with olive oil, scatter a few extra olive halves on top, and sprinkle with flaky sea salt. Bake at 425°F for 20–25 minutes. Totally different texture — flatter, crisper on the bottom, great for slicing into squares for a party.
- Refrigerator overnight rise: Mix the dough and put it straight in the fridge covered overnight (up to 16 hours) instead of leaving it at room temperature. Pull it out 1–2 hours before you want to bake to let it come to room temperature and finish its rise. The cold fermentation adds even more complex flavor — this is actually my preferred method when I remember to plan ahead.
Serving and Storage
Serving
Serve this bread warm, about 30–45 minutes out of the oven once it's had time to set. Tear it at the table rather than slicing if you want the full rustic effect — my kids prefer it that way. I usually set out a small bowl of good olive oil for dipping, sometimes with a pinch of flaky salt and dried chili flakes. It also works sliced alongside a Dill Pickle Dip with Cream Cheese as part of an appetizer spread — the briny flavors echo each other in a way that works surprisingly well. For a full dinner, serve it next to soups, roasted meats, or pasta — it's especially good for mopping up sauces.
Storage
Keep leftovers in a paper bag at room temperature for up to 2 days. Do not use a plastic bag or container — it makes the crust go soft. For anything beyond 2 days, slice the loaf, wrap individual slices in foil, and freeze them. They go straight from the freezer into the toaster at a medium setting and come out tasting close to fresh. The bread does not keep well in the fridge — cold air dries it out faster than room temperature does.
Frequently Asked Questions
Can I bake this without a Dutch oven?
Yes. If you don't have a Dutch oven, use any heavy oven-safe pot with a lid — a cast iron casserole dish works well. Alternatively, bake the loaf on a parchment-lined sheet pan and place a deep metal bowl upside-down over it for the first 30 minutes to trap steam. It won't be quite as dramatic a crust as the Dutch oven version, but it still produces a good loaf.
Can I make the dough ahead of time?
Absolutely — this is actually a make-ahead recipe by design. Mix the dough the night before and leave it at room temperature for 12–18 hours, or refrigerate it for up to 16 hours for a slower, more flavorful fermentation. If you refrigerate it, take it out 1–2 hours before baking to let it come back up to room temperature before shaping.
What type of olives work best?
Kalamata olives are my go-to because they're flavorful, firm, and widely available at most grocery stores. Castelvetrano olives work beautifully too — they're milder and buttery. Green olives are fine but tend to be sharper. Whatever you use, make sure they're pitted and drained well. Pre-sliced olives from a can are fine in a pinch, but chopped whole olives hold their texture better through baking.
Can I freeze this bread?
Yes. Slice the fully cooled loaf, wrap individual slices in foil, and freeze in a zip-lock bag for up to 2 months. Toast from frozen on a medium setting — the slices come out crispy and taste genuinely close to fresh-baked. I wouldn't freeze the whole unsliced loaf; it takes too long to thaw evenly and the crust suffers.
My dough didn't rise much overnight — what went wrong?
Most likely your yeast wasn't active. This happens if the water was too hot (above 115°F kills yeast), too cold (under 100°F slows it dramatically), or if the yeast was old. Always do the activation step first — mix the yeast, sugar, and warm water and wait 5–10 minutes for foam before adding the flour. No foam means start over with fresh yeast. The room temperature in your kitchen also matters; a cold kitchen will slow the rise, so put the bowl somewhere warm.
OLIVE BREAD
Ingredients
- 3 cups all-purpose flour
- 1 ½ teaspoons salt
- 1 teaspoon sugar
- 2 ¼ teaspoons active dry yeast 1 packet
- 1 cup warm water about 110°F / 45°C
- 2 tablespoons olive oil
- 1 cup chopped pitted olives green, black, or mixed
- 1 teaspoon dried rosemary or oregano optional
Instructions
Activate Yeast:
- In a large bowl, mix warm water, sugar, and yeast. Let sit for 5–10 minutes until foamy.
Mix Dough:
- Add flour, salt, olive oil, olives, and herbs (if using). Stir until a shaggy dough forms. Knead lightly for 1–2 minutes until combined.
First Rise:
- Cover bowl with a towel and let the dough rise in a warm place for 1–2 hours, until doubled in size.
Shape the Dough:
- Turn out dough onto a floured surface. Shape into a round loaf. Place on a parchment-lined baking sheet or in a greased Dutch oven.
Second Rise:
- Let rise again for 30–40 minutes while the oven preheats to 425°F (220°C).
Bake:
- Bake for 30–35 minutes until golden brown and the loaf sounds hollow when tapped on the bottom.
Cool and Serve:
- Cool slightly before slicing. Serve warm or at room temperature.
Notes
- Make Ahead:
Prepare the dough and refrigerate overnight for enhanced flavour. Let come to room temperature before baking. - Olive Options:
Use kalamata, Castelvetrano, or green olives—chopped and pitted. - Serving Suggestions:
Serve with olive oil and balsamic, cheeses, or alongside pasta dishes. - Allergy-Friendly Options:
Naturally dairy-free and vegan. Use gluten-free flour mix if needed. - Storage Tips:
Store in a paper bag at room temperature for up to 2 days or freeze for longer storage.
This bread has become one of those recipes I make on autopilot now. I mix it before I go to bed, shape it in the morning while coffee is brewing, and by late afternoon I have a loaf that looks and smells like it came from a bakery. It's one of the simplest things I bake, but it's consistently the thing guests comment on most. There's something about a whole rustic loaf with a crackly crust that makes people think you've done something complicated, even when you haven't.
I've made it so many times now that I know the dough by feel — what it looks like when it's ready to shape, when the second rise is done, when the bottom of the loaf sounds right. But even the very first time I made it, the results were genuinely good. It's one of those recipes where the process guides you





Comments
No Comments