
Saad asked for these three weeks in a row before I finally sat down and wrote out the actual measurements. He'd had something similar at a school bake sale and came home describing them in that very specific kid way — "peanut butter cookies but with cream cheese stuff inside" — and I figured I could figure it out. A few test batches later, here we are.
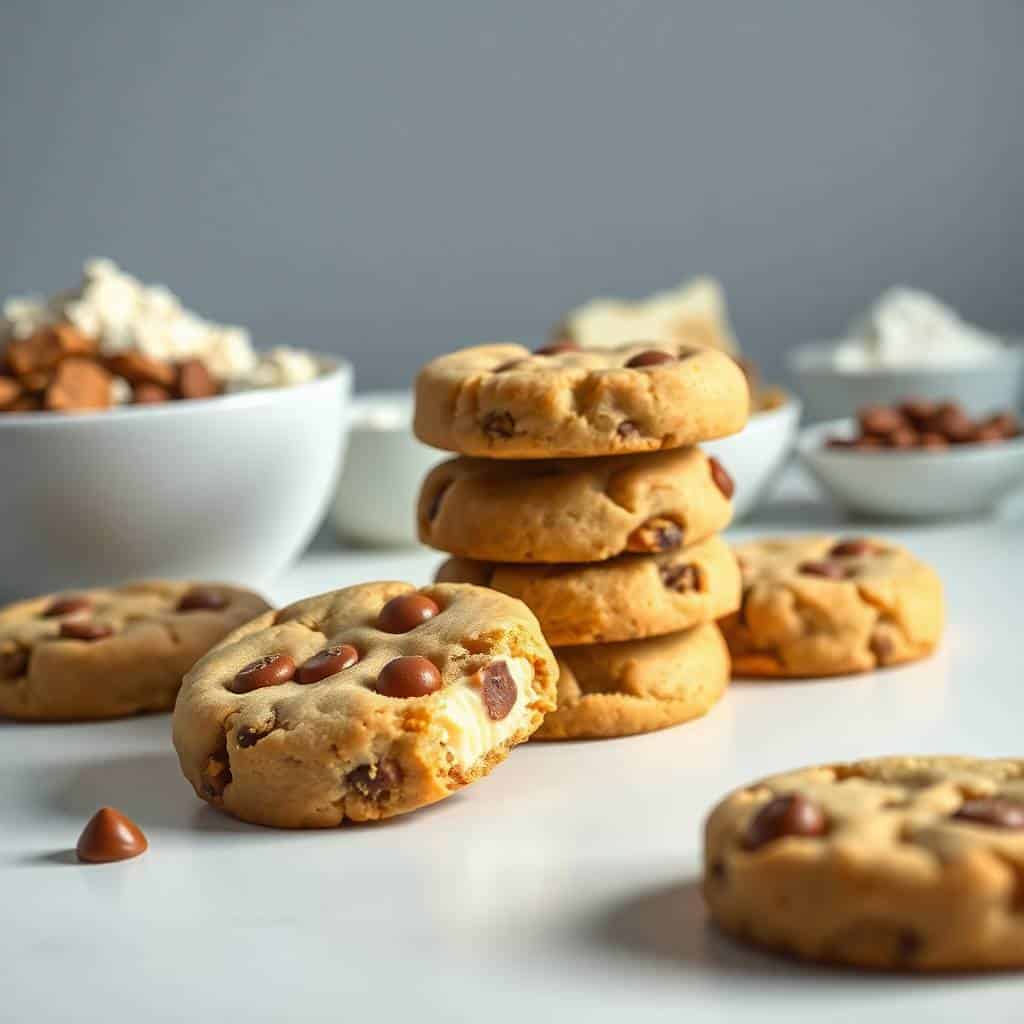
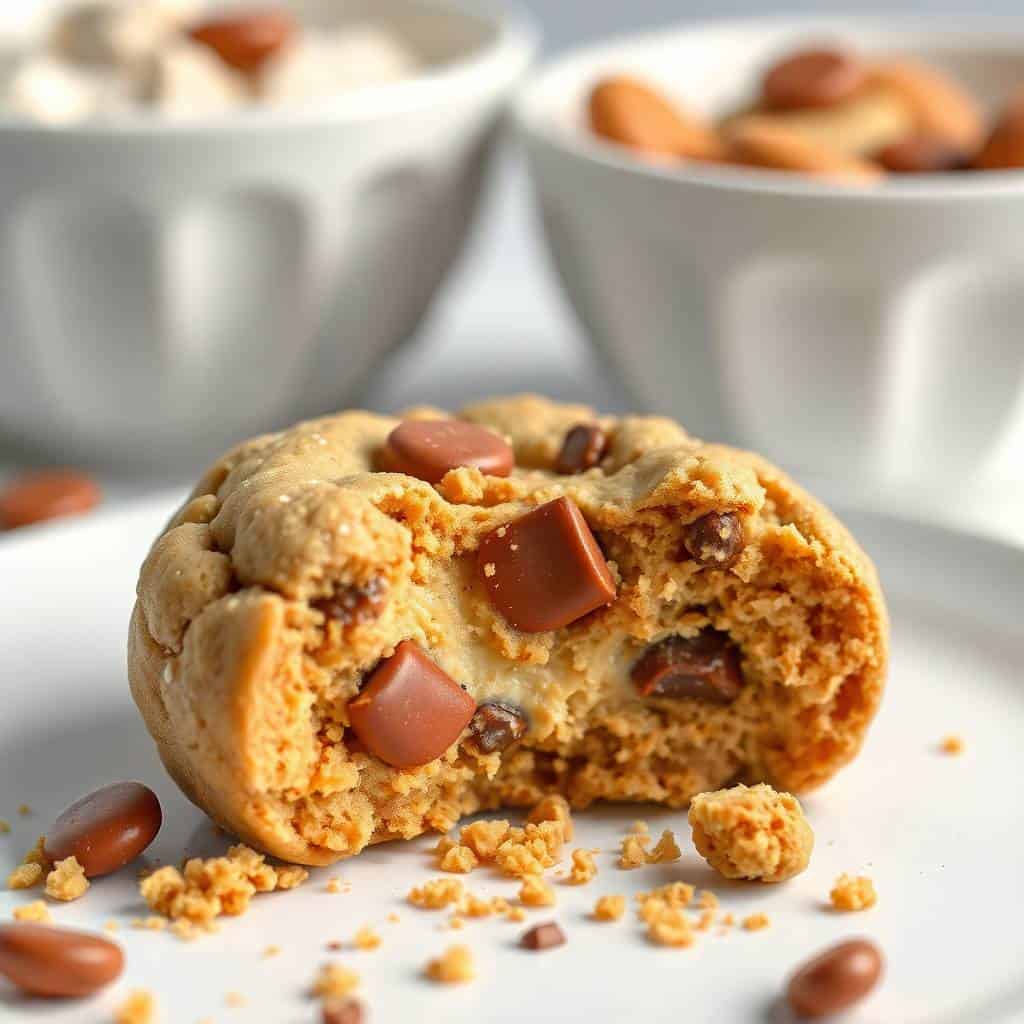
What makes these work is the cheesecake filling being chilled before you assemble. I skipped that step on my first attempt — I was impatient — and the filling just melted into the dough during baking. You couldn't even tell it was there. Fifteen minutes in the freezer makes all the difference. The filling stays distinct, and when you bite in you actually get that cool, creamy center against the warm peanut butter cookie.
These are the kind of cookies I make when we have people over and I want something that looks more impressive than it actually is to bake. They disappear fast — I usually make a double batch now because a single batch is gone before I've even finished cleaning up. If you're into no-bake cheesecake desserts, my No-Bake Oreo Mint Cheesecake has a similar creamy filling situation going on and it's just as much of a crowd-drawer.
One thing to know going in: these cookies need to be stored in the fridge because of the cream cheese center. They're not the kind of cookie you leave out on a counter. Chilled, they actually taste even better the next day — the filling firms up and the flavors settle in a way that warm-from-the-oven doesn't quite match.
Why You'll Love This Recipe
- Two desserts in one bite: The peanut butter cookie is already good on its own — rich, chewy, studded with Reese's pieces. But then there's a pocket of cream cheese filling in the center that turns the whole thing into something unexpected. I've watched people take one bite and immediately reach for a second cookie before they've even finished the first.
- They stay soft for days: A lot of stuffed cookies dry out by day two. These don't, because the cream cheese filling keeps the interior moist. I've eaten them straight from the fridge on day four and they were genuinely still good — not sad, not dry, actually good.
- No stand mixer needed: I don't have one, and I've never needed one for this recipe. A hand mixer works fine. If you don't even have that, softened butter and a wooden spoon and some patience gets you there — the dough doesn't need to be perfectly aerated like a cake batter does.
- Make-ahead friendly: You can prep the filling and the dough separately, refrigerate them for up to 24 hours, and assemble right before baking. On the day I served these at a gathering, I did all the prep the night before and just baked them fresh that morning. Much less stressful than doing everything at once.
- Reese's in every layer: There's peanut butter in the cookie dough itself, Reese's pieces folded through, and the filling has that cream cheese tang that cuts through all the richness. It doesn't taste one-note or overwhelmingly sweet — there's enough going on that each bite is actually interesting.
Ingredients
- For the Cookie Dough:
- ½ cup unsalted butter, softened
- ½ cup creamy peanut butter (I use Jif or Skippy — not natural/oily kinds)
- ½ cup granulated sugar
- ½ cup packed brown sugar
- 1 large egg
- 1 teaspoon vanilla extract
- 1¼ cups all-purpose flour
- ½ teaspoon baking soda
- ½ teaspoon salt
- 1 cup Reese's Pieces or chopped mini Reese's cups
- For the Cheesecake Filling:
- 4 oz cream cheese, softened (half a standard block — Philadelphia works great)
- 2 tablespoons powdered sugar
- ½ teaspoon vanilla extract
Directions
- Step 1: Make the cheesecake filling. Beat cream cheese, powdered sugar, and vanilla together in a small bowl until completely smooth — no lumps. Stick it in the freezer for 10 to 15 minutes. This firms it up just enough to scoop and hold its shape when you're assembling, which is what keeps the filling from disappearing into the dough during baking.
- Step 2: Make the cookie dough. In a large bowl, cream the softened butter, peanut butter, granulated sugar, and brown sugar together until fluffy and well combined. Add the egg and vanilla and mix until smooth. Stir in the flour, baking soda, and salt — mix until a dough forms but don't overwork it. Fold in the Reese's pieces with a spatula.
- Step 3: Assemble the cookies. Scoop about 1 tablespoon of dough and flatten it in your palm. Add a small spoonful (about 1 teaspoon) of the chilled cheesecake filling to the center. Flatten another tablespoon of dough and place it on top, pressing the edges together to seal the filling inside. Roll lightly to smooth the seams — you don't want gaps where filling can leak out.
- Step 4: Chill the assembled cookies. Place the filled cookies on a lined baking sheet and refrigerate for 10 minutes while you preheat your oven to 350°F (175°C). This short chill helps them hold their shape and prevents spreading too much in the oven.
- Step 5: Bake. Bake for 12 to 14 minutes until the edges are golden. The centers will still look slightly underdone — that's exactly what you want. They firm up as they cool, and pulling them out a little early is what keeps them soft.
- Step 6: Cool. Let cookies cool on the baking sheet for 5 minutes before moving them to a wire rack. Resist eating them straight out of the oven — the filling needs a few minutes to settle, and they're honestly better slightly cooled anyway.
Tips for Success
- Don't skip chilling the filling: I know it seems like an unnecessary step, but room-temperature cream cheese filling is too soft to stay contained inside the dough. The first time I tried to skip it, the filling just vanished — completely absorbed by the cookie. Ten minutes in the freezer is all it takes, and it makes assembly so much easier too because you can actually scoop it cleanly.
- Use regular creamy peanut butter, not natural: Natural peanut butter with the oil sitting on top does weird things to cookie dough — the texture gets greasy and the cookies spread unevenly. Jif, Skippy, or store-brand creamy peanut butter from Walmart or Aldi all work well. This is one of those times where the processed stuff is actually the right call.
- Seal the edges properly: Take a few extra seconds to really press the seams closed around each cookie. Any gap in the dough is a place the cream cheese can bubble out during baking. I run my finger around the edge after sealing to check for thin spots. Looks like extra effort but saves you from cookies that ooze all over the pan.
- Pull them out before they look done: Every time I've waited for the centers to look set in the oven, the cookies came out overdone and too firm once they cooled. The edges should be golden but the top should still look slightly soft and underbaked. Trust the process — carryover heat finishes the job on the baking sheet.
- Let your butter and cream cheese soften properly: Cold butter won't cream with the sugars properly — you'll end up with little lumps in the dough. And cold cream cheese won't beat smooth; it'll stay grainy. I leave both out for about 30 minutes before I start. If you're in a rush, cut the cream cheese into small cubes — it softens much faster that way.
Variations
- Swap the candy: Mini Snickers pieces work really well here — the caramel adds another layer to the whole thing. M&Ms work too if you want something a little less intense. I've also done chopped peanut butter cups from a standard-size Reese's bar when I couldn't find the mini pieces, and it was honestly just as good.
- Chocolate drizzle on top: Melt some chocolate chips (semi-sweet or dark) and drizzle over the cooled cookies before refrigerating. It sets up into a thin shell and makes the cookies look bakery-fancy with zero extra effort. My Cranberry Orange White Chocolate Cupcakes use a similar drizzle finish if you want to see how that looks.
- Sea salt finish: A small pinch of flaky sea salt pressed on top right before baking does something really nice to these cookies. The salt cuts through the sweetness of the Reese's and the richness of the cream cheese. I started doing this halfway through my test batches and didn't go back.
- Bar version: If you don't want to fuss with individually stuffing cookies, press half the dough into a lined 8x8-inch baking pan, spread the cheesecake filling over it, and press the remaining dough on top. Bake at 350°F for about 22 to 25 minutes. Cut into bars once completely cooled. It's not as dramatic as individual cookies but it's much faster to assemble.
- Gluten-free version: Swap the all-purpose flour for a 1:1 gluten-free baking blend — I've tried this with Bob's Red Mill and the texture was pretty close to the original. The cookies spread slightly more, so chilling the assembled cookies for an extra 10 minutes before baking helps. I won't pretend it's identical, but it's genuinely good.
Serving and Storage
Serving
These are good warm, but I actually prefer them after they've been refrigerated for an hour or two. The cheesecake filling firms up and the flavors come together in a way that fresh-out-of-the-oven doesn't quite achieve. If you want to serve them warm at a gathering, bake them, let them cool to room temperature, then give them a quick 10-second microwave before serving. Serve alongside something like my Snowflake Oreo Cream Salad for a dessert spread that really goes over well.
Storage
Because of the cream cheese filling, these need to be refrigerated — don't leave them out on the counter for hours. Store in an airtight container in the fridge for up to 5 days. For longer storage, freeze the unbaked stuffed cookie balls on a baking sheet until solid, then transfer to a zip-top freezer bag — they'll keep for up to 1 month. Bake straight from frozen, adding 2 to 3 extra minutes to the bake time.

Frequently Asked Questions
Can I make these without the cheesecake filling?
Yes, and you'll still have a solid peanut butter Reese's cookie — just not a stuffed one. Skip the filling entirely and bake the dough as-is. The texture will be slightly different since the dough amounts in this recipe are calibrated for stuffed cookies, so flatten them a little thinner than you normally would and reduce the bake time by about a minute.
What type of peanut butter should I use?
Use regular commercial creamy peanut butter — Jif, Skippy, or any store-brand smooth peanut butter works. Avoid natural peanut butter where the oil separates; that extra oil throws off the texture of the dough and the cookies end up greasy and flat. If natural is all you have, stir it extremely well and refrigerate it overnight first, but honestly, this is one recipe where the regular stuff is worth buying.
Can I freeze the stuffed cookie dough?
Yes — this is actually one of my favorite things about this recipe. Assemble the stuffed balls, place them on a baking sheet lined with parchment, and freeze until solid (about 2 hours). Then transfer to a zip-top bag and freeze for up to 1 month. When you're ready to bake, place them on a lined sheet and bake from frozen at 350°F, adding 2 to 3 extra minutes to the bake time.
Do these need to be refrigerated?
Yes, because of the cream cheese filling. Don't leave them out at room temperature for more than about 2 hours. I store mine in an airtight container in the fridge and they keep well for up to 5 days. They actually taste better chilled — the filling firms up and the texture improves overnight.
How do I know when the cookies are done baking?
Look at the edges — they should be lightly golden and set. The centers will still look slightly underdone and soft, and that's exactly right. They firm up as they cool on the baking sheet, and if you wait until the centers look fully done in the oven, the cookies will be overdone and crumbly once cooled. I made this mistake twice before I learned to pull them early.
These cookies have become one of my go-to bakes when I need something that looks like I put in more effort than I actually did. The stuffed center feels like a real moment when someone bites in for the first time — there's always that little pause, then "wait, what's inside this?" I've made them for Eid gatherings, for school events, and honestly just for a random Tuesday when Saad was being insistent about dessert.
The make-ahead option is genuinely useful — I usually assemble a full batch on a weekend afternoon, freeze half the balls unbaked, and pull them out whenever I need cookies in a hurry. Twenty minutes from frozen to table, and they taste exactly like fresh. That kind of flexibility makes a recipe worth keeping around long-term.
If you try these and have leftover cream cheese, my No-Bake Oreo Mint Cheesecake uses a full 8 oz block and is just as straightforward to put together — no oven required. Both recipes in the same week is not a bad idea at all. 🍪✨
REESE’S PEANUT BUTTER CHEESECAKE COOKIES
Ingredients
For the Cookie Dough:
- ½ cup unsalted butter softened
- ½ cup creamy peanut butter
- ½ cup granulated sugar
- ½ cup packed brown sugar
- 1 large egg
- 1 teaspoon vanilla extract
- 1 ¼ cups all-purpose flour
- ½ teaspoon baking soda
- ½ teaspoon salt
- 1 cup Reese’s Pieces or chopped mini Reese’s cups
For the Cheesecake Filling:
- 4 oz cream cheese softened
- 2 tablespoons powdered sugar
- ½ teaspoon vanilla extract
Instructions
Make Cheesecake Filling:
- In a small bowl, beat cream cheese, powdered sugar, and vanilla until smooth. Chill in freezer for 10–15 minutes to firm up.
Prepare Cookie Dough:
- In a large bowl, cream together butter, peanut butter, and both sugars until fluffy. Add egg and vanilla and mix well. Stir in flour, baking soda, and salt. Fold in Reese’s Pieces.
Assemble Cookies:
- Scoop 1 tablespoon of dough, flatten it, and place a small spoonful of cheesecake mixture in the center. Cover with another flattened dough piece and seal edges to encase filling.
Chill and Bake:
- Chill filled cookies for 10 minutes. Meanwhile, preheat oven to 350°F (175°C). Place cookies on a lined baking sheet and bake for 12–14 minutes or until golden at the edges.
Cool:
- Cool on baking sheet for 5 minutes before transferring to a wire rack.
Notes
Prepare the dough and cheesecake filling ahead. Store separately in the fridge up to 24 hours. Custom Flavors:
Try with Nutella or Biscoff spread instead of cheesecake for a fun twist. Serving Suggestions:
Serve warm for gooey centers or chilled for a firmer cheesecake bite. Allergy-Friendly Options:
Use nut-free spread and chocolate candy alternatives if needed. Storage Tips:
Store in an airtight container in the fridge for up to 5 days. Freeze unbaked cookie balls for up to 1 month.
If you liked these cookies, here are a few more things from my kitchen worth trying:
- No-Bake Oreo Mint Cheesecake — creamy, cool, no oven required
-
{"@context":"https://schema.org","@type":"Article","headline":"REESE’S PEANUT BUTTER CHEESECAKE COOKIES","description":"These Reese’s Peanut Butter Cheesecake Cookies combine creamy filling and rich candy bites in every soft, chewy, chocolatey bite.","datePublished":"2025-06-20T07:20:50+00:00","dateModified":"2026-05-03T21:14:45+00:00","author":{"@type":"Person","name":"Sana Umer","url":"https://forfoodiefriends.com/about/","description":"Self-taught home cook with 10+ years of kitchen experience. Mom of two who develops every recipe in her own kitchen.","jobTitle":"Recipe Developer & Food Blogger","image":"https://forfoodiefriends.com/wp-content/uploads/sana-umer-author-photo.jpg"},"publisher":{"@type":"Organization","name":"For Foodie Friends","url":"https://forfoodiefriends.com/","logo":{"@type":"ImageObject","url":"https://forfoodiefriends.com/wp-content/uploads/forfoodiefriends-logo.png"}},"mainEntityOfPage":{"@type":"WebPage","@id":"https://forfoodiefriends.com/reeses-peanut-butter-cheesecake-cookies/"},"image":"https://forfoodiefriends.com/wp-content/uploads/2025/06/REESES-PEANUT-BUTTER-CHEESECAKE-COOKIES.jpg"}






Comments
No Comments