
Zainab spotted these on my phone while I was looking up a recipe, and she would not let it go until I made them. That's how this whole thing started — a seven-year-old pointing at a screen saying "those ones, Mama, the swirly ones." I made a batch that weekend and honestly, I understood immediately why she was so insistent.
What I love about these mini cheesecakes is that they're genuinely two things at once — you get the buttery graham base, the creamy cheesecake filling, and then that cinnamon-sugar swirl running through the middle that tastes exactly like the inside of a cinnamon roll. It's not a gimmick. It actually works. I've made these about six times now and the recipe is locked in. I always make a double batch because one batch of 12 disappears the same evening I make them.
These are also the kind of dessert that works for a lot of situations — I've served them at a small birthday get-together, packed a few into Zainab's lunchbox the next day, and I made a tray for a friend's brunch alongside a Blueberry Croissant French Toast Bake and people kept going back for both. The size is part of the appeal — nobody feels like they're committing to a huge slice of cheesecake.
One thing to set expectations on: these do need at least two hours in the fridge before you serve them. I tried cutting that short the first time and the texture just wasn't there yet — they were soft in a way that wasn't pleasant. Plan ahead, chill them properly, and they're excellent. Everything else is very forgiving.

Why You'll Love This Recipe
- No springform pan, no stress: All you need is a standard 12-cup muffin tin and some paper liners. I don't own a springform pan worth more than $10 and I make cheesecake constantly — this muffin tin method is actually more practical for small-batch baking. It also makes portioning automatic since each one is its own individual serving.
- That cinnamon swirl is the whole point: The swirl isn't just decoration — it runs into the cheesecake batter as it bakes and gives you little pockets of spiced, sugary filling inside the cheesecake. It's the thing that makes these different from plain mini cheesecakes. Once you taste it you'll understand why I always make a double batch.
- Make-ahead friendly: These actually taste better the next day after a full night in the fridge. I usually make them the evening before I need them, which means day-of is just pulling them out and adding the glaze. For parties or brunches that's a huge relief — one less thing to think about on the morning itself.
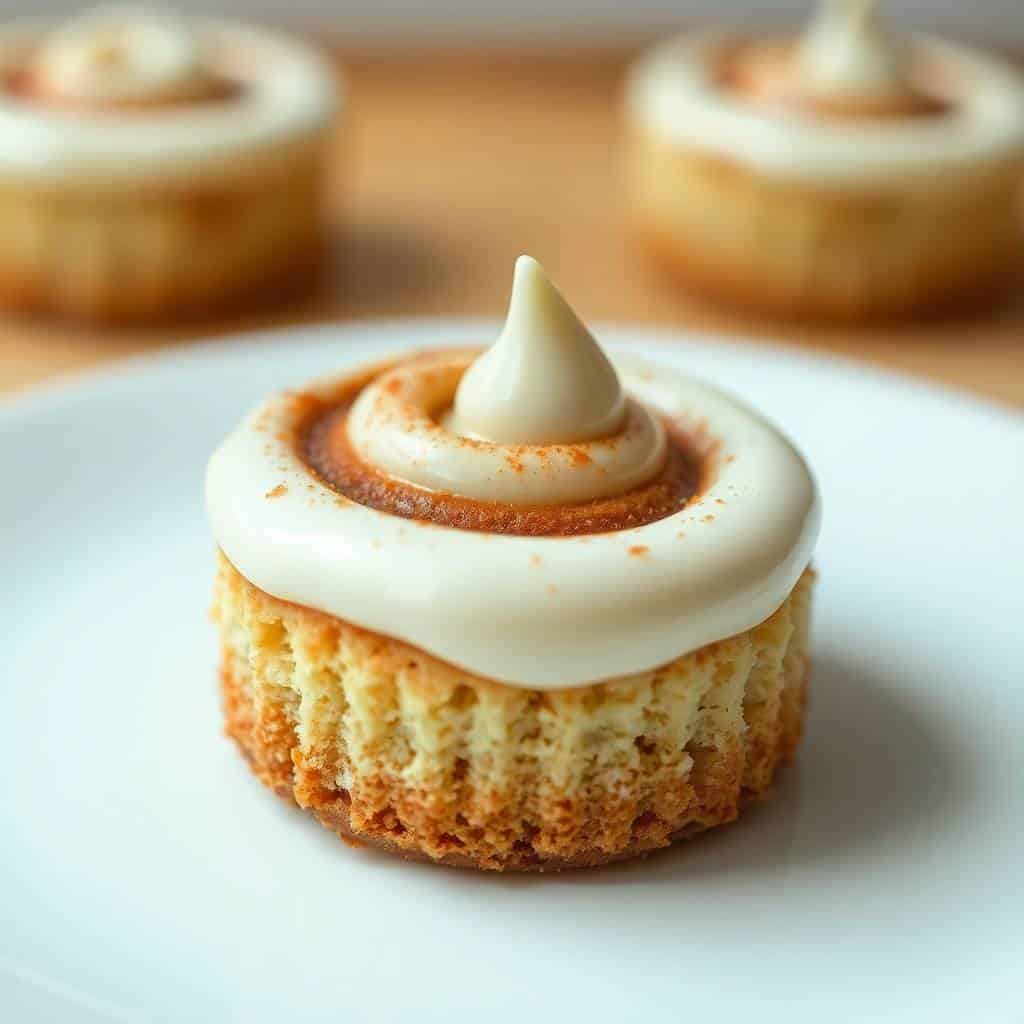
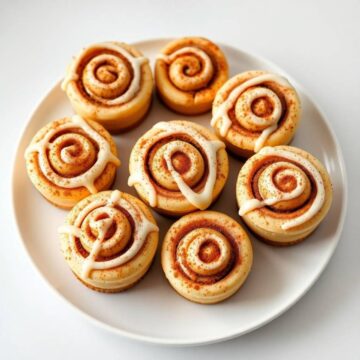
- The glaze brings it all together: The optional icing drizzle at the end is what makes them look like proper cinnamon rolls. It's just powdered sugar, milk, and vanilla — takes about two minutes. Skip it if you're in a hurry, but I think it's worth doing. It adds a little sweetness on top that ties the whole thing together visually and flavor-wise.
- Freezes beautifully: I freeze these without the glaze and they hold up really well for up to a month. Thaw them overnight in the fridge, add the drizzle right before serving, and nobody would ever know they weren't freshly made. This is how I handle holiday baking — I spread it over a few weeks so I'm not doing everything at once.
Ingredients
- For the Crust:
- 1 cup graham cracker crumbs (about 8 full crackers — I crush them in a zip-lock bag with a rolling pin)
- 2 tablespoons granulated sugar
- 3 tablespoons unsalted butter, melted
- For the Cheesecake Filling:
- 8 oz cream cheese, softened (one standard block — let it sit out for at least 15 minutes first)
- ⅓ cup granulated sugar
- 1 large egg
- 1 teaspoon vanilla extract
- ¼ cup sour cream (plain Greek yogurt works too)
- For the Cinnamon Swirl:
- 2 tablespoons brown sugar
- 1 teaspoon ground cinnamon
- 1 tablespoon unsalted butter, melted
- For the Glaze (Optional but recommended):
- ¼ cup powdered sugar
- 1 tablespoon milk
- ¼ teaspoon vanilla extract
Directions
- Step 1: Preheat and prep your tin — Set your oven to 325°F (160°C). Line a 12-cup muffin pan with paper liners. Don't skip the liners — without them you'll spend 20 minutes trying to pry the cheesecakes out and they'll break.
- Step 2: Make the crust — Mix the graham cracker crumbs, sugar, and melted butter together until it looks like wet sand. Press about 1 tablespoon of the mixture into the bottom of each liner and compact it firmly with the back of a spoon. Bake for 5 minutes, then pull it out and let it cool a bit while you make the filling.
- Step 3: Make the cheesecake filling — Beat the softened cream cheese until smooth — this is where room temperature really matters. Cold cream cheese will leave lumps no matter how long you beat it. Add the sugar, egg, vanilla, and sour cream and mix until everything is smooth and creamy with no streaks.
- Step 4: Make the cinnamon swirl — Stir together the brown sugar, cinnamon, and melted butter in a small bowl. It'll be a thick, wet paste. Set it aside — you'll dollop this on top of the filling in the next step.
- Step 5: Assemble — Spoon the cheesecake filling evenly over each crust, filling each liner about ¾ full. Drop a small amount of the cinnamon mixture on top of each one — about half a teaspoon or so. Use a toothpick to swirl it gently. Don't overdo it or the swirl disappears into the batter; a figure-eight motion is enough.
- Step 6: Bake — Bake for 18–20 minutes. The edges should look set and the centers should still have a slight jiggle — like set Jello, not wet batter. They firm up in the fridge, so don't wait for them to look completely solid in the oven or they'll overbake. Cool in the pan for 15 minutes, then move to a rack to cool completely before chilling.
- Step 7: Chill — Refrigerate for at least 2 hours, or overnight if you can. I know it's hard to wait but this step actually finishes the baking process in a sense — the texture goes from okay to genuinely good after a proper chill.
- Step 8: Add the glaze — Whisk together the powdered sugar, milk, and vanilla until smooth. It should be thick enough to drizzle but fluid enough to actually run. Add a tiny bit more milk if it's too stiff. Drizzle over the chilled cheesecakes right before serving.
Tips for Success
- Cold cream cheese will ruin the texture: I learned this the hard way — I was impatient once and used it straight from the fridge, and no matter how long I beat it there were tiny lumps in the batter. Let it sit on the counter for at least 15 to 20 minutes before you start. If you forgot, you can microwave it for 10 seconds, but don't overdo it or the fat separates.
- Don't overmix after adding the egg: Once the egg goes in, mix just until it's incorporated. Overmixing after the egg gets added incorporates too much air into the batter, which can cause the cheesecakes to puff up in the oven and then sink or crack as they cool. I use a hand mixer on low for this step — just enough to blend.
- Be gentle with the swirl: One figure-eight with the toothpick is genuinely enough. The first time I made these I swirled enthusiastically thinking more was better, and the cinnamon just dissolved into the batter — you couldn't see the swirl at all after baking. Light hand, one pass, done.
- Cool gradually before you refrigerate: Going straight from the oven into the fridge causes cracks. Let them cool in the muffin tin for 15 minutes, then on a rack until they're at room temperature, then into the fridge. The extra time is worth it — the surface stays smooth and clean-looking.
- Add the glaze at the last minute: If you drizzle the glaze too far in advance it soaks into the cheesecake surface and disappears. I drizzle right before I set them out for serving — it keeps that white icing look that makes them actually resemble a cinnamon roll. If you're making them ahead, keep the glaze separate in a small container and drizzle when you're ready.
Variations
- Pecan cinnamon swirl: Add 2 tablespoons of finely chopped pecans to the cinnamon swirl mixture. The pecans get a little toasty in the oven and add a really nice texture contrast against the creamy filling. My husband prefers these — he likes anything with nuts in it. You can find cheap pecans in the baking aisle at Walmart or Aldi.
- Maple version: Swap the vanilla extract in the cheesecake filling for maple extract. Use just ½ teaspoon — it's stronger than vanilla and a little goes a long way. This version tastes very autumn and pairs especially well with the cinnamon swirl. I made these in October and they felt very seasonal without any extra work.
- Cinnamon graham crust: If you can find cinnamon graham crackers at the store (Honey Maid makes them), use those instead of plain ones. It adds another layer of cinnamon flavor from the bottom up. The crust tastes noticeably different in the best way — it's a small change that makes the whole thing feel more cohesive.
- Pumpkin spice version: Add 1 tablespoon of pumpkin purée and ½ teaspoon of pumpkin spice to the cheesecake filling. Reduce the sour cream to 2 tablespoons to keep the batter from getting too loose. This is genuinely a fall dessert worth making — not just a gimmick. I served these at a Thanksgiving spread one year and they went faster than the pie.
- Chocolate chip swirl: Sprinkle a small pinch of mini chocolate chips on top of each cheesecake along with the cinnamon mixture before swirling. The chocolate melts slightly as it bakes and creates a marbled chocolate-cinnamon situation inside the cheesecake. Saad would choose this version every single time if I let her pick.
Serving and Storage
Serving
Serve these cold or at room temperature — both work, but I prefer them cold right out of the fridge where the texture is firmest. Add the icing drizzle right before setting them out. They're great on a dessert table alongside something like a Caramel Cream Cheese Dip with fruit — the flavor profiles complement each other nicely. If you're plating them individually, a small dusting of cinnamon on top looks really nice in addition to the glaze. This recipe makes 12, which is enough for a gathering but not so many that you're overwhelmed.
Storage
Store in an airtight container in the fridge for up to 4 days. Keep them in a single layer if you can — stacking them can smudge the glaze and dent the tops. For freezing, skip the glaze, place them on a baking sheet to freeze solid first (about an hour), then transfer to a zip-lock freezer bag. They'll keep frozen for up to 1 month. Thaw overnight in the refrigerator and add the glaze fresh before serving.

Frequently Asked Questions
Can I make these a day ahead?
Yes — and honestly, I'd recommend it. Making them the night before gives them a full overnight chill and the texture is noticeably better than cheesecakes that have only had 2 hours. Just hold off on the glaze until right before serving so it stays visible and doesn't soak in.
How do I know when they're done baking?
The edges should look set and matte, and the centers should jiggle slightly when you gently shake the pan — like set gelatin rather than liquid batter. They'll firm up completely in the fridge, so don't wait for them to look solid in the oven. At 18 minutes check them; 20 minutes is usually the max in most ovens before they start to overbake.
Can I freeze mini cinnamon roll cheesecakes?
Absolutely. Freeze them without the glaze — freeze individually on a tray first, then transfer to a freezer bag. They keep well for up to a month. Thaw overnight in the fridge and add the glaze right before serving. The texture holds up really well after freezing.
What can I use instead of sour cream?
Plain full-fat Greek yogurt is the closest substitute and works really well — same tang, similar fat content. You can also leave it out entirely; the cheesecake will be slightly firmer and a little less tangy but still good. I've made it both ways when I've run out mid-recipe.
Why did my cheesecakes crack on top?
Usually it's one of two things: overmixing the batter after adding the egg, or moving them into the fridge while they're still warm. Let them cool completely at room temperature before refrigerating. Also make sure you're not overbaking — pull them when the center still has a slight jiggle. The cinnamon swirl and glaze cover minor surface cracks anyway, so don't stress too much about it.
MINI CINNAMON ROLL CHEESECAKES
Ingredients
For the Crust:
- 1 cup graham cracker crumbs
- 2 tablespoons granulated sugar
- 3 tablespoons melted butter
For the Cheesecake Filling:
- 8 oz cream cheese softened
- ¼ cup sour cream
- ⅓ cup granulated sugar
- 1 large egg
- 1 teaspoon vanilla extract
For the Cinnamon Swirl:
- 2 tablespoons brown sugar
- 1 teaspoon ground cinnamon
- 1 tablespoon melted butter
For the Glaze (Optional):
- ¼ cup powdered sugar
- 1 tablespoon milk
- ¼ teaspoon vanilla extract
Instructions
Preheat the Oven:
- Preheat your oven to 325°F (160°C). Line a 12-cup muffin pan with paper liners.
Prepare the Crust:
- Mix graham cracker crumbs, sugar, and melted butter in a bowl. Press about 1 tablespoon of the mixture into each muffin cup. Bake for 5 minutes, then let cool slightly.
Make the Filling:
- Beat cream cheese until smooth. Add sour cream, sugar, egg, and vanilla. Mix until creamy and lump-free.
Prepare Cinnamon Swirl:
- In a small bowl, combine brown sugar, cinnamon, and melted butter.
Assemble Cheesecakes:
- Spoon cheesecake filling evenly over each crust. Add a small swirl of the cinnamon mixture on top of each and gently swirl with a toothpick.
Bake:
- Bake for 18–20 minutes or until centers are set. Cool in the pan for 15 minutes, then transfer to a rack to cool completely. Chill in the fridge for at least 2 hours.
Add Glaze (Optional):
- Whisk powdered sugar, milk, and vanilla. Drizzle over chilled cheesecakes before serving.
Notes
You can make these a day in advance and chill overnight. Custom Flavors:
Add chopped pecans to the cinnamon swirl for extra crunch or a pinch of nutmeg for warmth. Serving Suggestions:
Perfect for holiday brunch tables, tea parties, or plated with whipped cream and berries. Allergy-Friendly Options:
Use gluten-free graham crackers for the crust and dairy-free cream cheese if needed. Storage Tips:
Store in an airtight container in the fridge for up to 4 days. Freeze for up to 1 month without the glaze.
These mini cheesecakes have become one of my most-made desserts in the last year — which is saying something given how much baking happens in this house. What keeps me coming back to them is that they feel a little special without requiring any special skill or equipment. A muffin tin, a hand mixer, and about 40 minutes of active work. The rest is just waiting.
I especially love making them when I'm hosting a brunch because I can do everything the night before. The morning itself is just the glaze drizzle — two minutes of work — and then they look like I spent the whole day baking. If you're planning a holiday spread, these work really well alongside something like an





Comments
No Comments