
Zainab asked me to make "the Nutella balls" four times before I finally wrote the recipe down. That's how these truffles got documented — not because I planned it, but because my daughter wouldn't stop requesting them and I kept winging it slightly differently each time.
What I like about this recipe is that it's genuinely simple without cutting corners on flavor. The cream cheese keeps the filling from being too sweet or too soft, and the graham cracker crumbs give the whole thing some body so you're not just biting into a blob of Nutella. I've made truffles that were too sticky to roll, too firm to enjoy, and one very sad batch that melted all over my hands because I skipped the chilling step. This version has all of that figured out.
I make these whenever I need something to bring somewhere and don't want to bake. They look like you put in a lot of effort — the kind of thing people pick up at a dessert table and say "oh, did you make these?" When I'm putting together a party spread alongside something savory like my All-American BBQ Chicken Skewers, these truffles handle the sweet end of the table without me spending three hours in the kitchen.
One thing worth knowing upfront: the chilling steps aren't optional. I know it's tempting to skip straight to dipping, but if you don't freeze the rolled balls first, they'll fall apart in the chocolate. Give them at least 30 minutes in the freezer — 45 is better if your kitchen runs warm. That's the one step I'd push you not to rush.

Why You'll Love This Recipe
- No oven required: This whole recipe happens in a mixing bowl and your refrigerator. I've made these in the middle of summer when turning on the oven felt like a punishment, and they came out just as good. No baking means no worrying about temperatures or timing — just mix, roll, chill, and coat.
- Five real ingredients: Nutella, cream cheese, graham crackers, vanilla, and chocolate chips for coating. That's it. I usually have all of these in my kitchen already, which means I can make these on a whim without a grocery run. The cream cheese is the one thing people sometimes don't expect — it makes the filling smooth and helps it hold its shape.
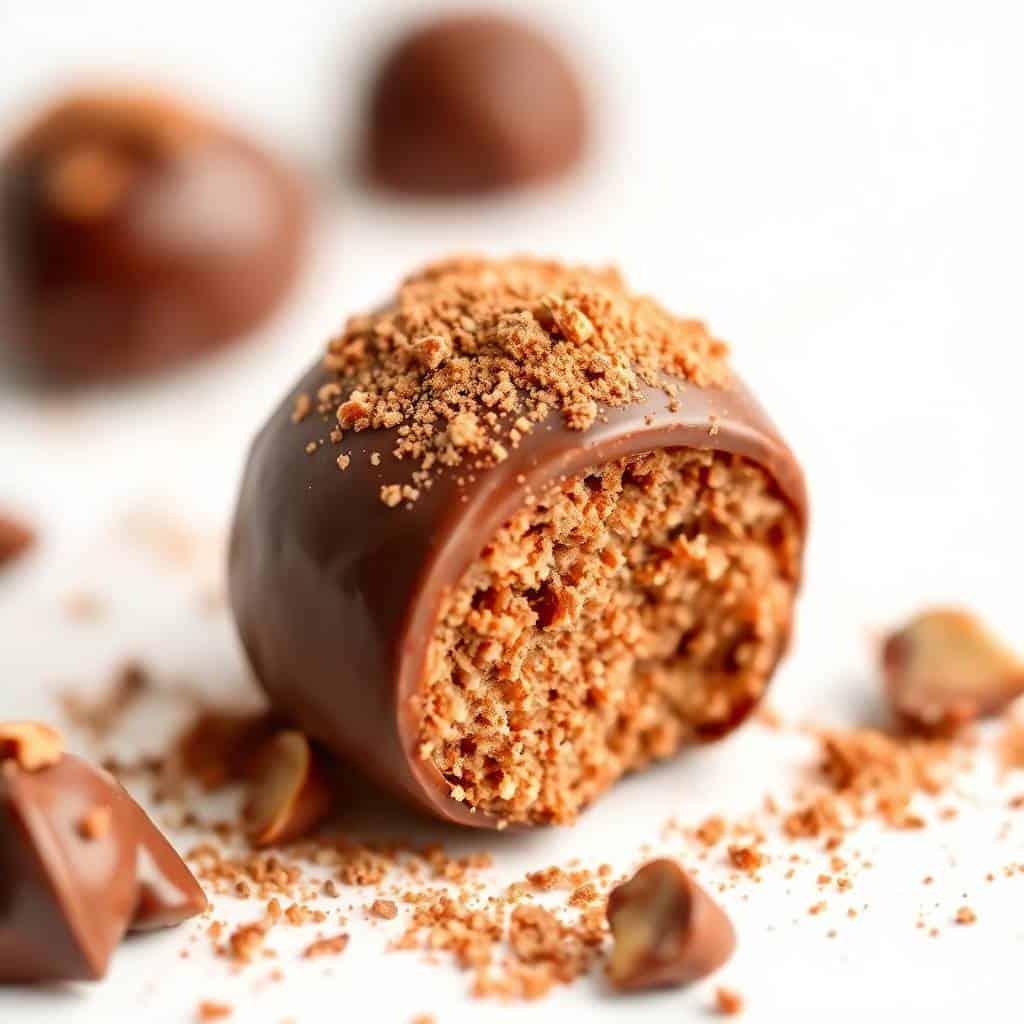
- The texture is genuinely good: The outside snaps when you bite through the chocolate, and the inside is dense and creamy without being heavy. I've had truffles that were grainy or too sweet — these aren't either of those things. The cream cheese cuts the sweetness just enough to make them actually enjoyable past the first one.
- You can coat them any way you like: Melted dark chocolate, white chocolate, cocoa powder, crushed hazelnuts, sprinkles — whatever you have or whatever the occasion calls for. I did a mix of coatings for Zainab's school event: half in chocolate, half rolled in crushed hazelnuts. They all disappeared, but the hazelnut ones went first.
- Make-ahead friendly: These actually get better after a night in the fridge. I usually make them the day before I need them, which takes the stress out of party prep entirely. They keep for a week refrigerated, so you're not racing against the clock to use them up.
Ingredients
- 1 cup Nutella
- 4 oz cream cheese, softened (leave it out on the counter for 20 minutes before you start)
- 1 cup graham cracker crumbs (or crushed digestive biscuits if you're in the UK)
- ½ teaspoon vanilla extract
- ¼ teaspoon salt
- 1 cup chocolate chips, for coating (semi-sweet or dark both work)
- Optional toppings: chopped hazelnuts, cocoa powder, or sprinkles
Directions
- Step 1: Make the filling. In a large mixing bowl, beat the softened cream cheese and Nutella together until completely smooth — no lumps. Add the vanilla, salt, and graham cracker crumbs and mix until everything is combined and the dough holds together. It should be thick but not dry. If it feels crumbly, your graham crackers might have been packed too densely; just add a teaspoon of milk and mix again.
- Step 2: Roll the truffles. Scoop out portions of the mixture — about 1 tablespoon each — and roll them into balls between your palms. Place them on a parchment-lined tray as you go. I find it easiest to use a small cookie scoop to keep them uniform, but a tablespoon works fine too. Don't worry if they're not perfectly round; once they're coated, no one will notice.
- Step 3: Freeze until firm. Slide the tray into the freezer for at least 30 minutes, or up to an hour. This step is the difference between truffles that hold together during dipping and truffles that disintegrate. I learned this after my first batch fell apart in the melted chocolate — not a great moment.
- Step 4: Melt the chocolate. Put the chocolate chips in a microwave-safe bowl and microwave in 30-second intervals, stirring between each one, until fully melted and smooth. Don't rush this — overheated chocolate seizes up and gets grainy. Three rounds of 30 seconds is usually enough.
- Step 5: Dip and decorate. Working quickly, drop each frozen truffle into the melted chocolate, use a fork to coat it, and lift it out letting the excess drip off. Place it back on the lined tray. If you're adding toppings like chopped hazelnuts or sprinkles, add them immediately before the chocolate sets. If you're dusting with cocoa powder, do that after the chocolate is fully set.
- Step 6: Set and serve. Refrigerate the coated truffles for another 10–15 minutes until the chocolate is completely firm. Transfer to a serving dish or an airtight container and keep them cold until you're ready to serve.
Tips for Success
- Soften the cream cheese properly: Cold cream cheese will not blend smoothly with the Nutella — you'll end up with lumps in your filling no matter how long you mix it. I learned this the hard way. Leave it on the counter for at least 20 minutes before you start. If you forgot and it's still cold, microwave it for 10 seconds, not more.
- Don't skip the freeze: I know 30 minutes feels like a long wait, but this is what makes dipping possible. Room-temperature truffles are too soft to hold up in melted chocolate — they'll slip off the fork or crack apart. Freezing gives them the structure they need. If you're really short on time, 20 minutes works in a pinch, but longer is better.
- Work in small batches when dipping: Only take a few truffles out of the freezer at a time. They warm up fast, and once they start to soften, dipping gets messy. I usually pull out 5 or 6 at a time, dip those, then grab the next batch. It takes slightly longer but the results are much cleaner.
- Use a fork, not a spoon, for dipping: A fork lets the excess chocolate drain off cleanly. A spoon traps a pool of chocolate underneath the truffle, which means thick uneven coating and a puddle that hardens into a flat mess. Just rest the truffle on the tines and tap the fork handle gently to shake off the drips before placing it on the tray.
- If you're gifting these, chill them right up until packing: Room-temperature chocolate coating softens after about 20–30 minutes in a warm room. If you're boxing these up as gifts or taking them somewhere, keep them refrigerated until the last minute. I put them in a cooler bag if I'm transporting them more than 15 minutes away.
Variations
- White chocolate coating: Swap the semi-sweet chocolate chips for white chocolate chips. The contrast between the dark Nutella filling and the white coating looks really striking on a dessert tray. White chocolate is a little more temperamental to melt — go even slower with 20-second intervals and stir frequently so it doesn't seize.
- Crushed hazelnut coating: Skip the chocolate dip entirely and roll the frozen truffles directly in finely chopped roasted hazelnuts. This is my personal favorite version — it leans into the hazelnut flavor that's already in the Nutella and gives the outside a satisfying crunch. Zainab calls these "the crunchy ones" and will specifically ask for them by that name.
- Peanut butter filling: Replace half the Nutella with creamy peanut butter. The result tastes like a Reese's cup in truffle form. My husband prefers these — he finds straight Nutella a bit too sweet. The texture stays the same, but the flavor shifts toward salty-sweet, which is a good thing.
- Espresso version: Add 1 teaspoon of instant espresso powder to the filling when you're mixing. It doesn't make the truffles taste like coffee — it just deepens the chocolate flavor in a way that's hard to put your finger on. If you're serving these to adults, this is the version to make. Pair them on a dessert table next to my Chocolate Fudge Dessert Pizza for a full chocolate spread.
- Oreo crumb coating: Crush some Oreos into fine crumbs and roll the truffles in them instead of (or after) the chocolate dip. This is the version kids go wild for. It's also useful if your chocolate seized and you don't want to start over — just pivot to the crumb coating and nobody will know the difference.
Serving and Storage
Serving
Serve these cold or at cool room temperature — once they've been out for more than 30 minutes in a warm room, the coating starts to soften. I like to arrange them in mini cupcake liners on a tray; it keeps them from sliding around and makes them look more finished. If you're putting together a dessert spread, these sit nicely alongside lighter options — a fruit plate, or even something like my Farro Breakfast Pudding with Dates and Cardamom if you want a mix of sweet flavors on the table.
Storage
Keep them in an airtight container in the fridge for up to 7 days. Layer them between sheets of parchment paper if you're stacking them, so the coatings don't stick together. They also freeze well — up to 1 month in a freezer-safe container. To serve from frozen, move them to the fridge for a couple of hours rather than thawing at room temperature, which can cause condensation to form on the chocolate coating.

Frequently Asked Questions
Can I make these truffles ahead of time?
Yes, and honestly they're better the next day once the filling has had time to settle. I almost always make these the night before I need them. Store them in an airtight container in the fridge and they'll be in good shape for up to a week.
Can I use something other than graham crackers?
Absolutely. Crushed digestive biscuits work just as well and are easier to find in the UK and Australia. Crushed Oreos (without the filling) also work and give the truffles a darker, more chocolatey flavor. I'd avoid anything too thick or oily — the crumbs need to absorb into the Nutella mixture, not sit on top of it.
My chocolate seized when I was melting it — what do I do?
Seized chocolate (where it goes thick and grainy) usually means it overheated or got a drop of water in it. If it's just a little thick, try stirring in half a teaspoon of neutral oil — that sometimes brings it back. If it's fully grainy and dry, it's easier to start fresh with new chocolate than to fix it. This is why I do short 30-second intervals and stir between each one.
Can I freeze the truffles before coating them?
Yes — that's actually what the recipe calls for. Freezing the rolled balls for 30–60 minutes before dipping is what makes the coating process work cleanly. If you want to freeze a full batch uncoated for later, that works too. Just thaw them in the fridge until firm (not soft), then coat and refrigerate as normal.
Can I make these dairy-free?
You can — use dairy-free cream cheese (the Violife or Kite Hill brands both work reasonably well) and dairy-free chocolate chips for coating. Note that Nutella itself does contain skim milk, so if you need fully dairy-free, you'd need to use a dairy-free hazelnut chocolate spread instead. Brands like Justin's make a hazelnut butter that works in a pinch, though the flavor is slightly different.
NUTELLA TRUFFLES
Ingredients
- 1 cup Nutella
- 1 cup graham cracker crumbs or crushed digestive biscuits
- ¼ teaspoon salt
- ½ teaspoon vanilla extract
- 4 oz cream cheese softened
- 1 cup chocolate chips for coating
- Optional: chopped hazelnuts sprinkles, or cocoa powder for topping
Instructions
Make the base:
- In a large bowl, beat the cream cheese and Nutella until smooth. Add vanilla, salt, and graham cracker crumbs. Mix until combined.
Shape the truffles:
- Roll mixture into 1-inch balls and place them on a parchment-lined tray.
Chill:
- Freeze the truffles for 30–60 minutes until firm.
Coat with chocolate:
- Melt chocolate chips in the microwave in 30-second intervals. Dip each truffle into the melted chocolate and place back on the tray.
Decorate (optional):
- Sprinkle with chopped hazelnuts, sprinkles, or dust with cocoa powder before the chocolate sets.
Set:
- Chill again until the coating is firm. Store in the fridge until ready to serve.
Notes
- Make ahead: These truffles store well and are perfect for gifting or party trays.
- Storage: Keep in an airtight container in the fridge for up to 1 week or freeze for up to 1 month.
- Toppings: Try coconut flakes, chopped nuts, or crushed Oreos for fun textures and flavours.
- Dairy-free version: Use dairy-free cream cheese and dark chocolate.
These truffles have become my default answer to "what should I bring?" — whether that's a school event, a holiday gathering, or a friend's birthday. They look like you spent real time on them, and the only honest answer is that most of that time was just waiting for them to chill in the freezer. I usually make a double batch because a single batch (about 20 truffles, depending on size) disappears faster than I expect every single time.
What I appreciate most is that this isn't a recipe where you need to be precise about much. The filling is forgiving — a little more or less graham cracker crumb won't ruin it. The coating options are flexible. Even the chilling time has some wiggle room. Once you make these once, you'll know exactly what the dough should feel like and you won't need to measure as carefully the next time around.
If you're putting together a dessert table with these, my Chocolate Fudge Dessert Pizza is another no-fuss option that looks impressive without complicated technique. And if you want something completely different to round out a party spread on the savory side, the Crab Rangoon Egg Rolls are always the first thing to go at my house.
I hope Zainab's enthusiasm for these translates to your family too. 🍫✨
If you liked this recipe, here are a few more from the blog you might want to try:
- Chocolate Fudge Dessert Pizza — another no-bake-friendly chocolate dessert that comes together fast
- Crab Rangoon Egg Rolls (Crispy, Creamy Party Appetizer) — for when you need a savory party bite to balance the sweets
- All-American BBQ Chicken Skewers — a crowd-friendly main for the same spread
- Pull Apart Garlic Bread Wreath — another make-ahead option that looks more effort than it is
- Farro Breakfast Pudding with Dates and Cardamom — something completely different for when you want a lighter sweet {"@context":"https://schema.org","@type":"Article","headline":"NUTELLA TRUFFLES","description":"These rich Nutella truffles are creamy, chocolatey, no-bake delights—perfect for parties, gifting, or sweet cravings anytime.","datePublished":"2025-06-15T08:05:02+00:00","dateModified":"2026-05-03T21:17:01+00:00","author":{"@type":"Person","name":"Sana Umer","url":"https://forfoodiefriends.com/about/","description":"Self-taught home cook with 10+ years of kitchen experience. Mom of two who develops every recipe in her own kitchen.","jobTitle":"Recipe Developer & Food Blogger","image":"https://forfoodiefriends.com/wp-content/uploads/sana-umer-author-photo.jpg"},"publisher":{"@type":"Organization","name":"For Foodie Friends","url":"https://forfoodiefriends.com/","logo":{"@type":"ImageObject","url":"https://forfoodiefriends.com/wp-content/uploads/forfoodiefriends-logo.png"}},"mainEntityOfPage":{"@type":"WebPage","@id":"https://forfoodiefriends.com/nutella-truffles/"},"image":"https://forfoodiefriends.com/wp-content/uploads/2025/06/NUTELLA-TRUFFLES.jpg"}





Comments
No Comments