
I made my first quiche about seven years ago and pulled it out of the oven looking completely confident — then cut into it and found the center completely raw. I didn't realize I'd used too much milk and not enough cream, and I hadn't let the crust blind-bake long enough. My husband ate it anyway (bless him), but I knew I had to figure this out properly. A few more attempts later, and I finally had a quiche that sliced cleanly, had a fully cooked custard, and a crust that didn't go soggy at the bottom.
What makes this version work is the combination of whole milk and heavy cream for the custard — milk alone gives you something a bit watery, and all cream can feel too heavy. The mix of cheddar and mozzarella is also intentional: cheddar brings the sharp, salty flavor you want, and mozzarella melts in a way that makes the filling pull together smoothly. And pre-baking the crust for a few minutes before adding the filling makes a real difference to the final texture.
This is the kind of thing I make for weekend brunch when I want something that feels a bit special without actually spending all morning in the kitchen. My husband is a big fan — he asks for this more than almost anything else I make on Saturday mornings. I usually pair it with my butter biscuits on the side and some fresh fruit, and that's a full brunch right there.
One thing I'll say upfront: this quiche needs about 10 minutes to rest after it comes out of the oven before you cut it. I know it's hard to wait when it smells that good, but if you slice it too soon the custard is still too loose and the slices don't hold. Give it the time — it's worth it.

Why You'll Love This Recipe
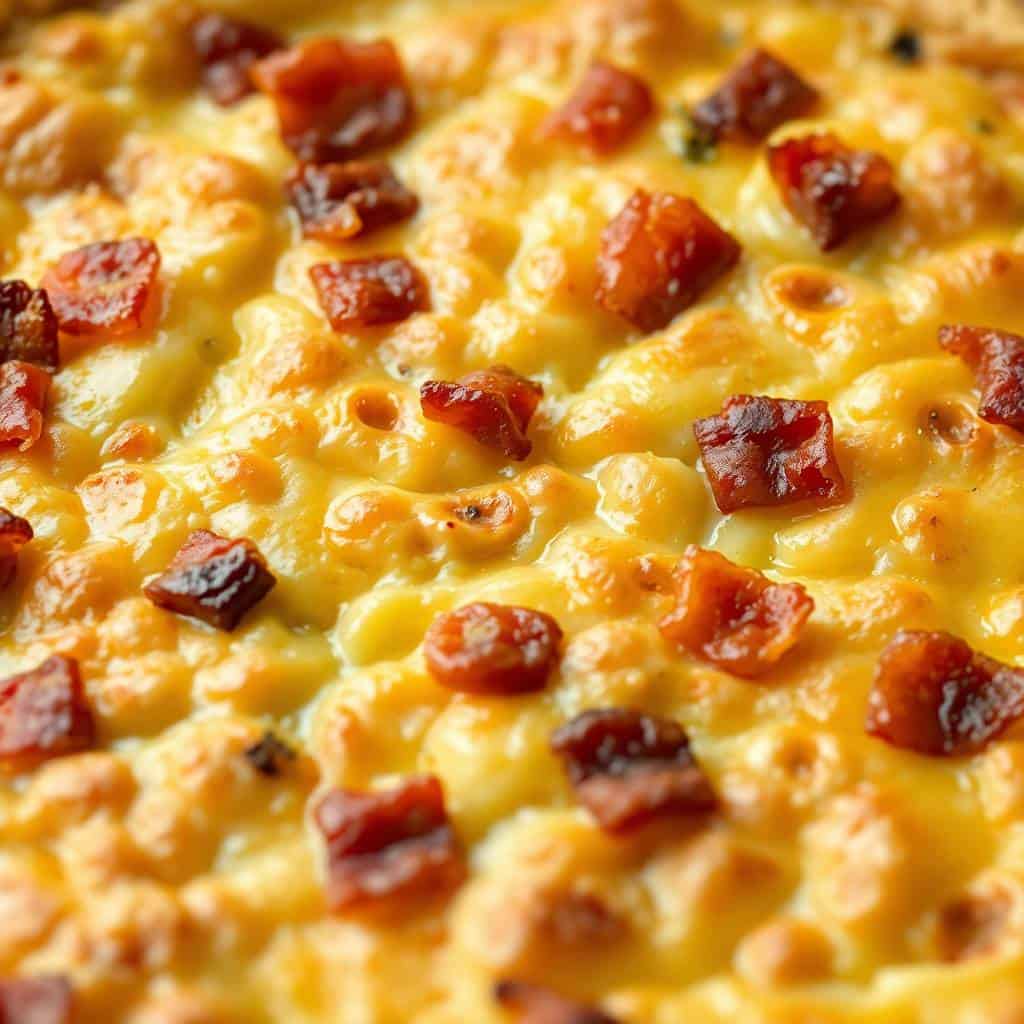
- The bacon flavor goes all the way through: Because the bacon gets scattered directly over the crust before the custard goes on top, it ends up suspended throughout the filling rather than just sitting on the surface. Every bite has that smoky, salty hit. I've made versions where I stirred the bacon into the egg mixture first, and it's not the same — this layering method is better.
- The custard sets up silky and smooth: I use a mix of whole milk and heavy cream, which gives you a custard that's rich without being cloying. The eggs give it structure and the cream gives it that velvety texture that's hard to get with just milk. The small amount of nutmeg in the custard sounds odd if you haven't tried it, but it rounds out the savory flavors in a way I really like.
- No special equipment needed: I don't have a tart pan with a removable bottom or any fancy quiche dish. I use a regular 9-inch glass pie dish from Walmart that I've had for years. A standard pie dish is genuinely all you need here. A refrigerated pie crust from the grocery store also works perfectly — I've used Pillsbury and the store brand from Aldi both with good results.
- It holds up well as leftovers: Unlike a lot of egg dishes that turn rubbery the next day, this quiche reheats nicely in the oven at a low temperature. I've had it for lunch the next day and it's genuinely good. Zainab actually likes it cold straight from the fridge, which — I'm not going to judge her for it because it does still taste good.
- You can make it ahead: The whole quiche can be baked a day in advance, stored covered in the refrigerator, and reheated gently before serving. This makes it genuinely useful for brunch gatherings where you don't want to be standing at the oven when your guests arrive. I've baked it the night before and it comes out just as good the next morning.
Ingredients
- 1 9-inch unbaked pie crust (store-bought refrigerated works great)
- 6 slices bacon, chopped
- 1 cup shredded cheddar cheese
- ½ cup shredded mozzarella cheese
- 4 large eggs
- 1 cup whole milk
- ½ cup heavy cream
- ¼ teaspoon salt
- ¼ teaspoon black pepper
- ¼ teaspoon ground nutmeg (optional, but I always use it)
Directions
- Step 1: Preheat the oven — Set your oven to 375°F (190°C). Press the pie crust into a 9-inch pie dish and set it aside while you prep everything else. If your crust has been refrigerated, let it sit for 5 minutes first so it doesn't crack when you press it in.
- Step 2: Cook the bacon — Cook the chopped bacon in a skillet over medium heat until it's crispy. Drain it on paper towels and let it cool for a few minutes. Getting it properly crispy matters here — underdone bacon releases a lot of grease into the filling and the texture isn't great.
- Step 3: Assemble the filling — Scatter the cooked bacon evenly over the bottom of the unbaked pie crust. Then layer the cheddar and mozzarella cheese over the top of the bacon. Don't stir everything together — just layer it so the flavors build from the bottom up.
- Step 4: Make the custard — In a mixing bowl, whisk together the eggs, milk, heavy cream, salt, pepper, and nutmeg until smooth and fully combined. Don't over-whisk or beat too aggressively — you want it combined, not airy. Too much air in the custard can make it puff and then collapse in the oven.
- Step 5: Pour and bake — Carefully pour the egg custard over the bacon and cheese in the crust. Slide it into the oven and bake for 35 to 40 minutes, until the center is just set and the top is lightly golden. The very center might still have a slight jiggle — that's fine, it'll firm up as it rests.
- Step 6: Rest before slicing — Let the quiche sit for at least 10 minutes before cutting into it. I know it's hard to wait. But the custard needs that time to fully set or your slices will fall apart. Use those 10 minutes to make coffee or put together a salad.
Tips for Success
- Drain the bacon well: After cooking, let the bacon sit on paper towels for a couple of minutes before adding it to the crust. If there's a lot of excess grease, pat it with an extra paper towel. I learned this after my second quiche came out with a slightly greasy filling — not terrible, but not what I wanted. Properly drained bacon keeps the custard clean and the crust from getting soggy on the bottom.
- Don't skip the rest time: Ten minutes after the oven feels like forever when you're hungry, but it genuinely matters. The custard is still finishing its set from the residual heat when you take it out. I've rushed this step and ended up with a puddle of egg in the center of my first slice. Now I always set a timer.
- Shred your own cheese if you can: Pre-shredded cheese from a bag has a coating on it that prevents clumping in the bag, but it also doesn't melt as smoothly. When I have time I buy a block of cheddar and shred it myself — the difference in how it melts into the custard is noticeable. If you're using pre-shredded, let it come to room temperature for 15 minutes before using it.
- Check the center carefully: Every oven runs a little differently. I check mine at the 35-minute mark by giving the dish a gentle nudge — if the edges are set and there's just a small, soft wobble in the center, it's done. If the whole surface is still liquid, give it another 5 minutes. An overcooked quiche gets rubbery, so it's worth checking rather than just leaving it in for the full 40 minutes without looking.
- Use a pie dish, not a springform: I tried making this in a springform pan once thinking it would be easier to slice and serve. The custard leaked out of the bottom seam before it set. Stick to a regular 9-inch pie dish — glass or ceramic both work, and ceramic holds heat a little longer which helps with the resting step.
Variations
- Add spinach: Sauté a big handful of fresh spinach in a dry pan for a minute or two until wilted, then squeeze out as much water as you can before adding it. Wet spinach makes the custard watery, so the squeezing step is important. Scatter it over the bacon before adding the cheese and it blends right into the filling.
- Swap in ham: Diced ham works really well in place of bacon — my ham and cheese quiche is actually a separate recipe I've written up if you want the full version. Ham gives you a milder, slightly sweeter flavor compared to bacon's smokiness. Use about ¾ cup of diced ham and skip the cooking step since it's already cooked.
- Try a different cheese: Gruyère is the classic French quiche choice and it melts beautifully into the custard with a slightly nutty flavor. Swiss works similarly. If you want something a bit more tangy, crumbled feta in place of the mozzarella is unexpectedly good — just use a bit less since feta is salty and you won't need as much added salt.
- Go crustless: If you want to skip the pastry, just grease your pie dish well and pour the filling straight in. It bakes in about the same time and comes out closer to a frittata in texture. This is also how I'd make it for anyone avoiding gluten — just make sure your cheese and bacon are gluten-free as well (most are, but worth checking the bacon packaging).
- Add fresh herbs: A tablespoon of fresh chives stirred into the custard before pouring adds a mild oniony flavor that works really well with the bacon and cheese. Thyme is also good if you want something a little more earthy. I'd avoid dried herbs here — fresh makes a bigger difference than you'd expect.
Serving and Storage
Serving
This quiche is good warm or at room temperature, which makes it flexible for brunch. I usually serve it with a simple green salad dressed with lemon and olive oil, or alongside butter biscuits if I'm making a bigger spread. Fresh fruit on the side keeps things feeling balanced. If you're serving it for a weekend brunch gathering, room temperature actually slices more cleanly than straight-from-the-oven hot.
Storage
Store leftover quiche covered tightly in the refrigerator for up to 3 days. To reheat, cover loosely with foil and warm in a 325°F oven for about 15 minutes — this keeps the custard from drying out. Microwaving works in a pinch but the texture suffers a bit. To freeze, let it cool completely, wrap individual slices tightly in plastic wrap and then foil, and freeze for up to 2 months. Reheat frozen slices in the oven at 325°F for 20 to 25 minutes.

Frequently Asked Questions
Can I make this quiche ahead of time?
Yes — this is actually one of the better make-ahead brunch dishes I know. Bake it the night before, let it cool completely, cover it, and refrigerate. The next morning, reheat it covered with foil in a 325°F oven for about 15 minutes. It comes out tasting just as good as it did fresh.
How do I know when the quiche is done?
Give the dish a gentle nudge around the 35-minute mark. The edges should be fully set and the center should have just a small, soft wobble — not a full liquid jiggle. It will firm up the rest of the way as it rests out of the oven. If the whole surface is still moving, give it 5 more minutes and check again.
Can I freeze bacon and cheese quiche?
Yes. Let it cool fully first, then wrap individual slices in plastic wrap followed by foil and freeze for up to 2 months. Reheat from frozen in a 325°F oven for 20 to 25 minutes covered with foil. I wouldn't recommend freezing the whole quiche unsliced — it takes too long to reheat evenly and the crust can get a bit soggy.
Can I substitute bacon with something else?
Diced ham is the easiest swap — use about ¾ cup and skip the cooking step since it's already cooked. Turkey bacon also works if you're avoiding pork; just cook it the same way. For a meatless version, sautéed mushrooms or roasted red peppers give you that savory depth without the meat.
Do I need to blind bake the crust first?
The recipe as written skips the blind bake, and it works because the filling isn't overly wet. If you find your crust is coming out a little soft on the bottom, you can prick it all over with a fork and pre-bake it at 375°F for about 8 minutes before adding the filling. I do this sometimes when my refrigerated crust feels extra thin.

BACON AND CHEESE QUICHE
Ingredients
- 1 9- inch unbaked pie crust
- 6 slices bacon chopped
- 1 cup shredded cheddar cheese
- ½ cup shredded mozzarella cheese
- 4 large eggs
- 1 cup milk
- ½ cup heavy cream
- ¼ teaspoon salt
- ¼ teaspoon black pepper
- ¼ teaspoon ground nutmeg optional
Instructions
Preheat the Oven:
- Preheat oven to 375°F (190°C). Place the pie crust in a 9-inch pie dish and set aside.
Cook the Bacon:
- In a skillet over medium heat, cook bacon until crispy. Drain on paper towels.
Assemble the Filling:
- Sprinkle the bacon evenly over the crust. Top with cheddar and mozzarella cheese.
Mix the Custard:
- In a bowl, whisk together eggs, milk, cream, salt, pepper, and nutmeg. Pour over the bacon and cheese in the crust.
Bake the Quiche:
- Bake for 35–40 minutes or until the centre is set and the top is lightly golden. Let rest for 10 minutes before slicing.
Notes
This quiche has become one of those recipes I come back to regularly because it actually delivers every time. The custard is silky, the bacon flavor runs all the way through, and the crust holds up without going soggy — which, after several failed attempts early on, feels genuinely satisfying. It's the kind of dish that looks like you put in more effort than you actually did, and I mean that as a compliment.
I make it most often on Saturday mornings when I have a bit more time, but it's also appeared on my table for casual dinner when I didn't feel like cooking





Comments
No Comments