
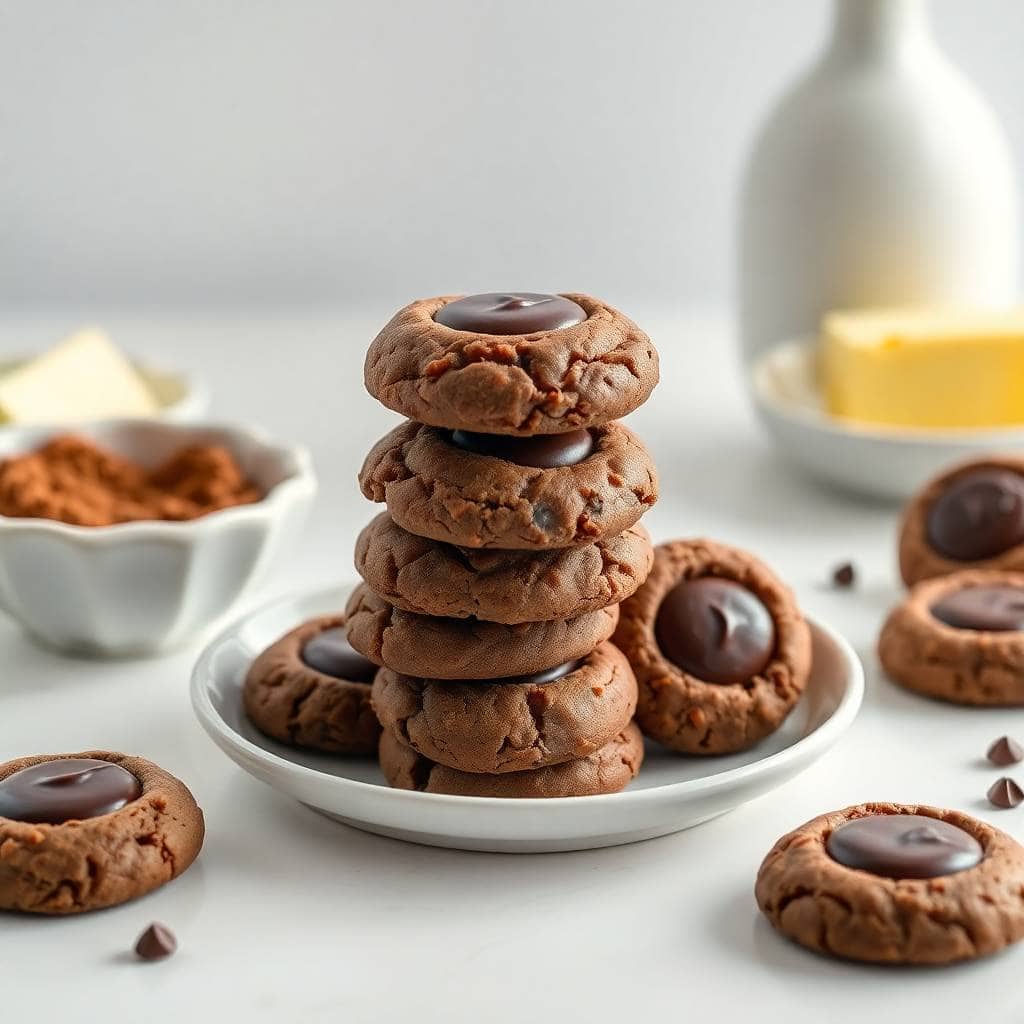
I made these chocolate thumbprint cookies for the first time around the holidays two years ago, mostly because Zainab had been asking for something "fancy but chocolatey" and I wanted to actually deliver. The idea seemed simple enough — chocolate dough, little well in the middle, ganache poured in — but I underestimated how much I'd need to tweak before they came out right. My first batch spread too much, the centers puffed up and swallowed the thumbprint, and the ganache was too thin and just pooled everywhere. Not pretty.
What finally worked was a few small adjustments: chilling the dough before rolling, using a heavier ganache ratio, and — this is important — re-pressing the centers immediately after they come out of the oven while everything is still warm and forgiving. The cookie dough itself is deeply chocolatey, somewhere between a brownie and a shortbread in texture, and the ganache sets into this silky, slightly firm filling that doesn't crack when you bite in. It's a genuinely good cookie, not just a pretty one.
These have become my go-to for holiday cookie boxes, Eid treat trays, and honestly any time someone says "bring something for dessert." Zainab loves helping press the thumbprints, and my husband eats them straight from the fridge because he prefers the ganache firmer. I usually make a double batch because one batch disappears faster than I expect — they travel well, they hold their shape, and people always ask what they are.
One thing to set your expectations on: this isn't a drop-and-bake cookie. The dough needs a short chill if your kitchen is warm, and you do need to wait for the cookies to fully cool before filling them. If you rush the ganache step, it soaks into the cookie instead of setting on top. But none of this is difficult — it's just about having a bit of patience. If you're in a baking mood and want something that looks like it came from a bakery, this is the recipe. And if you're already in cookie mode, my almond flour cookies are another one worth making alongside these.
Why You'll Love This Recipe
- Real chocolate flavor, not just sweetness: The dough uses a generous half cup of cocoa powder plus real butter, so these taste genuinely chocolatey rather than just sugary. The ganache filling — made with actual semi-sweet chocolate and cream — adds another layer of richness that cocoa alone can't give you. I've made versions with Dutch-process cocoa and they come out even deeper in color, if you can find it.
- Soft and fudgy in the middle: These don't bake up crispy — they stay tender, almost brownie-like, and that texture holds for a couple of days after baking. I pulled a few out of an airtight container on day three and they were still soft. That makes them practical for baking ahead, which I always appreciate when I'm planning for guests or a holiday spread.
- Easy to make your own: The ganache is the obvious place to play. Dark chocolate, white chocolate, a splash of peppermint extract, a pinch of sea salt on top — all of these work. I've also filled a few with Nutella when I didn't feel like making ganache and they were just as good, maybe more popular with the kids.
- Pantry ingredients, no special equipment: You don't need a stand mixer for this. I make the dough with a wooden spoon and a bit of elbow grease, and it comes together fine. Everything in the ingredient list — flour, cocoa, butter, sugar, egg yolk, cream, chocolate chips — is available at any Walmart, Aldi, or Sainsbury's. Nothing obscure, nothing expensive.
- They look like you worked harder than you did: The ganache-filled center makes these look like something from a bakery display. I've brought them to gatherings three or four times now and someone always asks if I bought them somewhere. They hold their shape well enough for cookie boxes or gifting — wrap a few in cellophane and they make a genuinely nice edible gift.
Ingredients
- For the Cookies:
- 1 cup all-purpose flour
- ½ cup unsweetened cocoa powder
- ¼ teaspoon salt
- ½ cup unsalted butter, softened
- ⅔ cup granulated sugar
- 1 large egg yolk
- 2 tablespoons milk
- 1 teaspoon vanilla extract
- For the Ganache Filling:
- ½ cup heavy cream
- 4 ounces semi-sweet chocolate, finely chopped (or ⅔ cup semi-sweet chocolate chips)
- 1 tablespoon unsalted butter
- Optional toppings: flaky sea salt, crushed peppermint candy, sprinkles
Directions
- Preheat your oven: Set your oven to 350°F (175°C) and line a baking sheet with parchment paper. I use a standard sheet pan — nothing fancy, just a flat metal pan from any grocery or hardware store.
- Mix the dry ingredients: Whisk together the flour, cocoa powder, and salt in a medium bowl. Set aside. Whisking them together first means the cocoa distributes evenly through the dough instead of clumping.
- Cream the butter and sugar: In a large bowl, beat the softened butter and sugar together until light and fluffy — about 2 minutes with a wooden spoon, or faster with a hand mixer. Add the egg yolk, milk, and vanilla, and mix until fully combined. Make sure your butter is genuinely soft here, not cold from the fridge. Cold butter will leave lumps in the dough.
- Bring the dough together: Add the dry ingredients to the butter mixture gradually, stirring as you go, until a smooth dough forms. If the dough feels sticky or soft, cover it and refrigerate for 20–30 minutes before rolling. In a warm kitchen, I almost always chill it — it makes shaping much easier.
- Shape and press: Roll the dough into 1-inch balls (about 1 tablespoon each) and place them on the prepared baking sheet with a bit of space between each. Press your thumb — or the back of a round teaspoon — into the center of each ball to create a well. Don't go all the way through to the pan.
- Bake: Bake for 10–12 minutes, until the edges are set. The centers will still look slightly underdone, which is exactly what you want. As soon as they come out of the oven, check the thumbprint wells — if any have puffed up and closed over, press them down again now while the cookie is still soft. Let them sit on the baking sheet for 5 minutes before moving to a wire rack.
- Make the ganache: Heat the heavy cream in a small saucepan over medium-low heat until it just starts to simmer — don't let it boil. Pour it over the chopped chocolate and butter in a bowl. Let it sit undisturbed for a full minute, then stir slowly from the center outward until completely smooth. This method gives you a silkier ganache than the microwave shortcut, though the microwave works fine in a pinch.
- Fill and set: Once the cookies are fully cooled, spoon the ganache into each thumbprint well. Don't rush this step — if the cookies are still warm, the ganache will soak in rather than set on top. Leave them at room temperature for an hour or so, or refrigerate for 20 minutes if you want the ganache to firm up faster.
Tips for Success
- Chill the dough if it's sticky: This is the step I skipped my first two times and I paid for it with cookies that spread flat. If your kitchen is warm or the dough just feels soft, 20–30 minutes in the fridge makes it firm enough to roll cleanly. I usually chill it while the oven preheats — it doesn't add much time to the process.
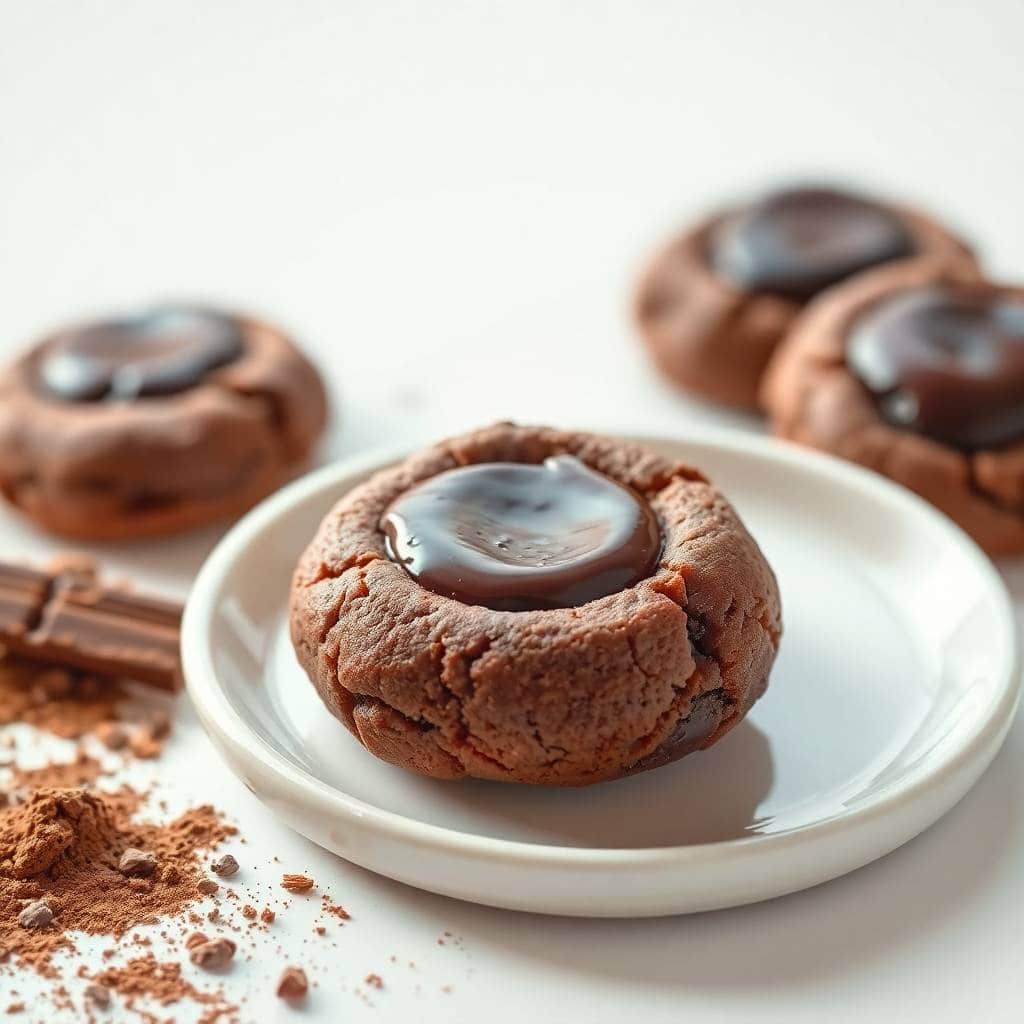
- Re-press immediately after baking: Cookies puff slightly as they bake and sometimes the well closes up or shrinks. The moment you pull the pan from the oven, check every cookie and press the centers back down with the back of a small spoon. You have maybe a 2-minute window while the cookie is still warm and pliable — after that, it firms up and you're stuck with a shallow well that won't hold much ganache.
- Don't overbake: Pull them when the edges look set but the centers still look a little underdone. They'll firm up as they cool on the pan, and you want that fudgy, soft texture in the finished cookie. I made the mistake of leaving one batch in an extra 3 minutes and they came out dry and crumbly — no amount of ganache fixes that.
- Cool completely before filling: I know it's tempting to fill them while they're still warm, but the ganache will just melt and soak into the cookie rather than sitting on top as a proper filling. Full room-temperature cooling takes about 30 minutes. If you want to speed that up, a few minutes in the fridge works fine — just don't skip this step.
- Use finely chopped chocolate for the ganache, not whole chips: Chips have stabilizers that can make the ganache slightly grainy. I learned this the hard way with a particularly stubborn batch. Chop a bar of semi-sweet chocolate instead — it melts cleaner and the ganache comes out noticeably smoother. In a rush, chips do work, especially if you add the butter and stir patiently.
Variations
- Peppermint chocolate: Add ¼ teaspoon of peppermint extract to the ganache (not the dough — it can be overpowering if you add it to both). Finish with a pinch of crushed candy canes on top while the ganache is still wet. This is my holiday version and it goes on the Christmas cookie tray every year alongside my butterscotch crunchies — they look great next to each other.
- Nutella or peanut butter fill: Skip the ganache entirely and fill the wells with a small spoonful of Nutella or peanut butter. Both work beautifully with the chocolate cookie base and require zero extra work. This is my quick version when I don't want to bother making ganache — Zainab prefers the Nutella ones anyway.
- Salted caramel center: Fill the wells with thick caramel sauce (store-bought works fine, just use a spoonful per cookie) and finish with a pinch of flaky sea salt. The combination of the bitter cocoa cookie and sweet-salty caramel is genuinely excellent. Let the caramel set for at least 30 minutes before serving so it firms up a bit.
- Espresso ganache: Stir ½ teaspoon of instant espresso powder into the cream before heating it for the ganache. It deepens the chocolate flavor noticeably without making the cookies taste like coffee — it just makes them taste more intensely chocolatey. My husband specifically requested this version after he tried it once.
- White chocolate ganache: Use 4 ounces of finely chopped white chocolate with 3 tablespoons of cream (white chocolate needs less cream than dark). The contrast of the dark cookie and the white filling looks striking, especially if you drizzle a little dark chocolate on top after it sets. I made these for an Eid tray once and they disappeared first.
Serving and Storage
Serving
Serve these at room temperature — the ganache is at its best when it's soft and slightly yielding rather than cold and hard. I put them out with hot cocoa for the kids and a cup of strong coffee for the adults, and they're always gone within an hour. If you've refrigerated them, let them sit out for 15–20 minutes before serving so the ganache can soften back up. They also pair beautifully with a glass of cold milk — Saad's preferred method. For a holiday table, try pairing these with something festive to drink, like a non-alcoholic Christmas punch or a white Christmas punch.
Storage
Store in an airtight container at room temperature for up to 4 days. For longer storage, keep them in the fridge for up to 6 days — just bring them to room temperature before eating. These freeze well too: place them in a single layer on a tray, freeze until solid, then transfer to a freezer bag. They'll keep for up to 2 months. Thaw at room temperature for about 30 minutes. If you're baking ahead, you can also freeze the unfilled cookies and make fresh ganache when you're ready to serve — the texture is noticeably better that way.

Frequently Asked Questions
Can I make the dough ahead of time?
Yes, and I actually recommend it. You can make the dough up to 2 days ahead and keep it wrapped in the fridge — the chill also makes it easier to roll. For longer storage, wrap the dough tightly and freeze it for up to a month; thaw overnight in the fridge before using.
Do I have to use ganache, or can I fill them with something else?
Ganache gives you the cleanest result and the best texture once it sets, but it's not mandatory. Nutella, peanut butter, thick caramel sauce, or even strawberry jam all work. The jam version is actually quite popular — it's closer to a classic thumbprint cookie and the tartness cuts through the rich chocolate dough nicely.
My thumbprint wells puffed up and closed during baking — what do I do?
This happens to me sometimes too. The fix is simple: the moment you pull the cookies from the oven, use the back of a small spoon or a round measuring spoon to press the centers down again while the cookies are still warm and soft. Work quickly — you have about 2 minutes before they firm up. If you miss that window, the cookies are still delicious, just harder to fill neatly.
Can I make these gluten-free?
A 1:1 gluten-free flour blend (the kind sold at Walmart or Trader Joe's specifically for baking substitution) works well here. The texture is slightly more delicate, so handle the dough gently and definitely chill it before rolling. I haven't tried almond flour in this specific recipe — if you want a nut-flour cookie, my almond flour cookies are a better starting point.
How far in advance can I bake these for a party or cookie box?
You can bake and fill these up to 2 days before you need them and they'll still be soft. If I'm making a big holiday batch, I bake the cookies the day before, let them cool overnight, then make and fill with ganache the morning of. They travel and package beautifully once the ganache is fully set — just layer them between sheets of parchment paper in your container.

CHOCOLATE THUMBPRINT COOKIES
Ingredients
For the Cookies:
- 1 cup all-purpose flour
- ½ cup unsweetened cocoa powder
- ¼ teaspoon salt
- ½ cup unsalted butter softened
- ⅔ cup granulated sugar
- 1 large egg yolk
- 2 tablespoons milk
- 1 teaspoon vanilla extract
For the Filling:
- ½ cup heavy cream
- 4 ounces semi-sweet chocolate finely chopped
- 1 tablespoon butter
Instructions
Preheat Oven:
- Preheat your oven to 350°F (175°C). Line a baking sheet with parchment paper.
Mix Dry Ingredients:
- In a bowl, whisk together flour, cocoa powder, and salt. Set aside.
Cream Butter and Sugar:
- In a separate bowl, beat butter and sugar until light and fluffy. Add egg yolk, milk, and vanilla; beat until combined.
Form Dough:
- Gradually add dry ingredients to the butter mixture until a smooth dough forms.
Shape Cookies:
- Roll dough into 1-inch balls and place on the baking sheet. Press a thumb or spoon gently into the center of each to create a well.
Bake:
- Bake for 10–12 minutes. If needed, gently press centers again while warm. Cool on the sheet for 5 minutes, then transfer to a wire rack.
Make Ganache Filling:
- Heat cream in a small saucepan until simmering. Pour over chopped chocolate and butter. Let sit for 1 minute, then stir until smooth.
Fill Cookies:
- Spoon ganache into each thumbprint. Let set at room temperature or chill for a firmer center.
Notes
- Storage: Store in an airtight container at room temperature for up to 4 days.
- Toppings: Sprinkle with sea salt or crushed peppermint for a festive twist.
- Make Ahead: Cookies and ganache can be made a day in advance. Fill just before serving for the best texture.
- Allergy-Friendly: Use dairy-free butter and chocolate for a vegan version.
These are one of those recipes I keep coming back to because they sit at this sweet spot between effort and payoff. The dough takes maybe 15 minutes to put together, the bake is quick, and the ganache is three ingredients and five minutes. But the finished cookie looks like you spent the afternoon in the kitchen, and it tastes like it too. I've made them for Eid, for Christmas trays, for a neighbor who just had a baby, for absolutely no occasion at all — and they always land well.
What I like most about them is how forgiving they are once you get the basic technique down. The dough is sturdy enough to chill and roll





Comments
No Comments