
Zainab calls these "the snowball ones" and starts asking for them the moment she sees candy canes appear in stores. That's how I know it's properly holiday season in our house — not the calendar, not the decorations, but Zainab hovering near the kitchen waiting for a batch of these to come out of the oven.
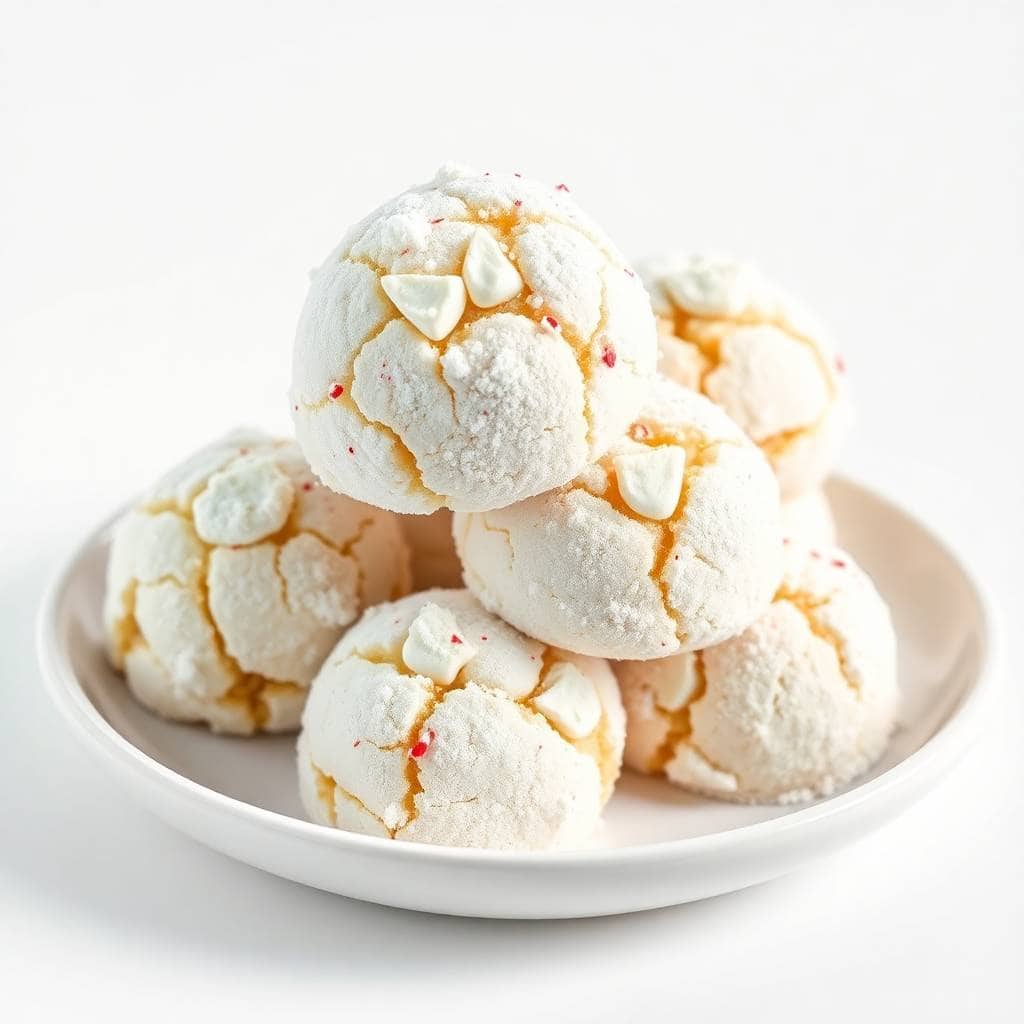
Snowball cookies have been around forever, and my version isn't trying to reinvent anything. What I did was take the classic buttery, crumbly base and add a full teaspoon of peppermint extract plus crushed candy canes folded right into the dough. The result is a cookie that tastes like winter — cool, a little sweet, melt-in-your-mouth soft. The double roll in powdered sugar is non-negotiable. Once warm, once cooled. That thick snowy coat is the whole point.
I make a double batch every December without fail because a single batch disappears the same day. Saad eats four before I can get them properly cooled, and my husband wraps a handful up to take to work without even asking. If you're planning to gift these or bring them somewhere, I'd strongly suggest making two batches at once — it takes maybe ten extra minutes and saves a lot of disappointment. I usually pair a tin of these with my Cranberry Pecan Cheese Ball for holiday gatherings, and between the two, the table looks properly festive without much effort.
One thing to know before you start: peppermint extract is strong. I overdid it the first time I made these and the cookies tasted more like toothpaste than dessert. One teaspoon is exactly right for this dough — you get the cool minty flavor without it overtaking everything. Measure carefully and don't wing it.
Why You'll Love This Recipe
- No eggs, short ingredient list: I genuinely appreciate a cookie recipe that doesn't require me to remember if I have eggs. This one uses butter, flour, powdered sugar, extracts, salt, and milk — things I almost always have on hand. The whole dough comes together in one bowl, which means less cleanup on an already busy December evening.
- That melt-in-your-mouth crumb: There's something about the ratio of butter to flour in snowball cookies that creates a texture you don't really get anywhere else. They're not chewy, not crisp — they sort of dissolve on your tongue. Zainab describes it as "soft like a cloud." I don't disagree.
- They look genuinely beautiful: I know that sounds like filler, but I mean it practically. A plate of these dusted in white powdered sugar looks like it took way more effort than it did. When I bring them to a holiday gathering, people always ask if I bought them somewhere. The answer is always no, and that never gets old.
- Make-ahead friendly: I usually make the dough two days before I need the cookies, wrap it in plastic, and keep it in the fridge. When I'm ready, I just roll the balls and bake. This is how I survive December — by breaking tasks into smaller steps across different days instead of doing everything at once.
- They pack and gift well: Snowball cookies travel better than most. They don't stick together, they don't crumble apart in a tin, and the powdered sugar coating stays intact if you layer them carefully with parchment between. I've shipped these to my sister and they arrived looking exactly as they left.
Ingredients
- 1 cup unsalted butter, softened to room temperature
- ¾ cup powdered sugar, plus extra for rolling
- 1 teaspoon vanilla extract
- 1 teaspoon peppermint extract (measure carefully — don't eyeball this one)
- 2 cups all-purpose flour
- ¼ teaspoon salt
- ¼ cup crushed peppermint candy canes (about 4-5 standard candy canes)
- Additional powdered sugar for the double coating
Directions
- Step 1: Preheat the oven — Set your oven to 350°F (175°C) and line a baking sheet with parchment paper. If you don't have parchment, a lightly greased sheet pan works too — I've done it both ways and the cookies come out fine either way.
- Step 2: Beat the butter and sugar — In a large bowl, beat the softened butter and powdered sugar together until the mixture is light and smooth. This takes about 2 minutes by hand with a wooden spoon, or 1 minute with a hand mixer. The butter really does need to be soft here — cold butter won't cream properly and your dough will be lumpy.
- Step 3: Add the extracts — Mix in the vanilla and peppermint extracts. The dough will smell intensely minty at this point, which is completely normal. It mellows out during baking.
- Step 4: Add flour and salt — Gradually add the flour and salt, mixing as you go until a soft dough comes together. Don't overmix once the flour is in — just mix until it's combined and no dry streaks remain.
- Step 5: Fold in the candy canes — Gently fold in the crushed peppermint candy canes. The pieces give little pops of crunch inside the cookie, which I love. If the dough feels too soft at this point, refrigerate it for 15-20 minutes before rolling.
- Step 6: Roll into balls — Scoop out portions of dough and roll them into 1-inch balls. Place them about 2 inches apart on your prepared baking sheet. They don't spread much, but give them a little room anyway.
- Step 7: Bake — Bake for 12-15 minutes, until the edges are just barely golden. They'll look slightly underdone on top — that's fine. They firm up as they cool, and overbaking makes them dry instead of that soft, crumbly texture we want.
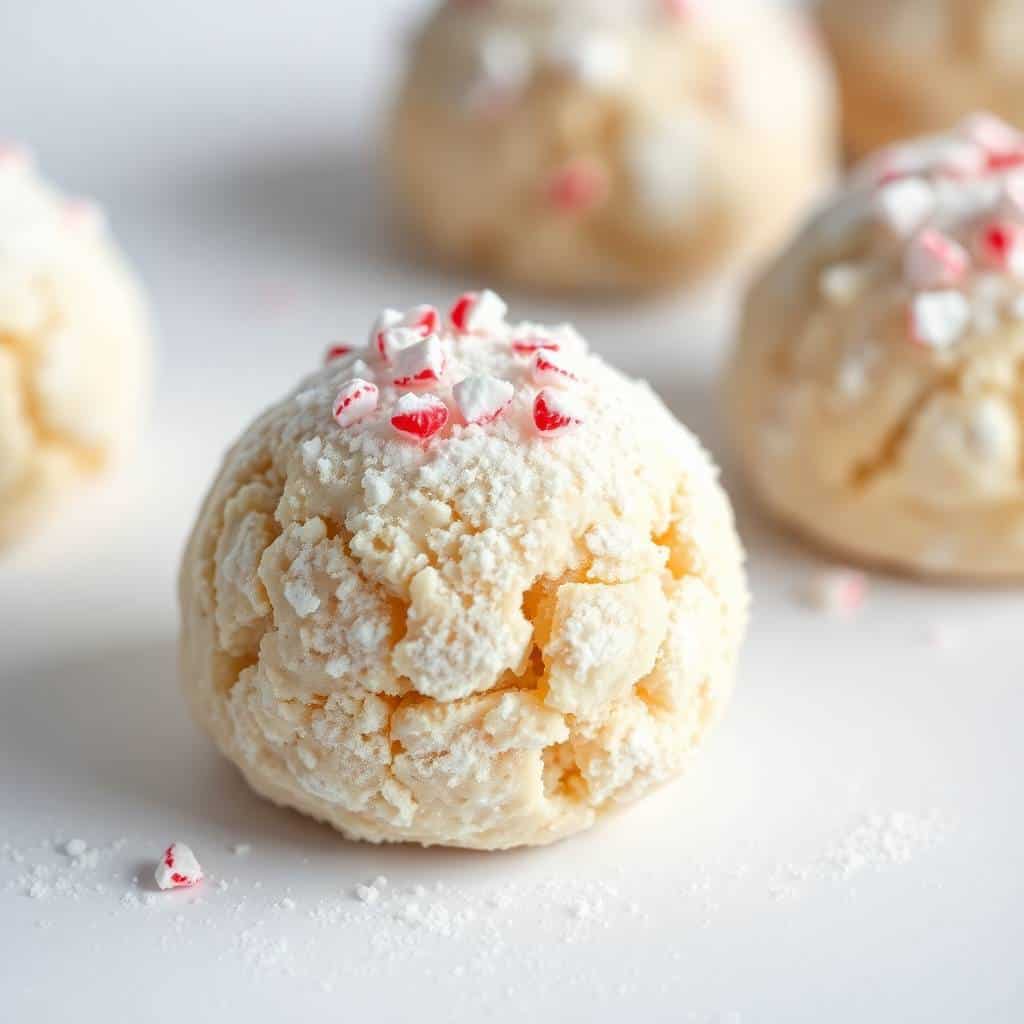
- Step 8: The double sugar roll — Let the cookies rest on the sheet for 5 minutes, then roll them in powdered sugar while they're still warm. Set them on a wire rack to cool completely, then roll them in powdered sugar one more time. That second roll is what gives them the thick, snowy coating that makes these look the way they do.
Tips for Success
- Butter temperature matters more than you'd think: I've tried rushing this with slightly cold butter and the dough ends up dense and harder to work with. Take the butter out of the fridge at least an hour before you start, or cut it into small pieces to speed up the process. You want it soft enough that it gives when you press it, but not so warm it's greasy or shiny.
- Don't skip the first sugar roll while warm: The warm cookies have a slightly tacky surface that helps the first layer of powdered sugar stick and form a base. If you wait until the cookies are fully cool for both rolls, the sugar doesn't adhere as well and you end up with a thin, patchy coating instead of that thick white crust. Roll them warm, let them cool, then roll again.
- Crush the candy canes fine but not to dust: I put mine in a zip-lock bag and hit them with a rolling pin. You want small pieces — roughly the size of coarse breadcrumbs — not powder. Too fine and you lose the crunch; too chunky and the dough is hard to roll into smooth balls. It takes about thirty seconds to get the right texture.
- Refrigerate the dough if it gets sticky: Kitchens get warm, especially if the oven's been running. If the dough starts feeling soft and hard to roll, just cover the bowl and put it in the fridge for 15-20 minutes. I do this almost every time I bake these in December because my kitchen is warm from cooking all day. Cold dough rolls into neater balls.
- Pull them out before they look done: This was my biggest mistake early on. I waited until they looked properly golden on top, and they came out dry and a little crumbly in the wrong way. These cookies should look pale and barely set when you pull them. The edges will have just the faintest hint of color. They continue cooking on the hot pan for those first few minutes out of the oven.
Variations
- Mint chocolate chip version: Fold ¼ cup of mini chocolate chips into the dough along with the crushed candy canes. The chocolate and peppermint combination is classic for a reason, and the chips melt slightly during baking into little pockets of chocolate throughout the cookie. My husband prefers this version, honestly. If you love chocolate and mint together, you might also enjoy my Hazelnut Brownies — different vibe entirely but that same rich chocolate satisfaction.
- Candy cane coating: Instead of (or in addition to) the powdered sugar, roll the warm cookies in finely crushed candy canes. They'll look very pink and festive. The sugar in the candy cane coating is stickier than powdered sugar so it sets into a harder shell — a different texture but really good if you want more peppermint punch in every bite.
- Dairy-free version: Swap the butter for a good plant-based butter stick (not the spreadable kind from a tub — the stick version has the right fat content for cookies). I've tried this with Earth Balance sticks and it works well. The texture is very slightly different but still soft and good. This is the version I make when guests have dairy allergies.
- Chocolate drizzle finish: Melt ¼ cup of chocolate chips (dark or white chocolate both work) and drizzle over the cooled, sugar-coated cookies with a fork or a small zip-lock bag with the corner snipped. This makes them look extra special on a cookie platter and takes about three minutes of effort for a result that looks much more elaborate.
- Gluten-free swap: I've made these once with a 1-to-1 gluten-free flour blend (the kind that measures the same as regular flour) and they came out pretty close to the original. The texture was slightly more crumbly, which honestly isn't a bad thing for a snowball cookie. Just make sure your candy canes are gluten-free certified — most plain candy canes are, but it's worth checking the label.
Serving and Storage
Serving
These are best served at room temperature. I set them out on a flat plate or a tiered cookie stand — the white powdered sugar coating looks really striking against a dark plate if you have one. They pair well with hot cocoa, coffee, or a peppermint tea. If you're putting together a holiday drinks spread, my Peppermint Bark Martini next to a plate of these makes a very cohesive peppermint theme that feels intentional without being over-the-top. For gifting, layer them in a tin with small squares of parchment between layers so the powdered sugar coating stays intact during transport.
Storage
Store in an airtight container at room temperature for up to 1 week. They actually taste better on day two once the flavors have settled — I always notice this. If you want to freeze the dough, roll it into balls first, freeze them on a sheet pan until solid, then transfer to a freezer bag. They'll keep frozen for up to 2 months. Bake straight from frozen at 350°F, adding 2-3 minutes to the bake time. If you're freezing already-baked cookies, wait to roll them in powdered sugar until after they've thawed — the sugar gets a bit damp in the freezer.

Frequently Asked Questions
Can I make the dough ahead of time?
Yes, and I'd actually encourage it. The dough keeps in the fridge, wrapped tightly in plastic wrap, for up to 2 days. When you're ready to bake, let it sit at room temperature for about 10 minutes so it's easier to roll into balls — straight-from-the-fridge dough can be quite firm and a little harder to work with.
Do I need a stand mixer or hand mixer for these?
Not at all. I make these with a wooden spoon most of the time. The key is that your butter is genuinely softened — if it's soft enough, creaming it with the sugar by hand takes about 2 minutes and isn't difficult. A hand mixer does speed things up if you have one, but it's definitely not required.
My dough is too sticky to roll — what do I do?
Put it in the fridge for 15-20 minutes. Warm kitchens (especially when the oven is already on) can soften the butter in the dough faster than expected. Cold dough rolls into clean balls without sticking to your hands. I almost always need to do at least one round of chilling midway through rolling — it's normal.
Can I freeze the baked cookies?
Yes, but freeze them before the powdered sugar coating. The sugar gets damp and clumpy in the freezer, and thawed cookies with pre-applied sugar don't look as nice. Freeze the plain baked cookies in a single layer, then transfer to a bag or container. When you're ready to serve, thaw at room temperature and do the double sugar roll fresh.
Is 1 teaspoon of peppermint extract too much?
It's the right amount for this recipe — not overwhelming, but clearly minty. I made a version with ½ teaspoon once and it was barely noticeable. However, peppermint extract varies slightly by brand — some are stronger than others. If you're using a brand you haven't tried before, you could start with ¾ teaspoon and taste the dough before adding the full amount.
PEPPERMINT SNOWBALL COOKIES
Ingredients
For the Cookies:
- 1 cup unsalted butter softened
- ¾ cup powdered sugar plus extra for rolling
- 1 teaspoon vanilla extract
- 1 teaspoon peppermint extract
- 2 cups all-purpose flour
- ¼ teaspoon salt
- ¼ cup crushed peppermint candy canes
For Decoration (Optional):
- Additional powdered sugar for rolling
Instructions
Preheat the Oven:
- Preheat the oven to 350°F (175°C). Line a baking sheet with parchment paper or a silicone mat.
Make the Cookie Dough:
- In a large bowl, beat the softened butter and powdered sugar until light and fluffy. Add the vanilla and peppermint extracts, and mix until combined. Gradually add the flour and salt, mixing until the dough forms. Fold in the crushed peppermint candy.
Shape the Cookies:
- Roll the dough into 1-inch balls and place them on the prepared baking sheet, spacing them about 2 inches apart.
Bake:
- Bake for 12–15 minutes, or until the edges are lightly golden. Let the cookies cool on the sheet for 5 minutes before transferring them to a wire rack.
Decorate:
- While still warm, roll the cookies in powdered sugar to coat them. Allow the cookies to cool completely and roll in powdered sugar again before serving, if desired.
Notes
The dough can be prepared in advance and stored in the refrigerator for up to 2 days. Customizing the Flavor:
For a stronger peppermint flavor, you can add a little more peppermint extract or mix in mini chocolate chips for extra indulgence. Serving Suggestions:
Serve these cookies at holiday parties, gift them to loved ones, or enjoy them with a warm cup of cocoa. Allergy-Friendly Options:
For a dairy-free version, substitute the butter with a plant-based butter alternative. Storage Tips:
Store these cookies in an airtight container at room temperature for up to 1 week. If you’re planning to freeze them, do so before rolling in powdered sugar.
These cookies have become one of those December constants for me — like putting up the lights or making a big pot of soup on a cold Sunday. They're not complicated, they don't require any special skills or equipment, and they reliably make people happy. The batch I made last year for my daughter's school holiday party came back with an empty tin and a note asking for the recipe. That's the kind of result I can get behind.
What I keep coming back to is how much of the magic is in that double powdered sugar roll. It's a small extra step — maybe five minutes total — and it completely changes how the finished cookie looks and feels. Don't skip it. The first roll while warm, the second once they're cool. That's the move.
If you're putting together a full holiday baking spread, these pair beautifully with my Baci di Dama Italian Cookies — both are small, elegant, and dusted or coated in something sweet. A plate of both together looks like you've been baking for hours. And if you're hosting and want something savory alongside the sweets, my Cranberry Pecan Cream Cheese Ball on the same table is always a good call.
I hope these find their way into your December baking rotation. Make a double batch, wrap some up for neighbors, and keep the rest within easy reach. 🍬❄️
If you liked this, here are a few





Comments
No Comments