
Every December I end up making something bread-based for our holiday table, and this Christmas tree pull-apart bread has become the one thing Zainab specifically requests. She spotted it online two years ago and asked if I could make it, and I said sure, not realizing how many times I'd end up testing it before I was actually happy with the result. The first time the cheese leaked everywhere and pooled onto the pan — still tasted fine, but looked like a disaster zone.
What makes this version work is the layered-dough approach: you cut the dough into a tree shape, layer the cheese directly inside, then cut and twist the branches so every piece pulls apart with that gooey, stringy cheese interior. It's not complicated, but there are a couple of things that can go wrong — I'll walk you through all of them. One package of refrigerated pizza dough from Walmart or Trader Joe's is all you need. No mixer, no proving, no fuss.
This is firmly a holiday-party food in my house. I make it when we have family over in December, or when we need something impressive-looking to bring to a potluck. If you're building out a full holiday spread, it pairs really well alongside my smoked salmon deviled eggs and some kind of dip situation. My husband and the kids both eat it — which is not always a guarantee in this household.
One thing to know going in: this bread is best eaten warm, right out of the oven. The cheese gets firmer as it cools, and while you can reheat it, that fresh-from-the-oven pull is really where it shines. Plan to serve it within 20 minutes of baking and you'll be in great shape.

Why You'll Love This Recipe
- It looks way harder than it is: People always ask me how long this took to make and I feel slightly embarrassed admitting it's about 40 minutes total. The tree shape comes from cutting one piece of dough — there's no complicated assembly. Once you've done it once, you'll do it in your sleep.
- Two cheeses, one pan: Mozzarella for the melt, cheddar for the flavor — together they do exactly what you want pull-apart bread to do. The garlic powder gets layered right in with the cheese, so the seasoning is baked into every single piece, not just on the surface.
- Store-bought dough works perfectly here: I know some recipes act like you have to make your own dough for something to count. You don't. A refrigerated pizza dough from any grocery store gives you exactly the right texture — soft inside, a little crisp on the outside — and it handles the twisting without tearing. I've used both Pillsbury and store-brand and they both worked fine.
- You can assemble it ahead of time: I've shaped the whole tree, covered it with plastic wrap, and put it in the fridge the night before a party. Pulled it out an hour before guests arrived, let it come to room temperature, then baked it fresh. Nobody knows the difference and you're not stuck in the kitchen when people show up.
- Kids love the interactive part: Zainab and Saad both compete over who gets the most branches. The pull-apart format means no one is waiting for someone to slice it — everyone just grabs. For a holiday gathering with kids around, that's actually really useful.
Ingredients
- 1 package refrigerated pizza dough (or homemade dough, about 1 pound)
- 2 cups shredded mozzarella cheese
- 1 cup shredded cheddar cheese
- ½ teaspoon garlic powder
- 1 tablespoon olive oil
- Fresh parsley or basil, for garnish
- Marinara sauce, for dipping (optional but really recommended)
Directions
- Step 1: Preheat your oven — Set it to 375°F (190°C) and line a baking sheet with parchment paper. The parchment is not optional — any cheese that escapes will weld itself to a bare pan and you'll be scrubbing for an hour.
- Step 2: Roll and shape the dough — On a lightly floured surface, roll the pizza dough into a rectangle roughly 12x10 inches. Use a sharp knife to cut out a Christmas tree shape. Set aside the scraps — you'll use them to form the trunk at the bottom of the tree.
- Step 3: Add the cheese — Spread the mozzarella and cheddar evenly over the bottom layer of your tree shape, leaving about half an inch clear around the edges. Sprinkle the garlic powder directly over the cheese so it gets baked in.
- Step 4: Layer and seal — Fold or lay a second layer of dough over the cheese (you can use remaining dough or fold the top half down, depending on your tree shape). Press the edges firmly to seal. This is where my first attempt went wrong — I was too light-handed with the sealing and cheese ran out everywhere. Press it down properly.
- Step 5: Cut and twist the branches — Using your knife, make horizontal cuts on both sides of the tree to form branches, leaving the center trunk strip intact. Gently twist each branch a turn or two. This is the step that makes it look like an actual tree and also exposes the cheesy layers.
- Step 6: Brush and bake — Brush the whole tree with olive oil. Bake for 25–30 minutes until golden brown and bubbly. Keep an eye on it after the 22-minute mark — oven temperatures vary and you want golden, not dark.
- Step 7: Garnish and serve — Pull it out of the oven, scatter fresh parsley or basil over the top, and serve immediately with marinara sauce on the side for dipping.
Tips for Success
- Seal those edges firmly: I cannot stress this enough. The first two times I made this, cheese bubbled out and burned onto the parchment. The fix is simple — after you fold or layer the dough, run your fingers along every edge and press hard. You can also use a fork to crimp the border like a pie crust. It holds much better that way.
- Don't skip the parchment: Any cheese that escapes will stick to a bare metal pan and make the whole thing difficult to remove cleanly. Parchment also helps the bottom of the bread bake evenly without over-browning. A regular sheet pan from any store works here — nothing fancy needed.
- Let the dough come to room temperature first: Cold dough straight from the fridge tears when you try to twist the branches. Take it out 15–20 minutes before you start and it'll stretch without fighting you. This is especially important for the twisting step.
- Keep your cuts even: If the branches are wildly different sizes, the thinner ones will overbake while the thicker ones are still doughy in the center. Aim for roughly equal-width cuts on both sides. I use a ruler the first time I made it for a party — slightly overkill but everything came out evenly.
- Serve it while it's hot: This is a warm-cheese bread — it's at its absolute best in the first 15–20 minutes out of the oven. If you're serving it at a party, time your bake so it comes out just before you want to put it on the table. Reheated is fine but it won't have the same pull.
Variations
- Add pepperoni inside: Lay thin slices of pepperoni over the cheese before you fold the dough. It turns this into something closer to a pizza bread, which my husband prefers. The pepperoni crisps slightly at the edges where it's near the outside of the dough and it's really, really good.
- Pesto instead of olive oil: Brush the top with basil pesto instead of plain olive oil before baking. It adds a herby, slightly nutty flavor that works beautifully with the mozzarella. I sometimes serve this version with a fresh berry spinach salad on the side for a lighter holiday spread.
- Spicy version: Mix a pinch of crushed red pepper flakes or a little cayenne into the cheese before layering. It's a small change but it gives the whole thing a gentle heat that adults at a party will really appreciate. I keep a second plain one for the kids.
- Different cheese blends: The mozzarella-cheddar combination is my go-to but provolone is excellent here too — it melts beautifully and has a slightly sharper flavor. A mozzarella-provolone mix is what I'd use if I wanted to serve this alongside something like mozzarella chicken in basil cream sauce for a more composed dinner party.
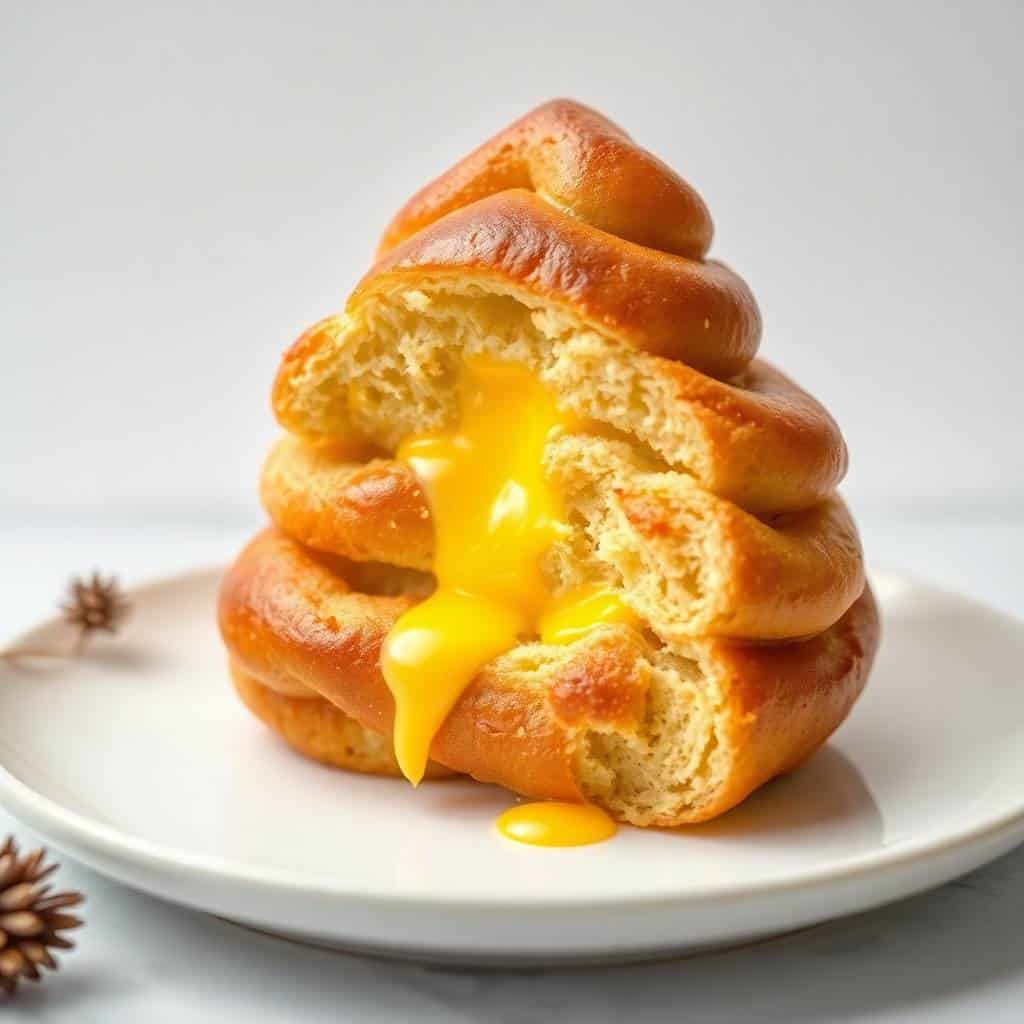
- Sweet version for dessert: Skip all the cheese and savory elements. Fill the dough with Nutella instead, bake the same way, and dust with powdered sugar when it comes out. Zainab spotted this idea and we tried it — it's basically a Nutella croissant in tree form and she lost her mind over it. Not a savory appetizer anymore, obviously, but worth knowing about.
Serving and Storage
Serving
Serve it straight from the baking sheet while the cheese is still hot and melty. Marinara sauce is the classic dip — the acidity cuts through the richness of the cheese nicely. Ranch works too if you have a crowd that prefers it. I usually put out both. This bread fits well on a holiday appetizer spread next to chicken sliders and something lighter like a salad. If you're building a full Christmas dinner, it also works as a starter before a main like Christmas prime rib.
Storage
Store any leftovers in an airtight container in the fridge for up to 3 days. To reheat, put it in a 350°F oven for about 8–10 minutes — this brings back some of the crispness on the outside. Microwaving works in a pinch but the crust goes soft. I won't pretend leftovers are as good as fresh, but they're still pretty satisfying the next day.

Frequently Asked Questions
Can I use frozen pizza dough instead of refrigerated?
Yes, frozen dough works fine — just make sure it's fully thawed and at room temperature before you start rolling. Cold or partially frozen dough tears when you try to cut and twist it, which is frustrating. I usually move it to the fridge the night before and then let it sit on the counter for 20 minutes before I start shaping.
Can I assemble this the night before?
Yes, and I actually recommend it for parties. Shape the tree, cover it tightly with plastic wrap, and refrigerate for up to 24 hours. Take it out about 30 minutes before baking to let it come back to room temperature, then brush with olive oil and bake as directed. It bakes up just as well as if you'd done it fresh.
Why did my cheese leak out during baking?
The edges weren't sealed tightly enough — this was my problem the first time I made it. After you layer the dough over the cheese, press the edges down firmly with your fingers and then run a fork around the border to crimp it. Think of it like sealing a calzone. As long as the edges are properly closed, the cheese stays where you want it.
What dipping sauces work best with this?
Marinara is the most natural pairing — the tomato acidity balances the richness of the melted cheese really well. Ranch is a hit with kids. Garlic butter is great if you want to lean into the savory side even more. I usually put out marinara and ranch together and let people pick. All three work.
Can I make this gluten-free?
Yes — use a gluten-free pizza dough in place of the regular dough. The shaping and baking process is the same. Gluten-free doughs can be a bit more delicate when twisting, so handle the branches gently and don't over-twist. I haven't tested every brand but Udi's and similar store-bought options should work.
CHEESY CHRISTMAS TREE BREAD
Ingredients
- 1 package refrigerated pizza dough or homemade dough
- 2 cups shredded mozzarella cheese
- 1 cup shredded cheddar cheese
- ½ teaspoon garlic powder
- 1 tablespoon olive oil
- Fresh parsley or basil for garnish
- Optional: marinara sauce for dipping
Instructions
Preheat Oven:
- Preheat oven to 375°F (190°C). Line a baking sheet with parchment paper.
Roll the Dough:
- Roll the pizza dough into a rectangle on a lightly floured surface. Use a sharp knife to cut the dough into a Christmas tree shape. Reserve scraps to form a tree trunk.
Add Cheese:
- Spread a thin layer of cheese (mozzarella and cheddar) on the bottom half of the tree shape. Sprinkle garlic powder over the cheese.
Layer the Dough:
- Place another layer of dough over the cheese. Press down to seal the edges and shape the tree.
Cut and Twist:
- Use a knife to make cuts in the dough to form tree branches, leaving the trunk intact. Gently twist the branches for a decorative effect.
Bake:
- Brush the dough with olive oil and bake for 25–30 minutes, or until golden brown and bubbly.
Garnish and Serve:
- Garnish with fresh parsley or basil and serve with marinara sauce for dipping.
Notes
- Make Ahead: The dough can be prepared and shaped ahead of time. Store it in the fridge for up to 24 hours before baking.
- Flavored Cheese: Feel free to mix in a blend of your favorite cheeses, like provolone or Parmesan, for extra flavor.
- Serve with Dip: Serve with marinara, ranch, or a garlic butter dip for a delicious touch.
This is one of those recipes I keep coming back to every December because it solves a real problem: you want something that looks impressive on a holiday table without spending three hours in the kitchen. The whole thing takes under an hour, most of that is baking time, and it genuinely looks like you put in serious effort. I've brought it to two different Christmas potlucks and both times it was gone within 20 minutes of hitting the table.
What I like most about it is that it's genuinely interactive — people pull pieces off rather than waiting to be served, which creates that relaxed, communal feeling that holiday gatherings are supposed to have. It's not a formal dish. It's a grab-and-dip situation and that's exactly right for December parties. My kids think it's the best thing I make all year, which is saying something given how many cookies and cakes appear in this house during the holidays.
If you're putting together a full holiday menu, this works as a starter before a big main — I've served it before a Christmas prime rib and it set exactly the right tone. Or serve it as part of a larger appetizer spread and let it hold its own alongside other finger foods. Either way, make a double batch if you're feeding more than six people. I say that from experience. 🎄🧀✨
If you're planning a holiday spread and want more ideas, here are a few other recipes I'd put on the same table:
- Smoked Salmon Deviled Eggs — elegant, easy, and gone fast at every party I've brought them to
- Chicken Sliders — great for feeding a crowd without too much effort
- Christmas Prime Rib — if this bread is your starter, this is the main event
- Berry Spinach Salad with Pecans, Feta, and Balsamic Glaze — a lighter side to balance all that cheese
- Chocolate Raspberry Cake — because the holiday table needs a proper dessert at the end of it all





Comments
No Comments