
I've baked a lot of vanilla cakes over the years, and for a long time I couldn't figure out why mine kept coming out dense and slightly rubbery — the kind of cake that's fine, but not the kind anyone goes back for seconds of. Then I started paying closer attention to two things: how long I was creaming the butter and sugar, and whether my eggs were actually at room temperature. Those two changes alone made the difference between a mediocre vanilla cake and one that my daughter Zainab called "the one that tastes like a real bakery."
What I love about this recipe is that it doesn't ask anything unusual of you. No specialty ingredients, no stand mixer required — I use a hand mixer I've had for years, and before that I genuinely used a wooden spoon and some patience. The batter comes together with flour, butter, sugar, eggs, vanilla, and milk. The technique is what makes it work: alternating dry and wet ingredients, not overmixing, and pulling the cakes out of the oven the moment a toothpick comes clean. I've overbaked this once, and once was enough to teach me to start checking at 23 minutes.
This is the cake I make for birthdays in our house. My husband likes it with a heavy layer of vanilla buttercream; Zainab wants sprinkles; Saad once asked if I could put strawberry jam between the layers, and honestly, that version was so good I now make it that way half the time. It's also the cake I default to when someone needs something that looks impressive but I don't have a lot of time — it bakes in under 30 minutes and the buttercream comes together in about 5. If you want something richer to serve alongside it at a dessert table, my Hazelnut Chocolate Tart with Dark Ganache pairs beautifully.
One expectation to set upfront: the frosting in the WPRM recipe card below is a classic vanilla American buttercream — sweet, smooth, and pipeable. If you find American buttercream too sweet, cut the powdered sugar by half a cup and add an extra tablespoon of cream. That's my adjustment and it works well. Also, please do not try to frost this cake while it's even slightly warm. I know it's tempting. I've done it. The frosting slides right off and you end up with a sugary puddle around the base of the cake. Cool it completely — fully, not just mostly.

Why You'll Love This Recipe
- It stays moist for days: I've left this cake covered on the counter for three days and it's still soft on day three. The ratio of butter to flour keeps it from drying out the way some leaner cake recipes do. If anything, I think it tastes even better the next day once the flavors have settled.
- You don't need special equipment: I don't own a $400 stand mixer, and I've made this cake more times than I can count. A hand mixer works perfectly. In a pinch, you can cream softened butter and sugar by hand with a wooden spoon — it just takes about 5 more minutes and a bit of arm effort. The result is still good.
- It's a blank canvas for frosting and fillings: The vanilla flavor is clean and neutral enough to go with almost anything — chocolate ganache, whipped cream, fruit jam, lemon curd. I've tried most of these combinations. None of them have been wrong. The cake holds its own without competing with whatever you put on top.
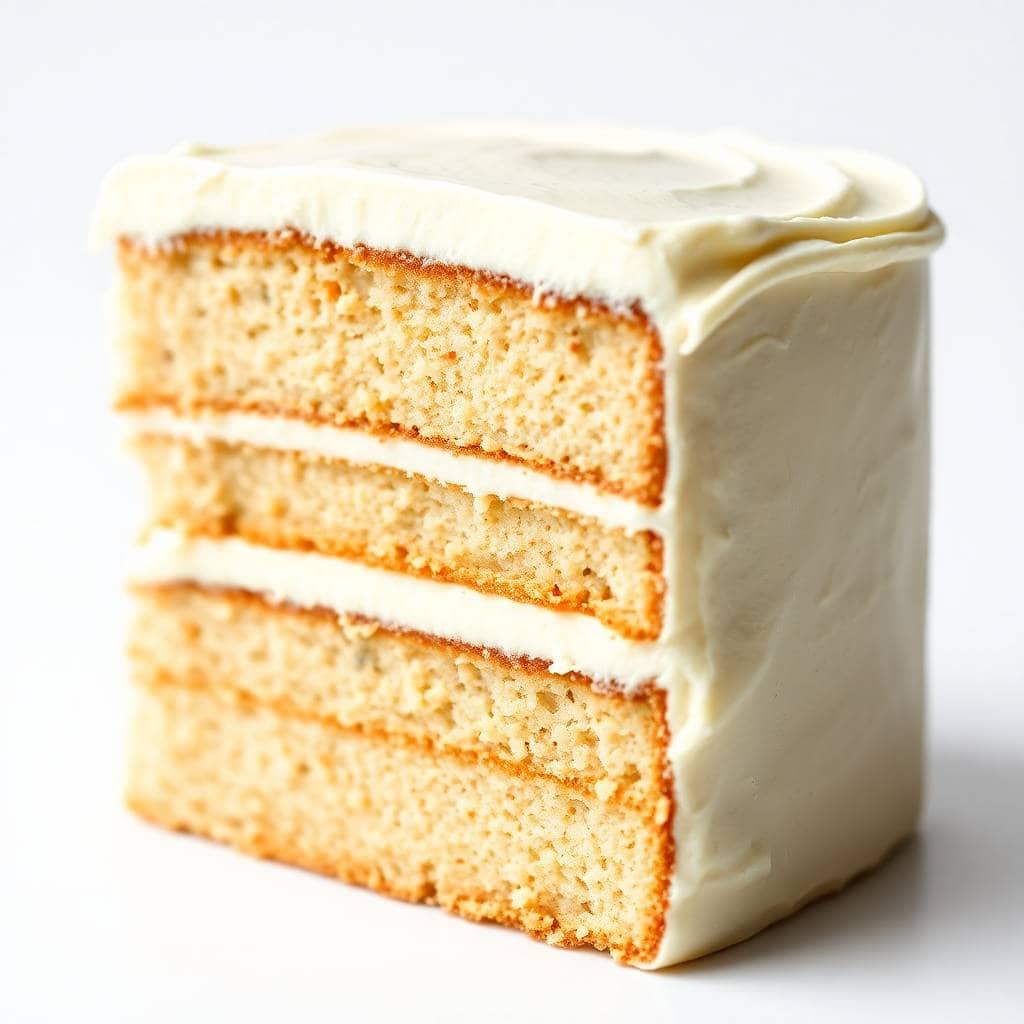
- It looks proper when you slice it: The crumb is fine and even, which means it slices cleanly without crumbling all over the plate. When you set this on a table at a birthday party, it looks like something you picked up from a bakery. I make a double batch for bigger gatherings because one cake disappears faster than I expect.
- It's genuinely make-ahead friendly: I usually bake the layers the day before I need the cake, wrap them tightly in plastic wrap, and frost them the morning of. This actually reduces stress considerably — you're not rushing through frosting a warm cake an hour before guests arrive. The layers keep well at room temperature overnight or in the fridge for up to five days unfrosted.
Ingredients
- For the Cake:
- 2½ cups all-purpose flour
- 2½ teaspoons baking powder
- ¼ teaspoon salt
- 1 cup unsalted butter, softened to room temperature
- 1½ cups granulated sugar
- 4 large eggs, at room temperature
- 1 tablespoon pure vanilla extract (use the real thing — it matters here)
- 1 cup whole milk, at room temperature
- For the Frosting:
- 1 cup unsalted butter, softened
- 4 cups powdered sugar
- 1 teaspoon vanilla extract
- 2–3 tablespoons heavy cream (or half-and-half in a pinch)
- A pinch of salt
Directions
- Step 1: Prep your pans and preheat — Preheat your oven to 350°F (175°C). Grease two 9-inch round cake pans, dust them with flour, and line the bottoms with parchment paper circles. The parchment is non-negotiable for me after losing the bottom of a cake to an under-greased pan once.
- Step 2: Whisk the dry ingredients — In a medium bowl, whisk together the flour, baking powder, and salt. Set this aside. Whisking rather than sifting is fine — you just want everything evenly distributed so the baking powder isn't concentrated in one spot.
- Step 3: Cream butter and sugar — In a large bowl, beat the softened butter and sugar together on medium speed for a full 3–4 minutes, until the mixture is pale, light, and noticeably fluffy. This step builds air into the batter and affects the final texture more than almost anything else. Don't rush it.
- Step 4: Add eggs and vanilla — Add the eggs one at a time, beating well after each one before adding the next. Then mix in the vanilla extract. If the mixture looks slightly curdled at any point, don't panic — it smooths out once the flour goes in.
- Step 5: Alternate dry and wet — Add the flour mixture in three additions, alternating with the milk in two additions — so: flour, milk, flour, milk, flour. Start and end with the flour. Mix on low speed until just combined after each addition. Overmixing at this stage develops gluten and makes the cake tough, so stop as soon as you don't see dry streaks.
- Step 6: Bake — Divide the batter evenly between the two pans and smooth the tops with a spatula. Bake for 25–30 minutes. Start checking at 23 minutes by inserting a toothpick into the center — it should come out clean or with just a crumb or two. The tops should be lightly golden and spring back when gently pressed.
- Step 7: Cool — Let the cakes cool in their pans on a wire rack for 10 minutes, then run a knife around the edges and turn them out onto the rack to cool completely. Completely means completely — I give them at least an hour, usually two. Frost them warm and the buttercream will melt right off.
- Step 8: Make the frosting — Beat the softened butter on medium speed until creamy, about 2 minutes. Add the powdered sugar one cup at a time, mixing on low after each addition. Add the vanilla, a pinch of salt, and heavy cream one tablespoon at a time until the frosting reaches a spreadable consistency. Beat on medium-high for one more minute to get it fluffy.
- Step 9: Assemble and frost — Place one cake layer on a plate or cake stand. Spread a generous layer of frosting on top. Set the second layer on top and frost the top and sides of the whole cake. Smooth with an offset spatula or the back of a spoon. Decorate as you like — sprinkles, fruit, nothing at all.
Tips for Success
- Room temperature everything: Cold butter won't cream properly — you'll end up with lumpy batter that doesn't hold air. Cold eggs can cause the emulsion to break, which gives you a slightly curdled-looking batter that bakes up denser than it should. I take butter and eggs out of the fridge about an hour before I start. If I forget, I sit the eggs in warm water for 10 minutes and it works well enough.
- Measure flour correctly: I learned the hard way that packing flour into the measuring cup adds way more than you think — sometimes 20–30% extra — and that's what makes cakes dry and dense. Spoon the flour into the cup and level it off with a straight edge. If you have a kitchen scale, 1 cup of flour is about 120 grams, and that's the most accurate way to do it.
- Don't open the oven early: I know it's tempting to check at the 15-minute mark. But opening the oven door before the structure has set causes the center to sink. Wait until at least 22 minutes before you peek. The cake will let you know when it's ready — the edges will start pulling away from the sides of the pan.
- Use good vanilla extract: This cake has nowhere to hide. The vanilla flavor is the whole point, so use pure vanilla extract, not imitation. The difference is noticeable in a recipe this simple. I usually buy the McCormick pure vanilla from Walmart or Costco — nothing fancy, but it's real extract and it works well.
- Stop mixing when it comes together: Once the last flour addition is in, mix only until you stop seeing dry streaks. Thirty seconds on low, maybe a little more. That's it. More mixing = more gluten development = a chewier, denser cake instead of the soft, tender crumb you're going for.
Variations
- Strawberry jam filling: Spread a thin layer of strawberry or raspberry jam on the bottom layer before adding the buttercream. Saad asked for this once on a whim and it was genuinely one of the best versions of this cake I've made. The jam adds a slight tartness that cuts through the sweetness of the frosting. Use a good-quality jam — the cheap kind can make it too sweet.
- Funfetti birthday cake: Stir ½ cup of rainbow sprinkles (the long jimmies, not the round nonpareils — those bleed color into the batter) into the finished batter just before dividing between pans. This is the version I make most often for kids' birthdays and it always gets a reaction. Keep the white vanilla frosting so the sprinkles inside are a surprise when you slice it.
- Lemon vanilla: Add 1 tablespoon of lemon zest to the batter along with the vanilla, and swap 2 tablespoons of the milk for fresh lemon juice. It brightens the whole cake noticeably. If you want to lean into this version, a lemon buttercream (swap the vanilla for lemon juice and zest in the frosting) takes it even further. This is a nice pairing if you're also serving my Classic Apple Pie at the same gathering — they complement without competing.
- Almond extract twist: Replace half the vanilla extract (so use ½ tablespoon vanilla and ½ tablespoon almond extract) for a nuttier, more aromatic cake. This is a small change but it shifts the whole flavor profile in an interesting direction. It works especially well if you're pairing the cake with a chocolate ganache frosting instead of buttercream.
- Dairy-free version: I've made this once for a friend who can't have dairy. I used vegan butter (the Country Crock Plant Butter sticks work well) and oat milk in place of whole milk. The texture is slightly different — a little less rich — but honestly still a good cake. For the frosting, vegan butter and oat milk work the same way. Just know it's my workaround version, not the original.
Serving and Storage
Serving
Serve this cake at room temperature — not straight from the fridge. Cold buttercream gets firm and a little waxy, and the cake itself is noticeably denser when cold. If you've stored it in the fridge, take it out at least 30–45 minutes before slicing. I usually serve it with tea or coffee, though if it's a birthday, my kids insist on cold milk alongside. For a full dessert spread, this pairs really well with Watermelon Lime Mocktails in summer — the freshness of the drink balances the richness of the cake.
Storage
Unfrosted cake layers can be wrapped tightly in plastic wrap and kept at room temperature for up to 2 days, or refrigerated for up to 5 days. Freeze them for up to 2 months — wrap in plastic first, then foil, and let them thaw at room temperature still wrapped so they don't dry out. The frosted assembled cake keeps at room temperature (covered) for up to 3 days, or in the fridge for up to 5 days. If you're refrigerating the frosted cake, I'd suggest a cake dome or a box — plastic wrap pressed directly against buttercream pulls it right off when you unwrap it.

Frequently Asked Questions
Can I make this cake a day ahead?
Yes, and I actually recommend it. Bake the layers the day before, let them cool completely, then wrap each one tightly in plastic wrap and leave them at room temperature overnight. Frost the cake the next morning. This approach is less stressful than trying to bake and frost the same day, and the layers are easier to work with once they've had time to settle.
Can I freeze the baked cake layers?
Yes. Wrap each cooled layer in plastic wrap, then in foil, and freeze for up to 2 months. When you're ready to use them, let the layers thaw at room temperature still wrapped — unwrapping them while frozen causes condensation to form on the surface, which can make the cake sticky. Once thawed, frost as normal.
Why did my cake turn out dry?
Two most likely culprits: too much flour (from packing the measuring cup) or overbaking. I've done both. Spoon your flour into the cup and level it off, and start checking for doneness at 23 minutes rather than waiting until the timer goes off. Every oven runs a little different — mine runs hot, so I always check early.
Can I use cake flour instead of all-purpose flour?
You can. Cake flour has less protein than all-purpose, which gives you an even softer, more delicate crumb. If you swap, use about 2¾ cups of cake flour to replace the 2½ cups of all-purpose (cake flour is lighter, so you need a slightly higher volume). The cake will be a little more fragile when handling the layers, so be gentle when assembling.
My buttercream is too sweet — how do I fix it?
This is my own adjustment that I make almost every time: reduce the powdered sugar by half a cup and add an extra tablespoon of heavy cream. A bigger pinch of salt also helps cut sweetness noticeably. If it still feels too sweet, a small squeeze of lemon juice (about a teaspoon) balances it without making the frosting taste like lemon.
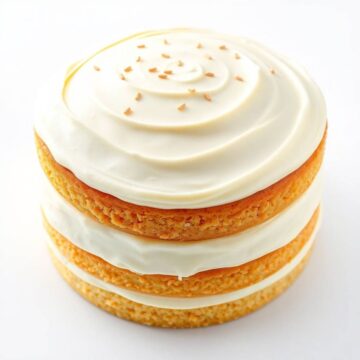
MOIST VANILLA LAYER CAKE
Ingredients
For the Cake:
- 2 ½ cups all-purpose flour
- 2 ½ teaspoons baking powder
- ¼ teaspoon salt
- 1 cup unsalted butter softened
- 1 ½ cups granulated sugar
- 4 large eggs
- 1 tablespoon vanilla extract
- 1 cup whole milk
For the Frosting:
- 1 cup unsalted butter softened
- 4 cups powdered sugar
- 1 teaspoon vanilla extract
- 2 –3 tablespoons heavy cream
- A pinch of salt
Instructions
Preheat the Oven:
- Preheat the oven to 350°F (175°C). Grease and flour two 9-inch round cake pans or line them with parchment paper.
Prepare the Cake Batter:
- In a medium bowl, whisk together flour, baking powder, and salt. Set aside. In a large bowl, beat together butter and sugar until light and fluffy. Add the eggs one at a time, beating well after each addition. Stir in the vanilla extract. Gradually add the dry ingredients, alternating with the milk, starting and ending with the dry ingredients. Mix until smooth.
Bake the Cake:
- Divide the batter evenly between the two prepared cake pans. Smooth the tops with a spatula. Bake for 25–30 minutes, or until a toothpick inserted into the center of the cakes comes out clean. Let the cakes cool in the pans for 10 minutes before transferring them to a wire rack to cool completely.
Prepare the Frosting:
- In a large bowl, beat the softened butter until creamy. Gradually add the powdered sugar, 1 cup at a time, mixing well after each addition. Add the vanilla extract and salt, then beat in heavy cream, one tablespoon at a time, until the frosting reaches your desired consistency.
Assemble the Cake:
- Once the cakes have cooled completely, place one layer on a serving plate. Spread a layer of frosting on top. Place the second cake layer on top and frost the top and sides of the entire cake.
Serve:
- Slice and serve! Enjoy your moist vanilla layer cake with a cup of tea or coffee.
Notes
The cakes can be baked in advance and stored at room temperature for up to 2 days, or in the fridge for up to 5 days. Frost the cake just before serving for the best texture. Customizing the Flavor:
You can add a teaspoon of almond extract for a twist on the flavor. For a fruity version, spread a thin layer of raspberry or strawberry jam between the cake layers before frosting. Serving Suggestions:
Serve this cake at birthday parties, holiday celebrations, or as a sweet treat for any occasion. Allergy-Friendly Options:
For a dairy-free version, substitute the butter with a plant-based butter alternative and use dairy-free milk. You can also use egg replacers for a vegan cake. Storage Tips:
Store the cake in an airtight container at room temperature for up to 3 days. If frosted, keep it refrigerated for freshness.





Comments
No Comments