
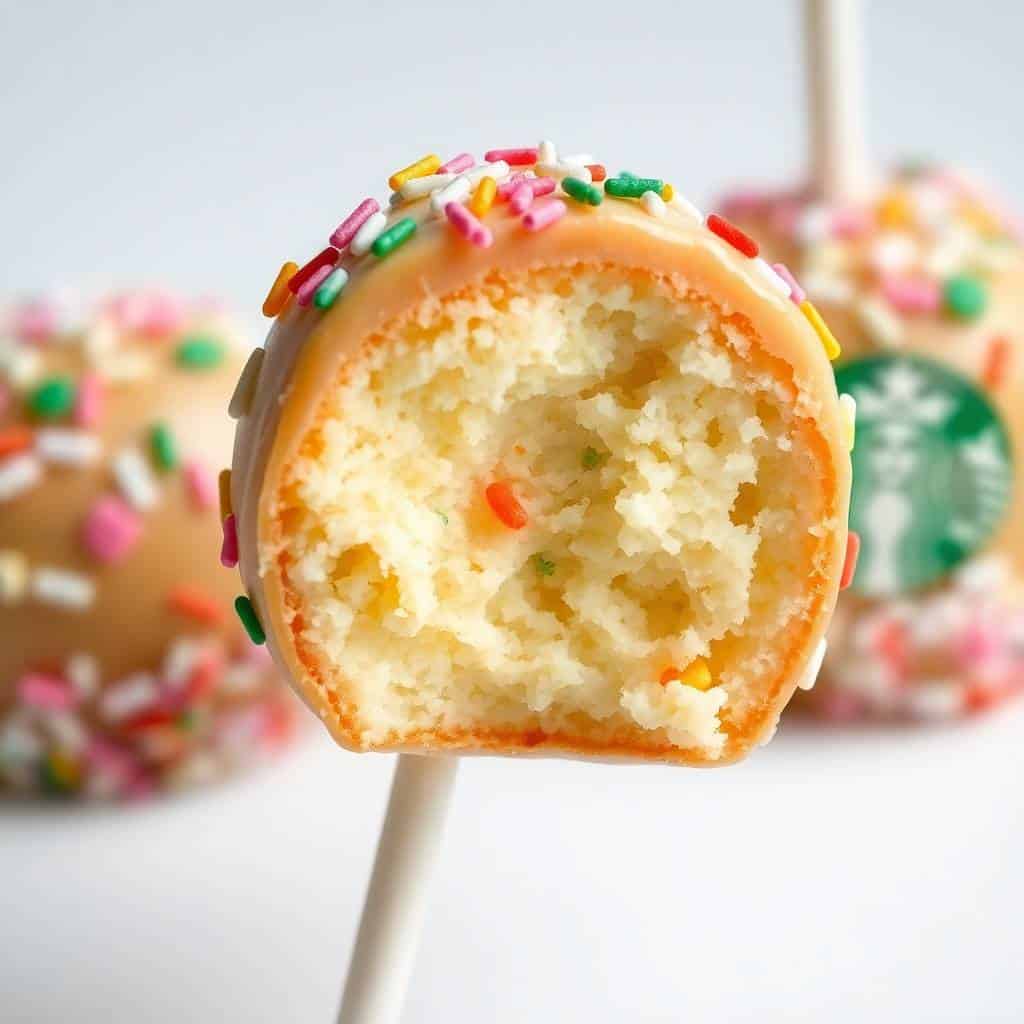
Cake pops are a fun, delicious treat perfect for birthdays, parties, or whenever you want a sweet, playful dessert. This Starbucks Cake Pops recipe shows you how to make those cute, yummy treats at home without the big coffee shop prices.
With simple ingredients, you can create bakery-style cake pops that everyone will love and enjoy. Whether it’s a birthday, graduation party, baby shower, or just a weekend treat, these cake pops fit right in.
Making cake pops at home might sound complicated, but it’s actually very easy when you follow each step carefully. You only need a baked cake, frosting, chocolate coating, and some fun decorations.
Another great thing about this Starbucks Cake Pops recipe is that you can customise the flavours, colours, and sprinkles to match any theme. Plus, making them at home means you can make a big batch for less money.
You'll love how adorable, tasty, and creative these cake pops turn out every single time. Get ready for lots of compliments and requests for your recipe. Trust me, this Starbucks Cake Pops recipe will become a party favourite!

WHY YOU WILL LOVE THIS RECIPE
- Fun and Easy: This recipe is simple enough for beginners but fun enough for experienced bakers to enjoy creating cake pops.
- Customisable Designs: You can personalise cake pops with colours, sprinkles, and flavours for birthdays, holidays, or themed parties.
- Budget Friendly: Making cake pops at home saves money compared to buying them individually at the coffee shop.
- Perfect for Parties: These mini treats are easy to grab, making them ideal for parties, showers, and celebrations of all kinds.
- Kid-Friendly Activity: Children love rolling, dipping, and decorating cake pops, turning it into a fun baking project for the whole family.
- Delicious Taste: Moist cake and creamy frosting coated in chocolate make an irresistible dessert that everyone will want seconds of.
- Make-Ahead Option: Cake pops can be made ahead of time and stored, making party prep and gift-giving easier and stress-free.
INGREDIENTS
- 1 box vanilla or chocolate cake mix (plus ingredients listed on the box)
- ½ cup frosting (store-bought or homemade)
- 2 cups white or milk chocolate melting wafers
- Colourful sprinkles for decoration
- Lollipop sticks
- Styrofoam block or stand (for drying)
DIRECTIONS
- Step No.1: Bake the cake
Prepare the cake mix according to package instructions. Let it cool completely before moving to the next step.
- Step No.2: Crumble the cake
Crumble the cooled cake into fine crumbs using your hands or a food processor for a uniform texture.
- Step No.3: Mix in frosting
Add frosting to the cake crumbs and mix until combined. The mixture should be moist enough to form balls.
- Step No.4: Form balls
Scoop out about 1 tablespoon of the mixture and roll into smooth balls. Place them on a lined baking sheet.
- Step No.5: Insert sticks
Melt a little chocolate, dip one end of each stick into it, and insert halfway into each cake ball. Chill to set.
- Step No.6: Dip and decorate
Melt the rest of the chocolate. Dip each cake pop into melted chocolate, tap off excess, and decorate with sprinkles immediately.
- Step No.7: Let them dry
Stick cake pops into a Styrofoam block to dry completely at room temperature or refrigerate for quicker setting.

TIPS FOR SUCCESS
- Use Cooled Cake: Make sure the cake is fully cooled before crumbling to avoid soggy or mushy cake pops.
- Right Frosting Ratio: Add just enough frosting to bind the cake crumbs, not too much to make them too wet.
- Chill Before Dipping: Chilling cake balls before dipping helps them stay firm and prevents them from falling off the sticks.
- Smooth Ball Rolling: Roll the cake balls tightly so they hold together better when dipped into the melted chocolate.
- Thin Chocolate Coating: Melt chocolate slowly and stir well for a smooth, thin, and even coating on each cake pop.
- Decorate Quickly: Add sprinkles or toppings immediately after dipping while the coating is still wet for best adhesion.
- Dry Upright: Stick cake pops into a block or stand vertically for perfect drying without smudging or flattening the tops.
VARIATIONS
- Chocolate Overload: Use chocolate cake with chocolate frosting and a dark chocolate coating for ultimate chocolate lovers.
- Funfetti Version: Bake a funfetti cake mix for colourful surprises inside your cake pops, perfect for birthdays or celebrations.
- Red Velvet Delight: Make red velvet cake pops with cream cheese frosting for a rich, classic flavour combination everyone loves.
- Strawberry Twist: Use strawberry cake mix and pink chocolate coating for a fun, fruity twist on the traditional cake pop.
- Holiday Themes: Decorate with red and green sprinkles for Christmas, or pastel colours for Easter and springtime parties.
- Nut-Free Option: Ensure your cake, frosting, and decorations are completely nut-free if serving to those with allergies.
- Mini Cakesicles: Shape the mixture into small bars instead of balls and coat them for a trendy cakesicle presentation.
SERVING AND STORAGE
Serving
Serve cake pops at room temperature, displayed upright in a stand or bouquet for a festive and fun party presentation.
Storage
Store cake pops in an airtight container in the refrigerator for up to one week to maintain freshness and texture.
FAQ
Yes! Any moist homemade cake recipe works perfectly for making Starbucks-style cake pops.
Make sure the cake balls are not too cold and the melted chocolate is not too hot to avoid cracks.
Absolutely. Freeze undecorated cake balls or finished cake pops for up to 1 month in an airtight container.
Chocolate melting wafers or candy melts are ideal because they create a smooth, easy-to-dip coating.
Gather your ingredients, mix up your cake and frosting, and start rolling your pops into adorable bite-sized pieces of heaven.
Whether you’re throwing a birthday bash or just want a sweet treat for the week, these cake pops will be a hit with everyone.
The best part is how creative you can be with flavours and decorations.
Let your imagination run wild and create your own cake pop masterpieces.
Make rainbow pops, chocolate-dipped pops, unicorn-themed pops—the possibilities are endless when you bake them yourself.
You’ll love the compliments you’ll receive when you serve your homemade Starbucks Cake Pops.
everyone will be amazed at your baking skills, and you’ll be proud to say you made them yourself.
So grab your apron, gather your family, and have fun creating a delicious batch of Starbucks Cake Pops that everyone will adore!


STARBUCKS CAKE POPS RECIPE
Ingredients
For the Cake:
- 1 box vanilla or chocolate cake mix plus ingredients listed on the box
For the Frosting:
- ½ cup frosting vanilla, chocolate, or cream cheese
For the Coating:
- 2 cups candy melts white, pink, or chocolate
- Sprinkles for decoration optional
- Lollipop sticks
Instructions
Bake the Cake:
- Prepare and bake the cake according to package instructions. Allow it to cool completely.
Crumble the Cake:
- Once cooled, crumble the cake into fine crumbs in a large bowl.
Mix with Frosting:
- Add frosting to the crumbs a little at a time until the mixture holds together when pressed.
Shape into Balls:
- Roll into 1-inch balls and place on a lined baking sheet. Insert a lollipop stick into each ball. Freeze for 15–20 minutes.
Dip and Decorate:
- Melt the candy melts according to package instructions. Dip each cake pop into the melted coating, tapping off excess. Decorate with sprinkles if desired.
Let Set:
- Place upright in a styrofoam block or a stand to set completely.
Notes
Cake pops can be made ahead and stored in the refrigerator for up to 1 week or frozen for up to 1 month. Customizing the Flavor:
Use any cake and frosting flavour combination to create different variations. Serving Suggestions:
Perfect for birthday parties, baby showers, or adding to dessert tables. Allergy-Friendly Options:
Use gluten-free cake mix or dairy-free frosting if needed. Storage Tips:
Store cake pops in an airtight container at room temperature for 3–4 days or refrigerate for up to 1 week.





Comments
No Comments