
Zainab spotted a Twix bar in the pantry one afternoon and asked me if I could make "those biscuit chocolate things" at home. I said yes without really thinking about it — and then spent the next two weekends figuring out how. The first batch had caramel that slid right off the cookies because I didn't let them cool long enough. The second batch was better. The third batch was what I'm sharing with you today.
What makes this version work is the caramel. Instead of melting store-bought wrapped caramels, I cook a proper caramel layer using condensed milk, brown sugar, and butter — the kind that firms up just enough to stay put but stays soft when you bite in. The shortbread underneath is simple and buttery, not too sweet, which is exactly what you want when the caramel and chocolate are doing most of the heavy lifting on top.
I make these for Eid, for school bake sales, and honestly just for a weekend project when I feel like doing something with my hands. Zainab likes to help press the dough into rounds. My husband eats them straight from the fridge — he says the cold caramel layer is the best part. I disagree. Room temperature is where these cookies really shine. If you're looking for something to bring to a cookie exchange or a holiday plate, these will hold their own next to anything you'd find at a bakery.
One thing to know going in: this is a layered cookie, which means it has some waiting time built in. The shortbread needs to fully cool before the caramel goes on, and the caramel needs to be set before the chocolate. It's not hard — it's just patient work. If you're also in the mood for something chocolate-forward and fudgy, my Gooey Brownie Pie is another one I keep coming back to. But today, Twix cookies.
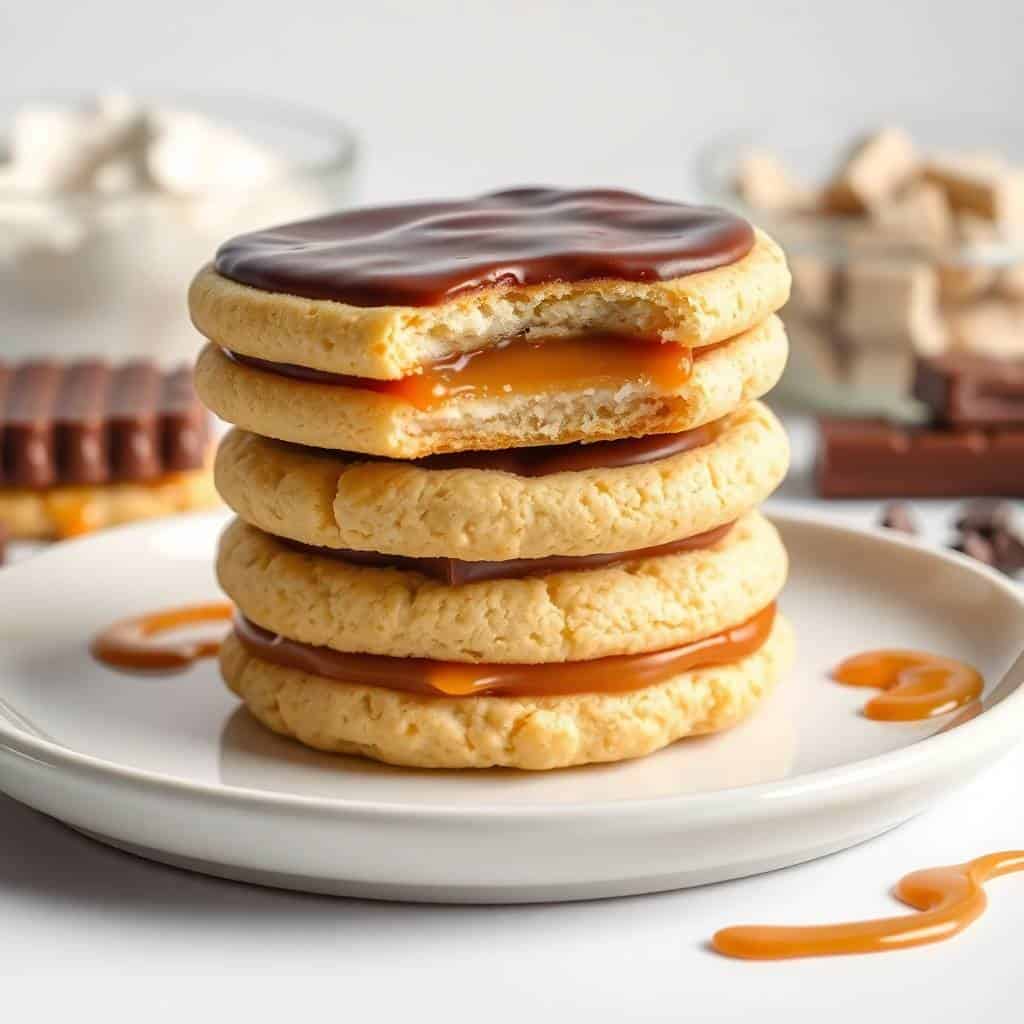
Why You'll Love This Recipe
- It actually tastes like a Twix: The combination of buttery shortbread, soft caramel, and chocolate on top is genuinely close to the real thing. I was skeptical the first time, but after the third batch I stopped buying the candy bars. The homemade caramel is richer and less sugary than what's in the actual bar, which I think makes it better.
- No candy thermometer needed: The caramel here is a condensed milk caramel, which is much more forgiving than traditional sugar caramel. You stir it in a saucepan for about 10 minutes until it thickens and turns golden — that's really it. I've made this with no special equipment beyond a regular saucepan and a wooden spoon.
- You can prep it in stages: The shortbread can be baked a day ahead and left at room temperature. The caramel can be made and stored separately. When you're ready to assemble, the whole thing comes together in under 20 minutes. This is how I approach it when I'm baking for an event and don't want everything piling up on the same day.
- They look like you bought them somewhere: The layered look — pale golden shortbread, amber caramel, dark chocolate — is genuinely pretty. A little sea salt on top and they look like they came out of a nice café. I've brought these to Eid gatherings and people always ask where I got them before I tell them I made them.
- Kids can help with most of it: Zainab presses the dough rounds. Saad drizzles the chocolate. There's very little in this recipe that requires precision, which makes it a genuinely fun thing to do together on a weekend afternoon without it turning into a stressful mess.
Ingredients
- For the Shortbread Base:
- 1 cup unsalted butter, softened
- ½ cup powdered sugar
- 1 teaspoon vanilla extract
- 2 cups all-purpose flour
- ¼ teaspoon salt
- For the Caramel Layer:
- 1 (14 oz) can sweetened condensed milk
- ½ cup brown sugar, packed
- 4 tablespoons unsalted butter
- 2 tablespoons corn syrup
- ¼ teaspoon salt
- 1 teaspoon vanilla extract
- For the Chocolate Topping:
- 1½ cups semi-sweet chocolate chips
- 1 tablespoon vegetable oil or coconut oil (optional — helps the chocolate spread smoothly and gives it a bit of shine)
Directions
- Make the shortbread dough: Preheat your oven to 350°F (175°C). Beat the softened butter and powdered sugar together until fluffy — about 2 minutes by hand with a wooden spoon, or a bit less if you're using a hand mixer. Add the vanilla, then mix in the flour and salt until a soft dough forms. Don't overwork it; as soon as it comes together, stop.
- Shape and bake: Roll the dough into balls roughly the size of a tablespoon and place them on a lined baking sheet, then press each one down gently into a round about ¼ inch thick. Bake for 12–14 minutes until the edges are just barely golden — the centers will look slightly underdone and that's fine. They firm up as they cool.
- Cool completely: Transfer cookies to a wire rack and let them cool all the way down before you touch them with caramel. I know it's tempting to rush this. The first time I tried to speed this up, the caramel melted right into the cookie and slid off the edges. Give them at least 30 minutes.
- Make the caramel: In a medium saucepan over medium heat, combine the condensed milk, brown sugar, butter, corn syrup, and salt. Stir constantly — don't walk away — until the mixture thickens and turns a deep golden color, about 8–10 minutes. Pull it off the heat and stir in the vanilla. It should be thick enough to coat the back of a spoon.
- Spoon on the caramel: Add about 1 teaspoon of caramel to each cooled cookie and spread it gently, leaving a small border around the edge. Let the caramel layer sit and set for at least 20–30 minutes before the chocolate goes on. If your kitchen is warm, pop them in the fridge for 10 minutes to help it along.
- Melt the chocolate: Add the chocolate chips and oil (if using) to a microwave-safe bowl. Microwave in 30-second bursts, stirring between each one, until completely smooth. It usually takes me 3 bursts. Don't rush this — overheated chocolate gets grainy and clumpy.
- Top with chocolate and let set: Spoon or drizzle the melted chocolate over the caramel layer on each cookie. If you want clean edges, use a small zip-top bag with a corner snipped off. Let the cookies sit at room temperature until the chocolate is fully set, or refrigerate them for about 15 minutes to speed things up.
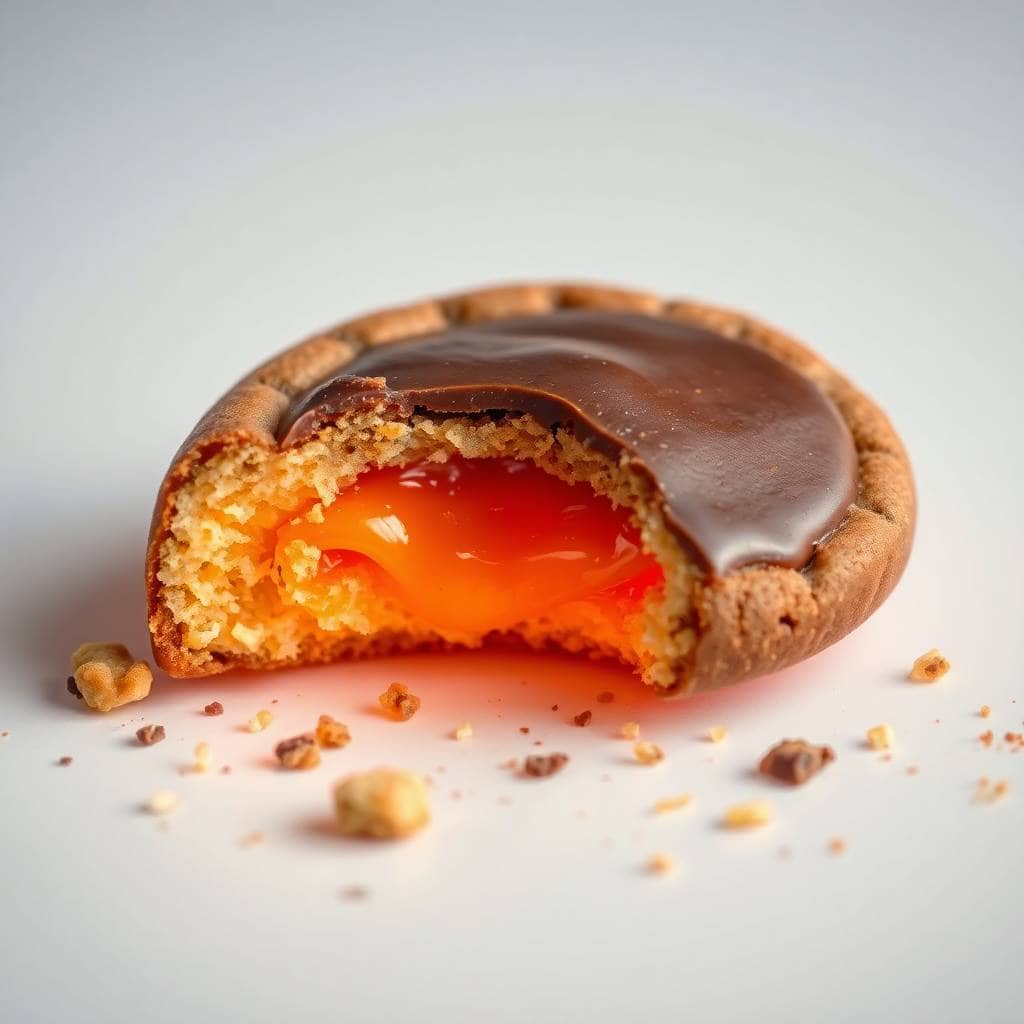
Tips for Success
- Don't skip the powdered sugar in the shortbread: I tested this with granulated sugar the first time around because it's what I had, and the texture came out slightly gritty. Powdered sugar dissolves fully into the butter and gives you that classic melt-in-your-mouth shortbread texture. It's worth the extra step of measuring it out separately.
- Stir the caramel the entire time it's on the heat: This isn't a step you can half-do. The condensed milk and brown sugar will scorch on the bottom if you leave it alone even for a minute. I set a timer and stand at the stove. The good news is it only takes about 10 minutes and the result is genuinely better than anything from a bag of wrapped caramels.
- Slightly underbake the shortbread: Pull them out when the very edges are just starting to turn golden. The centers should still look pale and soft. They set up completely as they cool, and if you bake them until they look done in the oven they'll be hard and dry by the time they're topped. I overbaked my first batch and the cookies were closer to crackers than shortbread.
- Add a pinch of sea salt on top of the chocolate: This is optional but I always do it now. A tiny pinch of flaky salt on each cookie right after the chocolate goes on — before it sets — makes the whole thing taste more complex. It cuts through the sweetness in a way that makes you want another one. Maldon salt or any flaky sea salt from the baking aisle works.
- Let each layer set fully before adding the next: I know I've said this already in the directions but it's worth repeating here because it's the one thing that determines whether these look beautiful or like a mess. Chocolate on barely-set caramel means everything slides. Take the time. The whole thing is worth it.
Variations
- Dark chocolate topping: Swap the semi-sweet chips for dark chocolate (60% cacao or higher) and the whole cookie tastes more grown-up and less sweet. My husband prefers this version. The bitterness of the dark chocolate against the sweet caramel is a really good combination — closer to a Twix Dark if you've ever had one.
- Sea salt caramel version: Increase the salt in the caramel layer to ½ teaspoon and add flaky salt on top of the chocolate before it sets. This is the version I bring to adult gatherings. It looks intentional and tastes noticeably more complex than the straight version. If you enjoy my Homemade Carrot Cake, the same balance of sweet and salty that works there works beautifully here too.
- Almond shortbread base: Add ½ teaspoon almond extract to the dough along with the vanilla, or fold in ¼ cup of finely crushed almonds before shaping. It gives the shortbread a nuttier, slightly more interesting flavor. This isn't traditional for a Twix copycat but it's a nice direction if you want to make these feel a little more special.
- Twix bars (pressed into a pan): Instead of individual cookies, press the shortbread dough into a parchment-lined 9x13 inch pan, bake it as one sheet, then pour the caramel over the top and let it set before adding the chocolate layer. Once everything is firm, cut it into rectangles. This is faster for large batches and the bars look really clean if you use a sharp knife.
- White chocolate version: Use white chocolate chips instead of semi-sweet for the top layer. The flavor is sweeter and creamier overall, and the pale white against the amber caramel looks really pretty on a dessert tray. Zainab asks for this version specifically around the holidays because she says it looks like snow.
Serving and Storage
Serving
These cookies are best at room temperature — the caramel layer is softer and the shortbread has a better texture than when they come straight out of the fridge. I usually take them out of the refrigerator about 20 minutes before serving. They look nice on a flat tray or in a box lined with parchment if you're giving them as a gift. Add a sprinkle of flaky salt on top right before serving if you didn't do it during assembly. If you're serving alongside other desserts, these pair well with something light — even the Snowflake Oreo Cream Salad would be a fun contrast on a holiday spread.
Storage
Store finished cookies in an airtight container. At room temperature they keep well for up to 5 days — just make sure they're somewhere cool and out of direct sunlight, otherwise the chocolate will get soft and tacky. In the fridge they'll last up to 10 days and the layers stay very clean and firm. If you want to freeze them, freeze in a single layer first until the chocolate is solid, then stack with parchment between each layer. They freeze well for up to 2 months. Thaw at room temperature for about 30 minutes before eating. If you're making ahead for an event, I'd suggest baking the shortbread and freezing it without toppings, then making the caramel and chocolate fresh on the day.

Frequently Asked Questions
Can I use store-bought caramel sauce instead of making the caramel from scratch?
You can, but it needs to be a thick caramel — the kind that holds its shape rather than pours like syrup. Thin caramel sauce will slide off the cookies and never really set. Kraft caramel bits melted with a tablespoon of cream also work as a shortcut if you're pressed for time. The from-scratch version in this recipe takes about 10 minutes and gives you a noticeably richer result, so I'd do that when you can.
Why did my chocolate crack when I bit into the cookie?
This usually happens when the caramel layer underneath hasn't fully set and the chocolate contracts unevenly as it hardens. Make sure your caramel is firm before adding the chocolate — it should feel slightly tacky but not soft or sticky when you lightly touch it. Adding a teaspoon of oil to the melted chocolate also helps it set to a slightly softer finish that cracks less dramatically when you bite in.
Can I make the shortbread dough ahead of time?
Yes, and I do this regularly. Wrap the dough tightly in plastic wrap and refrigerate for up to 3 days. When you're ready to bake, let it sit at room temperature for about 10 minutes first so it's easier to press into rounds. You can also freeze the raw dough for up to 2 months — thaw overnight in the fridge before using.
Do these cookies freeze well once fully assembled?
They do, though I prefer to freeze the shortbread base without the toppings and add the caramel and chocolate fresh. If you do freeze them assembled, lay them in a single layer on a sheet pan until frozen solid, then transfer to a container with parchment between layers. Thaw at room temperature for 30 minutes. The texture is very good after freezing — the caramel especially holds up well.
Can I make these gluten-free?
I haven't tested this personally, but a 1:1 gluten-free flour blend (the kind that substitutes directly for all-purpose flour) should work for the shortbread base. Look for one that contains xanthan gum, which helps with the texture. The caramel and chocolate layers are naturally gluten-free, so it's just the base you'd need to swap. Let me know in the comments if you try it — I'm curious how it turns out.

HOMEMADE TWIX COOKIES
Ingredients
For the Shortbread Base:
- 1 cup unsalted butter softened
- ½ cup powdered sugar
- 1 teaspoon vanilla extract
- 2 cups all-purpose flour
- ¼ teaspoon salt
For the Caramel Layer:
- 1 14 oz can sweetened condensed milk
- ½ cup brown sugar
- 4 tablespoons unsalted butter
- 2 tablespoons corn syrup
- ¼ teaspoon salt
- 1 teaspoon vanilla extract
For the Chocolate Topping:
- 1½ cups semi-sweet chocolate chips
- 1 tablespoon vegetable oil or coconut oil optional for shine
Instructions
Make the Shortbread:
- Preheat oven to 350°F (175°C). Cream butter and powdered sugar until fluffy. Add vanilla, then mix in flour and salt. Roll into balls or press into rounds. Bake for 12–14 minutes or until edges are lightly golden. Cool completely.
Prepare the Caramel:
- In a saucepan, combine condensed milk, brown sugar, butter, corn syrup, and salt. Cook over medium heat, stirring constantly, until thickened and golden (about 8–10 minutes). Stir in vanilla. Spoon caramel over cooled cookies and let set.
Top with Chocolate:
- Melt chocolate chips with oil in the microwave or a double boiler. Spoon or drizzle over caramel layer. Let cookies set at room temperature or refrigerate to speed up.
Notes
Keep in an airtight container at room temperature for up to 5 days, or refrigerate for longer freshness. Make Ahead:
Cookies can be baked and frozen without toppings. Add caramel and chocolate before serving. Customise:
Try milk or dark chocolate, or sprinkle sea salt on top for a gourmet twist.
These cookies have become one of my most-requested things to bring anywhere. Once I got the caramel layer right — and stopped trying to rush it — the whole recipe clicked into place. They're not complicated. They just need you to follow the order of operations and not skip the cooling steps, which I completely understand is harder than it sounds when your kitchen smells like caramel and chocolate.
I make a double batch when I know I'm bringing them somewhere, because a single batch of about 24 cookies disappears faster than I expect every single time. Somehow people always want one more. My husband circles the kitchen for the ones with the most caramel, which is every husband behavior I've ever witnessed.
If you want more baking projects to work through on a weekend, my Homemade Carrot Cake with Cream Cheese Frosting is another one that rewards patience with a genuinely beautiful result. And if you're putting together a dessert spread and want something chocolatey and fast that doesn't require layering, the Gooey Brownie Pie will fill that





Comments
No Comments