
Saad asked for cinnamon rolls three weekends in a row before I finally sat down and worked out a recipe I was actually happy with. Not the kind from a tube — the real kind, where you make the dough from scratch and the whole house smells like a bakery for two hours. I went through a few failed batches before I got there, but this version is the one I keep coming back to.
What makes these work is giving the dough time. Yeast dough rewards patience more than any other baking project I know. The two rises might feel like a lot if you're used to quick recipes, but they're what give you that soft, pull-apart texture that makes a cinnamon roll actually worth eating. I've rushed it before — the rolls came out dense and a little sad. Now I just start the dough in the morning and let it do its thing.
My husband will eat these for breakfast, Saad wants them warm with extra icing, and Zainab somehow loves them cold the next day straight from the container. I usually make a full pan and they're gone within 24 hours. On the rare weekend when I'm feeling extra, I'll put out a proper breakfast spread alongside my mini breakfast omelets and call it brunch. It's become one of those weekend things my family actually counts on.
One thing to know going in: you don't need a stand mixer for this. I don't own one. I knead by hand on a floured counter and it works completely fine — probably takes an extra two or three minutes compared to a machine. Also, make sure your cream cheese is fully softened before you make the icing. I've made the mistake of using cold cream cheese and ended up with lumpy icing that wouldn't smooth out no matter how long I beat it. Fifteen minutes on the counter fixes that.

Why You'll Love This Recipe
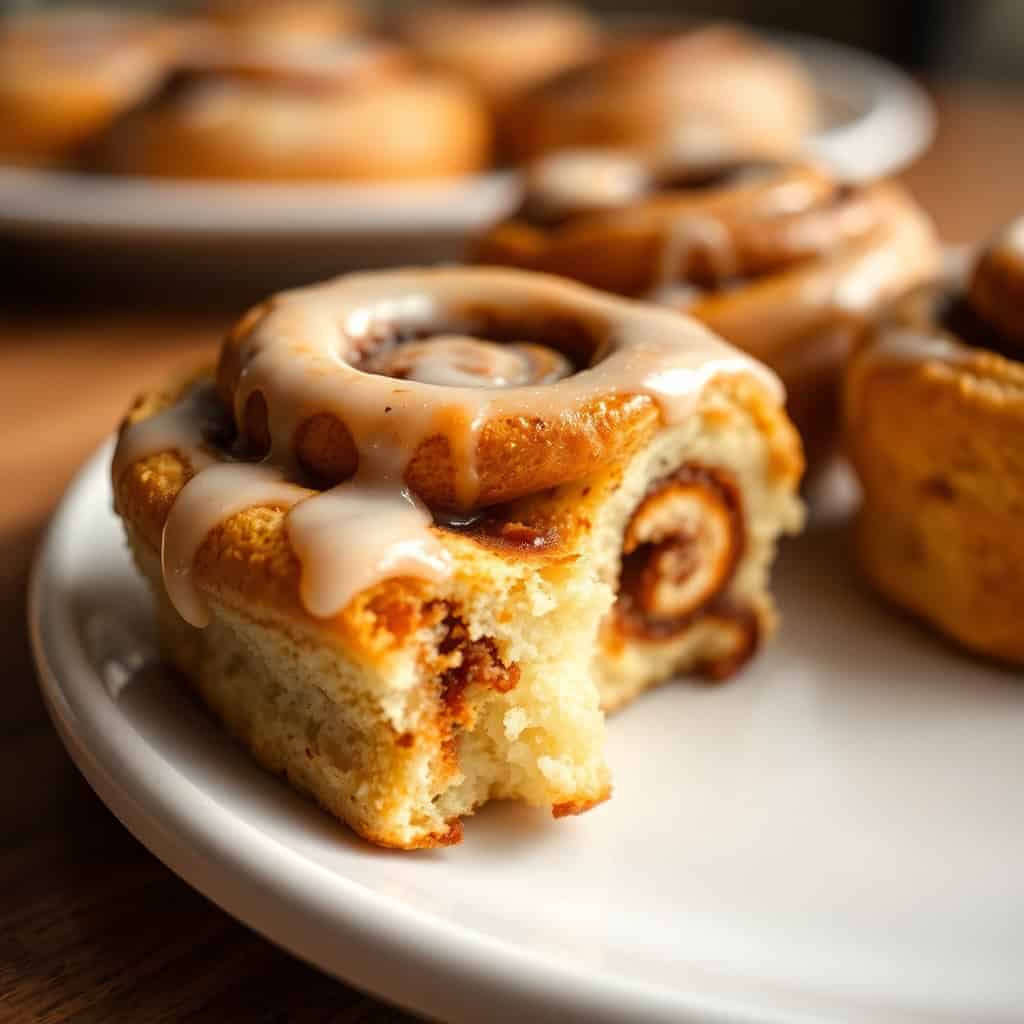
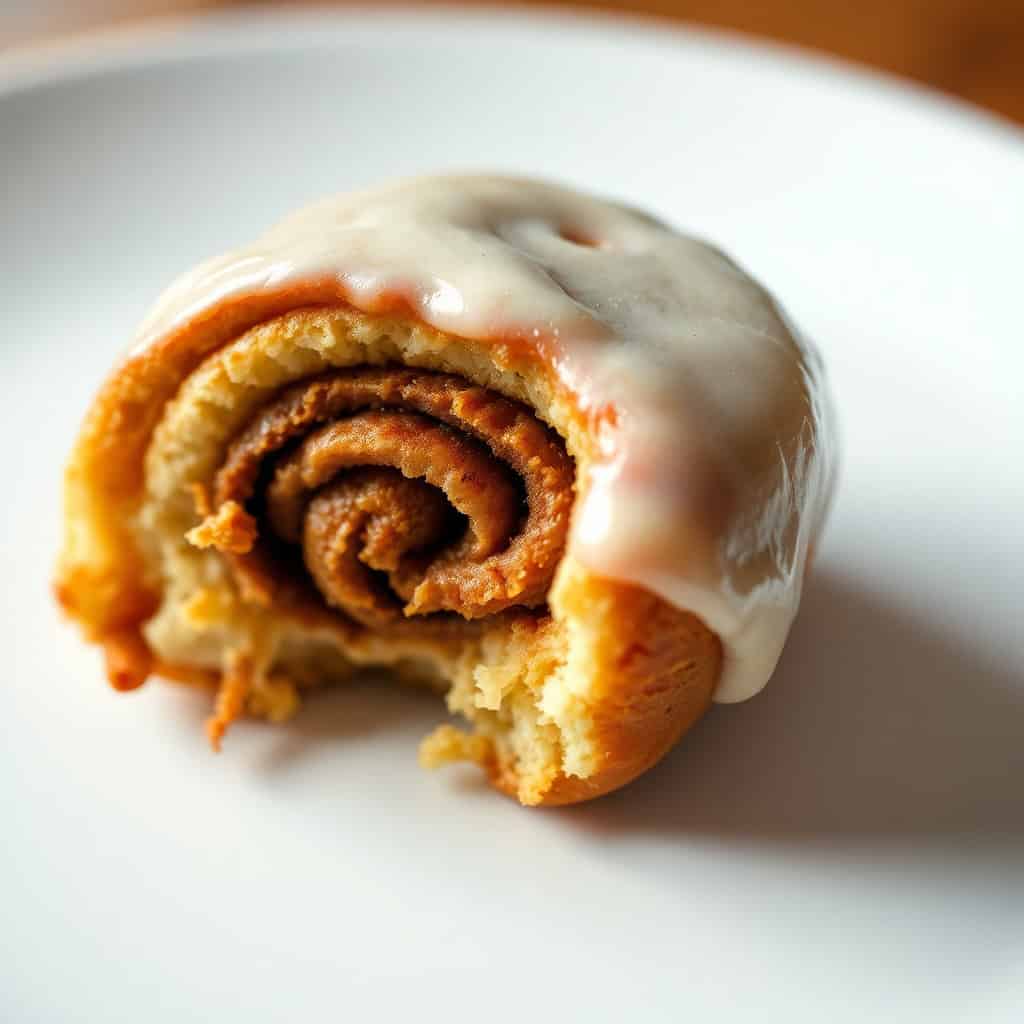
- The dough is genuinely soft: I've made cinnamon rolls that looked fine but were kind of tough inside — dry, chewy in the wrong way. This dough, when you let it rise properly, comes out pillowy and light. The butter and eggs in the dough are a big part of that. It's the kind of texture where you pull a roll apart and it stretches in long, soft layers.
- The filling-to-dough ratio is right: Some recipes go so heavy on the filling that it all leaks out and burns on the bottom of the pan. This one uses enough brown sugar and cinnamon to flavor every bite without turning into a sticky mess. The butter in the filling also helps it cling to the dough as you roll it up.
- The cream cheese icing is tangy, not just sweet: A lot of cinnamon roll icings are basically just powdered sugar and milk — sweet, flat, forgettable. The cream cheese here adds a slight tang that balances all that brown sugar in the filling. Spread it on while the rolls are still warm so it melts down into the crevices.
- You can make it ahead: The dough can go in the fridge overnight after the first rise. So you do the work the night before, then pull it out in the morning, shape the rolls, let them puff up for 30-45 minutes, and bake. Fresh cinnamon rolls on a Saturday morning without the Saturday morning chaos.
- No fancy equipment needed: I make these with a wooden spoon, a rolling pin, and a regular 9x13-inch baking dish from Walmart. That's it. If you have those three things, you can make this recipe.
Ingredients
- For the Dough:
- 2 ¼ teaspoon active dry yeast (1 standard packet)
- 1 cup warm milk (around 110°F — warm to the touch, not hot)
- ¼ cup granulated sugar
- ½ cup unsalted butter, melted
- 1 teaspoon salt
- 2 large eggs
- 4 cups all-purpose flour (plus extra for dusting)
- For the Filling:
- ½ cup unsalted butter, softened
- 1 cup brown sugar, packed
- 2 tablespoon ground cinnamon
- For the Cream Cheese Icing:
- 8 oz cream cheese, fully softened (this is important)
- 1 ½ cups powdered sugar
- ¼ cup unsalted butter, softened
- 1 teaspoon vanilla extract
- 1–2 tablespoon milk (add until it reaches a spreadable consistency)
Directions
- Activate the yeast: In a large bowl, combine the warm milk and sugar, then sprinkle the yeast over the top. Give it a gentle stir and leave it alone for 5–10 minutes. You're looking for it to get frothy and a little foamy — that tells you the yeast is alive and ready. If nothing happens after 10 minutes, your milk was probably too hot or the yeast is old. Start over with a fresh packet.
- Build the dough: Add the melted butter, eggs, and salt to the yeast mixture and stir to combine. Add the flour one cup at a time, mixing with a wooden spoon until a shaggy dough forms. It'll be sticky at first — that's normal. Don't add too much extra flour at this stage.
- Knead: Turn the dough out onto a lightly floured surface and knead for 5–7 minutes until it's smooth and elastic. You'll know it's ready when it springs back slightly when you poke it. If you don't have a stand mixer, this is genuinely fine to do by hand — just give yourself the time.
- First rise: Place the dough in a lightly greased bowl, cover it with a damp kitchen towel, and set it somewhere warm for 1 to 1½ hours, until it's doubled in size. I usually put mine in the oven with just the oven light on — that gentle warmth is perfect.
- Make the filling: While the dough rises, mix together the brown sugar and cinnamon in a small bowl and set aside. Make sure your butter is fully softened so it spreads easily without tearing the dough.
- Roll and fill: Once the dough has doubled, punch it down and transfer it to a floured surface. Roll it into a rectangle roughly 16x12 inches — it doesn't have to be perfect, just roughly even. Spread the softened butter all the way to the edges, then sprinkle the cinnamon-sugar mixture evenly over the top. Don't leave a bare border; you want filling in every bite.
- Roll and slice: Starting from the long side, roll the dough into a tight log. The tighter you roll it, the more defined the swirl will be. Cut the log into 12 equal pieces — a sharp knife or unflavored dental floss both work well here. Place them cut-side up in a greased 9x13-inch baking dish.
- Second rise: Cover the pan with plastic wrap or a towel and let the rolls rise for another 30–45 minutes until they're puffed and touching each other. This second rise is what makes them soft and airy, not dense. Don't skip it.
- Bake: Preheat the oven to 375°F (190°C). Bake the rolls for 20–25 minutes until the tops are golden. They should look set, not doughy, and the edges will be slightly deeper brown. Don't overbake — pull them when they're just golden or they'll dry out.
- Make the icing: While the rolls bake, beat together the softened cream cheese, powdered sugar, softened butter, and vanilla extract until completely smooth. Add milk one tablespoon at a time until it's spreadable but not runny. Again — make sure the cream cheese is at room temperature or this will be lumpy.
- Ice and serve: Let the rolls cool for about 10 minutes out of the oven, then spread the cream cheese icing generously over the top while they're still warm. The icing will melt slightly into the rolls and that's exactly what you want.
Tips for Success
- Check your milk temperature: I burned out two packets of yeast before I bought a cheap kitchen thermometer. If the milk is too hot (above 115°F or so), it kills the yeast and the dough won't rise at all. Too cold and the yeast won't activate. Around 110°F — warm like bathwater — is where you want to be. A $10 instant-read thermometer from any grocery store is worth it.
- Don't skip either rise: The first time I tried to rush this and only gave the dough 45 minutes for the first rise, the rolls came out dense and a little gummy in the middle. Both rises matter. The first develops flavor and structure, the second gives you that light, airy texture. If you're short on time, do the overnight method instead — slow-rise in the fridge actually makes them taste better.
- Use room temperature everything: Cold butter won't spread over the dough without tearing it. Cold eggs can shock the yeast. Cold cream cheese makes lumpy icing. I pull out all my dairy ingredients about 30 minutes before I start, and it makes the whole process smoother. In winter my kitchen is cold, so I give it a full hour.
- Roll the dough tightly: A loose roll means your swirl falls apart when you slice it and the filling escapes to the bottom of the pan where it burns. Roll it as firmly as you can without tearing the dough. I use both hands and work slowly from one end to the other. The tighter the log, the prettier the rolls.
- Ice them warm, not hot: If you pour the icing on when the rolls just came out of the oven, it all slides off and pools at the bottom of the pan. Wait about 10 minutes — they'll still be warm enough that the icing melts slightly into the layers, but it'll stay on top where you want it.
Variations
- Add pecans or walnuts: Scatter about ½ cup of roughly chopped pecans or walnuts over the cinnamon-sugar filling before you roll the dough up. They add a crunch that contrasts really nicely with the soft dough. My husband likes this version best — he thinks it makes them feel more substantial. These remind me of the pecan snowball cookies I make at Eid, same nutty warmth.
- Overnight cinnamon rolls: After shaping and placing the rolls in the baking dish, cover tightly with plastic wrap and refrigerate overnight instead of doing the second rise at room temperature. In the morning, take them out 45 minutes before baking to let them come to room temperature and puff up. Then bake as normal. This is my go-to for holiday mornings when I don't want to be in the kitchen at 7am.
- Maple icing instead of cream cheese: Mix 1 cup of powdered sugar with 2–3 tablespoons of pure maple syrup and a splash of milk until it reaches a drizzleable consistency. It's lighter than the cream cheese version but the maple flavor with the cinnamon filling is genuinely lovely. Good option if you don't have cream cheese on hand.
- Apple cinnamon rolls: Dice one medium apple (peeled) very finely and scatter it over the filling before rolling. It adds moisture, so keep an eye on bake time — you may need an extra 3–5 minutes. The apple softens completely during baking and blends into the filling. This version is really good in fall when the kids want something a little different.
- Bread flour swap: If you have bread flour, use it instead of all-purpose. The higher protein content makes the dough a bit chewier and gives the rolls a slightly more structured crumb — more like what you'd get from a bakery. I've used both and I like them each for different reasons. All-purpose gives you softer and more tender; bread flour gives you more chew.
Serving and Storage
Serving
These are best served warm, about 10 minutes out of the oven after the icing has been spread. I put the pan in the center of the table and let everyone pull their own roll — it's a good Sunday morning kind of thing. If you're making them for a crowd, pair them with something savory to balance out all that sweetness. They also work as a dessert — serve with a scoop of vanilla ice cream if you're feeling indulgent.
Storage
Store leftover rolls in an airtight container at room temperature for up to 2 days, or in the fridge for up to 4 days. To reheat, microwave a single roll for 10–15 seconds — it softens right back up. If reheating from the fridge, 20 seconds usually does it. You can also freeze the baked rolls (without icing) for up to 1 month. Wrap individually in plastic wrap, then put them in a zip-lock bag. Thaw overnight and warm in a 300°F oven for 8–10 minutes before icing. The frosting can be made ahead and stored in the fridge for up to 3 days — just let it soften at room temperature before spreading.
Frequently Asked Questions
Can I make the dough the night before?
Yes, and honestly this is my preferred method for weekend mornings. After the first rise, punch the dough down, shape the rolls, put them in the greased baking dish, cover tightly with plastic wrap and refrigerate overnight. In the morning take them out about 45 minutes before you want to bake so they can come to room temperature and puff up, then bake as directed. The slow cold rise also develops a slightly better flavor in the dough.
Can I freeze the rolls?
Yes. Bake and cool them completely, then freeze without the icing — wrap each roll individually in plastic wrap and store in a zip-lock freezer bag for up to 1 month. When you're ready to eat, thaw overnight in the fridge or on the counter, warm in a 300°F oven for 8–10 minutes, and then ice them fresh. You can also freeze the unbaked shaped rolls on a sheet pan, transfer to a bag once solid, and thaw and rise before baking.
My dough didn't rise — what went wrong?
This usually comes down to one of three things: the milk was too hot and killed the yeast, the yeast was expired, or the room was too cold for the dough to rise. Check your yeast packet's expiry date before you start. Make sure your milk is around 110°F — if you don't have a thermometer, it should feel warm on your wrist but not uncomfortable. And put the dough somewhere genuinely warm — inside your oven with just the oven light on works well.
Can I skip the cream cheese and use a simpler icing?
Definitely. A basic glaze of 1 cup powdered sugar, 2 tablespoons milk, and ½ teaspoon vanilla extract works fine. It's thinner and sweeter without the tang, but it's good and comes together in about 2 minutes. The maple version I mentioned in Variations is also a great option if you want something a little different but still simple.
How do I keep the rolls soft the next day?
Store them in an airtight container — don't leave them uncovered or they'll dry out fast. If they've been in the fridge, the microwave is your friend: 15–20 seconds per roll and they're soft again. The rolls that haven't been iced keep better than iced ones, so if you know you'll have leftovers, consider icing only what you'll eat that day and storing the rest plain.

These cinnamon rolls have become one of those recipes that I don't really think about anymore — I just make them. The process is familiar now, the timing is in my head, and I know exactly when the dough feels right under my hands. Getting there took a few tries and one completely flat batch that I had to throw out, but that's how baking goes sometimes.
If you're making these for the first time, don't stress about making them look perfect. Even slightly misshapen rolls taste the same as the neat ones — the icing covers everything anyway. Just focus on not rushing the rises and keeping an eye on the oven at the 20-minute mark. Pull them when they're golden, not dark.
The overnight method is genuinely how I make these most often now. I do everything the night before, wake up, let them sit on the counter while I make coffee, and they're in the oven by 8am. By 8:30 the kitchen smells like cinnamon and everyone has wandered in on their own. That's the whole point of a recipe like this, really — it brings people to the table without you having to call them twice. 🍥✨
If you're looking for other things to bake or cook on a slow weekend, here are a few I keep coming back to:
- Pecan Snowball Cookies (Buttery, Nutty & Dusted in Powdered Sugar) — these are a staple in my house around the holidays and they could not be simpler to make.
- Mini Breakfast Omelets — great alongside the cinnamon rolls if you want something savory on the table too.
- Smoked Jalapeño Bacon Cornbread Muffins — for when the weekend calls for something with a little kick.
- Cheesy Steak Bites and Rotini Pasta (30-Min Skillet Dinner) — a weeknight dinner that comes together fast and makes everyone happy.
- Crispy Parmesan Ranch Chicken Tenders — Saad's other most-requested thing, if you're keeping track.

BEST HOMEMADE CINNAMON ROLLS
Ingredients
For the dough:
- 2 ¼ teaspoon active dry yeast
- 1 cup warm milk 110°F/43°C
- ¼ cup granulated sugar
- ½ cup unsalted butter melted
- 1 teaspoon salt
- 2 large eggs
- 4 cups all-purpose flour
For the filling:
- 1 cup brown sugar packed
- 2 tablespoon ground cinnamon
- ½ cup unsalted butter softened
For the frosting:
- 8 oz cream cheese softened
- 1 ½ cups powdered sugar
- ¼ cup unsalted butter softened
- 1 teaspoon vanilla extract
- 1-2 tablespoon milk to achieve desired consistency
Instructions
- In a bowl, combine warm milk, sugar, and yeast. Stir gently and let it sit for 5-10 minutes until it becomes frothy.
- Add melted butter, salt, and eggs to the yeast mixture, stirring to combine. Gradually add flour, mixing until a dough forms.
- Turn the dough onto a lightly floured surface and knead for 5-7 minutes, or until smooth and elastic.
- Place the dough in a greased bowl, cover with a damp cloth, and let it rise for 1-1.5 hours, or until doubled in size.
- Preheat the oven to 375°F (190°C).
- Once the dough has risen, punch it down and roll it out on a floured surface into a large rectangle (about 16x12 inches).
- Spread softened butter over the dough, then sprinkle evenly with brown sugar and cinnamon.
- Roll the dough tightly from the longer side and cut it into 12 equal rolls.
- Place the rolls into a greased 9x13-inch baking dish, cover with plastic wrap, and let rise for 30 minutes.
- Bake for 20-25 minutes or until golden brown.
- While the rolls bake, make the frosting: beat together cream cheese, powdered sugar, butter, and vanilla extract until smooth. Add milk to achieve the desired consistency.
- Once the cinnamon rolls are done, spread the frosting over them while still warm. Serve and enjoy!
Notes
- For an extra touch, add chopped pecans or walnuts to the filling for crunch.
- Make sure your milk is not too hot, or it could kill the yeast.
- These rolls are best served fresh but can be stored in an airtight container for up to 2 days.
- To reheat, warm in the microwave for about 10-15 seconds or in the oven at 300°F for a few minutes.
- You can make the dough ahead of time and refrigerate it overnight for an easy, make-ahead breakfast.
- For an extra soft texture, use bread flour instead of all-purpose flour.
- The frosting can be made ahead and stored in the fridge for up to 3 days.
- Freeze leftover rolls for up to 1 month, and reheat them in the oven for a fresh, warm treat.





Comments
No Comments