
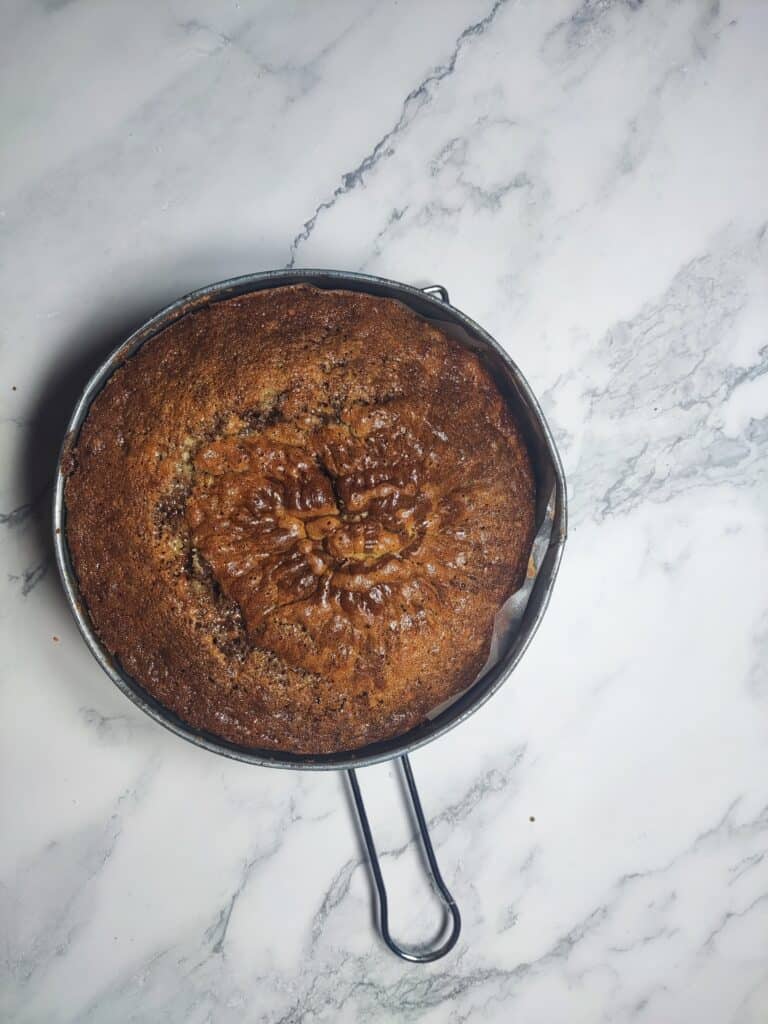
Saad asked for this cake three weeks in a row before I finally wrote the recipe down properly. He calls it "the swirly one" and every time I make it, he hovers near the oven for the last ten minutes like he can will it to bake faster. That's how I know this one is worth sharing.
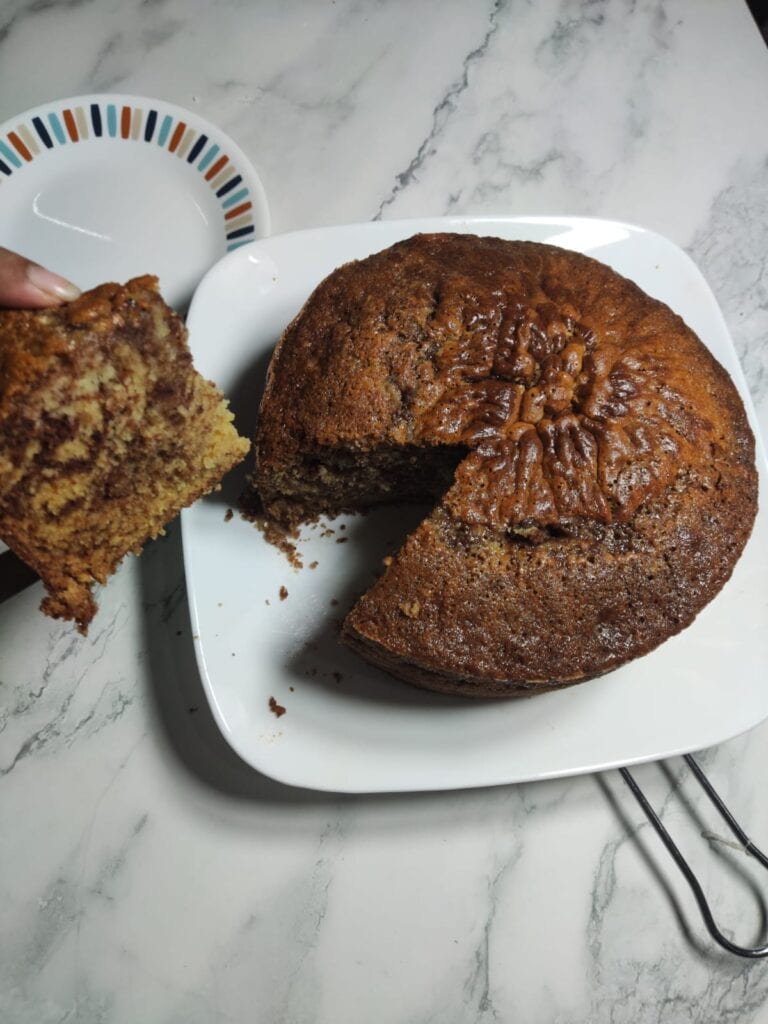
What I love about this marble bundt cake is that it's genuinely one batter. You mix everything together, split it in half, stir cocoa powder into one half, and that's it. There's no separate chocolate batter to make, no extra bowls, no complicated steps. The swirls happen almost on their own when you run a knife through the alternating layers — and it looks far more impressive than the effort it took. I've brought this to a few gatherings and people always assume I spent the whole afternoon on it.
My husband prefers his slice with a cup of tea in the afternoon, which is very on-brand for him. Zainab wants hers slightly warm with a scoop of vanilla ice cream alongside it, which honestly I can't argue with. This cake sits at the intersection of everyday baking and something that feels a little special — kind of like my Cranberry Pineapple Upside-Down Cake, which also looks far fancier than it is to make.
One thing I'll say upfront: don't rush the cooling. I've unmolded this cake too early more than once and had it crack straight down the middle. Let it sit in the pan for at least 15 minutes before you move it to a wire rack. The wait is genuinely worth it.
Why You'll Love This Recipe
- One batter, two flavors: You make a single base batter and divide it — there's no separate recipe to follow for the chocolate half. Just add cocoa powder to one portion and you're done. This means fewer dishes and a simpler process than most marble cake recipes I've seen. When I first started baking this, I assumed it needed two completely different batters, and I was genuinely surprised how easy the single-batter method is.
- Soft crumb that stays moist: The combination of melted butter and milk keeps this cake tender even on day two. I've had marble cakes from bakeries that go dry by the next morning, but this one holds up well if you store it properly. The powdered sugar also helps here — it dissolves more smoothly than granulated sugar and contributes to that soft texture.
- No stand mixer needed: I don't own a stand mixer and I make this with a hand mixer and a wooden spoon. You can even do the whole thing by hand if your butter is properly melted and your eggs are at room temperature. The batter comes together easily without heavy-duty equipment, which is how most of my baking works.
- Impressive enough for guests, simple enough for Tuesday: The marbled pattern inside looks like you put in real effort, even when you didn't. I've served this at birthdays, at afternoon teas, and also just on a random weeknight when someone wanted something sweet after dinner. It works for all of those occasions without needing to be dressed up.
- Pantry ingredients only: Eggs, butter, flour, sugar, milk, cocoa powder — nothing here requires a specialty store. I've made this on short notice with ingredients I already had on hand, which is a quality I look for in any cake recipe I keep coming back to.
Ingredients
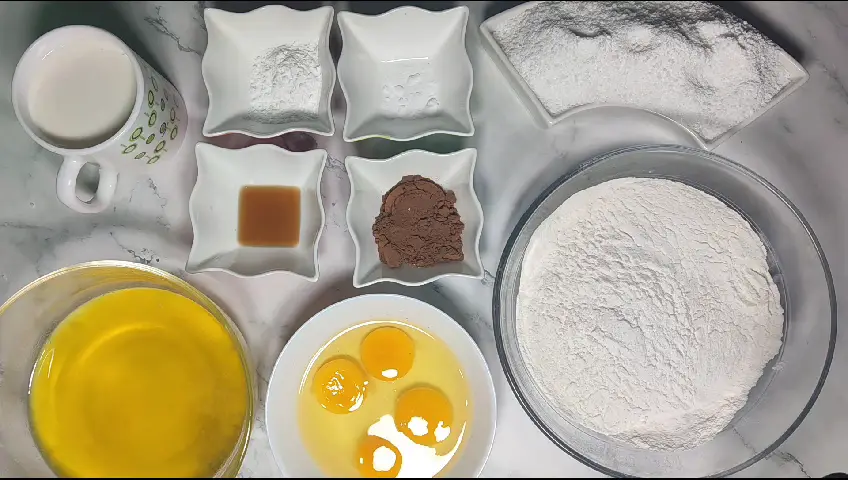
- 4 eggs, room temperature
- 1 cup (2 sticks / 225g) unsalted butter, melted and slightly cooled
- 2 cups (240g) powdered sugar
- 3 cups (360g) all-purpose flour
- 4 teaspoon baking powder
- ½ teaspoon baking soda
- 1½ cups (360ml) whole milk, room temperature
- 1 teaspoon vanilla extract
- 2 tablespoons unsweetened cocoa powder (I use a good-quality Dutch-process if I have it, regular unsweetened works fine too)
Directions
- Step 1: Preheat and prep your pan — Heat your oven to 320°F (160°C). Grease your bundt pan thoroughly, getting into every groove, then dust with flour and tap out the excess. I learned the hard way that butter alone isn't enough for a bundt — you need that flour coating so the cake releases cleanly.
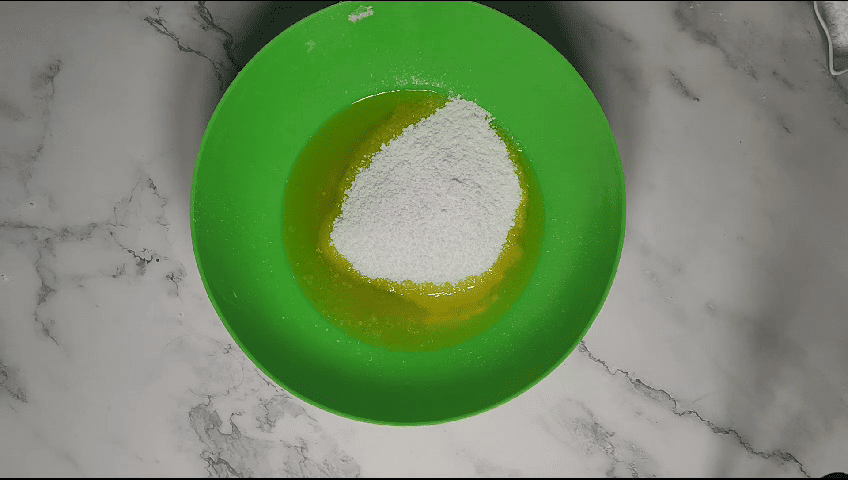
- Step 2: Beat butter and sugar — In a large bowl, beat the melted butter and powdered sugar together until combined and smooth. The mixture will look pale and slightly fluffy. Make sure your butter isn't hot when you add it — if it's steaming, wait five minutes, otherwise it'll start cooking the eggs in the next step.
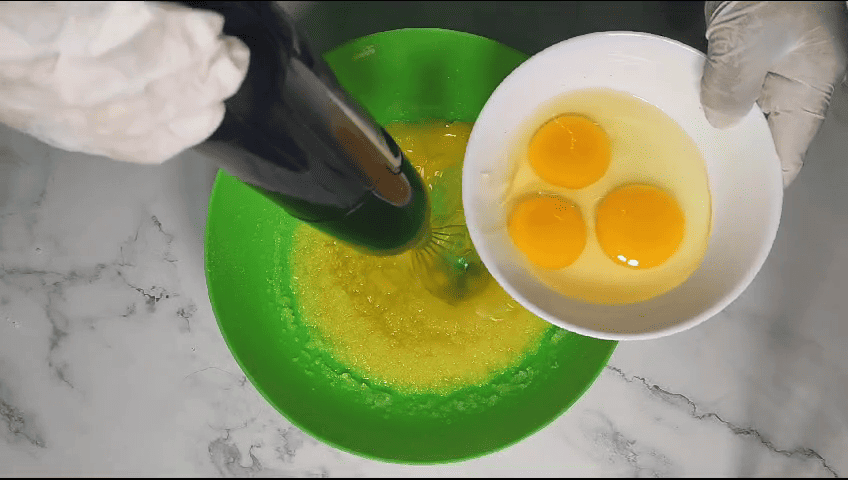
- Step 3: Add eggs and vanilla — Add the eggs one at a time, beating well on high speed after each one. Once all four eggs are in, stir in the vanilla extract. The batter should look smooth and a little glossy at this point.
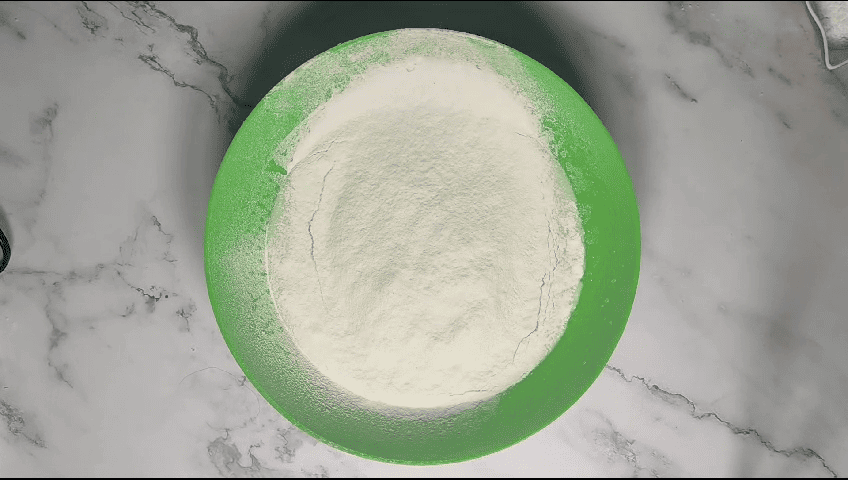
- Step 4: Combine dry ingredients — In a separate bowl, whisk together the flour, baking powder, and baking soda. Whisking the leaveners into the flour first means they'll distribute evenly — I used to skip this step and occasionally got uneven rise as a result.
- Step 5: Alternate dry and wet — Add half the flour mixture to the egg batter, mixing on low speed just until combined. Pour in half the milk and mix again. Add the remaining flour, then the remaining milk, and mix until the batter is smooth. Don't overmix at this stage — once the flour is in, you want to stop as soon as you don't see dry streaks.
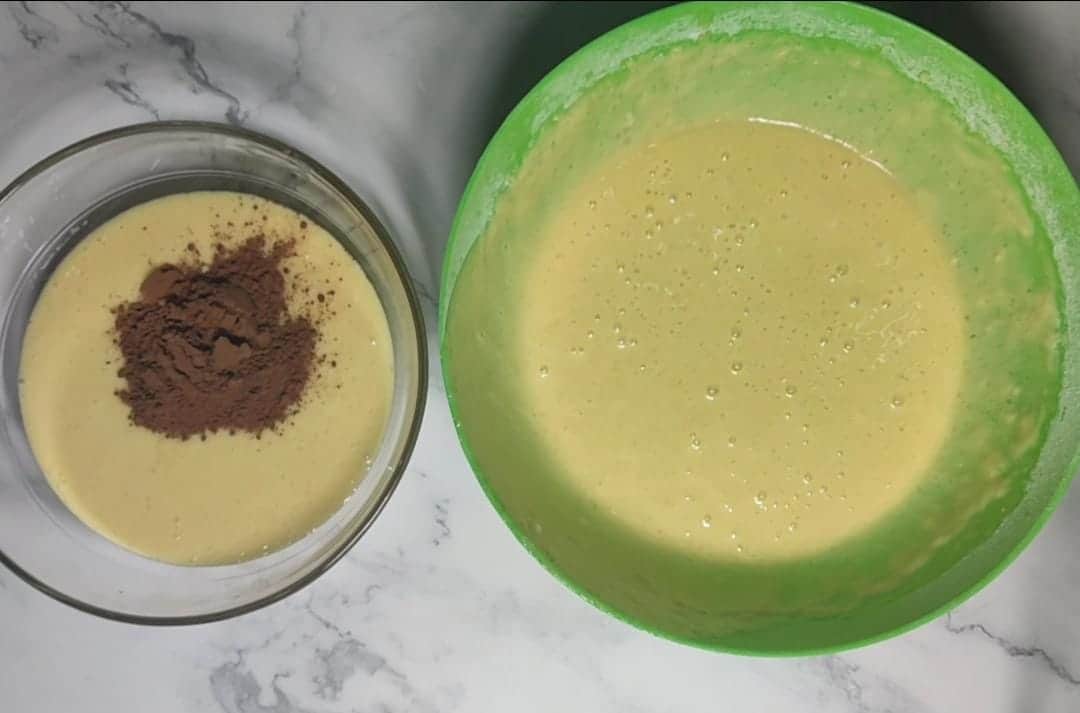
- Step 6: Make the chocolate batter — Divide the batter roughly in half between two bowls. Add the cocoa powder to one bowl and mix until it's fully incorporated and uniform in color. The chocolate batter will be slightly thicker, which is normal.
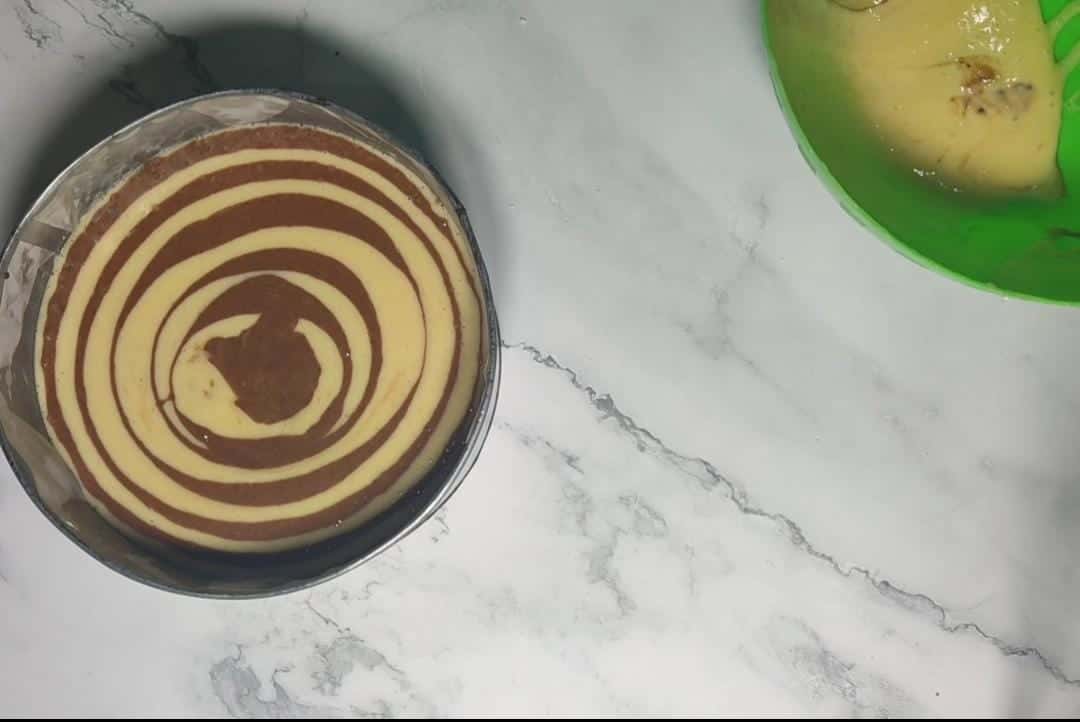
- Step 7: Layer and swirl — Spoon alternating dollops of vanilla and chocolate batter into your prepared pan, building up layers. Once all the batter is in, take a butter knife or skewer and drag it through the batter in a figure-eight motion two or three times. Don't go overboard with the swirling — 3 passes is plenty. More than that and the two flavors blur together instead of marbling.
- Step 8: Bake — Bake for 45–50 minutes, until a toothpick inserted into the thickest part of the cake comes out clean. Before sliding the pan into the oven, give it a firm tap on the counter to knock out any air bubbles — this takes five seconds and makes a real difference to the crumb.
- Step 9: Cool before unmolding — Let the cake cool in the pan on a wire rack for at least 15–20 minutes. Then invert it onto the rack and let it cool completely before slicing or frosting. Running a thin spatula around the edges before you invert helps if you're nervous about sticking.
Tips for Success
- Get everything to room temperature first: Cold eggs added to melted butter can cause the mixture to seize and look curdled. I set my eggs and milk out about 30 minutes before I start. This is one of those small things that makes a noticeable difference in how smoothly the batter comes together.
- Measure your flour carefully: Too much flour is the number one reason homemade cakes come out dense. If you don't have a kitchen scale, fluff the flour in its bag first, then spoon it into your measuring cup and level off the top with a straight edge. Scooping directly from the bag packs the flour and you can end up with 20–30% more than you need.
- Don't over-swirl: This is the one I mess up when I'm rushing. More swirling feels like it should mean more marbling, but what actually happens is the two batters merge into a muddy grey-brown situation. Two or three slow figure-eight passes with a knife is genuinely all you need. The layers do the rest.
- Grease AND flour your bundt pan: A regular bundt pan has all those grooves and a center tube, and cake loves to stick in the corners. I grease with butter, dust with flour, tip out the excess, and then I don't worry. If you skip the flour step, you risk leaving half the cake in the pan when you flip it — which I've done, and it's heartbreaking.
- Tap the pan before baking: Once the batter is in the pan, lift it a few inches off the counter and let it drop firmly. Do this two or three times. It sounds too simple to matter, but it pops the air bubbles in the batter that would otherwise create uneven pockets inside the cake. I started doing this after I kept getting weirdly hollow spots in my cakes.
Variations
- Chocolate ganache drizzle: Melt equal parts semi-sweet chocolate chips and heavy cream together, stir until smooth, and pour it over the cooled cake. Let it drip down the sides naturally — you don't need to spread it. This is the version I make when I'm serving it to guests. It turns an everyday cake into something that looks like it came from a proper bakery.
- Simple powdered sugar glaze: Mix 1 cup powdered sugar with 2–3 tablespoons of milk and a drop of vanilla until you get a pourable glaze. Drizzle it over the cooled cake. This is the low-effort option that still looks nice, and it's what I do on weeknights when I want something quick. My husband actually prefers this over the ganache version.
- Cream cheese frosting: Beat 4 oz softened cream cheese with 1 cup powdered sugar and 2 tablespoons milk until smooth. Spread it over the top of the cooled cake and let it drip down the sides a little. The slight tang of the cream cheese plays really well against the sweetness of the cake — if you've made raspberry cinnamon rolls before, you already know how cream cheese frosting can make a baked good sing.
- Mocha variation: Add 1 teaspoon of instant espresso powder to the cocoa powder before mixing it into the chocolate batter. This deepens the chocolate flavor and adds a subtle coffee note that you might not even identify as coffee — it just makes the chocolate taste more intensely chocolatey. I make this version when the cake is for adults.
- Loaf pan version: If you don't have a bundt pan, this batter works in a standard 9x5 inch loaf pan. The baking time will be similar — start checking at 45 minutes. You won't get the classic ring shape but the swirls still look great in cross-section when you slice it. I made it this way before I owned a bundt pan and it was just as good.
Serving and Storage
Serving
This cake is good at room temperature, which makes it easy to slice and serve at any point after it's fully cooled. I usually serve it plain or with a simple drizzle of ganache or powdered sugar glaze on top — the marble pattern inside is part of the presentation, so the cleaner the slice, the better it looks. Use a sharp knife and wipe it between cuts. If you want to dress it up for a party, a dusting of powdered sugar over the top takes about ten seconds and looks great against the dark and pale swirls inside. Zainab's preferred serving method is warm from the oven with ice cream, which I also fully endorse.
Storage
Store the cake covered at room temperature for up to 3 days — a cake dome or a plate covered with plastic wrap works fine. The moisture stays in better if you leave the cake whole and only slice what you need. If you've already frosted it with cream cheese frosting, store it in the fridge and bring it to room temperature before serving (about 30 minutes out). For longer storage, wrap individual slices tightly in plastic wrap and freeze for up to 2 months. Thaw at room temperature for an hour or so and they're nearly as good as fresh.
Frequently Asked Questions
Can I make this marble bundt cake ahead of time?
Yes, and it actually holds up really well. I often bake it the day before I need it and store it covered at room temperature. The texture is just as good the next day — sometimes I think it's even slightly better because the crumb has had time to settle. Just wait until the day you're serving it to add any frosting or glaze.
Can I use a regular round cake pan instead of a bundt pan?
You can. A 9x13 inch rectangular pan or two 9-inch round cake pans will both work with this batter. The baking time may be shorter — start checking at 30–35 minutes for round pans. You lose the classic bundt shape but the swirls will still show up beautifully when you slice it.
My marble pattern looks muddy and blended — what went wrong?
Almost certainly too much swirling. I've done this. Three passes with a knife is all the batter needs — after that you're just mixing the two flavors together rather than marbling them. Next time, alternate the spoonfuls of batter carefully so you have good distinct layers to start with, then swirl lightly and stop.
Can I freeze this cake?
Yes — freeze it before frosting. Wrap the cooled cake (or individual slices) tightly in plastic wrap, then in a layer of foil, and freeze for up to 2 months. Thaw at room temperature with the wrapping still on so condensation forms on the outside of the wrapper rather than on the cake itself. Add any glaze or frosting after it's fully thawed.
Can I use salted butter instead of unsalted?
You can, but reduce or skip any added salt and know that the final flavor will be slightly saltier. I use unsalted because it gives me more control over the overall taste. If salted butter is all you have, it will still work — the cake won't taste salty, just a little more savory in the background, which some people actually like with chocolate.
This marble bundt cake has become one of those recipes I come back to more often than I expected when I first made it. It looks like a celebration cake, it bakes in under an hour, and the whole thing comes from one bowl of batter. Those are three qualities I look for in a recipe I'll actually repeat.
If you want to turn it into a full dessert spread, it pairs really well alongside Nutella truffles — the hazelnut and chocolate combination makes sense next to the marble cake's vanilla and cocoa swirls. And if you're baking for a holiday or a gathering, chewy brownie ice cream sandwiches on the same table would make anyone happy.
The thing I keep telling people when they see this cake is that the swirls are not hard to do. You don't need a special technique or a steady hand — you just need to stop yourself from over-swirling. Once I figured that out, this became one of the most reliable bakes in my kitchen. I hope it becomes one of yours too. 🍰✨
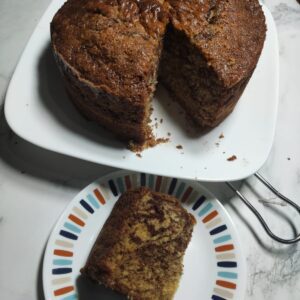
Easy Marble Bundt Cake Recipe
Equipment
- Pan
Ingredients
- 4 Eggs room temperature to make mixing easier
- 1 cups melted butter unsalted is better
- 2 cups powdered sugar
- 3 cups all-purpose flour
- 4 teaspoon baking powder
- ½ teaspoon baking soda
- 1 ½ cups cups of milk
- 1 teaspoon vanilla extract
- 2 tablespoon cocoa powder
Instructions
- Start by preheating your oven to 160°C (320°F). Prepare your baking pan by greasing it and lining it with parchment paper for easy cake removal.
- In a large mixing bowl, beat together the melted butter and powdered sugar until well combined.
- Add the eggs one at a time, beating at high speed after each addition. Stir in the vanilla extract after incorporating the eggs.
- In a separate bowl, combine the all-purpose flour, baking powder, and baking soda.
- Gradually add half the flour mixture to the egg batter, mixing at low speed. Follow this with half of the milk, and continue to mix.
- Add the remaining half of the flour mixture and the remaining milk, and mix until the batter is smooth.
- Divide the batter in half. Add the cocoa powder to one-half and mix thoroughly to create a chocolate batter.
- Create layers in your prepared baking pan by alternating between the vanilla and chocolate batters.
- Use a knife or skewer to create a marbling effect by swirling the batters together.
- Bake the cake in the preheated oven for 45-50 minutes or until a toothpick inserted into the center comes out clean.
- Allow the cake to cool in the pan, then transfer it to a wire rack to cool completely.
- Slice, serve, and enjoy your delectable classic marble cake!
Video
Notes





Comments
No Comments