
I started making these clusters because Zainab came home from school one day and announced she wanted to "bake something." It was a Tuesday, I had nothing defrosted for dinner, and the last thing I needed was a full baking project. But I also had a bag of chocolate chips, a box of Rice Krispies, and a kid who was not going to drop this. So we made clusters. Twenty minutes later, she was arranging them on a plate like she'd catered an event.
What I like about this recipe is how little can go wrong. You melt chocolate, you stir in cereal and marshmallows, you drop spoonfuls onto parchment paper, and you wait. That's genuinely it. There's no batter to over-mix, no oven temperature to worry about, no timing that matters down to the minute. My job is mostly just to handle the microwave step — the rest the kids can do themselves. If you're looking for another no-bake treat that's just as low-stress, my no-bake gingerbread spice cheesecake cups are in the same spirit.
We've made these clusters for school snack days, for birthday party favors, and honestly just for a random Saturday afternoon when everyone needed something to do. The mix-ins are where the fun happens — sprinkles, M&Ms, dried cranberries, shredded coconut. I lay everything out in small bowls and let the kids build their own batches. Saad always goes heavy on the M&Ms. Zainab adds sprinkles to everything, including things that don't need sprinkles.
One thing I'll say upfront: the chocolate sets faster than you expect once it starts cooling, so don't wander off after you combine everything. Have your parchment-lined sheet pan ready before you even start melting. I learned that the first time when I was mid-scoop and the mixture turned stiff on me — still edible, just uglier than it needed to be.

Why You'll Love This Recipe
- No oven, no stress: I've made these in July in a kitchen with no AC and it was completely fine. Nothing heats up, nothing needs to preheat, and the only appliance you're using is the microwave for about two minutes. On days when the last thing I want is a hot oven running, this is the recipe I reach for. It also means kids can be more involved without worrying about burns from hot pans.
- Kids can actually make this: I handle the microwave melting step, and then I step back. Zainab stirs, Saad scoops, and they both argue about mix-ins — which is a very normal part of the process. It's one of the few recipes where I'm genuinely not hovering the whole time. They feel like they made it themselves, which matters to them.
- The mix-ins make it endlessly customizable: I've made these with M&Ms, dried cranberries, toasted coconut, rainbow sprinkles, and chopped pretzels. Every batch is different depending on what's in the pantry and who's making them. This is not a recipe you'll get bored of because it's never quite the same twice.
- Ready in under an hour, start to finish: Fifteen minutes of actual work, then thirty minutes in the fridge to set. I make a double batch because a single batch disappears before I've even cleaned up the spoons. If you need these for a party, make them the night before and refrigerate overnight — they hold up well.
- Peanut butter makes them taste more substantial: The original cluster recipe I'd seen around used just melted chocolate, which is fine, but adding peanut butter to the melt gives these more depth and keeps them from feeling like just cereal coated in chocolate. It also helps the clusters hold their shape a little better once set.
Ingredients
- 1 cup chocolate chips (milk chocolate, semi-sweet, or dark — use what your family likes)
- ½ cup peanut butter (creamy or crunchy both work)
- ¼ cup butter or coconut oil
- 4 cups Rice Krispies cereal (or Corn Flakes, Chex, or any small crunchy cereal)
- 1 cup mini marshmallows
- Optional mix-ins:
- Sprinkles
- Chopped nuts (skip if there are allergy concerns)
- Dried fruit — cranberries or raisins work well
- M&Ms or other small candies
- Shredded coconut
Directions
- Melt the chocolate mixture: Combine the chocolate chips, peanut butter, and butter (or coconut oil) in a large microwave-safe bowl. Microwave in 30-second intervals, stirring after each one, until fully melted and smooth. This usually takes about 90 seconds total — don't rush it with longer intervals or the chocolate will scorch.
- Combine the dry ingredients: In a separate large bowl, mix together the Rice Krispies cereal and mini marshmallows. Having this ready before you start melting saves time once the chocolate is hot.
- Mix everything together: Pour the melted chocolate mixture over the cereal and marshmallows. Stir gently until everything is evenly coated. Work quickly here — the chocolate starts setting as it cools, so you want to move to the next step within a minute or two.
- Add your mix-ins: Stir in whatever optional mix-ins you're using. This is the fun part — lay out the options and let the kids choose. I usually add them after the main mix so each batch can be customized if different kids want different things.
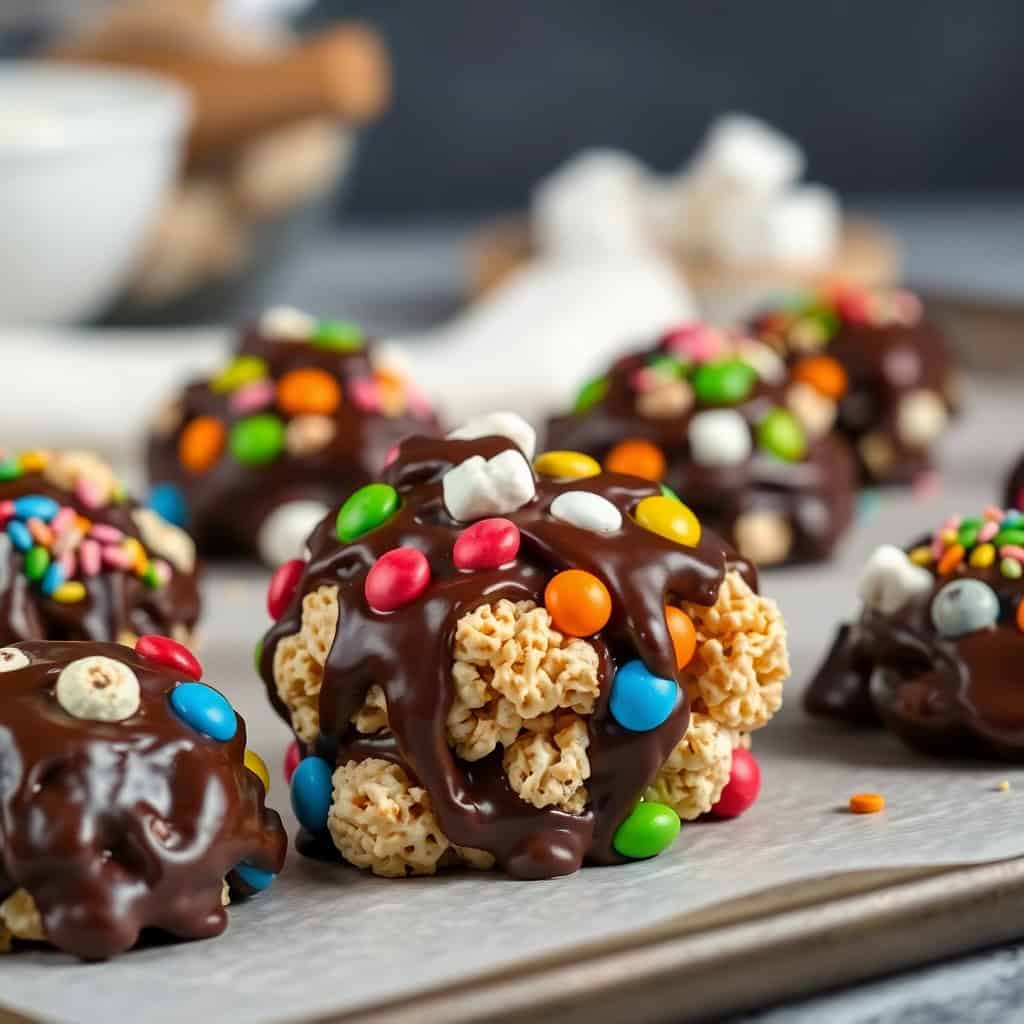
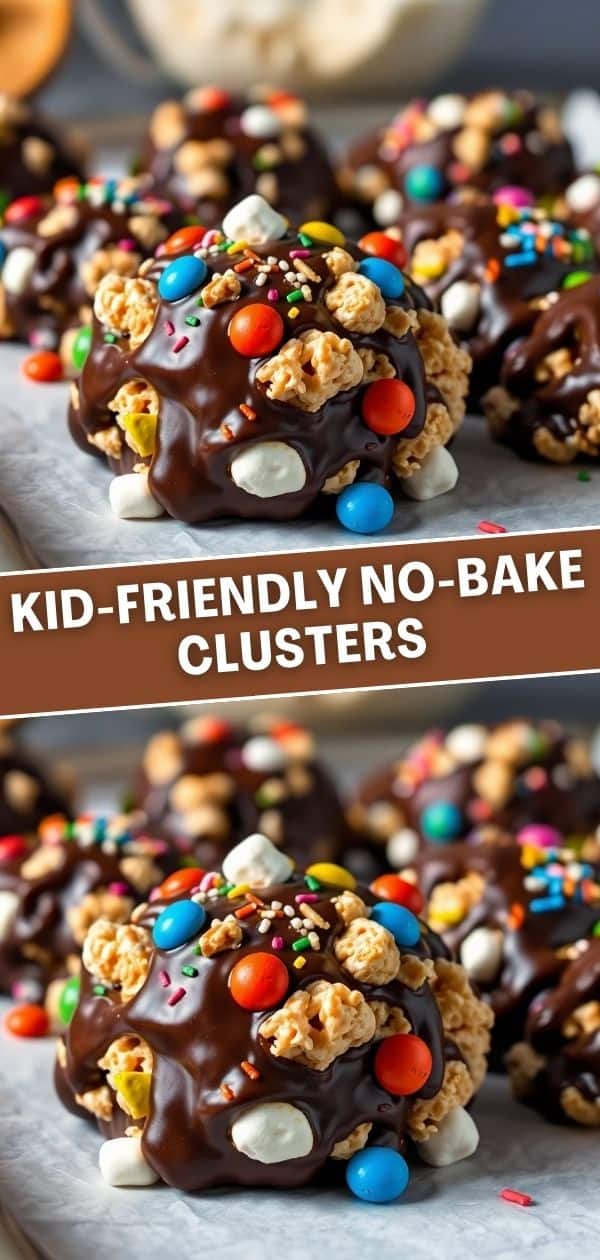
- Scoop into clusters: Drop heaping spoonfuls onto a parchment-lined baking sheet. A cookie scoop works great here, but two spoons or even lightly greased hands are fine. Don't worry about them being perfectly round — rustic is the whole vibe.
- Chill until set: Refrigerate for at least 30 minutes, or until the chocolate is firm to the touch. If you're in a hurry, 20 minutes in the freezer also works.
- Serve: Serve cold or at room temperature. They're good either way, though they hold their shape better straight from the fridge on a warm day.
Tips for Success
- Prep your pan before you melt the chocolate: Line your baking sheet with parchment paper and have it sitting right next to you before you turn on the microwave. The first time I made these, I started scooping and then realized I hadn't lined the pan yet — by the time I found the parchment roll, the mixture had stiffened significantly and the clusters came out lumpy and dense. Two minutes of prep saves a lot of frustration.
- Don't overheat the chocolate: Chocolate burns faster than you'd think, and scorched chocolate smells terrible and tastes worse. Thirty-second intervals with stirring in between is the only way I do this. If after two intervals it looks almost melted, just stir — the residual heat usually finishes the job without another round in the microwave.
- Use a cookie scoop for even clusters: You don't need anything fancy — a medium cookie scoop from Walmart or Target for around $8 gives you consistently sized clusters that set more evenly. If you're using two spoons, aim for about 2 tablespoons of mixture per cluster. Smaller clusters set faster, which kids find very exciting.
- Let the chocolate cool slightly before adding marshmallows: If the melted chocolate is too hot when you stir in the marshmallows, they'll start to melt and you'll lose that soft, chewy texture. I usually let the bowl sit for about 60 seconds after the chocolate is melted before adding the dry ingredients. Not a long wait, but it makes a difference.
- Double the batch: Seriously. A single batch makes roughly 20 to 24 clusters depending on how big you scoop them, and in my house that lasts about a day. I always make a double batch and store half in the fridge for later in the week. The extra effort is maybe five more minutes of stirring.
Variations
- White chocolate version: Swap the semi-sweet or milk chocolate chips for white chocolate chips. White chocolate is sweeter and a little more delicate when melting, so use shorter 20-second microwave intervals and stir frequently. The visual result is really nice if you're adding colorful sprinkles or M&Ms — everything shows up against the white base. Zainab prefers this version by a wide margin.
- Skip the peanut butter (nut-free version): If you're making these for school or a party where allergies are a concern, just leave out the peanut butter and increase the butter or coconut oil to ⅓ cup. The clusters will be slightly thinner in consistency before setting but still hold together fine once chilled. Sunflower seed butter also works as a direct swap if you want that nutty flavor without the actual nuts.
- Coconut chocolate clusters: Add ½ cup of toasted shredded coconut to the mix along with the cereal. It adds a slightly chewy texture and a flavor that works really well with dark chocolate in particular. This is actually my husband's favorite version — he says it reminds him of a Bounty bar, which is apparently his benchmark for all things good.
- Swap the cereal: Rice Krispies are the classic, but Corn Flakes give a slightly different crunch and Chex (any variety) adds more texture. I've also used Cocoa Puffs when I wanted a double-chocolate version, which was exactly as intense as it sounds. If you have a box of cereal that's going stale, this is a good way to use it up before it goes completely flat.
- Cookie cutter shapes: If you want to make these for a holiday or party, press the warm mixture into a parchment-lined pan in an even layer about ¾ inch thick, then refrigerate until set and use cookie cutters to cut out shapes. It's a little more effort than free-form clusters but looks really impressive on a dessert table. I've done this for Eid gatherings with star-shaped cutters — worked beautifully.
Serving and Storage
Serving
These are good straight from the fridge or at room temperature. On warm days, I keep them refrigerated until right before serving because the chocolate softens in heat. They work well as a party snack, a school treat, or packaged in small cellophane bags tied with a ribbon if you're doing party favors. Arrange them on a plate with a few extra sprinkles on top if you want them to look a little more presentable — takes thirty seconds and makes them look like you put in more effort than you did. If you're planning a full snack spread, an American flag veggie tray alongside these makes for a nice mix of sweet and fresh.
Storage
Store in an airtight container — either at room temperature for up to 5 days, or in the refrigerator for up to a week. I prefer the fridge because the texture stays firmer and they don't get that slightly waxy bloom that chocolate sometimes develops at room temperature. Layer them between sheets of parchment or wax paper if stacking so they don't stick together. I don't recommend freezing these — the marshmallows get a bit strange in texture once thawed, and the cereal loses its crunch.
Frequently Asked Questions
My chocolate seized up and turned thick and grainy — what happened?
This usually happens when even a tiny drop of water gets into the melted chocolate, or when it overheats. Make sure your bowl is completely dry before adding the chocolate chips, and stick to those 30-second microwave intervals. If it seizes, you can sometimes rescue it by stirring in a teaspoon of coconut oil or butter and gently reheating in 10-second bursts, but if it's burned, there's no saving it — start fresh.
Can I make these ahead of time?
Yes, and I actually recommend it. Make them the night before and refrigerate overnight — the chocolate sets fully and the texture is better the next day. They keep well in the fridge for up to a week, so making a batch on Sunday for school snacks throughout the week is very doable.
Can I use almond butter or sunflower butter instead of peanut butter?
Both work well. Almond butter is a little milder in flavor so it lets the chocolate come through more. Sunflower seed butter is the best swap if you need a completely nut-free version — it melts and behaves almost identically to peanut butter in this recipe. Just note that sunflower butter can sometimes turn the chocolate mixture a slightly greenish color when mixed, which is a natural chemical reaction and safe to eat, just a bit alarming if you're not expecting it.
How do I know when the clusters are fully set?
They should be firm to the touch and not leave any chocolate residue on your finger when you lightly press one. Thirty minutes in the fridge is usually enough, but if your kitchen runs warm or you made particularly large clusters, give them a full hour. If you're in a hurry, 15 to 20 minutes in the freezer speeds things up considerably.
Can I use chocolate melting wafers instead of chocolate chips?
Yes, and they're actually easier to work with. Melting wafers (like Wilton's or any brand from Walmart or Michaels) are designed to melt smoothly without needing butter or oil. If you use them, you can skip the butter or coconut oil in this recipe and just melt the wafers with the peanut butter. The result is a slightly shinier cluster that sets very cleanly.

KID-FRIENDLY NO-BAKE CLUSTERS
Ingredients
- 1 cup chocolate chips (milk chocolate, semi-sweet, or dark chocolate)
- ½ cup peanut butter (creamy or crunchy)
- ¼ cup butter or coconut oil
- 4 cups Rice Krispies cereal (or other similar cereal)
- 1 cup mini marshmallows
Optional Mix-ins (get creative!):
- Sprinkles
- Chopped nuts (if no allergies are present)
- Dried fruit (cranberries, raisins)
- M&Ms or other small candies
- Shredded coconut
Instructions
- Melt chocolate mixture: In a large microwave-safe bowl, combine the chocolate chips, peanut butter, and butter (or coconut oil). Microwave in 30-second intervals, stirring after each interval, until melted and smooth.
- Combine dry ingredients: In a separate large bowl, combine the Rice Krispies cereal and mini marshmallows.
- Combine wet and dry: Pour the melted chocolate mixture over the cereal and marshmallow mixture. Gently stir until everything is evenly coated.
- Add mix-ins (optional): If using any optional mix-ins, stir them into the mixture now.
- Form clusters: Drop spoonfuls of the mixture onto baking sheets lined with parchment paper or wax paper. You can use a spoon, cookie scoop, or even your hands (lightly greased) to form the clusters.
- Chill: Refrigerate the clusters for at least 30 minutes, or until the chocolate has set.
- Serve: Serve chilled.
Notes
- Melting Chocolate: Be careful not to overheat the chocolate, as it can burn. Microwave in short intervals and stir frequently.
- Cereal: You can use other types of cereal, such as corn flakes or Chex cereal, instead of Rice Krispies.
- Mix-ins: This is where you can get creative and let the kids choose their favorite mix-ins!
- Storage: Store the clusters in an airtight container at room temperature or in the refrigerator. They will keep for several days.
These clusters have become one of those recipes I keep coming back to because they require almost nothing from me and deliver a lot of happiness. On afternoons when I need to keep the kids occupied and I don't have the energy for a real baking project, this is what we do. I melt the chocolate, I hand over the spoon, and I let them take it from there. That's a rare thing in my kitchen — a recipe that's genuinely hands-off for the parent after the first two minutes.
The peanut butter version is our standard now, but I've made the white chocolate variation for parties and it photographs beautifully if you care about that kind of thing. I brought a batch to a school function last year and someone asked me for the recipe assuming I'd spent hours on them. I did not correct that assumption immediately. If you're in the mood for another no-bake treat that works well for gatherings, my no-bake gingerbread spice cheesecake cups are worth bookmarking for the holiday season.
If you make these, the mix-in combinations are worth experimenting with across a few batches. Dried cranberries with dark chocolate is underrated. Toasted coconut with milk chocolate is what my husband requests. And if you hand a bowl of sprinkles to a six-year-old with no limits, you'll get something that looks wild and tastes exactly like childhood. That's the whole point. 🍫✨
If you liked this, here are a few more recipes from the site you might enjoy:
- No-Bake Gingerbread Spice Cheesecake Cups — another no-bake treat that's great for making ahead
- American Flag Veggie Tray — a fun, hands






Comments
No Comments