
I've made this cake twice now for Valentine's Day, and the second time was significantly better than the first — which tells you something. The first time I forgot to let the layers cool completely before frosting, and the whole thing started sliding around on the plate like it was trying to escape. Not ideal when you're trying to do something romantic. The second year I got it right, and my husband actually asked me where I'd ordered it from. I'll take that.
What makes this chocolate cake work is the hot coffee in the batter. I know it sounds strange if you haven't done it before — you're essentially pouring hot liquid into cake batter and watching it go very thin and wondering if you've ruined everything. You haven't. The coffee deepens the chocolate flavor without making the cake taste like coffee at all. It just tastes more chocolate than chocolate, if that makes sense. The cocoa does the same thing my chewy maple cinnamon cookies with white chocolate do — relies on quality ingredients doing quiet but important work.
I make this for Valentine's Day, but honestly I've also made it for birthdays and once just because it was a Sunday and I felt like baking. The chocolate buttercream is rich enough that a small slice goes a long way — which is good because Zainab will eat more than her fair share if I'm not watching. My husband prefers the cream cheese frosting version, which I've also included below, so we sometimes do half and half on the frosting depending on whose day we're celebrating.
One thing to know going in: this batter is thin. I mean really thin. The first time I made it I was convinced I'd measured wrong. I hadn't — that's just how it is, and it's what gives you that soft, moist crumb at the end. Don't add more flour to fix it. Just trust the process and let the oven do its job.
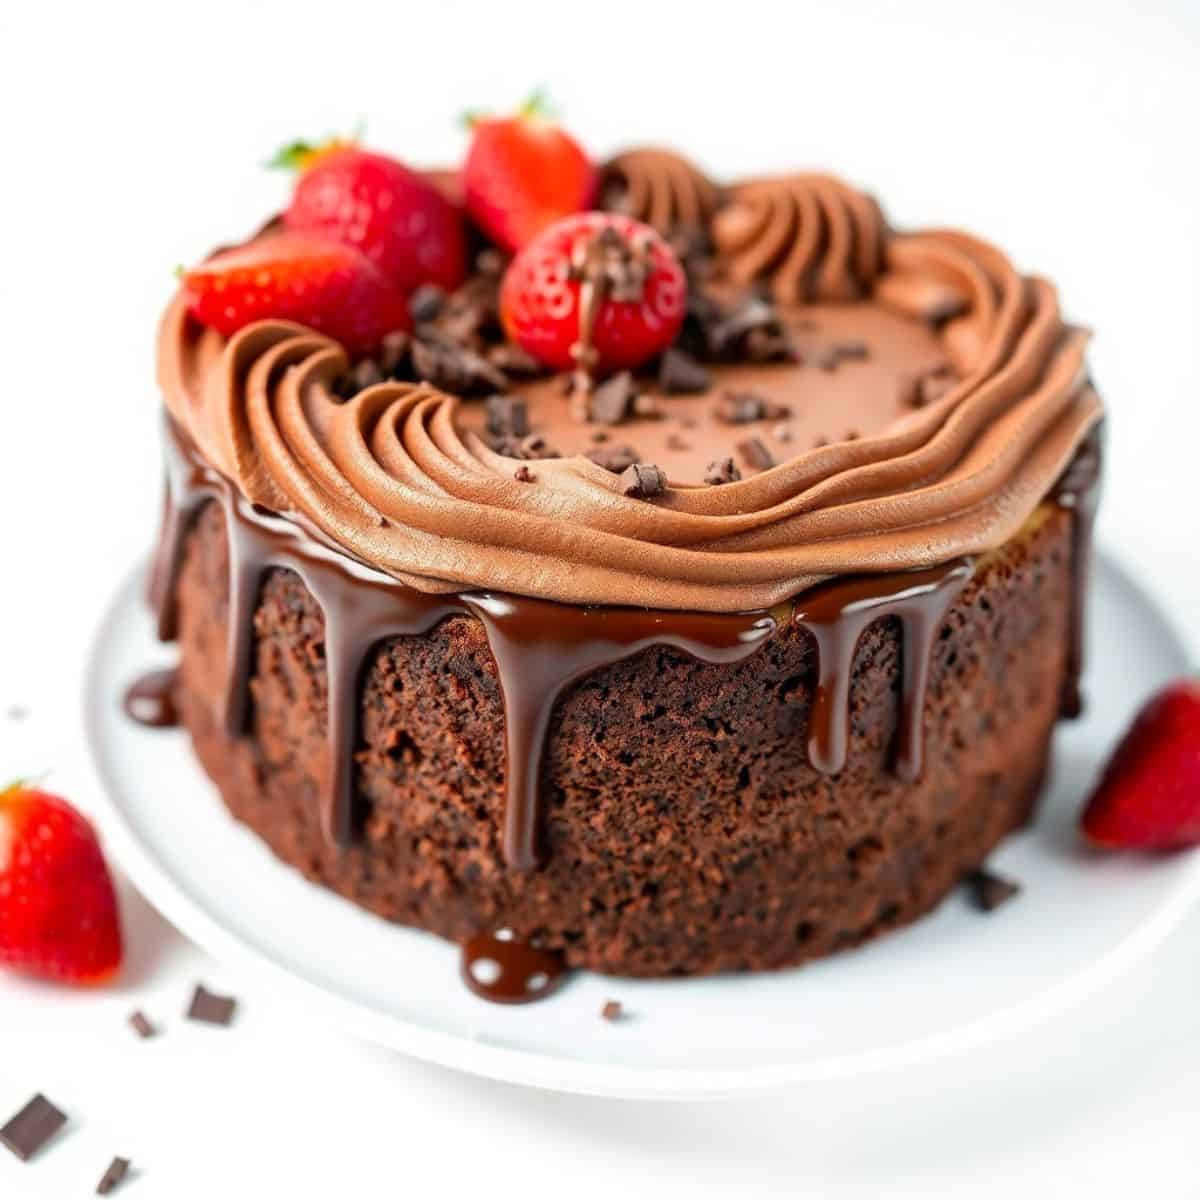
Why You'll Love This Recipe
- The coffee trick actually works: I was skeptical the first time I saw hot coffee listed as a cake ingredient, but it genuinely makes a difference. It doesn't taste like coffee when it's baked — it just makes the chocolate flavor go deeper and darker. If you don't drink coffee, you can use hot water instead and it still works well, just slightly less intense.
- Three frosting options so you can actually pick one you like: The chocolate buttercream is what I go to first, but the cream cheese version is genuinely amazing with this cake — tangy against all that dark chocolate. I've included a strawberry option too, which is lovely for Valentine's Day if you want something a little lighter and more fruity on top.
- No stand mixer required: I don't own a stand mixer. I make the frosting with a hand mixer — a cheap one from Walmart — and it comes out smooth every time. If you don't even have a hand mixer, you can beat butter by hand with a wooden spoon; it takes more effort but it works. The key is that the butter has to be genuinely soft before you start.
- It looks impressive without being technically difficult: Layer cakes look complicated but the actual skill level here is beginner-friendly. Even if your layers aren't perfectly even and your frosting has drag marks in it, a handful of fresh raspberries on top covers a multitude of sins. I say this from experience.
- You can make it ahead: The cake layers can be baked the day before, wrapped tightly, and left at room temperature overnight. I actually prefer doing it this way — the layers firm up slightly and are easier to frost without crumbling. I make the frosting the same day I assemble, but that's personal preference.
Ingredients
- For the Cake:
- 2 cups all-purpose flour
- 2 cups granulated sugar
- ¾ cup unsweetened cocoa powder (Dutch-processed if you can find it — Hershey's Special Dark works well)
- 1½ teaspoons baking powder
- 1½ teaspoons baking soda
- 1 teaspoon salt
- 1 cup buttermilk (see tips if you don't have it)
- ½ cup vegetable oil
- 2 large eggs
- 2 teaspoons vanilla extract
- 1 cup freshly brewed hot coffee (or hot water in a pinch)
- For the Chocolate Buttercream Frosting:
- 1 cup (2 sticks) unsalted butter, softened to room temperature
- 3 cups powdered sugar
- ¾ cup unsweetened cocoa powder
- ¼ cup milk or heavy cream
- 1 teaspoon vanilla extract
- Pinch of salt
- For the Cream Cheese Frosting (alternative):
- 8 ounces cream cheese, softened
- ½ cup (1 stick) unsalted butter, softened
- 3 cups powdered sugar
- 1 teaspoon vanilla extract
- For Decoration (optional):
- Fresh strawberries or raspberries
- Chocolate shavings
- Heart-shaped sprinkles
- Edible glitter
- Melted chocolate for drizzling
Directions
- Prepare the pans: Preheat your oven to 350°F (175°C). Grease and flour two 9-inch round cake pans, then line the bottoms with parchment paper. The parchment is worth the extra step — I've had layers stick without it and had to patch the cake back together before frosting, which is not fun.
- Mix the dry ingredients: In a large bowl, whisk together the flour, sugar, cocoa powder, baking powder, baking soda, and salt. Make sure everything is evenly combined — lumps of baking soda in the final cake are not pleasant.
- Mix the wet ingredients: In a separate bowl, whisk together the buttermilk, vegetable oil, eggs, and vanilla extract until smooth.
- Combine wet and dry: Gradually pour the wet ingredients into the dry, mixing on low speed (or stirring by hand) until just combined. Stop as soon as you don't see dry flour streaks — overmixing activates the gluten and makes the cake dense instead of tender.
- Add the coffee: Pour in the hot coffee and stir until the batter is smooth. It will look very thin at this point — that's correct. Don't add more flour.
- Bake: Divide the batter evenly between the two prepared pans. Bake for 30–35 minutes, until a toothpick inserted in the center comes out clean. Resist the urge to open the oven door before 28 minutes — I've collapsed a cake layer doing that and it is not worth it.
- Cool in the pans: Let the cakes sit in their pans for 10 minutes before turning them out onto a wire rack. They need that time to firm up slightly or they'll break when you flip them.
- Cool completely: Let the layers cool on the rack until they're fully at room temperature — at least 1 hour, ideally 2. This is not optional. Frosting a warm cake ends in disaster.
- Make the frosting: For the chocolate buttercream, beat the softened butter until it's smooth and pale — about 2 minutes with a hand mixer. Add the powdered sugar and cocoa powder gradually, alternating with the milk or cream, mixing on low until it comes together. Add vanilla and a pinch of salt, then beat on medium until it's light and fluffy. For the cream cheese frosting, beat the cream cheese and butter together first until smooth, then add the powdered sugar gradually and finish with vanilla.
- Assemble: Place the first cake layer on your plate or stand. Spread a generous layer of frosting over the top — I use about one-third of the frosting here. Place the second layer on top, then frost the sides and top with the remaining frosting. Decorate with whatever you like.
Tips for Success
- Don't skip the coffee: I know it's tempting if you've already brewed a cup and don't want to make more, but the coffee is doing real work here — it intensifies the cocoa flavor in a way that hot water doesn't quite replicate. If you truly don't have coffee, hot water is fine, but the flavor won't be quite as deep. I've done both and I always prefer the coffee version.
- Your butter needs to be actually soft: Not melted, not cold from the fridge — genuinely soft, where you can press your finger in easily. I leave mine on the counter for about an hour before I start. Cold butter makes lumpy frosting that no amount of beating will fix. I learned this the hard way making my very first buttercream, which came out looking like cottage cheese.
- No buttermilk? Make a substitute: Measure 1 cup of regular whole milk into a liquid measuring cup, add 1 tablespoon of white vinegar or lemon juice, stir, and let it sit for 5 minutes. It curdles slightly and that's exactly what you want — it behaves just like buttermilk in the batter. I do this probably half the time because I don't always have buttermilk on hand.
- Don't overbake: This cake is meant to be moist. Start checking at 30 minutes — insert a toothpick in the center and if it comes out with just a few moist crumbs (not wet batter), pull it out. Every extra minute in the oven after it's done is a minute of moisture leaving the cake.
- Do a crumb coat if your frosting is pulling up crumbs: Spread a very thin layer of frosting over the whole cake first, then refrigerate for 15 minutes. This seals the crumbs in and gives you a clean surface for the final coat. I didn't know this trick for the first two years I was making layer cakes and I always had crumb-streaked frosting. Game changer once I figured it out.
Variations
- Raspberry filling between the layers: Spread a thin layer of raspberry jam over the bottom cake layer before adding the frosting. The tartness cuts through the richness of the chocolate in a really nice way. Fresh raspberries work too — just press them gently into the frosting layer before stacking. This is my favorite version for Valentine's Day specifically.
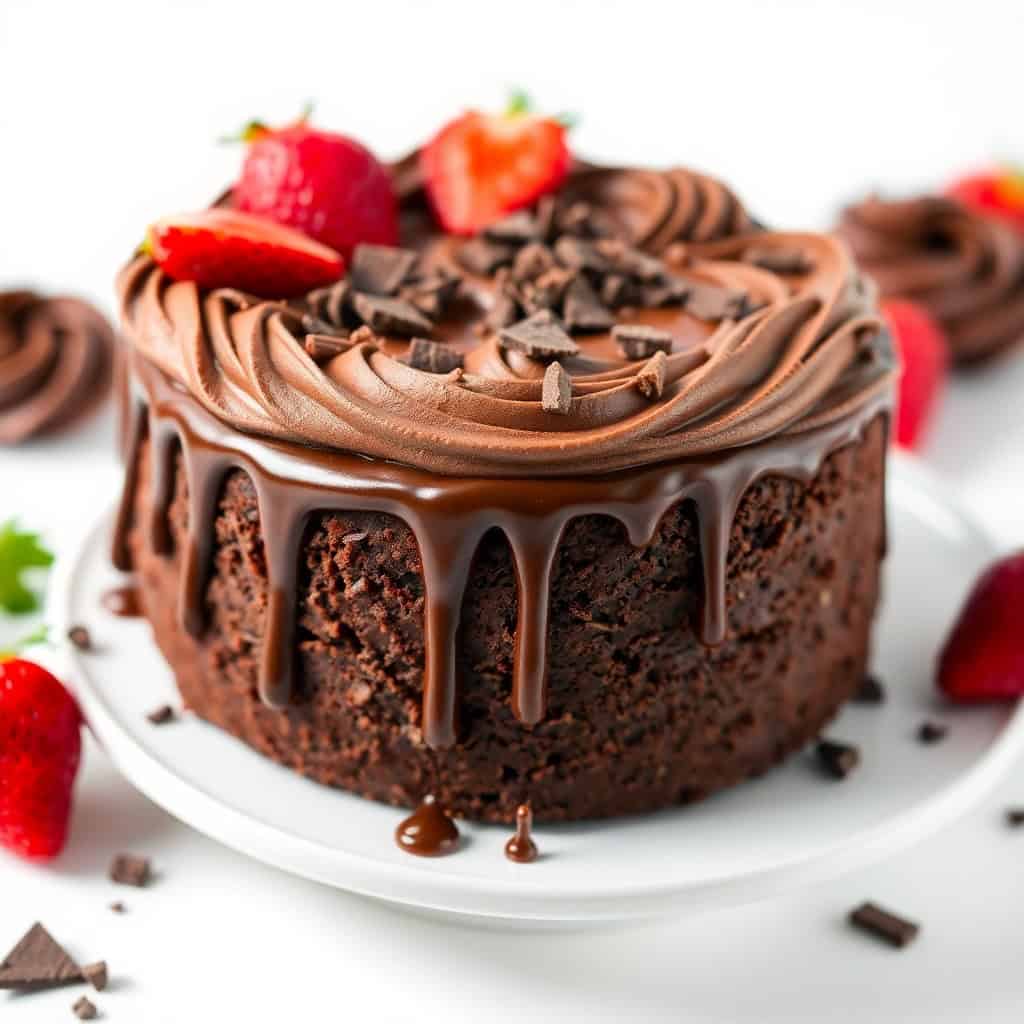
- Chocolate ganache drizzle on top: Heat ½ cup of heavy cream until just simmering, pour it over ½ cup of chopped dark chocolate, let it sit for 2 minutes, then stir smooth. Let it cool for 10 minutes before drizzling over the frosted cake from a spoon. The ganache sets slightly on the cold frosting and gives you those beautiful drips down the sides. It looks very fancy for about 10 minutes of extra work.
- Strawberry frosting version: Take the cream cheese frosting base and blend in 3 tablespoons of good strawberry jam (or 2 tablespoons of strawberry puree that you've cooked down slightly to remove extra water). Adjust the powdered sugar to get the right consistency. It comes out a soft pink, which is genuinely beautiful on a dark chocolate cake for Valentine's Day. Zainab specifically requests this version.
- Espresso buttercream: Add 1½ teaspoons of instant espresso powder to the chocolate buttercream. It deepens the chocolate flavor even further and makes the frosting taste almost mocha-like. This is the version I make when it's just my husband and me — he loves anything coffee-flavored. If you like my chewy maple cinnamon cookies, you'll understand the appeal of pairing unexpected flavors.
- Mini individual cakes: Bake the batter in a cupcake tin (lined with paper cups) at 350°F for 18–20 minutes for single-serving portions. This is a good option if you're serving a small group and don't want to deal with slicing a layer cake at the table. I make a double batch for gatherings because a single recipe of cupcakes disappears fast.
Serving and Storage
Serving
Serve this cake at room temperature — cold cake straight from the fridge has a denser, slightly waxy texture and the frosting loses its creaminess. If you've refrigerated it, pull it out at least 45 minutes before you plan to serve it. I usually slice it with a sharp knife that I run under hot water and wipe dry between cuts — it gives you cleaner slices without dragging the frosting. Fresh berries on the side are a nice touch and balance out the richness. If you're doing a romantic dinner, a scoop of vanilla ice cream alongside a warm slice is not a bad idea at all — for the same reason I love pairing a rich main with something simple, the way I do with my chicken piccata and plain pasta.
Storage
At room temperature, the frosted cake keeps well for up to 3 days in an airtight container or under a cake dome. If your kitchen runs warm, keep it in the refrigerator — store it in an airtight container and it'll keep for up to a week. The unfrosted cake layers freeze really well: wrap each layer tightly in plastic wrap, then in foil, and freeze for up to 3 months. Thaw overnight on the counter still wrapped, then frost as normal. I've done this for birthday cakes when I wanted to get the baking done a week ahead — works perfectly.
Frequently Asked Questions
Can I make the cake layers ahead of time?
Yes, and I actually recommend it. Bake the layers, cool them completely, then wrap each one tightly in plastic wrap and leave them at room temperature overnight — or freeze them for up to 3 months. Thaw frozen layers completely before frosting. I almost always bake the day before and assemble the morning of; it makes the whole thing feel much less stressful.
Can I make the frosting ahead of time?
Yes. Store it in an airtight container in the refrigerator for up to a week. When you're ready to use it, let it sit on the counter for about 30 minutes to soften, then beat it again briefly with a hand mixer until it's smooth and spreadable. Cold frosting goes on stiff and tears the cake — give it time to come back to room temperature first.
Can I use a different pan size?
You can. If you use 8-inch pans the layers will be slightly thicker and may need an extra 5 minutes of bake time. If you use a 9x13 inch pan, bake for about 35–40 minutes and check with a toothpick. Just keep in mind that thicker layers take longer and thinner layers go faster — start checking early and use the toothpick test rather than the clock.
My frosting looks greasy or separated — what happened?
This usually means the butter was too warm — almost melted rather than just softened. If it happens, try refrigerating the frosting for 10–15 minutes, then beating it again. Sometimes that's enough to bring it back together. If it's very far gone, you can add a tablespoon of powdered sugar at a time and keep beating until the texture improves. I've rescued frosting this way more than once.
Can I skip the coffee in the batter?
You can substitute hot water 1:1 for the coffee if you don't have it or prefer not to use it. The cake will still be moist and chocolatey — just slightly less intense in flavor. The coffee doesn't make the cake taste like coffee, so if that's your concern, don't worry about it. I've made it both ways and the coffee version is noticeably richer, but the hot water version is still very good.
VALENTINE’S DAY CHOCOLATE CAKE
Ingredients
Cake
- 2 cups all-purpose flour
- 2 cups granulated sugar
- ¾ cup unsweetened cocoa powder (high-quality)
- 1 ½ teaspoons baking powder
- 1 ½ teaspoons baking soda
- 1 teaspoon salt
- 1 cup buttermilk
- ½ cup vegetable oil
- 2 large eggs
- 2 teaspoons vanilla extract
- 1 cup freshly brewed hot coffee
Frosting (options below)
Chocolate Buttercream Frosting
- 1 cup (2 sticks) unsalted butter, softened
- 3 cups powdered sugar
- ¾ cup unsweetened cocoa powder
- ¼ cup milk or cream
- 1 teaspoon vanilla extract
Cream Cheese Frosting
- 8 ounces cream cheese, softened
- ½ cup (1 stick) unsalted butter, softened
- 3 cups powdered sugar
- 1 teaspoon vanilla extract
- Strawberry Frosting: (see notes for ingredients)
Garnish (optional)
- Fresh strawberries, raspberries, or other berries
- Chocolate shavings
- Sprinkles
- Edible glitter
Instructions
- Prepare the pans: Preheat oven to 350°F (175°C). Grease and flour two 9-inch round cake pans. You can also line the bottoms with parchment paper for easy removal.
- Combine dry ingredients: In a large bowl, whisk together the flour, sugar, cocoa powder, baking powder, baking soda, and salt.
- Combine wet ingredients: In a separate bowl, whisk together the buttermilk, vegetable oil, eggs, and vanilla extract.
- Combine wet and dry ingredients: Gradually add the wet ingredients to the dry ingredients, mixing on low speed until just combined. Do not overmix.
- Add coffee: Carefully pour in the hot coffee and mix until the batter is smooth. The batter will be thin.
- Bake: Divide the batter evenly between the prepared cake pans. Bake for 30-35 minutes, or until a toothpick inserted into the center comes out clean.
- Cool: Let the cakes cool in the pans for 10 minutes before inverting them onto a wire rack to cool completely.
Make the frosting: While the cakes are cooling, prepare your chosen frosting.
- Chocolate Buttercream: Cream the butter until smooth. Gradually add the powdered sugar and cocoa powder, alternating with the milk or cream, mixing on low speed until combined. Stir in the vanilla extract. Beat on medium speed until light and fluffy.
- Cream Cheese Frosting: Beat the cream cheese and butter until smooth. Gradually add the powdered sugar, mixing on low speed until combined. Stir in the vanilla extract. Beat on medium speed until light and fluffy.
- Strawberry Frosting: (For strawberry frosting, you can adapt a buttercream or cream cheese recipe by adding strawberry puree or jam. Adjust the liquid and sugar as needed for the desired consistency and sweetness.)
- Frost the cake: Once the cakes are completely cooled, frost the first layer with your chosen frosting. Place the second layer on top and frost the entire cake.
- Garnish: Decorate the cake with fresh berries, chocolate shavings, sprinkles, edible glitter, or other toppings of your choice.
Notes
- Cocoa Powder: Using high-quality cocoa powder will enhance the chocolate flavor of the cake.
- Coffee: The hot coffee enhances the chocolate flavor. Don't skip it!
- Frosting: Feel free to use your favorite frosting recipe. You can also add different flavors to the frosting, such as espresso powder or a liqueur. Consider a white chocolate ganache or a raspberry glaze.
- Decorations: Get creative with your decorations! Use stencils to create patterns on the frosting, pipe decorative borders, or arrange berries in a heart shape.
- Make-Ahead: The cake layers can be baked ahead of time and stored in an airtight container at room temperature for up to 3 days, or frozen for up to 3 months. The frosting can also be made ahead of time and stored in the refrigerator for up to 3 days. Let it come to room temperature and re-whip before using.





Comments
No Comments