
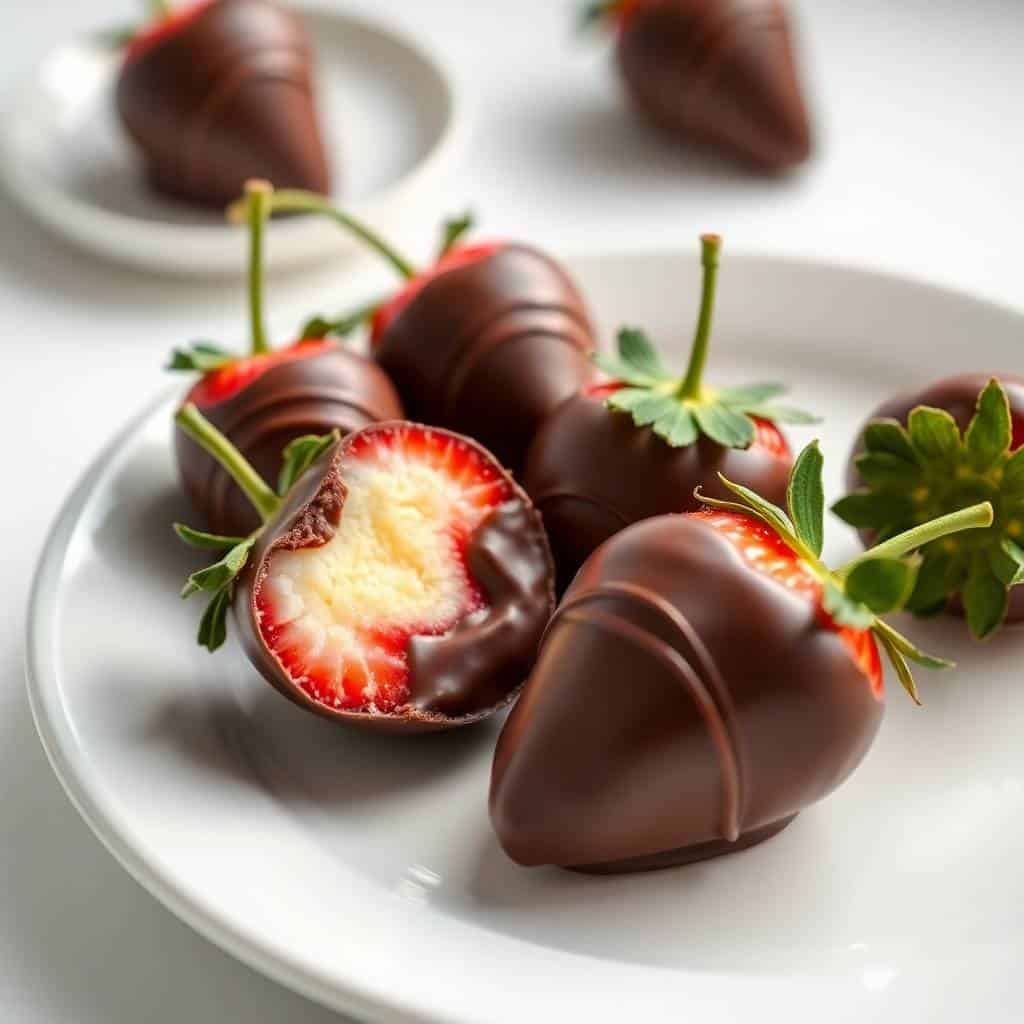
I first made Chocolate Covered Cheesecake Strawberries for a Valentine's Day dessert platter when I wanted something that looked like it came from a chocolatier but required zero oven time. The result stopped everyone mid-bite — a firm, ripe strawberry hollowed and piped full of silky, tangy cream cheese filling, then dipped in a glossy chocolate shell that snaps cleanly when you bite through it. Three elements — fresh fruit, cheesecake, chocolate — in one perfect two-bite treat. They looked like a specialty dessert and took me about 25 minutes to make.
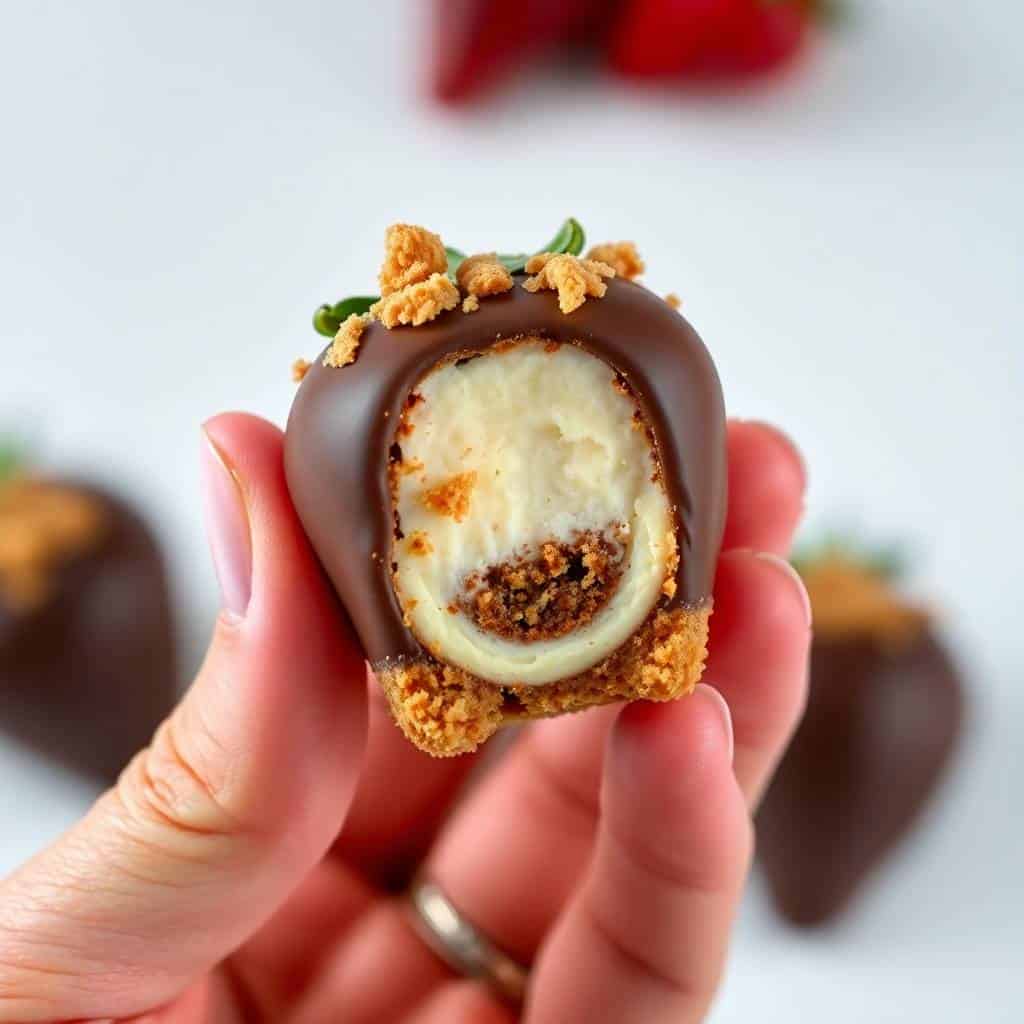
The cheesecake filling is what makes these completely different from a standard chocolate-dipped strawberry. It is simply cream cheese beaten smooth with powdered sugar and vanilla — the same base as a classic no-bake cheesecake — but it pipes into the berry and holds its shape beautifully through the chocolate dipping process. The cold, tangy filling against the sweet strawberry and bitter chocolate is one of the best flavor combinations I have found in any dessert. Once you try it you will understand why this recipe has become my most-requested party treat.
I make these for Mother's Day, bridal showers, birthday celebrations, and dinner parties. They also double as a homemade edible gift — pack them in a small box lined with parchment and they look like they came from a specialty shop. Every single time I serve them, people ask how long they took to make. The answer is always less than 30 minutes.
No oven, no special equipment, no baking experience required. Let me walk you through every step.
WHY YOU WILL LOVE THIS RECIPE
- Three Desserts in One Bite: Each strawberry delivers the freshness of fruit, the richness of cheesecake, and the satisfaction of chocolate in a single two-bite treat. It is the kind of dessert that stops conversation at the table because people cannot immediately figure out what they are eating — they just know it is something special. That layering of flavors and textures is what separates these from any other chocolate-covered fruit.
- Completely No-Bake: The entire recipe comes together without turning on the oven. You beat the filling, pipe it into the berries, melt the chocolate, dip, and chill. The most technical step is melting chocolate in the microwave. This makes them genuinely accessible for anyone and ideal for warm weather when you do not want to heat the kitchen.
- Make-Ahead Friendly for Stress-Free Entertaining: These can be assembled up to 12 hours ahead and kept refrigerated on a parchment-lined tray. The chocolate sets fully, the filling stays firm and cold, and the strawberries hold their shape perfectly. I always make these the afternoon before a dinner party and they are in perfect condition at serving time — no last-minute rush.
- Stunning Presentation for Minimal Effort: A platter of chocolate-dipped cheesecake strawberries looks like something from a patisserie — polished, elegant, and clearly intentional. A dusting of graham cracker crumbs or a drizzle of white chocolate adds even more visual impact in about 30 additional seconds. Very few desserts deliver this level of presentation for this little effort.
- Endlessly Customizable: The cream cheese filling accepts additions easily — lemon zest for a citrus version, cocoa powder for a chocolate cheesecake center, a splash of Baileys for an adult party variation. The chocolate coating can be semi-sweet, dark, milk, or white depending on the occasion. These adapt to any crowd and any season.
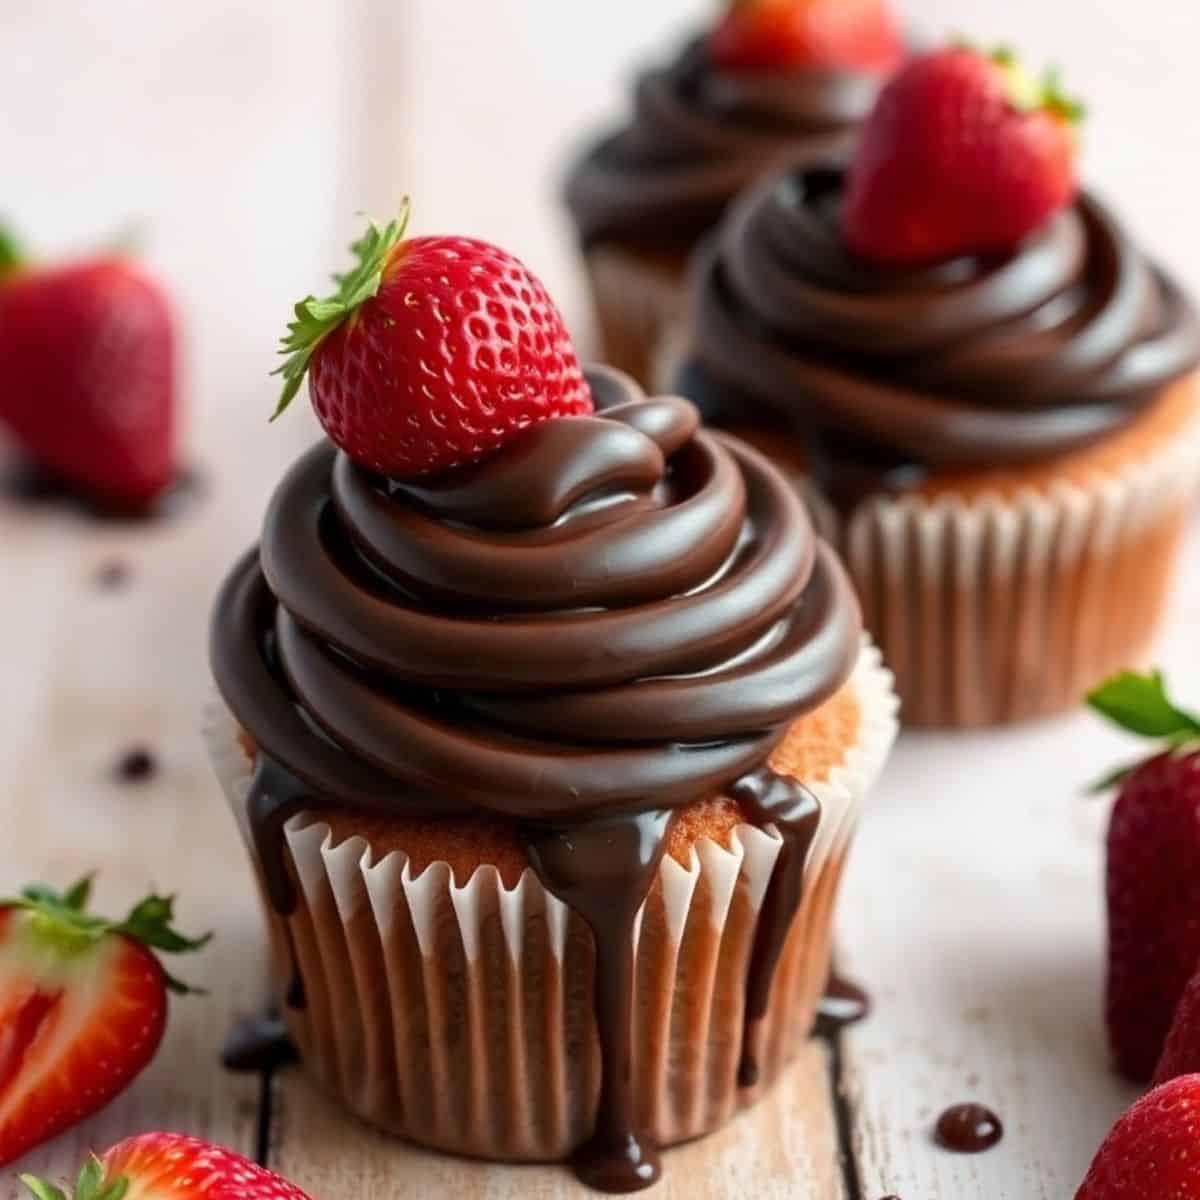
- Works Beautifully as an Edible Gift: Arranged in a small gift box lined with parchment, these make one of the most impressive homemade edible gifts you can give. I have brought them as Valentine's Day gifts, bridal shower favors, and birthday treats — every recipient assumes they came from a specialty chocolate shop. For more strawberry dessert ideas to gift or serve, see my Chocolate Covered Strawberry Cupcakes.
INGREDIENTS
For the Strawberries:
- 20 large fresh strawberries (choose ripe but firm — overripe berries are too soft to hollow cleanly and will collapse when dipped)
- 8 oz cream cheese, fully softened to room temperature (cold cream cheese will be lumpy and won't pipe smoothly — take it out 1 hour before starting)
- ¼ cup powdered sugar
- ½ teaspoon vanilla extract
For the Chocolate Coating:
- 1 cup semi-sweet chocolate chips (quality matters — better chocolate melts smoother and sets with a glossier finish)
- 1 tablespoon coconut oil or butter (thins the chocolate for smoother dipping and a glossier set)
Optional Toppings:
- Crushed graham crackers
- White chocolate drizzle
- Crushed pistachios or almonds
DIRECTIONS
- Step No.1: Wash and Dry the Strawberries. Rinse the strawberries under cold water, then lay them on a clean kitchen towel and pat completely dry. This is the most critical prep step — any moisture on the berry surface will prevent the chocolate from adhering properly and cause it to seize or slide off. Dry thoroughly and allow an additional 10-minute air dry before proceeding.
- Step No.2: Hollow the Strawberries. Using a small sharp paring knife or melon baller, carefully hollow out the center of each strawberry from the top to create a cavity for the filling. Remove the white core but leave enough wall intact so the berry holds its shape. A teaspoon of filling per berry is the right amount — do not hollow so deeply that the walls become fragile.
- Step No.3: Make the Cheesecake Filling. In a mixing bowl, beat the fully softened cream cheese with an electric mixer until completely smooth with no lumps — about 1 to 2 minutes. Add the powdered sugar and vanilla extract and continue beating until light and fluffy. Taste and adjust sweetness. Transfer to a piping bag or a zip-top bag with a small corner snipped off.
- Step No.4: Fill the Strawberries. Pipe the cheesecake filling into each hollowed strawberry until the filling domes slightly above the opening — a small dome is ideal and looks intentional once the chocolate sets. If the filling spreads too wide, smooth gently with a small spatula before dipping.
- Step No.5: Melt the Chocolate. Combine the chocolate chips and coconut oil in a microwave-safe bowl. Microwave in 20-second increments, stirring thoroughly between each, until fully melted and smooth. Never microwave more than 20 seconds at a time — chocolate burns quickly and seized chocolate cannot be recovered. The finished chocolate should be glossy and fluid.
- Step No.6: Dip and Set. Hold each filled strawberry by the base and dip the filled end and a portion of the berry into the melted chocolate. Let the excess drip off for 3 to 5 seconds, then place on a parchment-lined tray. Immediately sprinkle with any optional toppings before the chocolate sets. Refrigerate for 20 to 30 minutes until the chocolate is fully firm, then serve.
TIPS FOR SUCCESS
- Choose Firm, Ripe Berries: The berry is the structural backbone — ripe enough to taste good, firm enough to hollow cleanly, hold the filling, and survive dipping without collapsing. Avoid very large hollow-centered berries (not enough wall) and very small berries (not enough room for filling). Medium-large, uniformly shaped berries with no soft spots are ideal.
- Dry Everything Completely: Even a small amount of water on the berry surface — or steam from a warm filling — causes the chocolate to seize or peel away. Wash the berries early, dry thoroughly, and air dry on a towel for at least 10 minutes before starting. The filling should also be at room temperature, not warm, when dipping.
- Fully Soften the Cream Cheese: Cold cream cheese will not beat smooth — it produces a grainy, lumpy filling regardless of how long you work it. Take it out of the fridge at least 1 hour before starting, or soften in the microwave in 10-second increments until soft to the touch but not melted. Fully softened cream cheese beats to a silky, airy consistency in under 2 minutes.
- Use Quality Chocolate for the Best Finish: Chips with stabilizers melt adequately but produce a duller, streakier finish than good-quality bar chocolate. If you want a polished, professional-looking result, use a quality semi-sweet or dark chocolate bar chopped into pieces in place of chips. The coating will be glossier, smoother, and will set with a satisfying snap.
- Do Not Overfill: Too much filling overflows when the berry is dipped, creating a messy, uneven coat and preventing the chocolate from adhering cleanly to the filling surface. A small dome — filling slightly above the rim of the berry — is the right amount. It looks deliberate and holds together through the dipping process perfectly.
- Work Quickly Once the Chocolate Is Melted: Melted chocolate thickens as it cools and thick chocolate does not coat evenly. Have your filled strawberries lined up, toppings ready, and parchment tray in position before melting. The entire dipping process takes about 5 minutes — preparation before melting makes everything run smoothly.
VARIATIONS
- White Chocolate Coating: Swap the semi-sweet chocolate for white chocolate melting wafers. White chocolate is sweeter and creates a beautiful visual contrast with the red berry — particularly striking on a Valentine's Day or bridal shower platter. The sweetness pairs especially well with the tangy cream cheese filling.
- Lemon Cheesecake Filling: Add 1 teaspoon of freshly grated lemon zest and a small squeeze of lemon juice to the cream cheese filling. The citrus lifts the flavor considerably and creates a bright, fresh version that is particularly good in spring and summer. Pair with white chocolate coating for the best flavor balance.
- Graham Cracker Crust Finish: Press crushed graham crackers onto the chocolate while still wet to mimic a cheesecake crust on the outside of each berry. This adds a pleasant crunch and a buttery, toasted flavor that reinforces the cheesecake theme all the way through — not just in the filling.
- Nutty Crunch: Roll the dipped strawberries in finely chopped pistachios, toasted almonds, or crushed pecans before the chocolate sets. Nuts add texture and a savory element that balances the sweetness beautifully. Pistachios produce the most visually striking result — the green against dark chocolate and red berry is genuinely eye-catching on any platter.
- Boozy Adult Version: Stir 1 tablespoon of Baileys Irish Cream, Amaretto, or Chambord into the cream cheese filling. The alcohol does not prevent the filling from setting and it adds a complex, sophisticated flavor that makes these feel like a proper cocktail-party treat. Reduce the powdered sugar slightly if using a sweet liqueur.
SERVING AND STORAGE
Serving
Serve chilled on a dessert platter lined with parchment or arranged in small paper cups for individual presentation. These look particularly beautiful on a tiered stand and pair perfectly alongside my Chocolate Covered Strawberry Layer Cake and my Valentine's Day Chocolate Cake for a full chocolate-strawberry dessert spread.
Storage
Store in an airtight container in the refrigerator for up to 2 days. Best consumed within 24 hours for optimal texture — strawberries begin releasing juice after the first day which can slightly soften the chocolate coat. Do not freeze; freezing causes the berries to become watery and the cream cheese filling separates on thawing.
Yes — these are ideal make-ahead desserts. Assemble up to 12 hours in advance and store covered in the refrigerator. The chocolate sets fully, the filling holds its shape, and the strawberries stay firm and fresh. I typically make these the afternoon before an evening event and they are in perfect condition at serving time. Beyond 12 hours, the berries begin releasing juice that can soften the chocolate coat.
Freezing is not recommended. Strawberries have high water content and freeze poorly — when thawed they release water and become mushy. The cream cheese filling also changes texture on freezing and thawing, becoming grainy rather than smooth. These are best made fresh and consumed within 2 days for optimal texture and flavor.
Semi-sweet or dark chocolate with at least 55% cocoa content provides the best balance of richness and sweetness against the tangy cream cheese filling. For the smoothest coat and most professional finish, use a quality bar chocolate chopped into pieces rather than chips — chips contain stabilizers that make melted chocolate thicker and less glossy. Adding a teaspoon of coconut oil to any chocolate significantly improves fluidity and gives a shinier set.
Yes, with a small adjustment. Strawberry, honey, or plain whipped cream cheese all work well as the filling base. If using a pre-sweetened variety, reduce or eliminate the powdered sugar to avoid an overly sweet result. Strawberry cream cheese creates a double strawberry effect that is particularly good. Avoid herb or savory varieties — these are sweet applications only.
No special tools are required. A small sharp paring knife or melon baller for hollowing the berries, a mixing bowl, a hand mixer or wooden spoon for the filling, and a zip-top bag with a corner snipped off as a piping bag — that is everything you need. A proper piping bag with a small round tip gives the cleanest result, but a zip-top bag works equally well. A parchment-lined tray completes the setup.
These Chocolate Covered Cheesecake Strawberries are one of those recipes that delivers maximum impact for minimum effort — and once you make them, you will keep coming back to them for every special occasion. The combination of fresh fruit, tangy cheesecake, and glossy chocolate is genuinely one of the most satisfying dessert combinations I have found.
Leave a comment below — I would love to know which topping or variation you tried! For more no-bake strawberry desserts, see my Strawberry Brownies and my Dark Chocolate and Strawberry Cupcakes.
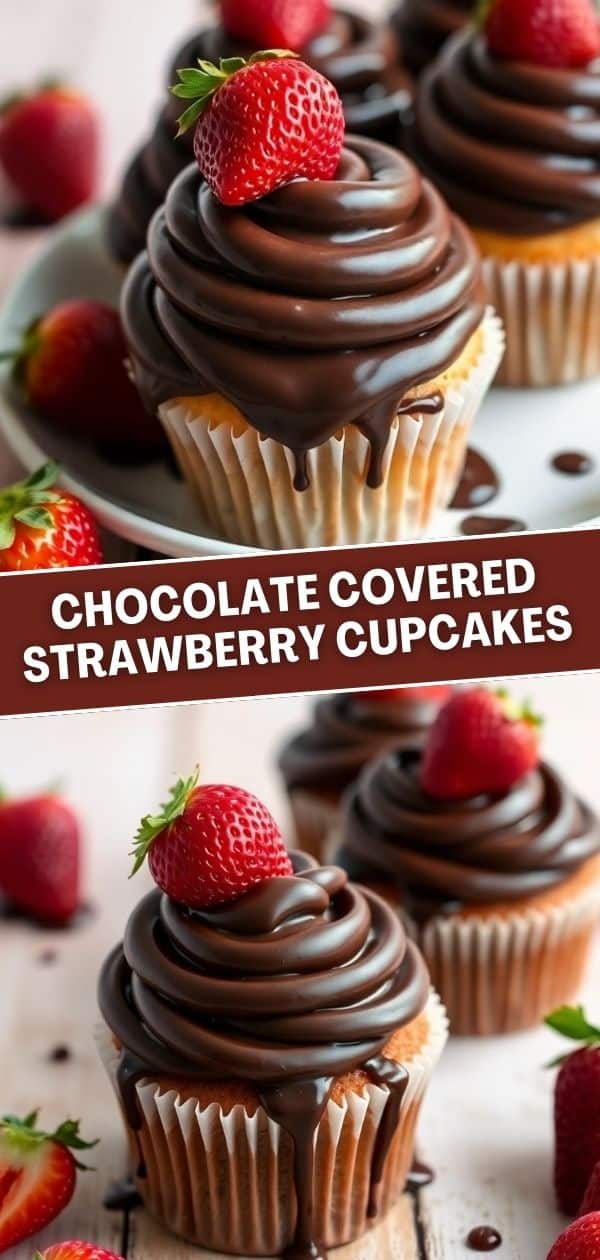
CHOCOLATE COVERED STRAWBERRY CUPCAKES
Ingredients
- 1 ½ cups all-purpose flour
- ½ cup unsweetened cocoa powder
- 1 teaspoon baking powder
- ½ teaspoon baking soda
- ½ teaspoon salt
- ½ cup unsalted butter, melted
- 1 cup granulated sugar
- 2 large eggs
- ¾ cup milk
- 1 teaspoon vanilla extract
- ½ cup hot water or coffee
- 12 fresh strawberries
For Frosting:
- 1 cup unsalted butter, softened
- 2 cups powdered sugar
- ½ cup strawberry puree
- 1 teaspoon vanilla extract
For Chocolate Coating:
- 1 cup chocolate chips
- 1 tablespoon coconut oil
Instructions
- Prepare the Cupcakes:Preheat oven to 350°F (175°C). Line a cupcake tin with liners.
- Mix Ingredients:In a bowl, whisk flour, cocoa powder, baking powder, baking soda, and salt.
- Make Batter: In another bowl, mix sugar, melted butter, eggs, milk, and vanilla. Gradually add dry ingredients. Stir in hot water.
- Bake: Divide batter into cupcake liners. Bake for 18-20 minutes. Cool completely.
- Make Frosting: Beat butter until creamy. Add powdered sugar, strawberry puree, and vanilla. Mix until smooth.
- Dip Strawberries: Melt chocolate chips with coconut oil. Dip strawberries and let them set.
- Assemble: Frost cooled cupcakes, then top each with a chocolate-covered strawberry.
- Serve & Enjoy!
Notes
- Make Ahead: Cupcakes can be baked a day ahead. Store them in an airtight container. Frost before serving.
- Customizing the Flavor: Use dark chocolate for a richer taste. Add a splash of almond extract for extra depth.
- Serving Suggestions: Serve chilled for a firm chocolate shell. Pair with a glass of milk or hot coffee.
- Storage Tips: Store in an airtight container in the fridge for up to 3 days.





Comments
No Comments