
Dessert doesn't need to be a whole production. That's something I had to remind myself early on — I used to think if it wasn't a layered cake or a perfectly piped tart, it wasn't worth serving. Then I started keeping a running list of the quick desserts that actually got made on a regular Tuesday, and I realized the best ones were almost always the simplest ones: a mug cake when the kids wanted something sweet after dinner, a frozen yogurt bark that came together in ten minutes, a no-bake truffle I could roll out while talking on the phone. Those are the recipes that actually live in my kitchen.
What makes a quick dessert actually worth making is pretty straightforward to me: it has to use ingredients you already have or can find at any Walmart or Trader Joe's, it has to come together without needing three bowls and a stand mixer, and it has to taste like you actually tried. A lot of the easy dessert recipes online fail on that last point — they're fast, sure, but they taste like it. Everything in this list clears all three bars. If you're looking for ideas that also work for entertaining, I've got you covered over at my recipe roundups page where I keep things organized by occasion and category.
This list covers a lot of ground — we've got no-bake chocolate mousse, air fryer cupcakes, a deeply fudgy brownie cookie, grilled peaches for when stone fruit is in season, Oreo tart, mug cakes in three different versions (because sometimes you need options at 10pm), and a few frozen treats that are Zainab-approved. There's also a Kladdkaka caramel trifle that I genuinely did not expect to love as much as I do. For more ideas on the chocolate side of things, my roundup of easy chocolate desserts has a lot of overlap with this list in the best possible way.
Here are the 34 I keep coming back to — pick whatever fits your mood, your pantry, and how much energy you have left tonight.
33 Easy Dessert Ideas for Quick and Delicious Treats

33. Best Air Fryer Chocolate Cupcakes (From Scratch)
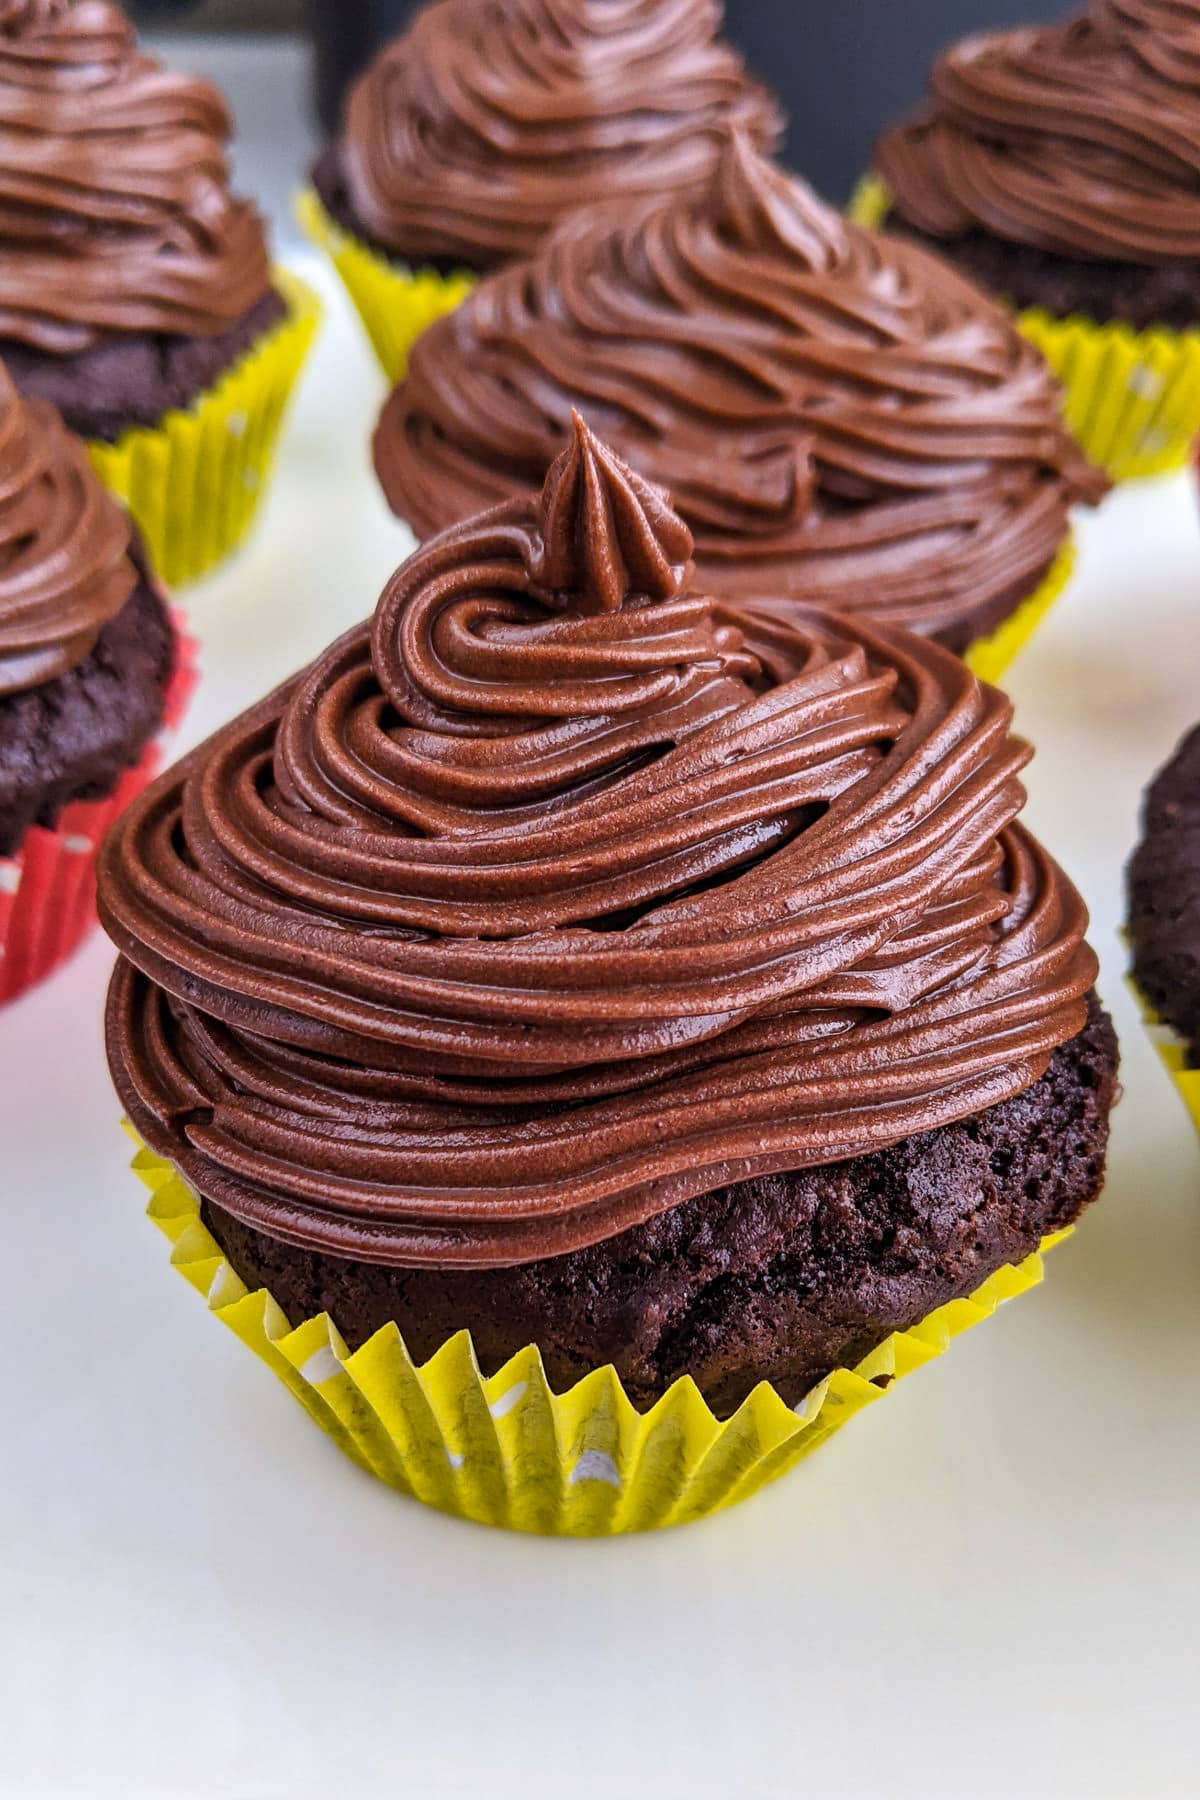
I was skeptical the first time someone told me to bake cupcakes in an air fryer. My oven works fine — why would I? Then I tried it on a day when I didn't want to heat up the whole kitchen, and honestly, I was impressed. These come out genuinely moist and deeply chocolatey, with that slight dome on top that makes a cupcake look like it actually tried. The air fryer runs hotter and more concentrated than a regular oven, so they bake faster and the tops set nicely. If you have a small air fryer, work in batches — don't crowd them.
Ingredients
- ¾ cup all-purpose flour
- ½ cup unsweetened cocoa powder
- ¾ cup granulated sugar
- 1 teaspoon baking powder
- ¼ teaspoon salt
- 2 large eggs
- ½ cup whole milk
- ¼ cup vegetable oil
- 1 teaspoon vanilla extract
Instructions
- Preheat your air fryer to 320°F for 3 minutes. Line a silicone cupcake mold or individual foil cups with paper liners.
- In a large bowl, whisk together the flour, cocoa powder, sugar, baking powder, and salt until fully combined.
- Add the eggs, milk, oil, and vanilla. Mix until a smooth batter forms — don't overmix or the cupcakes will be dense.
- Fill each cupcake liner about two-thirds full. Place in the air fryer basket in a single layer and bake at 320°F for 12–14 minutes.
- Check doneness with a toothpick — it should come out with just a few moist crumbs. Cool completely before frosting.
Tips
- Tip: Every air fryer runs slightly differently — check at the 12-minute mark the first time you make these so you don't overbake.
- Tip: Silicone molds work better than metal muffin tins here since air needs to circulate all around the cup.
- Tip: Let cupcakes cool fully before adding frosting — I've made the mistake of frosting warm cupcakes and it slides right off.
32. Easy Tiramisu Cups (No Bake)
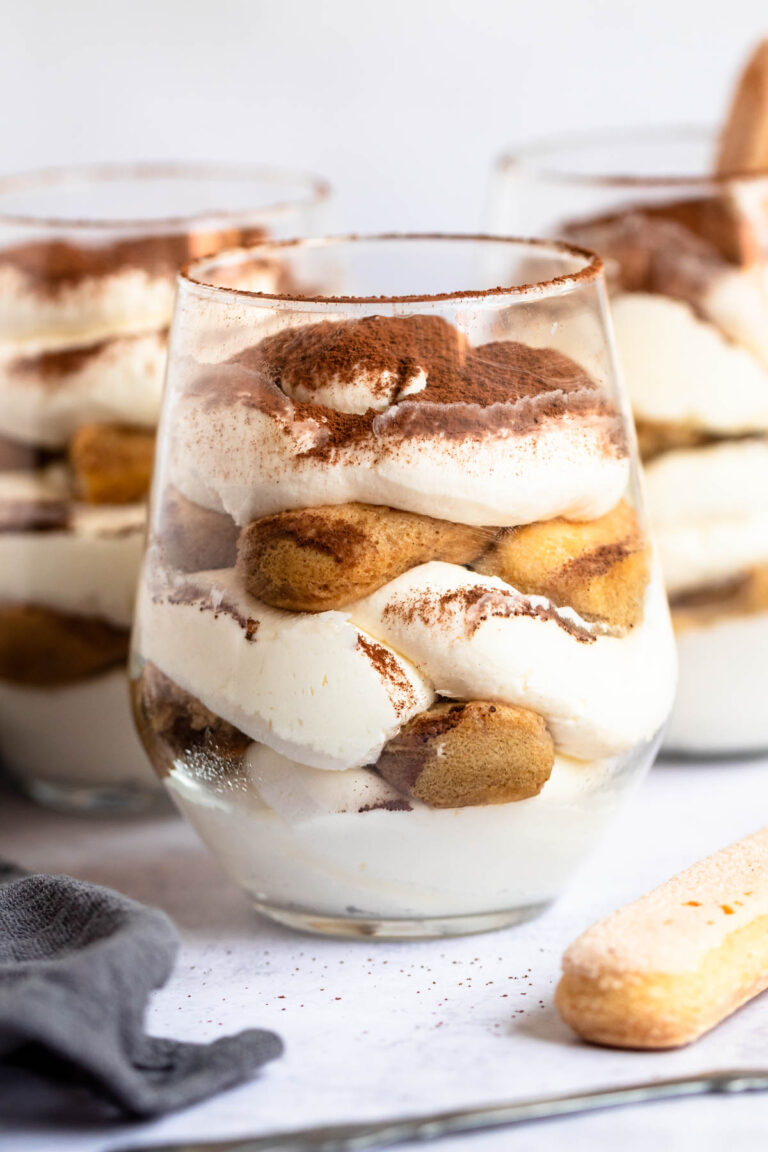
Tiramisu used to feel like a project to me — something you make when you have time and patience. These individual cups changed that completely. You get all the coffee-soaked ladyfinger layers and that creamy mascarpone filling in a single serving cup, and there's no baking involved at all. I make these when I need something that looks impressive but took me maybe 20 minutes of actual hands-on time. They do need a few hours in the fridge to set, so make them earlier in the day if you're serving them at dinner.
Ingredients
- 16 ladyfinger cookies (savoiardi)
- 1 cup strong brewed coffee, cooled
- 2 tablespoons coffee liqueur, optional (Kahlúa works)
- 8 oz mascarpone cheese, room temperature
- 1 cup heavy whipping cream
- 3 tablespoons powdered sugar
- 1 teaspoon vanilla extract
- Unsweetened cocoa powder, for dusting
Instructions
- Combine the cooled coffee and liqueur (if using) in a shallow bowl. Set aside.
- Beat the heavy cream, powdered sugar, and vanilla together until soft peaks form. Add the mascarpone and beat again until the mixture is thick and smooth — don't overbeat or it gets grainy.
- Quickly dip each ladyfinger into the coffee mixture — just 1–2 seconds per side. You want them moist but not soggy.
- Break the soaked ladyfingers into pieces and layer them into individual cups or glasses. Add a layer of the mascarpone cream on top.
- Repeat the layers, finishing with cream on top. Dust generously with cocoa powder. Refrigerate for at least 3 hours before serving.
Tips
- Tip: If you can't find mascarpone, full-fat cream cheese softened with 2 tablespoons of heavy cream works as a substitute — it's not the same but it's close enough for a weeknight.
- Tip: Make these the night before if you're serving guests — the longer they sit, the better the layers meld together.
- Tip: Ladyfingers are usually in the cookie or international aisle at most grocery stores — Walmart and Kroger both carry them.
31. Fudgy Brownie Cookies (30 Minutes)
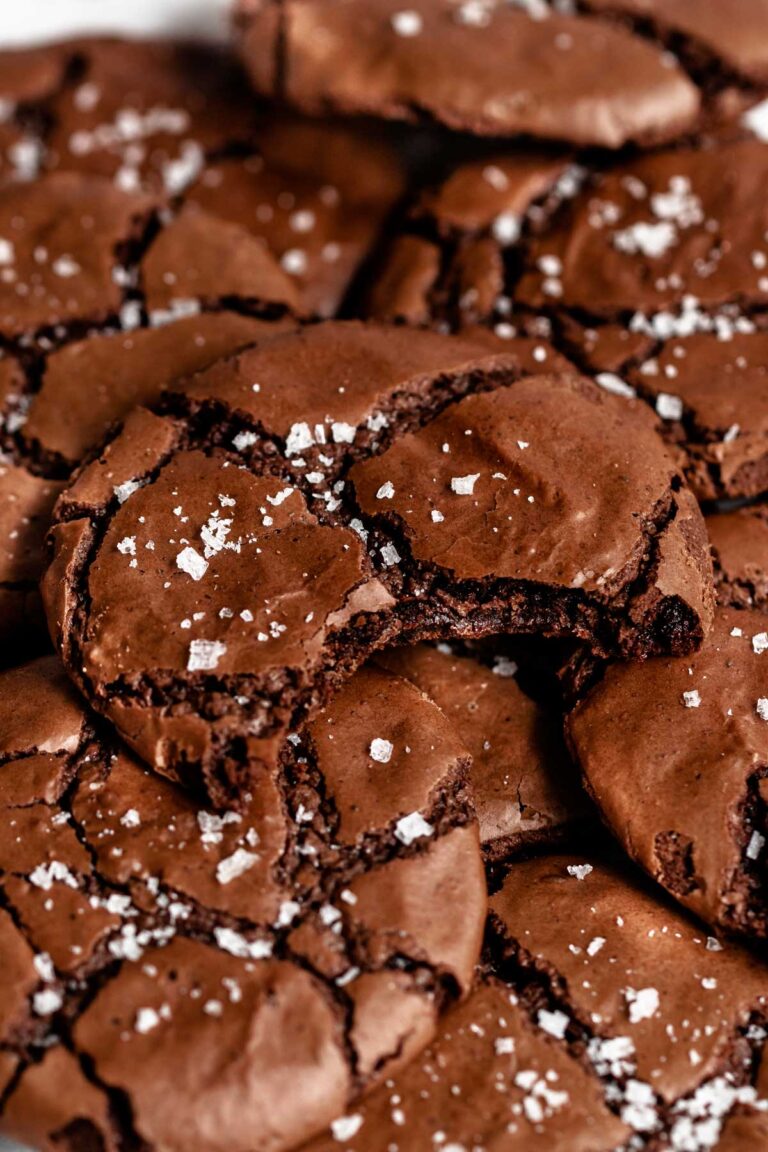
These are exactly what they sound like — a brownie in cookie form, which means you get that crackly top, that dense fudgy center, and that deep chocolate flavor, all in a handheld shape. Saad discovered these and asked me to make them every single week for about a month straight, so I can confirm they are genuinely addictive. The key is using melted chocolate (not just cocoa powder) and not overbaking — pull them out when the edges are just set and the center still looks slightly underdone. They firm up as they cool.
Ingredients
- 6 oz semi-sweet chocolate, chopped (or chocolate chips)
- ¼ cup unsalted butter
- ¾ cup granulated sugar
- 2 large eggs
- 1 teaspoon vanilla extract
- ½ cup all-purpose flour
- 2 tablespoons unsweetened cocoa powder
- ¼ teaspoon baking powder
- ¼ teaspoon salt
Instructions
- Preheat oven to 350°F. Line two baking sheets with parchment paper.
- Melt the chopped chocolate and butter together in a microwave-safe bowl in 30-second intervals, stirring between each, until fully smooth. Let cool for 5 minutes.
- Whisk the sugar, eggs, and vanilla into the melted chocolate mixture until the batter looks glossy and slightly thick.
- Fold in the flour, cocoa powder, baking powder, and salt until just combined — a few streaks are fine, don't overwork it.
- Drop heaping tablespoons of batter onto the prepared sheets, spacing 2 inches apart. Bake for 10–12 minutes until the tops are crackled and edges are set. Cool on the pan for 5 minutes before moving.
Tips
- Tip: The batter will look very thin and runny — that's normal. It thickens slightly as it bakes and produces that signature crackly top.
- Tip: Don't skip the parchment paper — these cookies stick badly to an unlined pan.
- Tip: Store in an airtight container at room temperature for up to 4 days. They actually get fudgier on day two.
30. 2-Ingredient Easy Vegan Truffles
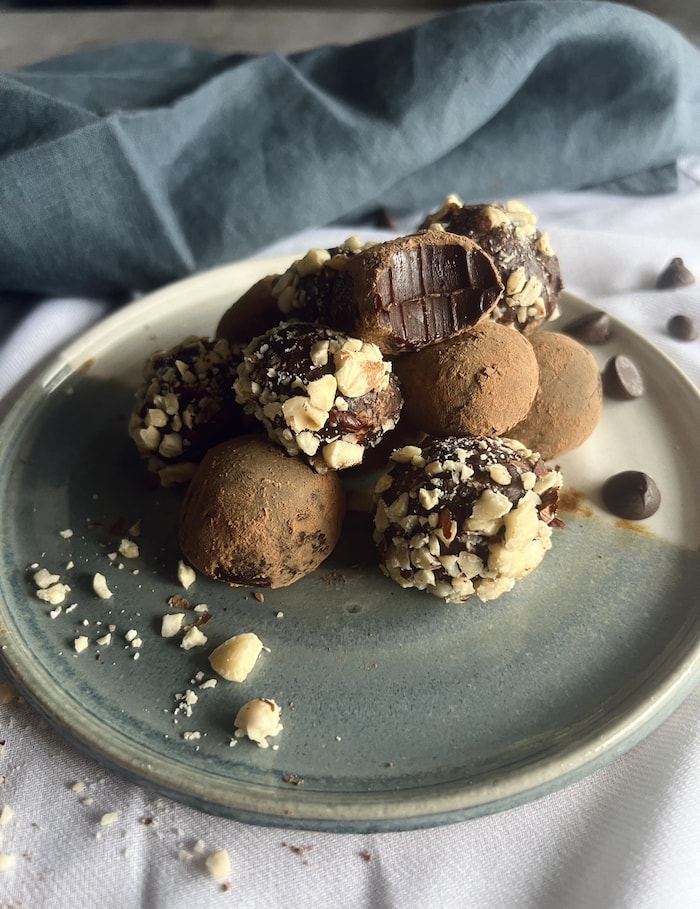
Two ingredients. That's it. Dark chocolate and full-fat coconut cream come together into a ganache you roll into balls, coat in cocoa powder or chopped nuts, and refrigerate until firm. I made these the first time because I ran out of everything else and needed something for dessert, and they turned out so good I've made them intentionally ever since. They taste genuinely rich and indulgent — no one would guess they're vegan unless you told them. Use good quality dark chocolate here because there's nowhere to hide behind other flavors.
Ingredients
- 8 oz good-quality dark chocolate (70% cocoa or higher), finely chopped
- ½ cup full-fat coconut cream (from a chilled can — scoop just the thick cream off the top)
- Unsweetened cocoa powder, crushed nuts, or shredded coconut for rolling (optional)
Instructions
- Place the chopped chocolate in a heatproof bowl. Heat the coconut cream in a small saucepan over medium heat until it just begins to simmer — do not boil.
- Pour the hot coconut cream over the chocolate. Let it sit undisturbed for 2 minutes, then stir slowly from the center outward until the ganache is completely smooth and glossy.
- Cover the bowl and refrigerate for at least 2 hours, until the ganache is firm enough to scoop and roll.
- Scoop out tablespoon-sized portions and roll quickly between your palms into balls. Roll each truffle in cocoa powder, crushed nuts, or shredded coconut to coat. Place on a parchment-lined tray.
- Refrigerate for another 30 minutes to set. Store in an airtight container in the fridge for up to 1 week.
Tips
- Tip: Chill your coconut cream can overnight — the thick cream separates to the top and is much easier to scoop out cleanly.
- Tip: Work fast when rolling — the warmth of your hands melts the ganache quickly. If they get too soft, pop the tray back in the fridge for 10 minutes and continue.
- Tip: Trader Joe's and Whole Foods both carry good 70% dark chocolate bars that work perfectly here — no need for specialty chocolate.
29. Oreo Tart

An Oreo tart sounds fancy but it's honestly one of the most forgiving no-fuss desserts I've made. You crush the cookies, press them into the pan, pour in a simple chocolate ganache filling, and let the fridge do all the work. No rolling, no blind baking, no stress. The crunchy Oreo crust against the smooth, dark chocolate center is the kind of combination that makes people think you spent hours in the kitchen — you didn't.
Ingredients
- 24 Oreo cookies (about 2½ cups crushed)
- 4 tablespoons unsalted butter, melted
- 1 cup heavy whipping cream
- 8 oz semi-sweet chocolate, finely chopped (or 1⅓ cups chocolate chips)
- 2 tablespoons unsalted butter, cut into small pieces
- 1 teaspoon vanilla extract
- Pinch of salt
- Crushed Oreos or whipped cream, for topping (optional)
Instructions
- Crush the Oreos into fine crumbs using a zip-lock bag and rolling pin, or pulse in a food processor. Mix with melted butter until the crumbs hold together when pressed.
- Press the crumb mixture firmly and evenly into the bottom and up the sides of a 9-inch tart pan or pie dish. Refrigerate for 20 minutes while you make the filling.
- Heat the heavy cream in a small saucepan over medium heat until it just begins to simmer — don't let it boil. Pour it over the chopped chocolate in a bowl and let sit for 2 minutes.
- Stir the chocolate and cream together until smooth, then add the butter pieces, vanilla, and salt. Stir until everything is fully melted and glossy.
- Pour the ganache filling into the chilled Oreo crust and refrigerate for at least 2 hours, until set. Top with crushed Oreos or whipped cream before serving.
Tips
- Tip: Don't remove the Oreo cream filling before crushing — it actually helps bind the crust together.
- Tip: Use good quality chocolate here — it makes a real difference in the ganache. Ghirardelli chips from Walmart work great.
- Tip: This tart keeps covered in the fridge for up to 4 days, which makes it a great make-ahead dessert for guests.
28. Easy Moist Chocolate Walnut Cake with Ganache Frosting

Chocolate cake is one of those things I've made so many times that I finally stopped looking at recipes and just trusted what I know works. This version with walnuts folded into the batter is one I keep coming back to — the nuts add a little texture and earthiness that stops it from being one-note. The poured ganache frosting is so much easier than buttercream and gives you that shiny, bakery-style finish without any fuss. My husband calls this his birthday cake of choice, every single year.
Ingredients
- 1¾ cups all-purpose flour
- ¾ cup unsweetened cocoa powder
- 2 cups granulated sugar
- 2 teaspoons baking soda, 1 teaspoon baking powder, 1 teaspoon salt
- 2 large eggs, room temperature
- 1 cup buttermilk (or 1 cup milk + 1 tablespoon vinegar, left to sit 5 minutes)
- ½ cup vegetable oil
- 1 cup hot strong-brewed coffee (or hot water)
- 1 cup walnuts, roughly chopped
- For ganache: 1 cup heavy cream, 8 oz semi-sweet chocolate chips
Instructions
- Preheat oven to 350°F. Grease and flour two 9-inch round cake pans. Whisk together flour, cocoa, sugar, baking soda, baking powder, and salt in a large bowl.
- In a separate bowl, whisk eggs, buttermilk, and oil together. Add the wet ingredients into the dry and stir until just combined. Slowly pour in the hot coffee and mix until smooth — the batter will be thin, that's normal.
- Fold in the chopped walnuts, then divide the batter evenly between the two prepared pans. Bake for 30–35 minutes, until a toothpick inserted in the center comes out clean.
- Let the cakes cool completely in the pans for 10 minutes, then turn out onto a wire rack. Don't rush this — a warm cake will break apart.
- For the ganache, heat cream until steaming, pour over chocolate chips, wait 2 minutes, then stir smooth. Let it cool for 10–15 minutes until slightly thickened, then pour over the assembled cake.
Tips
- Tip: The coffee deepens the chocolate flavor without making the cake taste like coffee — don't skip it, but hot water works if you must.
- Tip: Toast the walnuts in a dry pan for 3–4 minutes before adding them to the batter — it wakes up their flavor significantly.
- Tip: If your ganache sets too quickly, place the bowl over warm water for a minute and stir — it'll loosen right up.
27. 5-Minute Strawberry Frozen Yogurt

This is the dessert I make when the kids are asking for ice cream and I want to feel slightly less guilty about saying yes. Zainab specifically asks for this one — she loves the bright pink color and the fact that it tastes like real strawberries rather than strawberry candy. All you need is frozen strawberries, yogurt, and a little honey, and your blender or food processor does everything. Five minutes is not an exaggeration.
Ingredients
- 3 cups frozen strawberries
- ¾ cup plain Greek yogurt (full-fat for creamier texture)
- 3 tablespoons honey or maple syrup (adjust to taste)
- 1 teaspoon vanilla extract
- 1 tablespoon lemon juice (optional, brightens the flavor)
Instructions
- Add frozen strawberries, Greek yogurt, honey, vanilla, and lemon juice to a blender or food processor. Let the strawberries sit for 2 minutes at room temperature so they soften just slightly — this helps everything blend more smoothly.
- Blend on high, stopping to scrape down the sides as needed, until you get a thick, creamy, smooth consistency. Taste and adjust sweetness with more honey if needed.
- Serve immediately as soft-serve, or transfer to a freezer-safe container and freeze for 1–2 hours for a firmer scoopable texture.
Tips
- Tip: Use frozen fruit straight from the bag — fresh strawberries won't give you that thick, frozen yogurt texture without an ice cream machine.
- Tip: If you freeze leftovers and they set too hard, let the container sit on the counter for 10 minutes before scooping.
- Tip: Swap strawberries for frozen mango, mixed berries, or peaches — same method, totally different dessert.
26. Two Ingredient Chocolate Mousse – Easy Eggless Mousse

Two ingredients. That's it. I was genuinely skeptical the first time I came across this, but it works — and it works well. You melt chocolate into heavy cream, chill it, then whip it into a mousse. The result is deeply chocolatey, light but rich, and looks like something you'd get at a restaurant. No eggs to worry about, no tempering, no drama. Chocolate and cream are doing all the heavy lifting here.
Ingredients
- 8 oz semi-sweet or dark chocolate, finely chopped (or 1⅓ cups chocolate chips)
- 2 cups heavy whipping cream, divided
Instructions
- Heat ¾ cup of the heavy cream in a small saucepan until just simmering. Pour over the chopped chocolate in a heat-safe bowl and let sit for 2 minutes, then stir until completely smooth and glossy. This is your ganache base.
- Let the ganache cool to room temperature, then cover and refrigerate for at least 2 hours (or up to overnight) until it's fully cold and slightly firm.
- Add the remaining 1¼ cups of cold heavy cream to the chilled ganache. Using a hand mixer or a whisk and some effort, beat on medium-high until the mixture holds soft, fluffy peaks — about 2–3 minutes with a mixer.
- Spoon or pipe into serving glasses and refrigerate for at least 30 minutes before serving. Top with a little whipped cream or chocolate shavings if you like.
Tips
- Tip: Don't over-whip — once it starts looking grainy or curdled you've gone too far. Stop at soft, billowy peaks.
- Tip: The quality of chocolate really matters here since there's nowhere to hide. Use a bar you'd actually eat — Ghirardelli or Lindt both work well.
- Tip: Make this the night before a dinner party — it actually improves with a few hours in the fridge and frees you up on the day.
25. Dulce de Leche Mousse
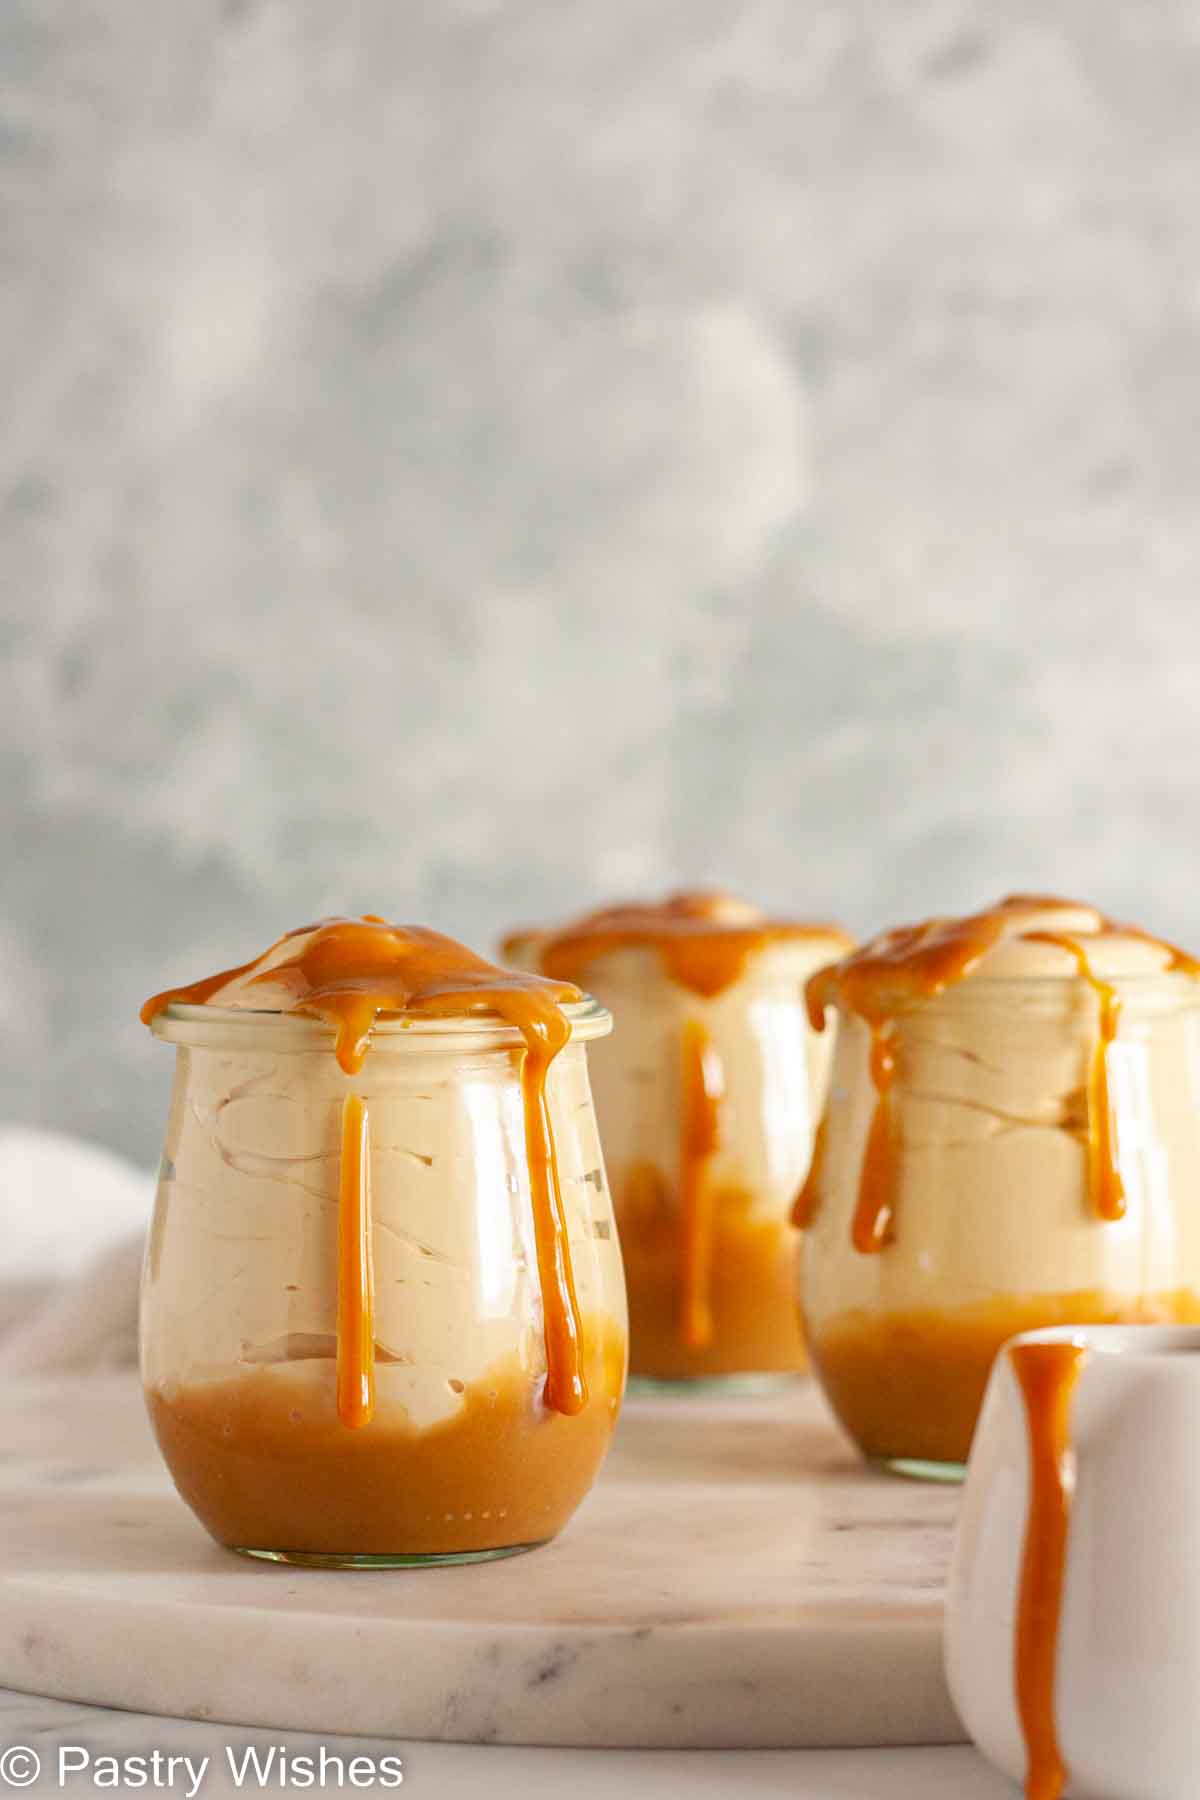
If you've never had dulce de leche, think caramel but deeper, smoother, and slightly more complex — it's one of those flavors that's hard to stop eating once you start. Folded into whipped cream to make a mousse, it becomes something truly special with very little work. You can find canned dulce de leche at Walmart or Trader Joe's (look near the condensed milk), and from there this easy dessert comes together in under 15 minutes of active time. It's the kind of thing that disappears fast at any gathering.
Ingredients
- 1 can (13.4 oz) dulce de leche (such as La Lechera brand)
- 2 cups heavy whipping cream, cold
- 1 teaspoon vanilla extract
- Pinch of salt
- Flaky sea salt or crushed cookies, for topping (optional)
Instructions
- Spoon the dulce de leche into a large bowl and stir in the vanilla and pinch of salt until smooth. If it's very thick and stiff from the can, microwave for 15 seconds and stir — it'll loosen up.
- In a separate cold bowl, whip the heavy cream using a hand mixer until it forms firm peaks. This takes about 3–4 minutes — make sure your cream is cold or it won't whip properly.
- Add about one-third of the whipped cream to the dulce de leche and stir it in to loosen the mixture. Then gently fold in the remaining whipped cream in two additions, keeping as much air as possible.
- Divide between serving glasses or bowls and refrigerate for at least 1 hour. Top with a pinch of flaky salt or crushed graham crackers before serving.
Tips
- Tip: A pinch of flaky sea salt on top is not optional in my opinion — it cuts through the sweetness and makes every bite more interesting.
- Tip: If you can't find dulce de leche, you can make your own by simmering an unopened can of sweetened condensed milk in water for 2–3 hours — just make sure it's fully submerged the whole time.
- Tip: This mousse is great layered in a glass with crushed vanilla wafers or graham crackers for a quick no-bake parfait situation.
24. No Bake Peanut Butter Fudge

Peanut butter fudge sounds like it should require a candy thermometer and a lot of patience, but this no-bake version is genuinely simple — just a few ingredients, a pan, and the fridge does most of the work. It sets up smooth and creamy with that dense, rich texture that real fudge should have. I usually make a batch when I need something to bring to a gathering and don't want to spend an hour at the stove. It cuts cleanly into little squares and people always assume it took much more effort than it did.
Ingredients
- 1 cup creamy peanut butter (not the natural kind — it splits)
- ½ cup (1 stick) unsalted butter
- 3 cups powdered sugar, sifted
- 1 teaspoon vanilla extract
- ¼ teaspoon salt
Instructions
- Line an 8x8-inch baking pan with parchment paper, leaving some overhang so you can lift the fudge out easily later.
- Melt the butter in a medium saucepan over low heat. Add the peanut butter and stir until fully combined and smooth. Remove from heat.
- Stir in the vanilla and salt, then add the sifted powdered sugar one cup at a time, mixing well after each addition until no lumps remain.
- Press the mixture firmly and evenly into the prepared pan. Smooth the top with the back of a spoon or an offset spatula.
- Refrigerate for at least 2 hours until firm, then lift out using the parchment and cut into small squares. Store in an airtight container in the fridge for up to 2 weeks.
Tips
- Tip: Sift the powdered sugar before adding it — skipping this step leads to lumpy fudge that won't smooth out properly.
- Tip: Press the mixture into the pan while it's still warm — it stiffens quickly as it cools and becomes harder to spread evenly.
- Tip: For a chocolate-peanut butter version, drizzle melted chocolate chips over the top before refrigerating and let it set together.
23. 3 Ingredient Oreo Cake

Three ingredients. An actual cake. I know it sounds like a trick, but this Oreo cake is completely real and completely worth making. You blend Oreos, add a couple more things, and what comes out of the oven is a soft, fudgy cake that tastes way more intentional than a three-ingredient recipe has any right to. Zainab spotted this one on my phone and asked me to make it immediately — we had it on the table within the hour. It's the kind of recipe you keep in your back pocket for when you need dessert fast and don't want to run to the store.
Ingredients
- 1 standard package Oreo cookies (about 36 cookies, 14.3 oz)
- 1 cup milk (whole milk works best)
- 1 tablespoon baking powder
Instructions
- Preheat your oven to 350°F. Grease an 8x8-inch baking pan and line it with parchment paper.
- Place all the Oreos in a blender or food processor and pulse until you have fine crumbs. No blender? Put them in a zip-lock bag and crush with a rolling pin — it takes a few minutes but works fine.
- Transfer crumbs to a bowl. Add the milk and baking powder and stir until a thick batter forms with no dry crumbs visible.
- Pour into the prepared pan and smooth the top. Bake for 20-25 minutes, until a toothpick inserted in the center comes out clean.
- Let cool for 10 minutes before slicing. Serve as-is or with a scoop of vanilla ice cream on top.
Tips
- Tip: Don't overbake — this cake is meant to be slightly fudgy in the center, not dry. Pull it at 20 minutes and check before going longer.
- Tip: Try it with different Oreo flavors — Golden Oreos give a vanilla version, and mint Oreos make a surprisingly good chocolate-mint cake.
- Tip: The batter will look thicker than normal cake batter — that's correct. Spread it evenly with a spatula and don't worry about it.
22. Chocolate Chip Mug Cake
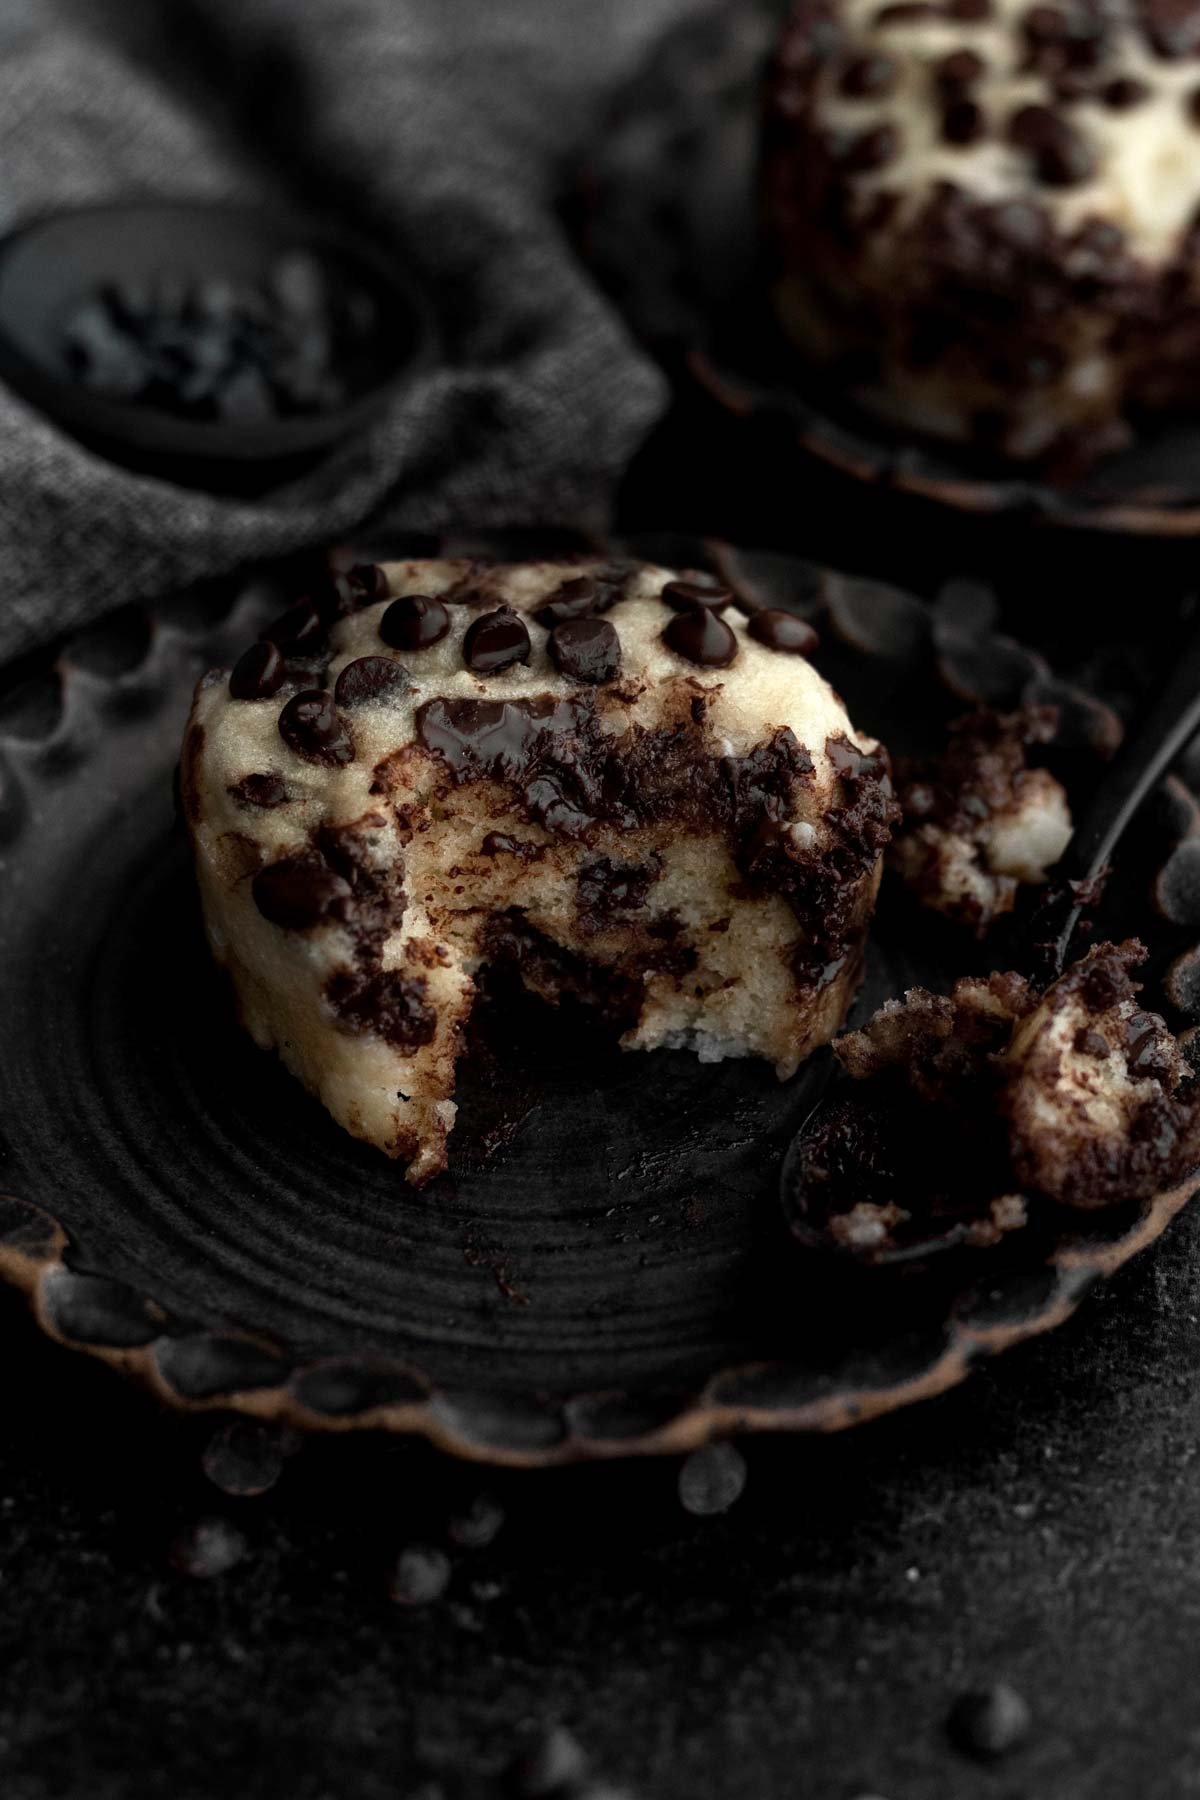
There are nights when you want something sweet and warm and you want it in under five minutes — that's exactly what a mug cake is for. This chocolate chip version is the one I come back to most because the chips melt into little pockets of chocolate throughout the cake, and the texture stays soft rather than rubbery the way some mug cakes go wrong. The key is not to overcook it — a few seconds too long and it turns dense and dry. Pull it out when the center still looks just barely underdone and let it sit for 30 seconds. It finishes cooking on its own.
Ingredients
- 4 tablespoons all-purpose flour
- 3 tablespoons granulated sugar
- ¼ teaspoon baking powder
- 1 egg
- 3 tablespoons milk
- 2 tablespoons melted butter (or neutral oil)
- ½ teaspoon vanilla extract
- 3 tablespoons semi-sweet chocolate chips, divided
Instructions
- In a large microwave-safe mug (at least 12 oz), whisk together the flour, sugar, and baking powder with a fork.
- Add the egg, milk, melted butter, and vanilla. Mix until smooth and no flour streaks remain — get into the corners of the mug.
- Stir in 2 tablespoons of the chocolate chips, then sprinkle the remaining tablespoon on top.
- Microwave on high for 60-75 seconds. Check at 60 seconds — the center should look just set but still slightly glossy. If it's still very wet, microwave in 10-second bursts.
- Let it rest for 30 seconds before eating. Eat straight from the mug with a spoon, or add a small scoop of ice cream on top.
Tips
- Tip: Every microwave is different — start checking at 60 seconds no matter what. Overcooked mug cake is rubbery and no amount of ice cream saves it.
- Tip: Use a mug that's bigger than you think you need — the batter rises as it cooks and will overflow a small mug.
- Tip: For a richer flavor, swap 1 tablespoon of flour for 1 tablespoon of unsweetened cocoa powder to make it a double-chocolate version.
21. Mini Skillet Hot Fudge Pudding Cake
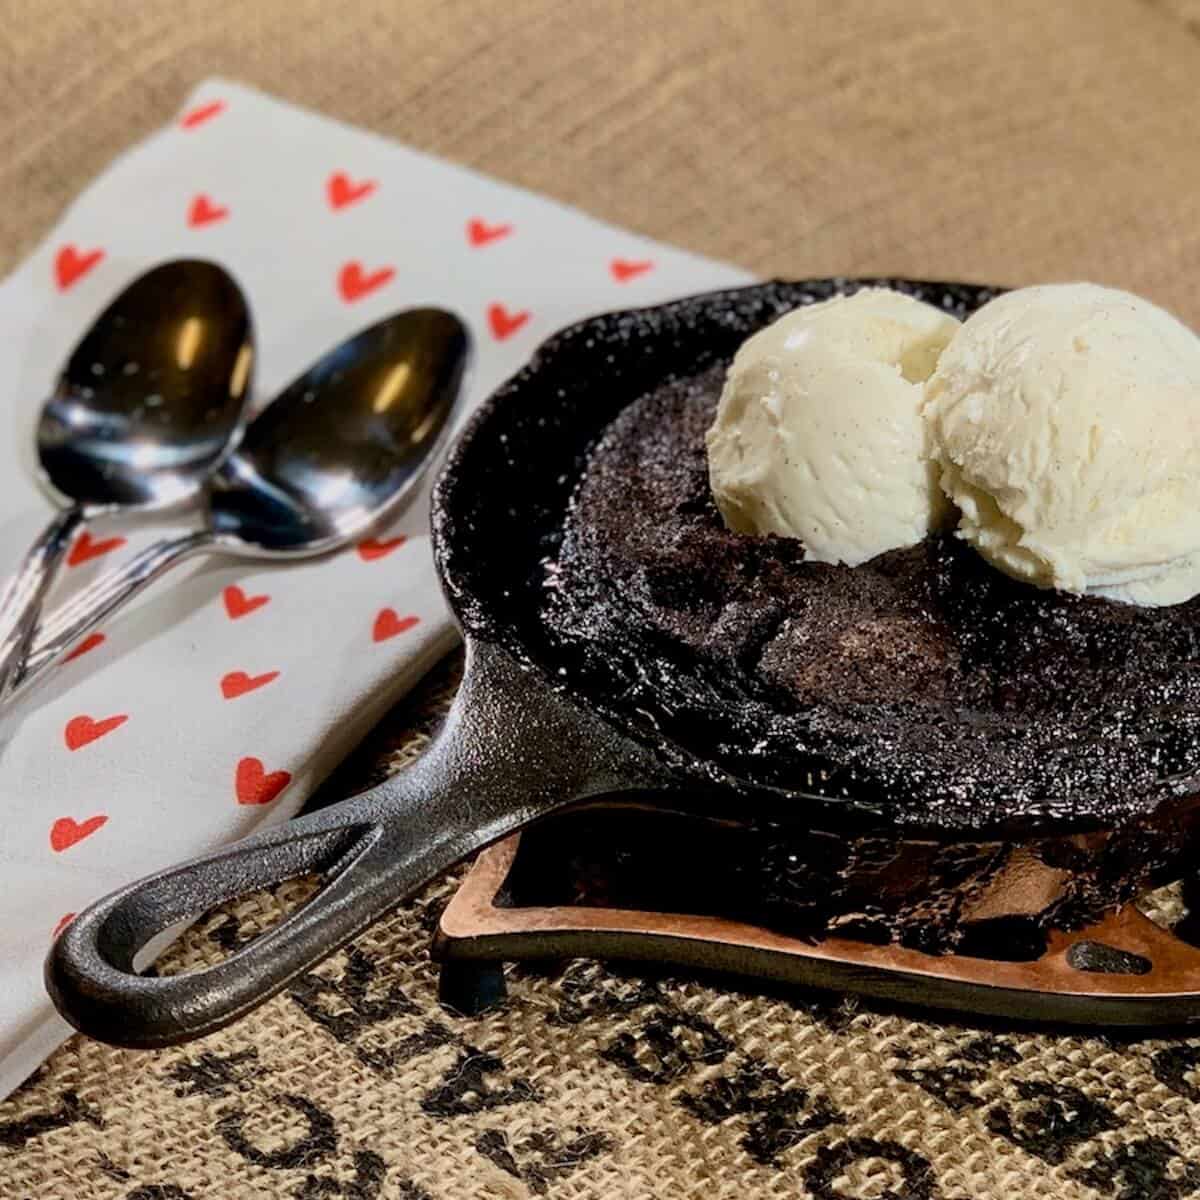
Hot fudge pudding cake is one of those old-fashioned American desserts I didn't grow up with, but the first time I made it I understood immediately why people love it. You pour hot water over the batter before baking and it seems completely wrong — but then it comes out of the oven with a fudgy sauce layer under a soft chocolate cake on top. Making it in a mini skillet means you get a perfectly portioned individual dessert with crispy edges and a molten center. Serve it straight from the skillet while it's still warm — that's the only way to eat it.
Ingredients
- ½ cup all-purpose flour
- ¾ cup granulated sugar, divided
- 3 tablespoons unsweetened cocoa powder, divided
- 1 teaspoon baking powder
- ¼ teaspoon salt
- ¼ cup milk
- 2 tablespoons melted butter
- ½ teaspoon vanilla extract
- ¼ cup packed brown sugar
- ½ cup hot water
Instructions
- Preheat oven to 350°F. Lightly butter a 6-inch cast iron skillet (or small oven-safe skillet).
- In a bowl, whisk together flour, ½ cup of the granulated sugar, 1½ tablespoons cocoa, baking powder, and salt. Stir in milk, melted butter, and vanilla until a thick batter forms. Spread evenly into the prepared skillet.
- In a small bowl, mix together the brown sugar, remaining ¼ cup granulated sugar, and remaining 1½ tablespoons cocoa. Sprinkle this mixture evenly over the batter — don't stir it in.
- Carefully pour the hot water over the top. Again, do not stir — this looks wrong but trust the process. The water creates the fudge sauce underneath during baking.
- Bake for 25-30 minutes, until the top is set and the edges look firm but the center still jiggles slightly. Serve immediately with vanilla ice cream.
Tips
- Tip: Don't be tempted to bake it longer to firm up the center — that jiggly middle is the hot fudge sauce, and it firms up as the cake cools.
- Tip: No cast iron skillet? Use a small oven-safe ramekin or a regular 8x8-inch baking dish — just reduce the baking time by 5 minutes and check early.
- Tip: This is best eaten the day it's made — the sauce absorbs into the cake overnight and loses that gooey contrast.
20. No-Bake Chocolate Rum Balls
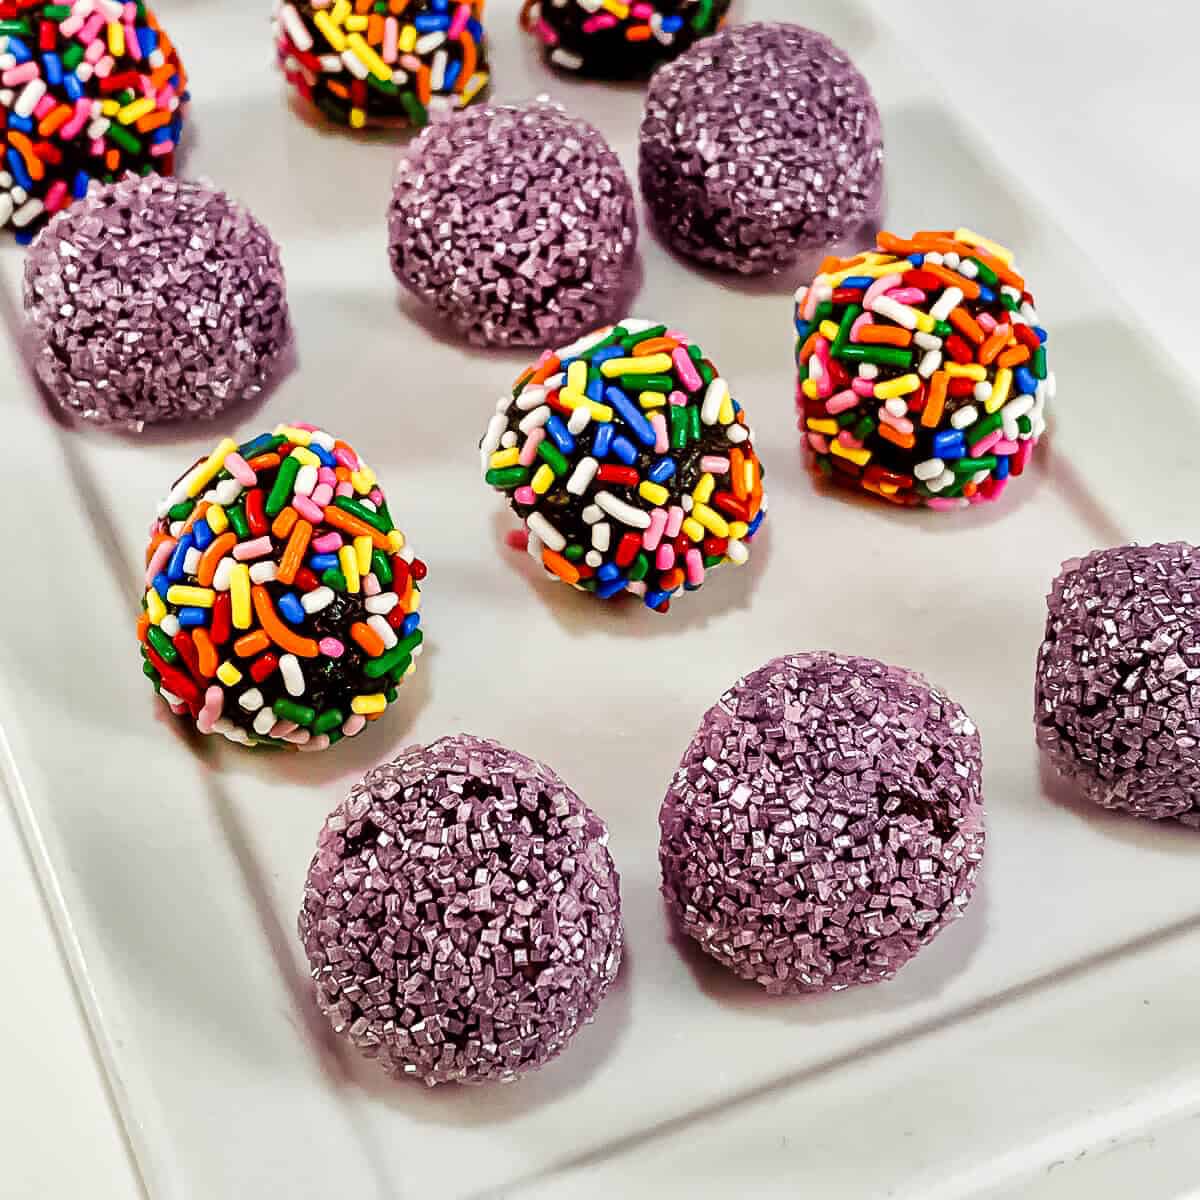
Rum balls are one of those no-fuss desserts that look like you put in real effort — little truffle-like rounds rolled in cocoa or powdered sugar, with a deep chocolate flavor and a hint of rum underneath. No baking, no special equipment, just mixing and rolling. I will say these are strictly an adults-only dessert in our house — for a kid-friendly version, swap the rum for orange juice or just leave it out and add a little extra vanilla. They actually get better after a day in the fridge once everything melds together, so this is a great make-ahead option when you're planning for a party.
Ingredients
- 2½ cups vanilla wafer crumbs (about one 11-oz box, crushed)
- 1 cup powdered sugar, plus more for rolling
- 3 tablespoons unsweetened cocoa powder
- 1 cup finely chopped pecans or walnuts
- 3 tablespoons light corn syrup
- ⅓ cup dark rum (or substitute orange juice for a non-alcoholic version)
- Extra cocoa powder or powdered sugar for rolling
Instructions
- In a large bowl, combine the vanilla wafer crumbs, powdered sugar, cocoa powder, and chopped nuts. Stir until evenly mixed.
- Add the corn syrup and rum. Stir until the mixture comes together and holds its shape when pressed — it should feel like stiff dough. If it's too dry, add rum a teaspoon at a time.
- Roll the mixture into 1-inch balls using your hands. If it's sticking, lightly dampen your palms.
- Roll each ball in powdered sugar or cocoa powder until coated, then place on a parchment-lined tray.
- Refrigerate in an airtight container for at least 24 hours before serving — they taste significantly better after resting. Store for up to 2 weeks in the fridge.
Tips
- Tip: Make a double batch — they keep well and disappear fast at any gathering. I always regret making just one batch.
- Tip: Rolling in powdered sugar gives a classic finish, but cocoa powder gives a more intense chocolate look and less sweetness — try half and half to see which you prefer.
- Tip: These make great holiday gifts — pack them in a small tin with parchment between layers and they travel well.
19. Carrot Cake Energy Balls

These little guys are what I make when I want something sweet but don't want to feel like I ate an entire slice of cake. All the warm spices of carrot cake — cinnamon, nutmeg, a little vanilla — packed into a no-bake ball you can grab straight from the fridge. I started making them as an afternoon snack for the kids and now I'm the one eating three before they even get home. The rolled oats and shredded carrot give them enough texture that they actually feel like something, not just a mouthful of nut butter.
Ingredients
- 1 cup rolled oats
- ½ cup finely grated carrot (about 1 medium carrot)
- ⅓ cup almond butter (or peanut butter)
- 3 tablespoons honey or maple syrup
- ¼ cup shredded sweetened coconut
- 1 teaspoon cinnamon
- ¼ teaspoon nutmeg
- 1 teaspoon vanilla extract
- Pinch of salt
Instructions
- Pat the grated carrot dry with a paper towel — excess moisture will make the balls too soft to hold their shape.
- Combine all ingredients in a large bowl and mix until everything is evenly incorporated. The mixture should hold together when pressed — if it's too crumbly, add another teaspoon of honey.
- Refrigerate the mixture for 20 minutes. Cold dough is much easier to roll.
- Roll into balls about 1 inch in diameter. You should get around 16-18 balls.
- Store in an airtight container in the refrigerator for up to one week.
Tips
- Tip: Roll the finished balls in extra shredded coconut or a pinch of cinnamon sugar for a pretty finish if you're serving them to guests.
- Tip: Don't skip the chilling step — the mixture spreads and sticks to your hands when warm, but firms up beautifully after 20 minutes in the fridge.
- Tip: These freeze well. Make a double batch, freeze half on a sheet pan, then transfer to a zip-lock bag for up to 2 months.
18. Cream Filled Coconut Rolls

Coconut and cream is one of those combinations I never get tired of. These rolls are soft, slightly chewy on the outside, and filled with a sweet cream that just melts when you bite in. They remind me a little of the coconut-based sweets I grew up eating, but the rolled format makes them feel more like something you'd find in a bakery display case. The toasted coconut coating on the outside adds a nutty crunch that makes every bite interesting — this isn't a flat, one-note dessert.
Ingredients
- 1½ cups shredded sweetened coconut, divided
- 4 oz cream cheese, softened
- 3 tablespoons powdered sugar
- ½ teaspoon vanilla extract
- 2 tablespoons heavy cream
- ¼ teaspoon coconut extract (optional but recommended)
- 1 cup white chocolate chips, melted (for binding the outer coconut layer)
Instructions
- Toast 1 cup of the shredded coconut in a dry skillet over medium-low heat, stirring constantly, until golden — about 3-4 minutes. Set aside to cool completely.
- Beat the softened cream cheese, powdered sugar, vanilla, heavy cream, and coconut extract together until smooth and creamy. This is your filling.
- Mix the remaining ½ cup untoasted coconut into the melted white chocolate. Spread the mixture thinly on a parchment-lined sheet pan and refrigerate for 10 minutes until just firm enough to handle.
- Cut the coconut-chocolate sheet into rectangles. Place a small spoonful of cream filling at one end and roll tightly. Press the seam to seal.
- Roll each finished log in the toasted coconut and refrigerate for at least 30 minutes before serving.
Tips
- Tip: Make sure your cream cheese is fully at room temperature before mixing — cold cream cheese leaves lumps in the filling no matter how long you beat it.
- Tip: Work quickly when rolling — the white chocolate shell softens fast in warm hands. If it gets too sticky, pop it back in the fridge for 5 minutes.
- Tip: These keep well in the fridge for up to 4 days in an airtight container, making them a great make-ahead option for a party dessert tray.
17. Frozen Peanut Butter Yogurt Bark
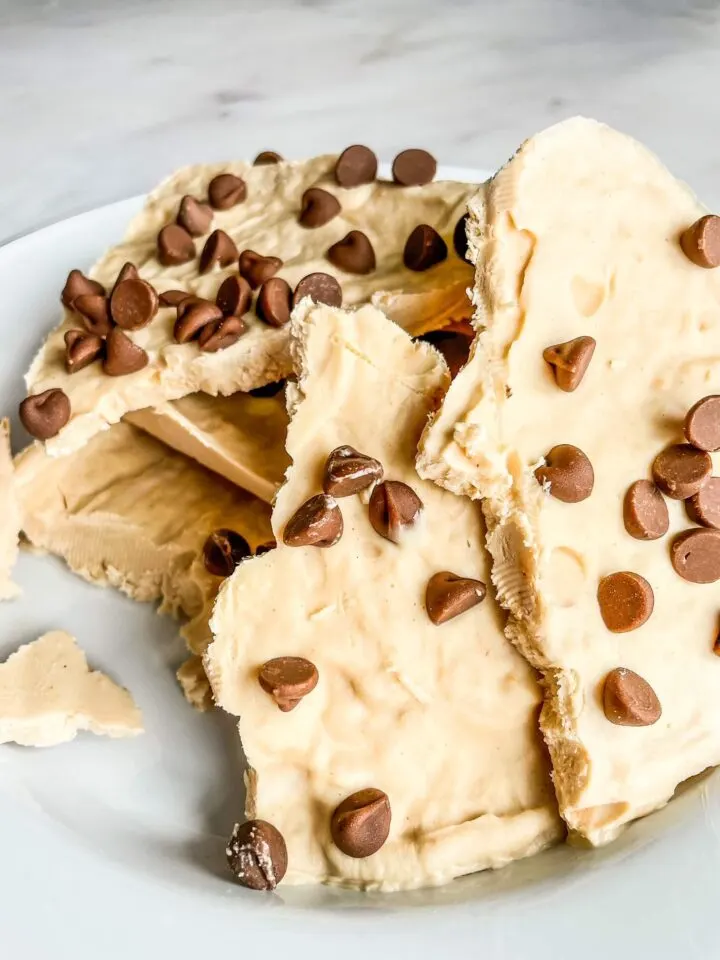
Yogurt bark is one of those things I wish someone had told me about sooner. You spread it, freeze it, break it — that's basically the whole process. This peanut butter version is my favorite because the swirl of peanut butter through the tangy yogurt base tastes like a frozen peanut butter cup, but without any of the effort. I make a double batch because it disappears in one meal — Saad found it in the freezer once and that was the end of my stash. The Greek yogurt base means it's actually filling, not just cold sugar.
Ingredients
- 2 cups plain Greek yogurt (full-fat works best)
- 3 tablespoons honey
- 1 teaspoon vanilla extract
- ⅓ cup creamy peanut butter
- 2 tablespoons mini chocolate chips
- 2 tablespoons crushed salted peanuts (optional)
Instructions
- Line a sheet pan with parchment paper. Mix the Greek yogurt, honey, and vanilla together until smooth.
- Spread the yogurt mixture evenly onto the prepared pan in a layer about ¼ inch thick.
- Warm the peanut butter for 20 seconds in the microwave to loosen it, then drop spoonfuls across the yogurt surface. Use a toothpick or skewer to swirl it through.
- Scatter mini chocolate chips and crushed peanuts across the top.
- Freeze for at least 3 hours or overnight. Break into irregular pieces and serve immediately straight from the freezer.
Tips
- Tip: Store bark pieces in a zip-lock bag in the freezer — they soften fast at room temperature so serve them straight from the freezer.
- Tip: Full-fat Greek yogurt gives a creamier, less icy texture than low-fat. The extra fat makes a real difference here.
- Tip: Swap toppings based on what you have — sliced banana, granola, or a drizzle of dark chocolate all work beautifully on top of the peanut butter swirl.
16. Chocolate Almond Flour Mug Cake
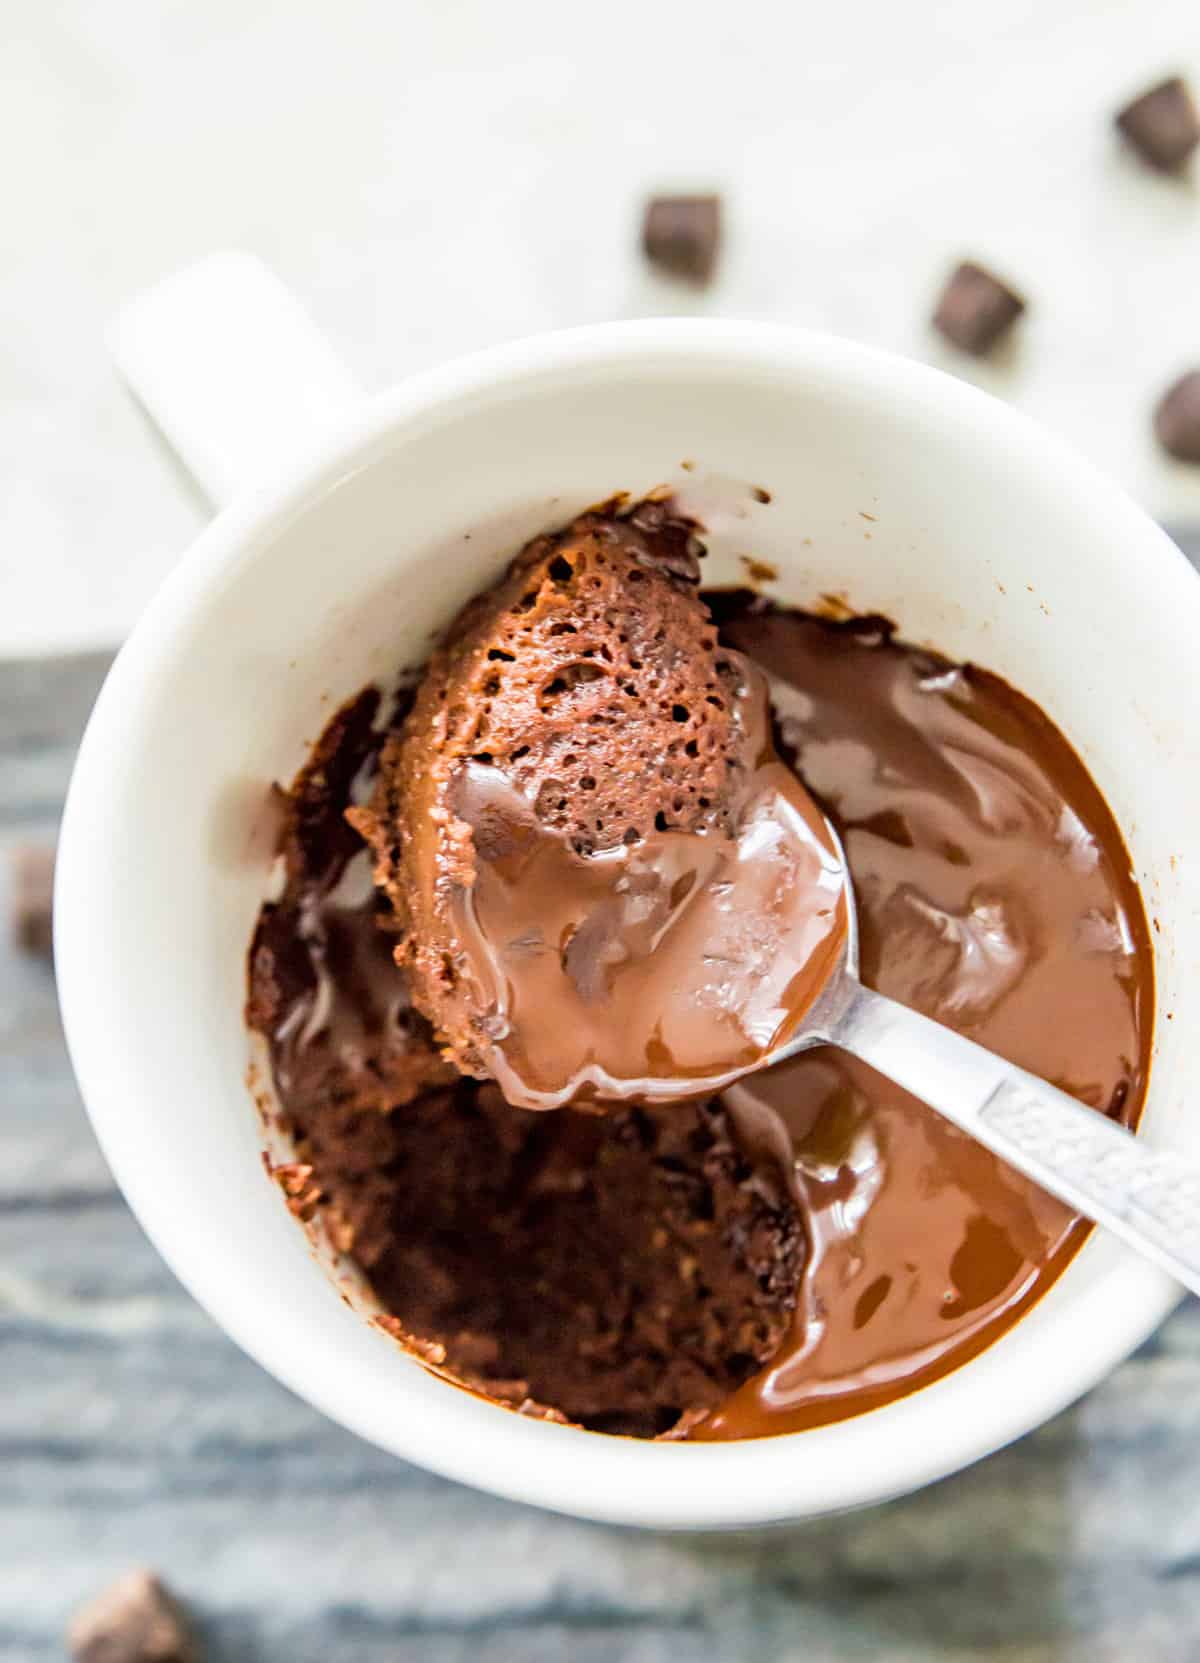
I was skeptical about almond flour in a mug cake the first time I tried it — I thought it would come out dense and grainy. It doesn't. The almond flour actually makes the texture more tender and fudgy than regular flour, and it keeps the cake gluten-free without tasting like health food. This is the mug cake I make when I want something that actually tastes like dessert, not a compromise. Three minutes from craving to eating — that's the whole timeline.
Ingredients
- 3 tablespoons almond flour
- 1½ tablespoons unsweetened cocoa powder
- 2 tablespoons granulated sugar (or coconut sugar)
- ¼ teaspoon baking powder
- Pinch of salt
- 1 large egg
- 2 tablespoons milk (any kind)
- 1 tablespoon melted butter or coconut oil
- ¼ teaspoon vanilla extract
- 1 tablespoon chocolate chips (optional, for a melty center)
Instructions
- In a large microwave-safe mug, whisk together the almond flour, cocoa powder, sugar, baking powder, and salt.
- Add the egg, milk, melted butter, and vanilla. Stir until completely smooth with no dry pockets at the bottom.
- If using, press the chocolate chips into the center of the batter.
- Microwave on high for 60-75 seconds. The center should look just set — slightly underdone is better than overdone, as it continues cooking from residual heat.
- Let sit for 1 minute before eating. Top with a spoonful of peanut butter or a scoop of ice cream if you're feeling it.
Tips
- Tip: Every microwave runs differently — start at 60 seconds and check. Overcooked mug cake turns rubbery fast, so err on the side of slightly underdone.
- Tip: Use a mug that holds at least 12 oz — the batter rises as it cooks and will overflow a small mug.
- Tip: Almond flour brands vary in texture — Bob's Red Mill superfine almond flour gives the smoothest result in this recipe.
15. 3 Ingredient Chocolate Mug Cake
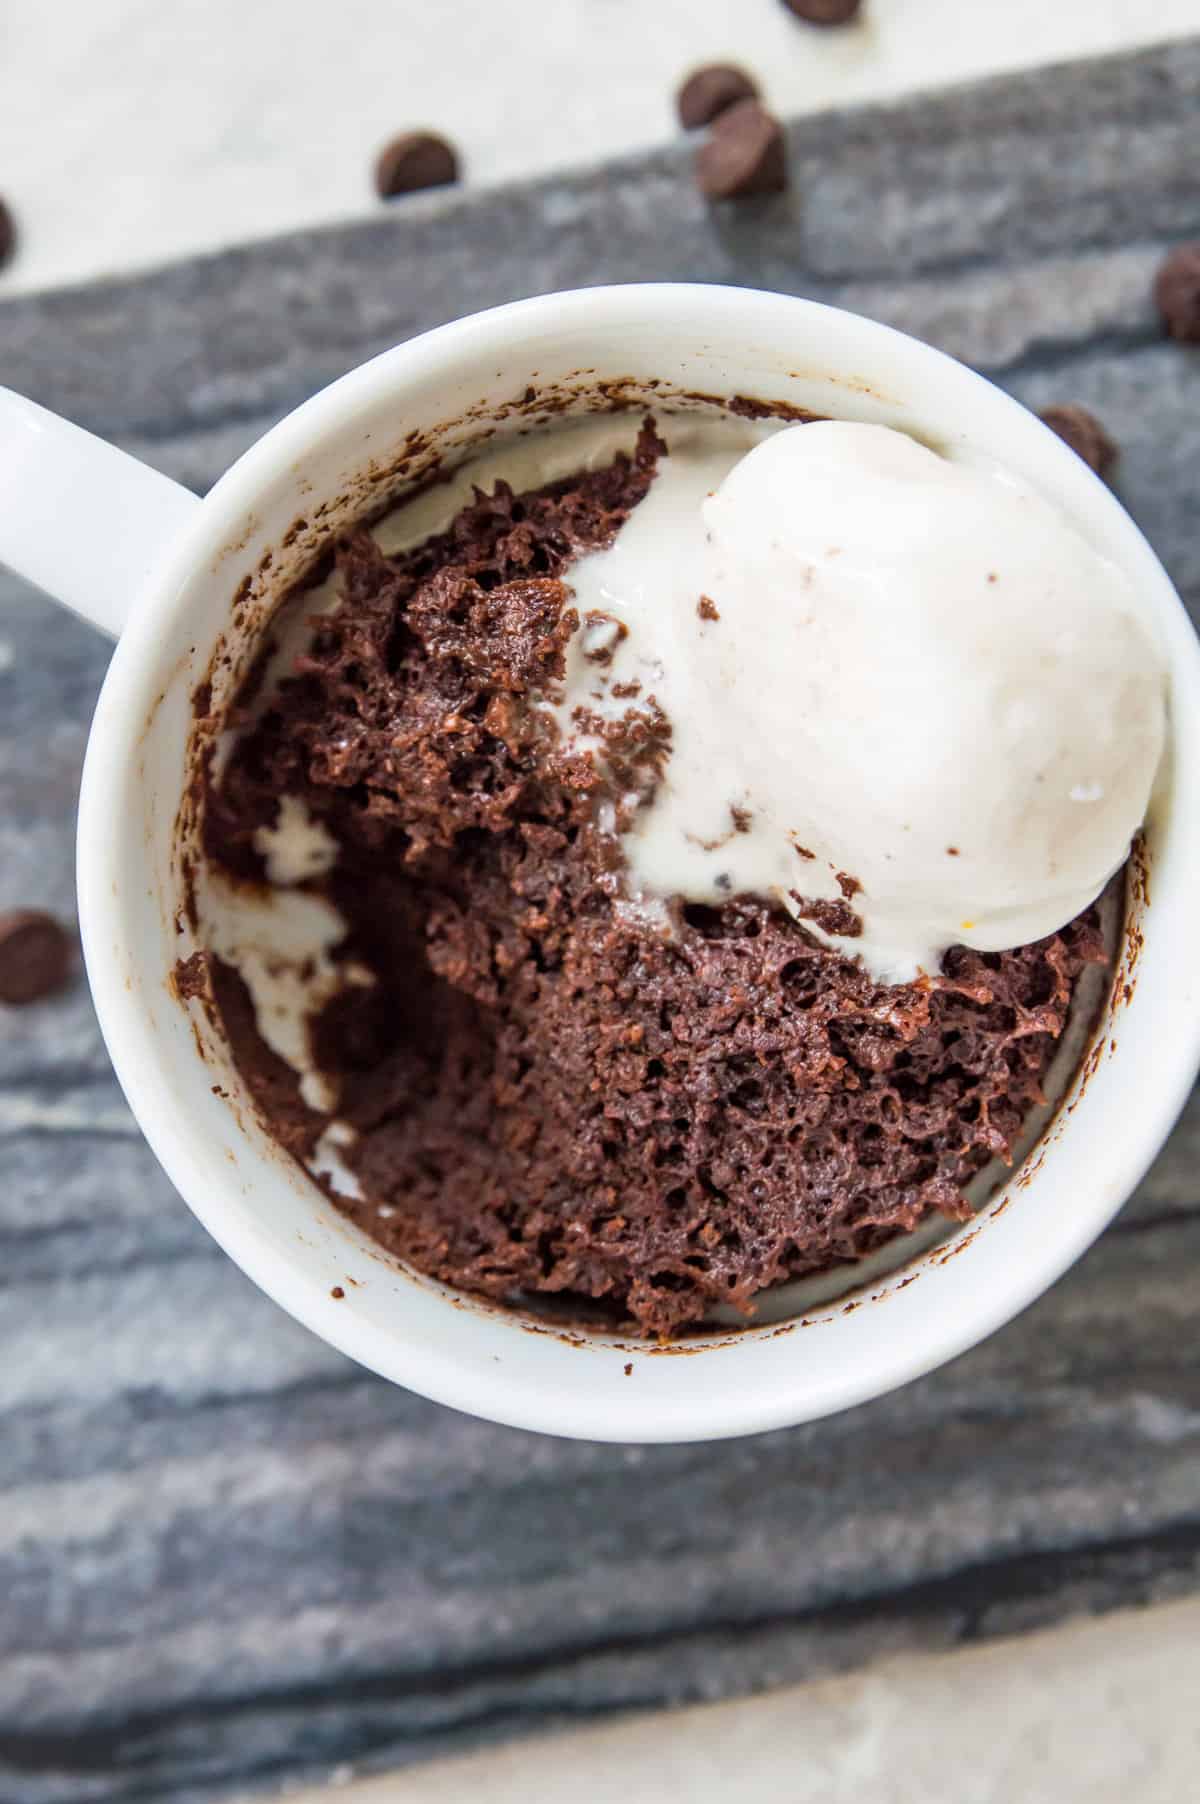
Three ingredients. I'll say it again — three. A can of black beans, an egg, and chocolate chips. That's it. I know it sounds completely wrong, and honestly I made this recipe with the most skeptical face possible the first time. But black beans blended smooth create a genuinely fudgy, dense cake base that tastes nothing like beans and everything like the richest chocolate cake you've had. It's also naturally gluten-free. This is the one I text people about when they say they can't bake.
Ingredients
- ¼ cup canned black beans, drained and rinsed
- 1 large egg
- 3 tablespoons semi-sweet chocolate chips, divided
Instructions
- Blend the drained black beans and egg together in a blender or small food processor until completely smooth — no visible bean pieces. If you don't have a blender, mash the beans as finely as possible with a fork and whisk in the egg thoroughly.
- Melt 2 tablespoons of the chocolate chips in the microwave in 20-second intervals, stirring between each, until smooth. Stir the melted chocolate into the bean-egg mixture.
- Pour the batter into a large microwave-safe mug. Press the remaining 1 tablespoon of chocolate chips on top.
- Microwave on high for 60-90 seconds until the top is just set. It will look slightly underdone in the center — that's right. Let it rest for 2 minutes before eating.
Tips
- Tip: Rinse your black beans very thoroughly — any residual liquid from the can has a strong flavor that you don't want bleeding into the cake.
- Tip: Use good quality chocolate chips here since they're carrying all the flavor — Ghirardelli or Trader Joe's semi-sweet chips work really well.
- Tip: This recipe scales up easily — double or triple it for a small batch of brownies baked in a greased ramekin at 350°F for 18-20 minutes.
10. Cottage Cheese Lemon Mousse

I'll be honest — cottage cheese in a dessert sounded wrong to me the first time I saw it. But I blended it up anyway, added lemon, a little honey, and some whipped cream, and the result was genuinely light and bright in a way that heavier mousses just aren't. It comes together in about five minutes if you have a blender, and it keeps well in the fridge for a couple of days, which means I can make it ahead when I know the week is going to be chaotic. If you're after something that feels refreshing rather than heavy after a meal, this is it.
Ingredients
- 1 cup full-fat cottage cheese
- 3 tablespoons honey (or maple syrup)
- 2 tablespoons fresh lemon juice
- 1 teaspoon lemon zest
- ½ teaspoon vanilla extract
- ½ cup heavy whipping cream, cold
- Pinch of salt
Instructions
- Add the cottage cheese, honey, lemon juice, lemon zest, vanilla, and salt to a blender or food processor. Blend on high for about 60 seconds until completely smooth — no lumps at all.
- In a separate bowl, whip the cold heavy cream until stiff peaks form. This takes about 2-3 minutes with a hand mixer, or a few more minutes by hand with a whisk.
- Gently fold the whipped cream into the blended cottage cheese mixture in two additions. Don't stir aggressively — fold slowly so you keep the mousse airy.
- Spoon into serving glasses or small bowls. Refrigerate for at least 30 minutes before serving. Top with extra lemon zest or fresh berries if you have them.
Tips
- Tip: Full-fat cottage cheese blends much smoother than low-fat. If all you have is low-fat, it'll still work but the texture will be slightly less creamy.
- Tip: Make sure your heavy cream is cold straight from the fridge — warm cream won't whip up properly and you'll end up with a flat mousse.
- Tip: This keeps covered in the fridge for up to 2 days. Give it a gentle stir before serving if it's been sitting overnight.
11. Kladdkaka Caramel Trifles (with Mars Bars)

Kladdkaka is a Swedish sticky chocolate cake — think somewhere between a brownie and a molten lava cake, dense and fudgy in the center. This recipe takes that base and layers it into individual trifles with caramel and chopped Mars Bars, and the result is the kind of dessert that makes everyone go quiet at the table. Mars Bars are easy to find at most Walmart or World Market stores in the US, or any Sainsbury's or Tesco in the UK. It looks impressive in individual glasses but the actual effort involved is not nearly as serious as it looks.
Ingredients
- ½ cup (1 stick) unsalted butter
- ¾ cup granulated sugar
- 2 large eggs
- ½ cup all-purpose flour
- 3 tablespoons unsweetened cocoa powder
- 1 teaspoon vanilla extract
- Pinch of salt
- 3 Mars Bars, roughly chopped
- ½ cup store-bought caramel sauce (or dulce de leche)
- 1 cup heavy whipping cream, whipped to soft peaks
Instructions
- Preheat oven to 350°F. Melt the butter and stir in the sugar. Whisk in the eggs one at a time, then add the vanilla. Fold in the flour, cocoa, and salt until just combined — don't overmix.
- Pour into a greased 8-inch round cake pan and bake for 15-18 minutes. The center should look slightly underdone — that's exactly right for kladdkaka. Let it cool completely in the pan, then cut or crumble into rough chunks.
- Whip the heavy cream to soft peaks. Have your caramel sauce and chopped Mars Bars ready.
- To assemble: place a layer of kladdkaka chunks in the bottom of each serving glass. Drizzle with caramel sauce, scatter over some Mars Bar pieces, then spoon over whipped cream. Repeat the layers once more, ending with cream and a few Mars Bar pieces on top.
- Refrigerate for at least 20 minutes before serving so the layers settle. Serve cold.
Tips
- Tip: The kladdkaka is intentionally gooey and under-baked in the center — don't leave it in longer thinking it needs more time. That sticky center is what makes this dessert work in trifle form.
- Tip: No Mars Bars? Snickers or Milky Way bars work as a substitute and give a similar caramel-chocolate-nougat effect.
- Tip: You can bake the kladdkaka a day ahead and keep it covered at room temperature — assemble the trifles the day of serving.
12. Frog In The Pond
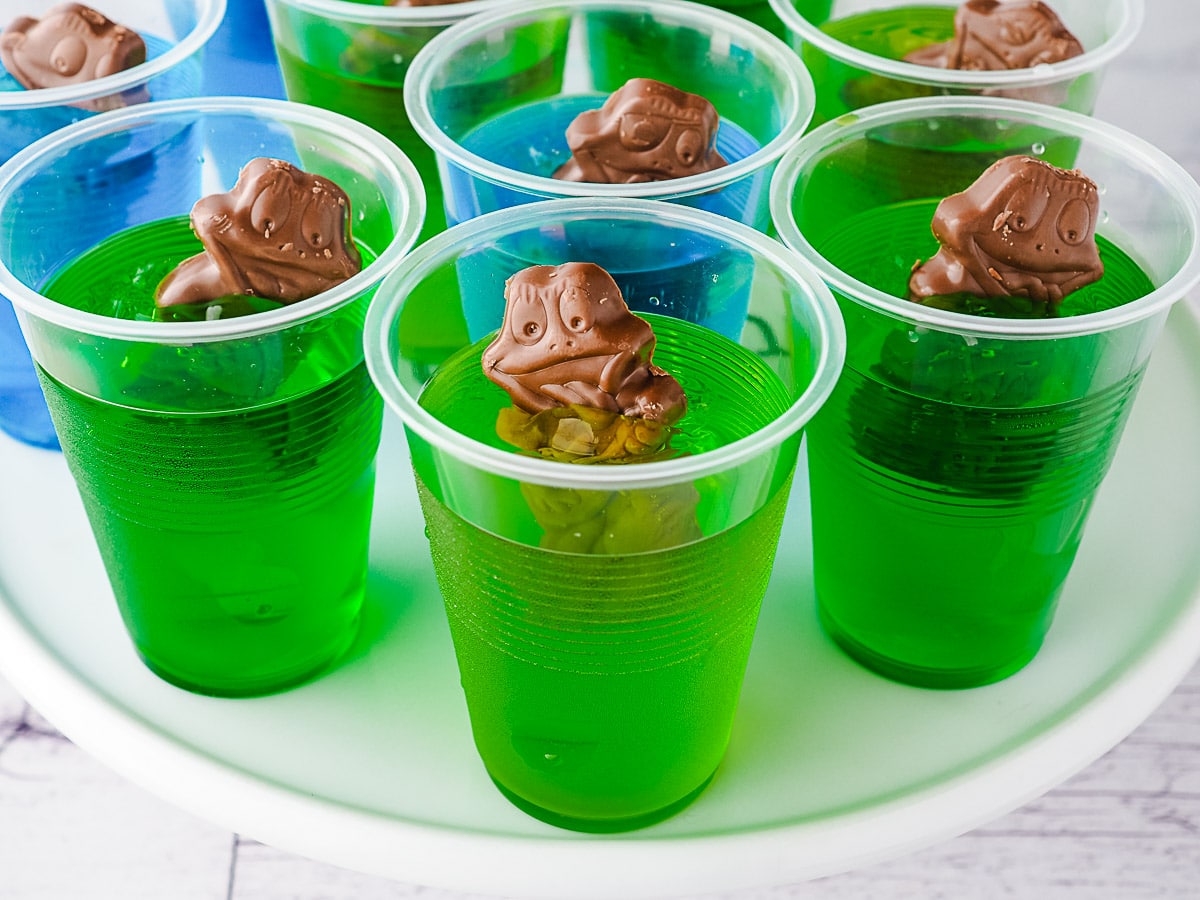
Saad thought this was the greatest thing I'd ever made, and it is literally just jelly with a chocolate frog sitting in the middle. That's it. You set blue or green jello halfway, press in a chocolate frog candy, let it finish setting, and suddenly you have the most dramatic dessert on the table. It's an Australian classic — the kind of thing kids remember for years — and it genuinely requires about four minutes of active effort. I used blue raspberry Jell-O from Walmart and it looked exactly like a little pond. The kids lost their minds.
Ingredients
- 1 box (3 oz) blue raspberry or lime Jell-O (or any green/blue flavored gelatin)
- 1 cup boiling water
- 1 cup cold water
- 4-6 chocolate frog candies (found at World Market, Cost Plus, or online — gummy frogs work too)
- Whipped cream for serving (optional)
Instructions
- Dissolve the Jell-O powder in 1 cup of boiling water and stir for about 2 minutes until fully dissolved. Stir in the cold water.
- Pour the jello into individual serving cups or glasses — fill each about two-thirds of the way. Refrigerate for 1.5 to 2 hours until the jello is partially set but still a little wobbly on top (not fully firm).
- Press one chocolate frog into each cup so it's sitting upright with its head poking out of the jello surface. Return to the fridge and let set completely — at least another 1.5 hours, or overnight.
- Serve cold, straight from the fridge. Add a dollop of whipped cream around the frog if you want it to look like lily pad foam.
Tips
- Tip: The timing on the partial set matters — too soon and the frog sinks to the bottom, too late and it won't embed at all. Check it after 90 minutes; it should hold a spoon indentation but still jiggle.
- Tip: Can't find chocolate frogs? Green gummy frogs from any candy aisle work just as well and are easier to find at Target or Walmart.
- Tip: Make these the night before a party — they need the time to set fully and they keep perfectly in the fridge for up to 2 days.
13. Creamy 3-Ingredient Coffee Mousse (Eggless)
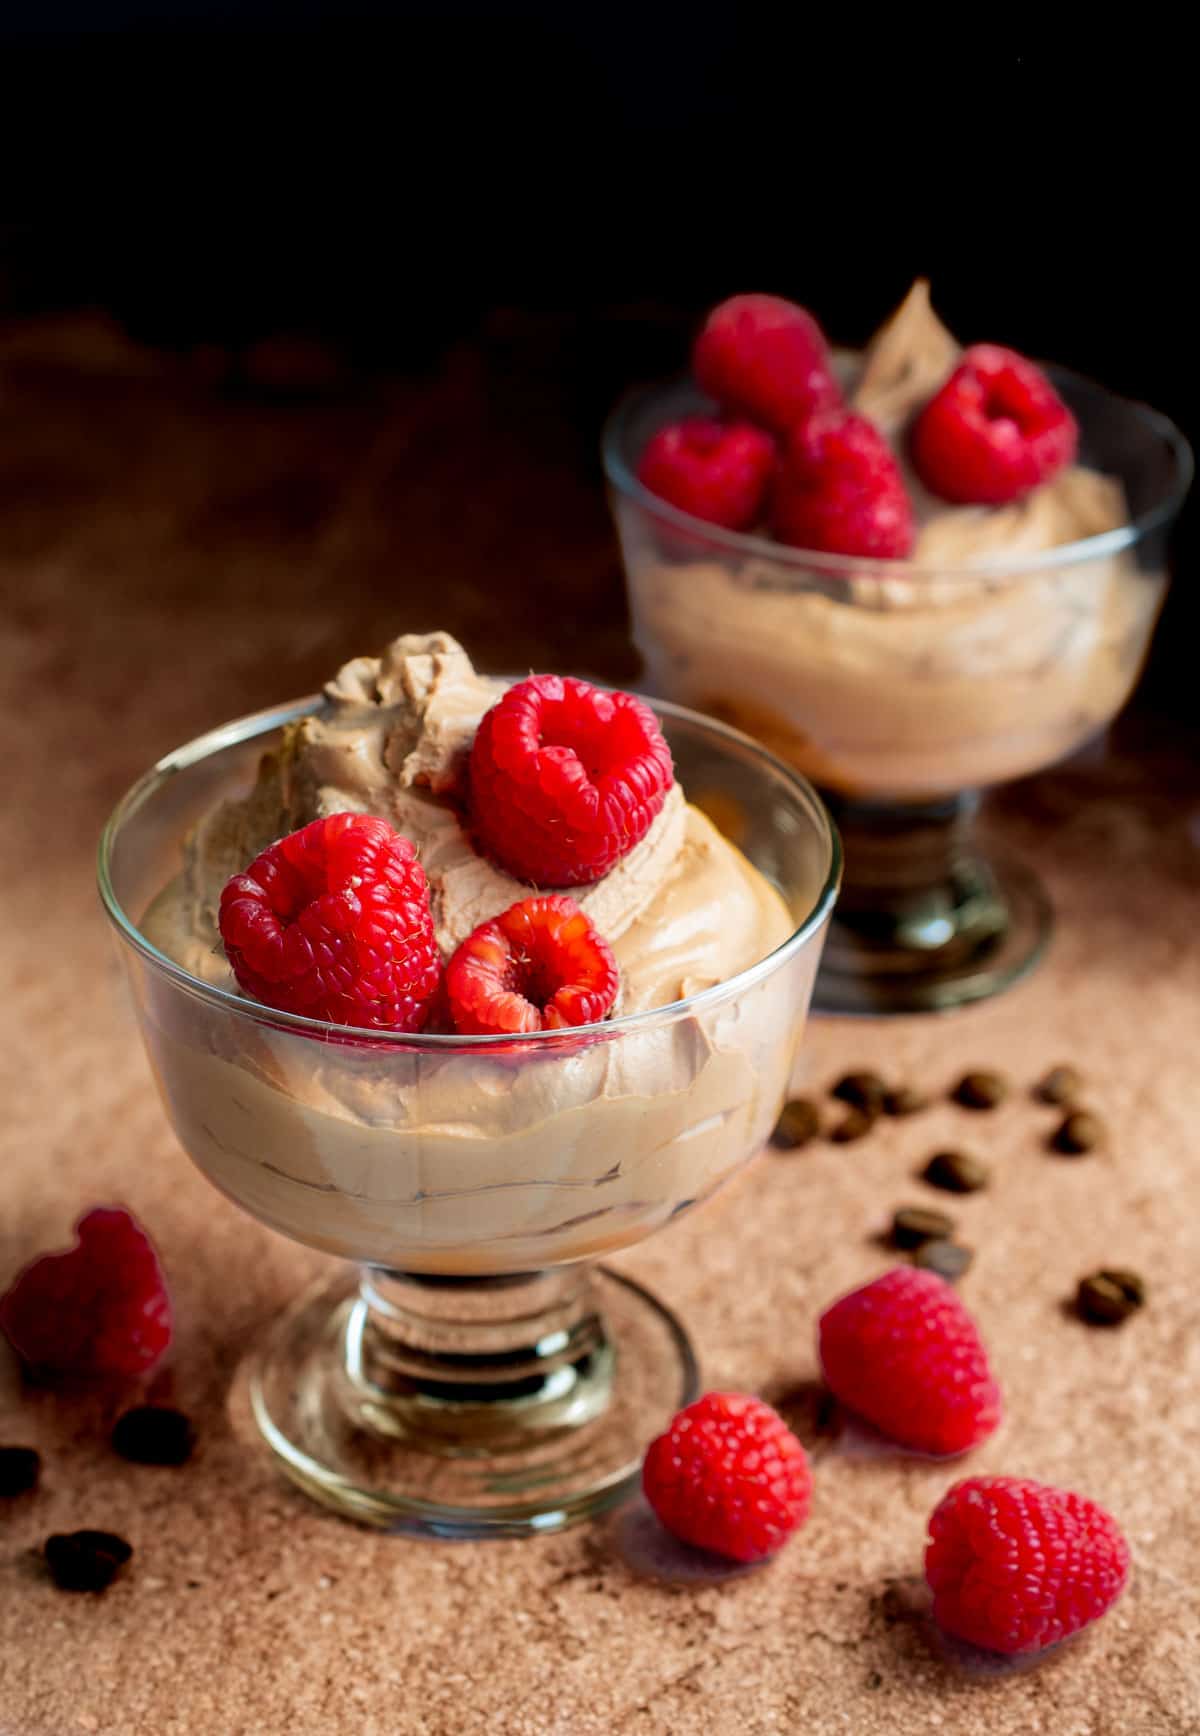
Three ingredients, no eggs, about ten minutes of work, and you end up with something that looks like it came out of a restaurant. The base is just heavy cream, instant coffee, and sweetened condensed milk — whipped together until thick and mousse-like. It's intensely coffee-forward, so if you're a coffee person, this is going to be your new go-to. I make a double batch because it disappears fast — my husband can finish his portion before I've even sat down. Serve it in small glasses because it's rich enough that a little goes a long way.
Ingredients
- 2 cups heavy whipping cream, cold
- 3 tablespoons instant coffee granules (or 2 tablespoons instant espresso powder for stronger flavor)
- ⅓ cup sweetened condensed milk
Instructions
- Dissolve the instant coffee in 1 tablespoon of very hot water, stirring until completely liquid. Let it cool for 2-3 minutes — you don't want to add hot liquid to cold cream.
- Combine the cold heavy cream, sweetened condensed milk, and dissolved coffee in a large bowl. Beat with a hand mixer on medium-high speed for 3-4 minutes until the mixture holds stiff peaks and looks thick and mousse-like.
- Spoon or pipe into small serving glasses. Refrigerate for at least 1 hour before serving — this lets the mousse firm up properly. Dust lightly with cocoa powder or a few coffee granules on top before serving.
Tips
- Tip: Keep everything cold — the bowl, the cream, even the beaters if you can. Warm cream takes much longer to whip and sometimes won't reach stiff peaks at all.
- Tip: Adjust the sweetness by adding a little more or less condensed milk — the mousse will be less sweet if you pull back, which some people prefer with coffee desserts.
- Tip: This keeps well in the fridge for up to 3 days covered. It may soften slightly but a quick re-whip brings it back.
14. Baked Yogurt with Caramel Shards

Baked yogurt is one of those desserts that looks like you really know what you're doing, but the technique is almost embarrassingly simple — you whisk yogurt with a few things, pour it into ramekins, and bake it low and slow until it sets into something silky and custard-adjacent. The caramel shards on top are just melted sugar poured thin and left to harden, which sounds scary but takes about four minutes once you get going. Growing up in Pakistan, we always had dahi (yogurt) on the table but always savory — turning it into a dessert this elegant still feels like a small revelation to me.
Ingredients
- 2 cups full-fat plain yogurt (Greek yogurt works well here)
- 3 tablespoons sweetened condensed milk
- 2 tablespoons heavy cream
- 1 teaspoon vanilla extract
- Pinch of cardamom (optional but good)
- ½ cup granulated sugar (for the caramel shards)
- 2 tablespoons water (for the caramel)
Instructions
- Preheat oven to 300°F. Whisk together the yogurt, condensed milk, heavy cream, vanilla, and cardamom until completely smooth. Pour into 4 small ramekins.
- Place the ramekins in a deep baking dish. Pour hot water into the baking dish until it comes halfway up the sides of the ramekins. Bake for 35-40 minutes until the yogurt is just set — it should have a slight wobble in the center when you shake the pan gently.
- Remove ramekins from the water bath and let cool to room temperature, then refrigerate for at least 2 hours (or overnight).
- For the caramel shards: combine sugar and water in a small saucepan over medium heat. Do not stir — just swirl the pan occasionally. Cook until the sugar turns a deep amber color, about 6-8 minutes. Immediately pour onto a parchment-lined sheet pan in a thin layer. Let it harden completely at room temperature, about 10 minutes, then break into shards.
- Just before serving, press a few caramel shards into the top of each baked yogurt. Serve immediately — the shards will start to soften after about 20 minutes.
Tips
- Tip: Don't skip the water bath — it keeps the heat gentle and even, which is what gives the baked yogurt that smooth, silky texture rather than a rubbery one.
- Tip: Watch the caramel carefully once it starts to color — it goes from golden to burnt very quickly. Pull it off the heat the moment it turns a deep amber.
- Tip: The baked yogurt can be made up to 2 days ahead and kept covered in the fridge. Make the caramel shards the day you plan to serve so they stay crisp.
9. Easy Lemon Cheesecake Parfait Recipe
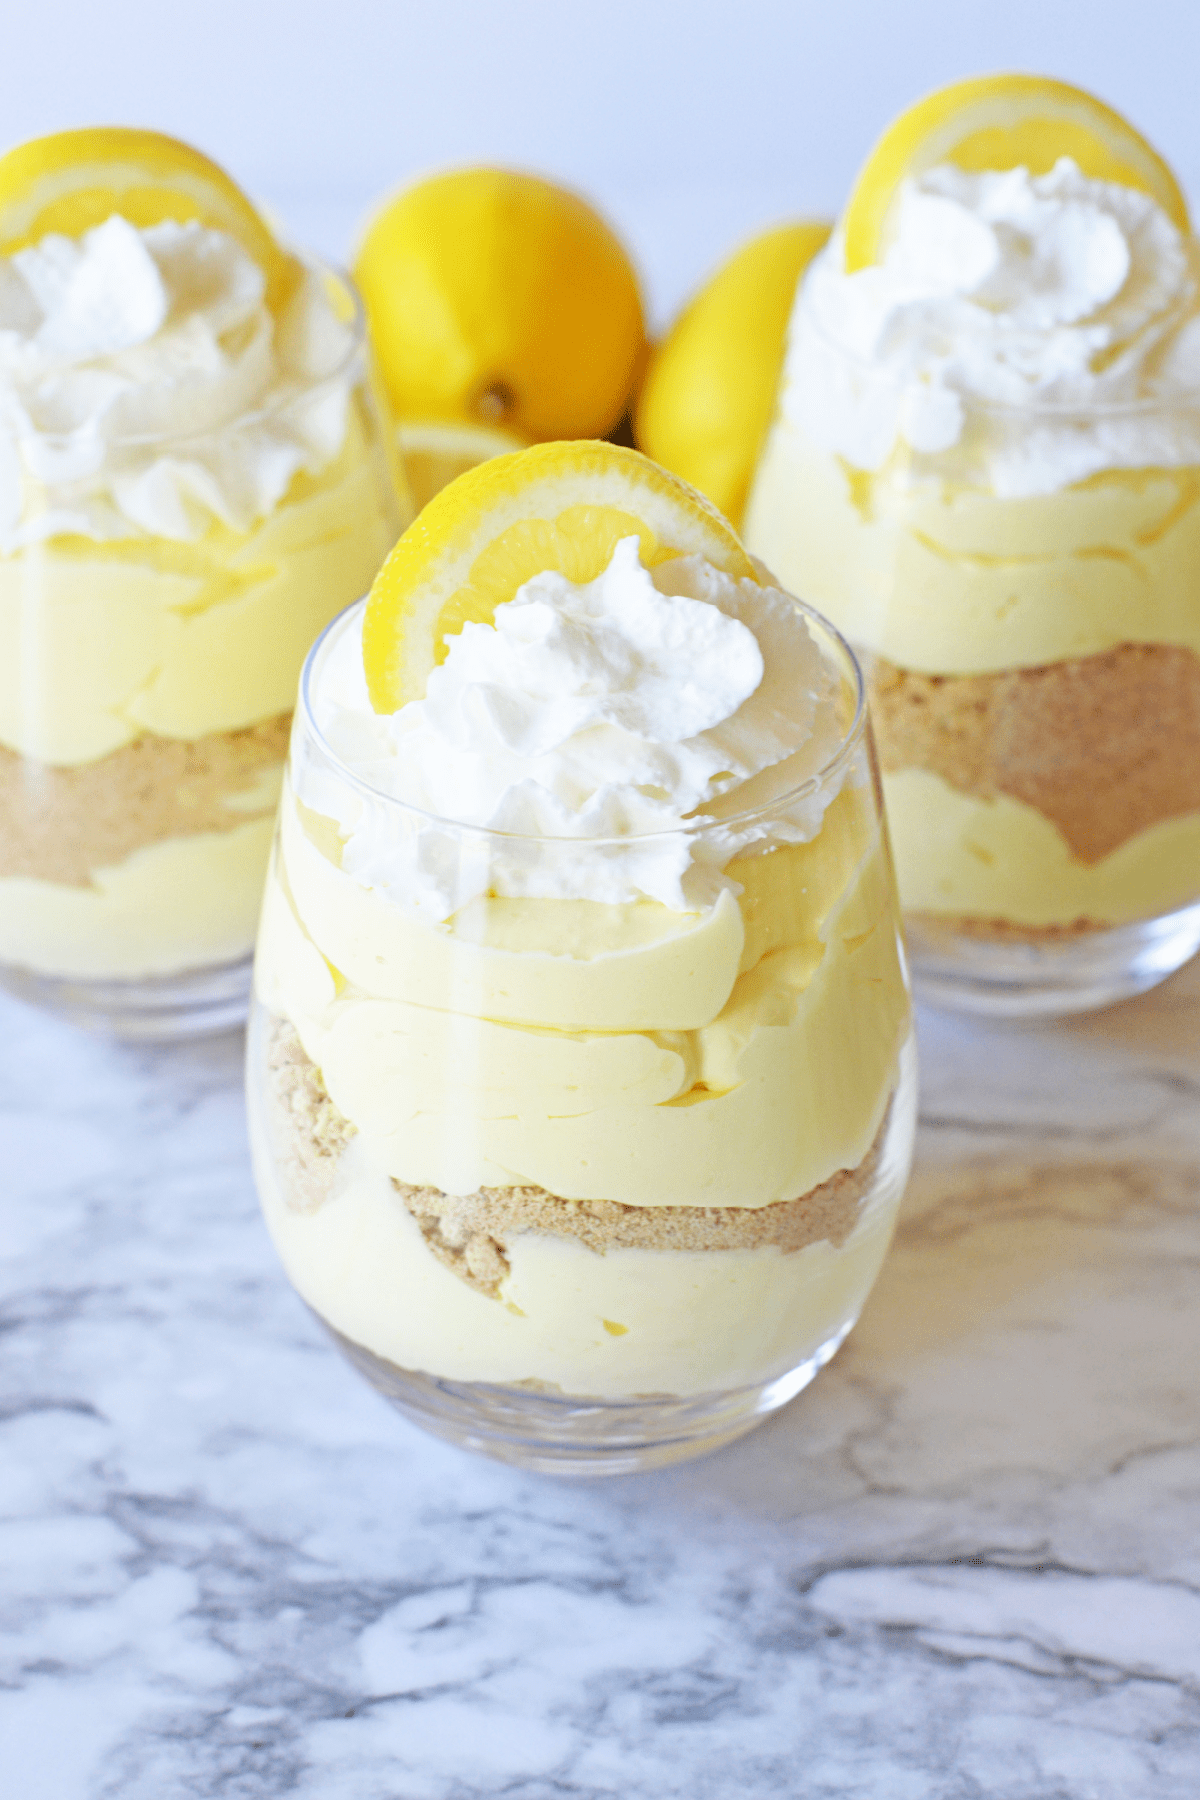
These lemon cheesecake parfaits are my go-to when I want something that looks impressive but takes almost no effort. Layers of tangy cream cheese filling, crushed graham crackers, and that hit of lemon make every spoonful feel like an actual cheesecake — minus the baking, minus the water bath, minus the cracked top situation I've dealt with more than once. I make these in regular drinking glasses when I don't have proper parfait cups, and honestly they look just as good. They need about an hour in the fridge to set up properly, so I make them right after dinner cleanup and they're ready by the time the kids are done with their homework.
Ingredients
- 8 oz cream cheese, softened to room temperature
- 1 cup powdered sugar, sifted
- 3 tablespoons fresh lemon juice (about 1 large lemon)
- 1 teaspoon lemon zest
- 1 cup heavy whipping cream
- 1 cup graham cracker crumbs (about 8 full crackers, crushed)
- 2 tablespoons unsalted butter, melted
- Lemon slices or zest curls for garnish (optional)
Instructions
- Mix the graham cracker crumbs with the melted butter until combined. Set aside — this is your crust layer.
- Beat the softened cream cheese with the powdered sugar until smooth and fluffy, then mix in the lemon juice and zest. Taste it — it should be tangy and bright.
- In a separate bowl, whip the heavy cream until stiff peaks form. Fold it gently into the cream cheese mixture — don't overmix or you'll lose the fluffiness.
- Layer into glasses: start with a spoonful of graham crumbs, then cream cheese filling, then crumbs again, then more filling on top. Repeat until the glass is full.
- Refrigerate for at least 1 hour before serving. Garnish with lemon zest or a small slice of lemon right before you bring them to the table.
Tips
- Tip: Cold cream cheese will not beat smooth — it stays lumpy no matter how long you mix it. Pull it out of the fridge at least 30 minutes before you start.
- Tip: You can assemble these up to 24 hours ahead and keep them covered in the fridge — the crumbs will soften slightly, which is actually nice.
- Tip: If you want to skip whipping cream from scratch, a tub of Cool Whip folded in works just as well for a weeknight version.
8. Snowballs Coconut Fudge Truffles
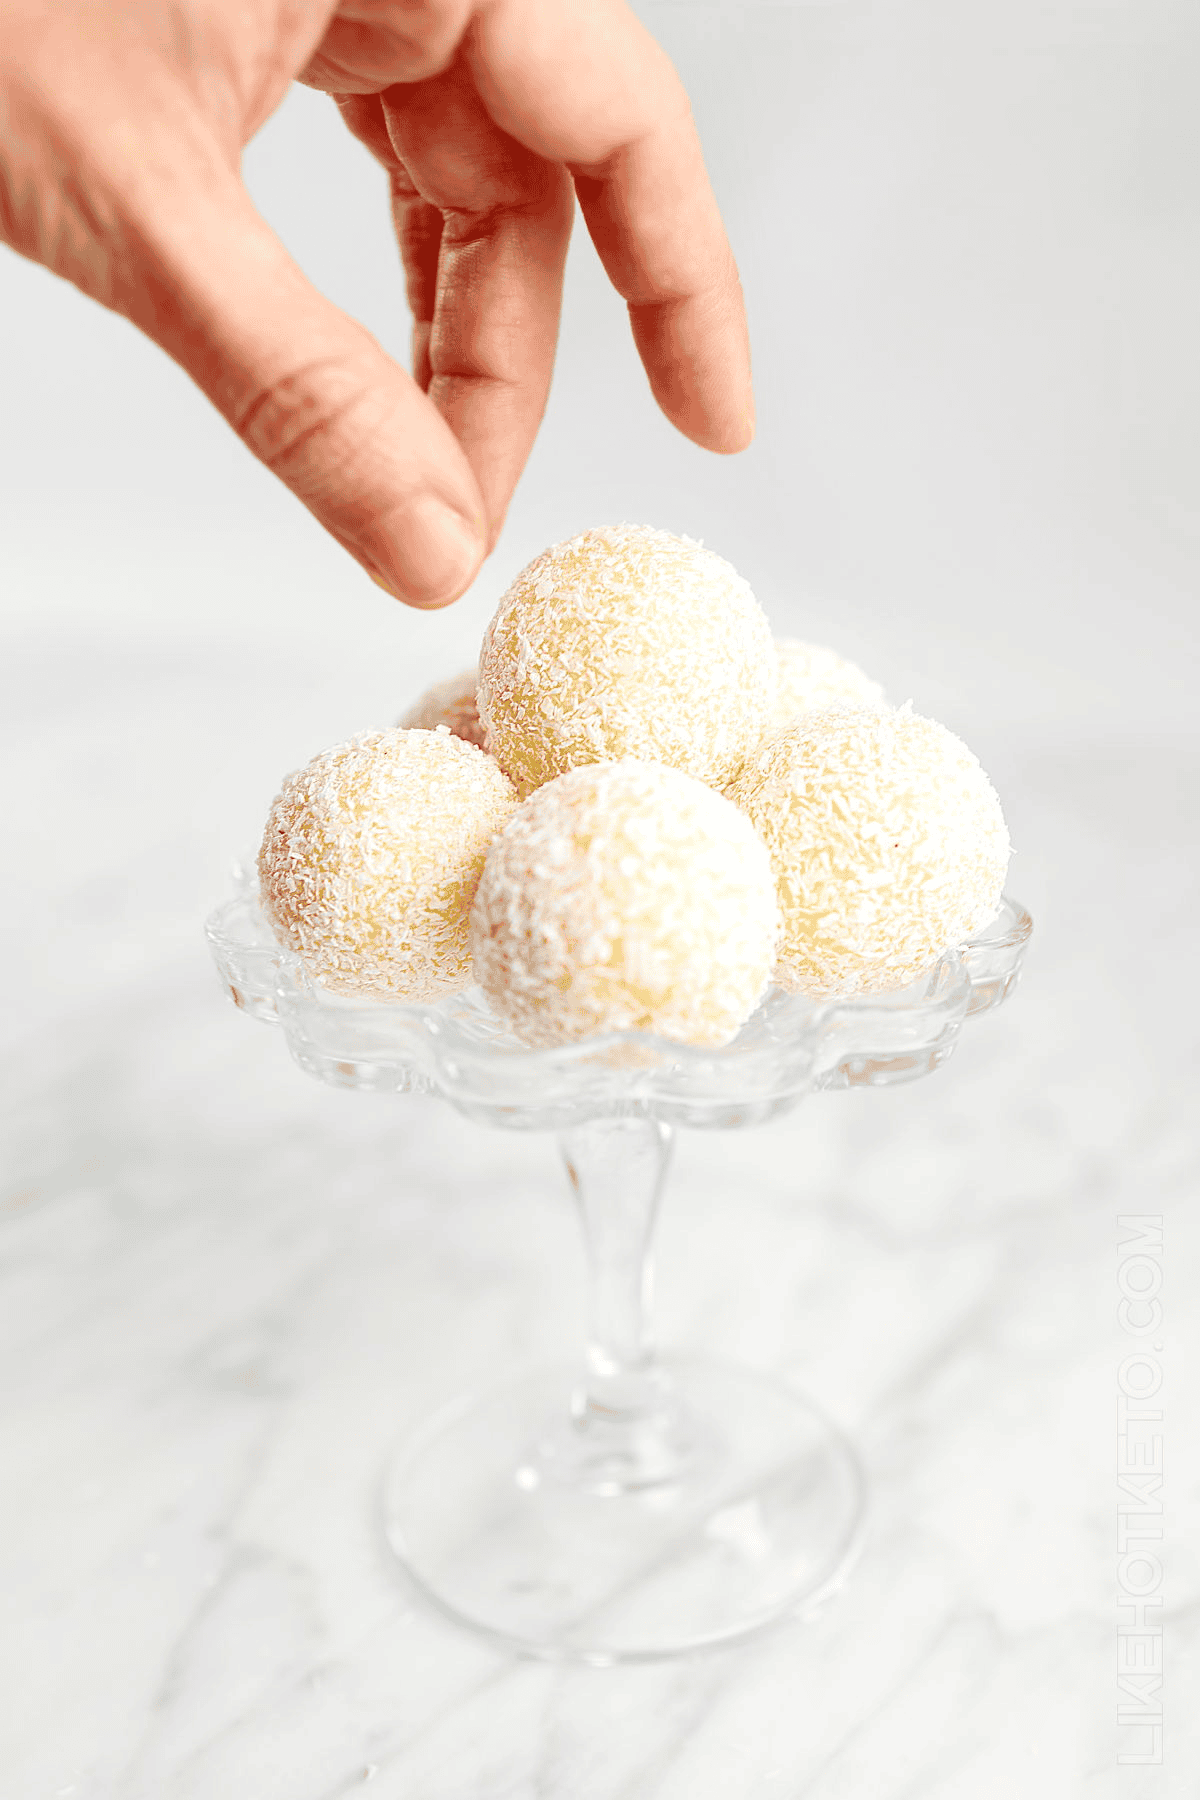
Coconut fudge truffles — rolled in shredded coconut so they look like little snowballs — are one of those no-bake treats that disappear faster than I can make them. The center is rich and chocolatey, and the coconut coating gives you that slight chew and sweetness that makes one truffle feel like a complete dessert. I usually make a double batch because a single batch lasts maybe two days in our house, and that's only if I hide them in the back of the fridge where the kids don't immediately spot them. They're also the kind of thing you can bring to a gathering and people assume took way more effort than they did.
Ingredients
- 1 cup semi-sweet chocolate chips
- ½ cup heavy cream
- 2 tablespoons unsalted butter
- 1 teaspoon vanilla extract
- Pinch of salt
- 1½ cups shredded sweetened coconut, for rolling
Instructions
- Place chocolate chips and butter in a heatproof bowl. Heat the heavy cream in a small saucepan over medium heat until it just begins to simmer, then pour it over the chocolate. Let it sit for 2 minutes without stirring.
- Add the vanilla and salt, then stir gently from the center outward until the mixture is completely smooth and glossy. This is your ganache.
- Cover with plastic wrap and refrigerate for at least 2 hours, until the ganache is firm enough to scoop and roll without sticking to your hands.
- Scoop out tablespoon-sized portions and roll quickly between your palms into balls. Work fast — the warmth of your hands softens the ganache quickly.
- Roll each ball in the shredded coconut, pressing lightly so it sticks. Place on a parchment-lined tray and refrigerate until firm, about 30 minutes.
Tips
- Tip: If the ganache gets too soft while you're rolling, pop it back in the fridge for 15 minutes — fighting soft ganache is a battle you won't win.
- Tip: Toasted coconut instead of plain gives these a nuttier, deeper flavor — just spread it on a dry pan over medium heat for a couple of minutes, watching it carefully.
- Tip: These keep well in an airtight container in the fridge for up to a week — if they last that long.
7. Strawberry Crisp (Gluten-Free, Vegan)

A warm strawberry crisp straight out of the oven is one of those desserts that works on everyone — the filling is jammy and bubbling, and the oat topping crisps up into something that feels almost like granola baked right on top of the fruit. This version is gluten-free and vegan, which matters when you're feeding a group with different dietary needs and don't want to make two separate desserts. I use certified gluten-free oats (you can find them at most Walmart or Whole Foods locations) to keep it safe for anyone with actual gluten sensitivity. Serve it warm with a scoop of dairy-free vanilla ice cream if you're keeping it vegan, or regular vanilla if you're not — both work.
Ingredients
- 4 cups fresh strawberries, hulled and halved
- 2 tablespoons maple syrup
- 1 tablespoon cornstarch
- 1 teaspoon vanilla extract
- 1 cup certified gluten-free rolled oats
- ¼ cup almond flour
- 3 tablespoons maple syrup (for the topping)
- 3 tablespoons coconut oil, melted
- ¼ teaspoon cinnamon
- Pinch of salt
Instructions
- Preheat your oven to 350°F. Toss the strawberries with 2 tablespoons maple syrup, cornstarch, and vanilla extract. Spread into an 8x8 inch baking dish.
- In a separate bowl, combine the oats, almond flour, 3 tablespoons maple syrup, melted coconut oil, cinnamon, and salt. Stir until everything is clumped together and looks like a rough crumble.
- Spread the oat topping evenly over the strawberries in the baking dish. Don't press it down too hard — you want some texture and air in there.
- Bake for 30-35 minutes, until the topping is golden and the strawberry filling is bubbling at the edges. Let it sit for 10 minutes before serving so the filling thickens slightly.
Tips
- Tip: Frozen strawberries work here — thaw them first and drain off the excess liquid so the filling doesn't get watery.
- Tip: If you don't need it to be vegan, regular butter works in place of coconut oil and gives the topping an even better crunch.
- Tip: Add a handful of sliced almonds or chopped pecans to the topping for extra texture — it makes it feel fancier with zero additional effort.
6. How To Grill Peaches

I had never grilled fruit before moving here — the concept just didn't exist in the way I grew up cooking. Then one summer I had a bag of peaches that were ripe to the point of almost too ripe, and I figured the grill was worth a try. The heat caramelizes the natural sugars and the peach gets this soft, almost jammy texture with gorgeous char marks on the outside. It's technically a three-ingredient situation — peaches, butter, and a little brown sugar — and it works both as a standalone dessert and as a topping for easy summer desserts like ice cream or pound cake. If you don't have an outdoor grill, a grill pan on the stovetop gives you the same result.
Ingredients
- 4 ripe but firm peaches, halved and pitted
- 2 tablespoons unsalted butter, melted
- 2 tablespoons brown sugar
- ½ teaspoon cinnamon (optional)
- Vanilla ice cream or whipped cream, for serving
Instructions
- Preheat your grill or grill pan to medium-high heat. Mix the melted butter with the brown sugar and cinnamon in a small bowl.
- Brush the cut side of each peach half generously with the butter-sugar mixture. Make sure you coat right to the edges.
- Place the peaches cut-side down on the grill. Do not move them for 3-4 minutes — you need that contact time to get the char marks and caramelization. Resist the urge to peek.
- Flip the peaches and grill skin-side down for another 2-3 minutes until the peach is soft all the way through when you poke it with a knife.
- Serve warm with a scoop of vanilla ice cream or a dollop of whipped cream. A drizzle of honey on top is optional but very good.
Tips
- Tip: Peaches that are too soft will fall apart on the grill — you want fruit that gives slightly when you press it but still holds its shape.
- Tip: A grill pan on the stovetop over high heat works perfectly if you don't have an outdoor grill — just open a window because it will smoke a bit.
- Tip: Nectarines and plums grill beautifully using the exact same method if peaches aren't in season.
5. Strawberry Parfait (Strawberry Fool)

A strawberry fool is a classic British dessert — essentially crushed sweetened strawberries folded through whipped cream — and it's one of the lightest, most effortless things you can put on a table at the end of a meal. I call it a parfait here because I layer the strawberry mixture and plain whipped cream in glasses rather than folding everything together, which gives you those pretty pink-and-white layers when you look at it from the side. There's no baking, no cooking, no equipment beyond a bowl and a hand mixer or whisk. Zainab declared this her favorite summer dessert after the first time I made it, and I've probably made it ten times since then just because it takes fifteen minutes from start to finish.
Ingredients
- 2 cups fresh strawberries, hulled
- 3 tablespoons granulated sugar, divided
- 1 teaspoon lemon juice
- 1 cup heavy whipping cream
- 1 teaspoon vanilla extract
- Fresh mint leaves, for garnish (optional)
Instructions
- Slice or roughly mash the strawberries with 2 tablespoons of sugar and the lemon juice. You want some pieces and some pulpy juice — not a smooth puree. Let them sit for 10 minutes so the sugar draws out the juices.
- Whip the heavy cream with the remaining 1 tablespoon of sugar and vanilla extract until soft peaks form. Don't take it all the way to stiff peaks — a slightly soft whipped cream folds and layers more beautifully.
- To assemble: spoon a layer of whipped cream into the bottom of each glass, then a layer of the strawberry mixture, then whipped cream again, finishing with strawberries on top. Repeat until the glass is filled.
- Serve immediately for the lightest texture, or refrigerate for up to 2 hours. Garnish with a mint leaf or a whole strawberry right before serving.
Tips
- Tip: The bowl and beaters need to be cold for whipping cream to work properly — stick them in the freezer for 10 minutes before you start if your kitchen is warm.
- Tip: Frozen strawberries that have been thawed and drained work fine here — the texture of the fool is forgiving enough that it doesn't matter.
- Tip: For a more traditional fool, fold the strawberry mixture directly into the whipped cream for a swirled pink cream — less layered but just as good.
30. Easy Peach Cobbler with Canned Peaches
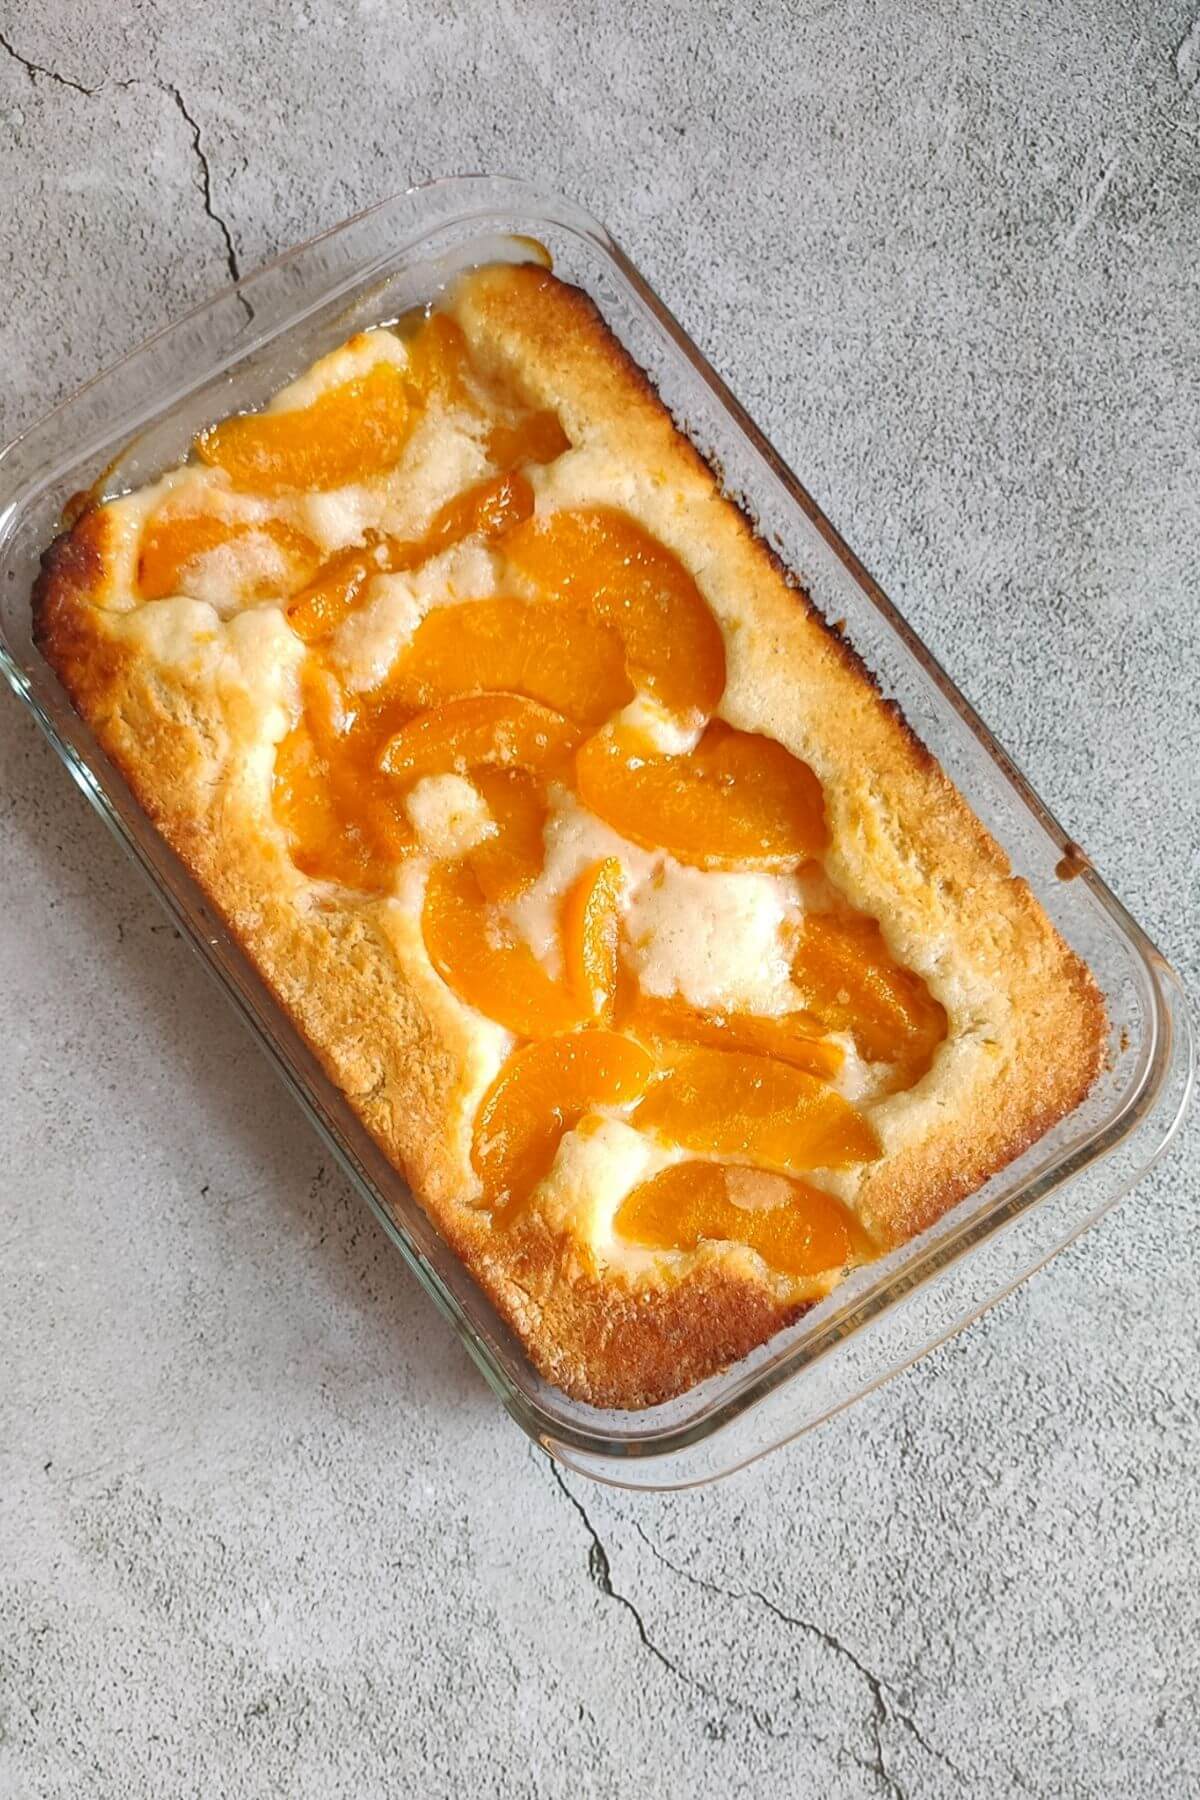
Peach cobbler is one of those desserts that feels like a lot of effort but really isn't — especially when you're using canned peaches. I started making this version on weeknights when I wanted something warm and comforting without standing in the kitchen for an hour. The batter comes together in minutes, the canned peaches go right in without any peeling or slicing, and the oven does everything else. Serve it warm with a scoop of vanilla ice cream and nobody is asking questions about whether the peaches were fresh.
Ingredients
- 1 can (29 oz) sliced peaches in syrup (do not drain)
- ½ cup (1 stick) unsalted butter
- 1 cup all-purpose flour
- 1 cup granulated sugar
- 1 cup whole milk
- 1½ teaspoons baking powder
- ¼ teaspoon salt
- ½ teaspoon ground cinnamon
Instructions
- Preheat your oven to 350°F. Place the butter in a 9x13 inch baking dish and set it in the oven for a few minutes until fully melted — watch it so it doesn't brown.
- In a bowl, whisk together the flour, sugar, baking powder, salt, and cinnamon. Stir in the milk until you have a smooth, thin batter.
- Pour the batter directly over the melted butter in the dish. Do not stir — just let it settle.
- Spoon the canned peaches and their syrup evenly over the batter. Again, don't stir — the batter will rise up around the peaches as it bakes.
- Bake for 50-55 minutes until the top is golden and the edges are bubbling. Let it rest for 10 minutes before serving.
Tips
- Tip: Don't skip the syrup from the can — it soaks into the batter and adds extra sweetness and that glossy top layer.
- Tip: This works with canned pears or canned mixed fruit too if that's what you have in the pantry.
- Tip: Leftovers reheat well in the microwave for about 45 seconds — the topping softens a bit but it still tastes great.
31. Chocolate Banana Spring Rolls
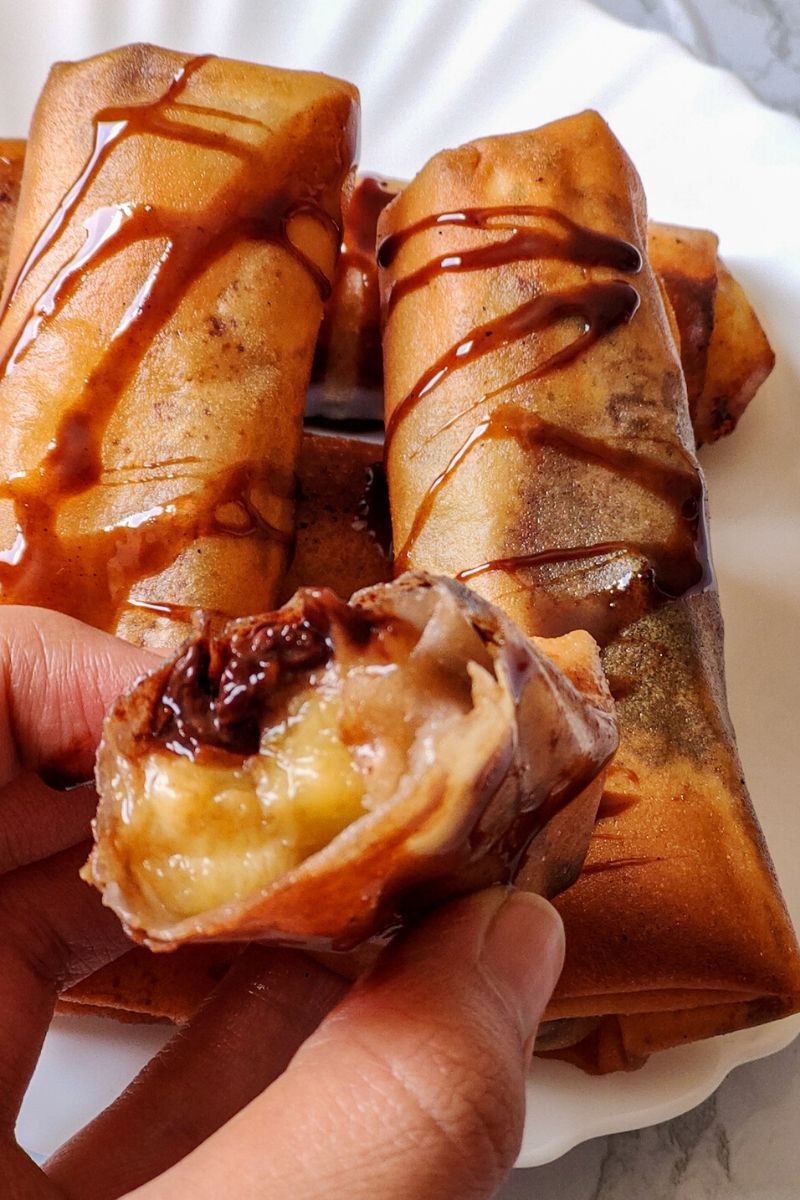
These are genuinely one of the more fun desserts I've made — crispy fried wrappers, melted chocolate inside, soft banana holding it all together. I grew up making savory spring rolls with my mother, so the first time I filled them with chocolate and banana it felt a little rebellious. Saad absolutely lost his mind over these. They come together fast, the ingredient list is short, and you can use store-bought spring roll wrappers from the freezer section at most Asian grocery stores or Walmart. Dust them with powdered sugar and serve them warm.
Ingredients
- 8 spring roll wrappers (thawed if frozen)
- 2 ripe bananas, halved lengthwise and then crosswise (4 pieces per banana)
- ½ cup semi-sweet chocolate chips (or chopped dark chocolate)
- 1 tablespoon water (for sealing the wrappers)
- Vegetable oil, for frying
- Powdered sugar, for dusting
Instructions
- Lay a spring roll wrapper on a clean surface in a diamond shape. Place one banana piece near the bottom corner and scatter a tablespoon of chocolate chips over it.
- Fold the bottom corner up over the filling, then fold in the two side corners. Roll it up tightly toward the top corner. Dab the top corner with a little water to seal. Repeat with remaining wrappers.
- Heat about 2 inches of vegetable oil in a deep skillet or saucepan over medium heat to 350°F. If you don't have a thermometer, drop a tiny piece of wrapper in — it should sizzle immediately.
- Fry the spring rolls in batches of 2-3 for about 2-3 minutes per side, turning once, until golden and crispy all over. Don't crowd the pan.
- Remove to a paper towel-lined plate to drain. Dust with powdered sugar and serve immediately while the chocolate is still melty inside.
Tips
- Tip: Use bananas that are just ripe — not overripe — or they'll turn mushy inside the wrapper during frying.
- Tip: A drizzle of Nutella on top instead of powdered sugar takes these over the edge if you want to be extra.
- Tip: Make sure the seam is sealed well before frying — if it opens in the oil, the chocolate leaks out and burns quickly.
32. Easy Chocolate Sheet Cake with Fudge Frosting
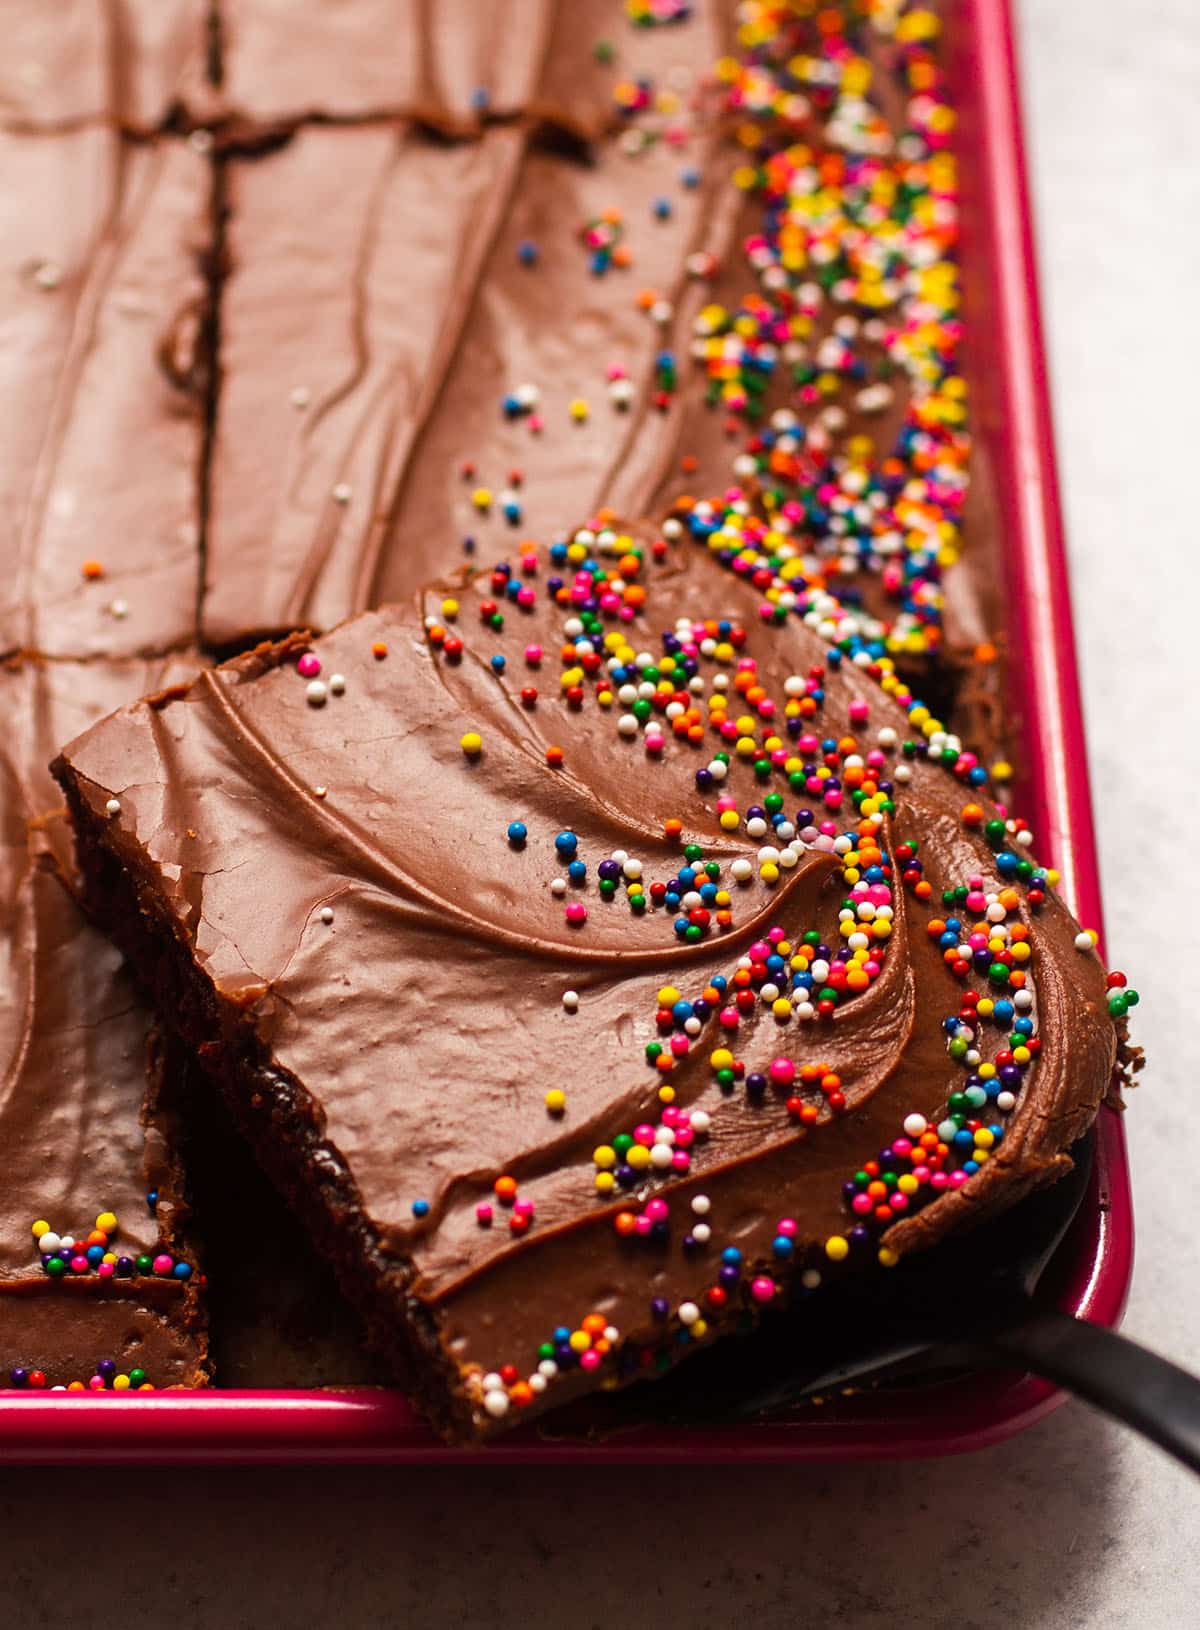
Sheet cake is my go-to whenever I need to feed more than six people — one pan, no layering, no stacking, no stress. This chocolate version with fudge frosting is the one I make for birthdays when someone specifically says "I don't want anything fancy, just chocolate cake." The cake itself is tender and deeply chocolatey, and the frosting is poured on warm so it sets into this glossy, slightly fudgy layer on top. I don't have a stand mixer — I make this with a hand whisk and a wooden spoon and it comes out perfectly every time.
Ingredients
- 2 cups all-purpose flour
- 2 cups granulated sugar
- 1 teaspoon baking soda
- ½ teaspoon salt
- 1 cup (2 sticks) unsalted butter
- ⅓ cup unsweetened cocoa powder, divided (3 tablespoons for cake, rest for frosting)
- 1 cup water
- 2 large eggs
- ½ cup buttermilk (or ½ cup milk + 1½ teaspoons white vinegar, let sit 5 minutes)
- 1 teaspoon vanilla extract
- 3 cups powdered sugar (for frosting)
- 6 tablespoons whole milk (for frosting)
Instructions
- Preheat oven to 350°F. Grease a 9x13 inch baking pan. In a large bowl, whisk together the flour, sugar, baking soda, and salt.
- In a small saucepan over medium heat, melt 1 stick of butter with 3 tablespoons cocoa powder and 1 cup water. Stir until smooth and bring just to a boil. Pour the hot mixture over the dry ingredients and stir to combine.
- Add the eggs, buttermilk, and vanilla to the batter and whisk until smooth. Pour into the prepared pan and bake for 25-30 minutes, until a toothpick inserted in the center comes out clean.
- About 5 minutes before the cake is done, make the frosting: melt the remaining stick of butter with the remaining cocoa powder and 6 tablespoons milk in a saucepan over medium heat. Whisk in the powdered sugar until smooth and glossy.
- Pull the cake from the oven and immediately pour the warm frosting over it. Spread gently to the edges. Let the cake cool completely before cutting — the frosting will set as it cools.
Tips
- Tip: Pour the frosting while the cake is still hot from the oven — this is what gives it that smooth, slightly sunken fudge-like finish rather than a thick sugar crust.
- Tip: The cake keeps well covered at room temperature for up to 3 days — if anything it gets more moist by day two.
- Tip: Add ½ cup chopped walnuts or pecans to the frosting before pouring if you want a little texture on top.
33. Salted Dark Chocolate Olive Oil Cookies
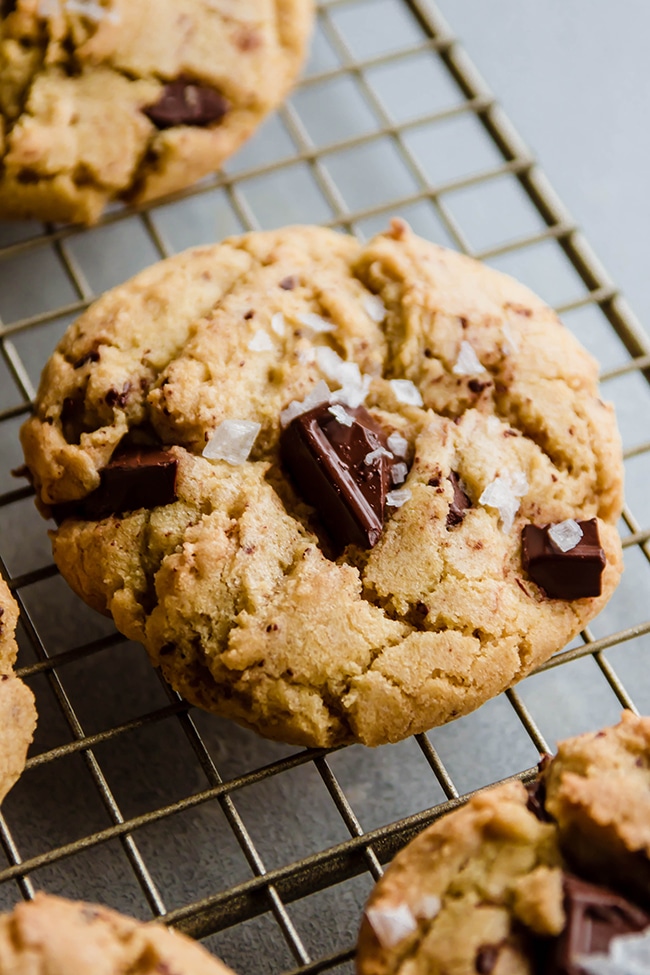
I was skeptical about olive oil in cookies the first time I saw this recipe — it sounded like something that belonged in a savory dish, not a dessert. But these converted me completely. The olive oil keeps them incredibly moist and almost fudgy in the center, and the flaky sea salt on top against the dark chocolate is one of those combinations that makes you stop mid-bite. No butter to soften, no mixer needed — you just whisk everything together in one bowl. I use a good-quality extra virgin olive oil here because it genuinely makes a difference in the final flavor.
Ingredients
- ½ cup extra virgin olive oil
- ¾ cup granulated sugar
- ¼ cup brown sugar, packed
- 2 large eggs, room temperature
- 1 teaspoon vanilla extract
- 1½ cups all-purpose flour
- ½ cup unsweetened cocoa powder
- 1 teaspoon baking soda
- ¼ teaspoon fine salt
- 1 cup dark chocolate chunks or chips (70% cacao or higher)
- Flaky sea salt, for topping (Maldon works great)
Instructions
- In a large bowl, whisk together the olive oil, granulated sugar, and brown sugar until well combined. Add the eggs and vanilla and whisk again for about a minute until the mixture looks slightly thick and glossy.
- Add the flour, cocoa powder, baking soda, and fine salt. Stir with a wooden spoon until just combined — don't overmix. Fold in the dark chocolate chunks.
- Cover the bowl and refrigerate the dough for at least 30 minutes (up to overnight). This step matters — chilling keeps the cookies from spreading too thin.
- Preheat your oven to 350°F. Line two baking sheets with parchment paper. Scoop the dough into balls about 1½ tablespoons each and place them 2 inches apart on the sheet.
- Sprinkle a pinch of flaky sea salt on top of each cookie. Bake for 10-12 minutes — they'll look slightly underdone in the center, which is exactly right. Let them cool on the pan for 5 minutes before moving them; they firm up as they cool.
Tips
- Tip: Don't skip the chill time — the dough is sticky and the cookies will spread into flat puddles without it.
- Tip: Use the best dark chocolate you can find here — this is a case where quality actually shows up in every bite. Trader Joe's 72% dark chocolate bar chopped up is my go-to.
- Tip: These keep in an airtight container for up to 4 days, but honestly in my house they're gone by the next morning.
Thirty-four desserts later and I still can't pick a favorite — which tells you something about this list. Some of these I've made a dozen times, some I only discovered recently, but every single one earned its place here because it actually works in a real kitchen with real ingredients and no drama. No fancy equipment, no obscure ingredients, no three-day projects unless you want one. These are the desserts I reach for when I need something reliable, something crowd-friendly, or something that just makes a Tuesday feel a little more special.
If you're new here, a little context: I cook out of a normal home kitchen in Pakistan, but I write for readers in the US, UK, Canada, and Australia — so everything in this list uses measurements and ingredients you can find at Walmart, Costco, or your regular grocery store. My kids Saad and Zainab have eaten their way through most of this list over the years, which means these recipes have been tested by the toughest critics I know. Saad votes for anything chocolate. Zainab always goes straight for the no-bake stuff. My husband eats whatever I put in front of him and says it's good, which is either loyalty or honesty — I've never been sure which.
Whether you're looking for a quick weeknight treat, something to bring to a party, or a recipe to make with kids on a Saturday afternoon, there's something in this list for you. Save the ones that call to you, come back when you need inspiration, and if you try one and it works out, I genuinely want to hear about it. That's the whole reason I write these. 🍰🍫✨
More Recipes You Might Like
- Easy Cake Recipes — Simple layer cakes, sheet cakes, and dump cakes that don't require any special skills.
- No-Bake Desserts — For when the oven is off-limits or the weather is too hot to even think about turning it on.
- Cookie Recipes — Classic drop cookies, bar cookies, and everything in between for when you need something handheld and shareable.
- Chocolate Desserts — Because sometimes the answer is always chocolate, no questions asked.
- Browse All Recipe Roundups — Every list I've put together in one place, from dinner ideas to holiday baking and beyond.
Frequently Asked Questions
Which of these desserts is the easiest for a beginner?
Any of the no-bake options are your safest starting point — things like chocolate bark, no-bake cheesecake cups, or rice crispy treats require almost no technique and very little that can go wrong. If you want to bake but you're nervous, brownies from scratch are genuinely forgiving. I've overmixed them, underbaked them slightly, and forgotten to fully melt the butter before, and they still turned out fine every single time.
Can I make any of these desserts ahead of time?
Most of them, yes. Cookies, bars, and brownies can be baked 1-2 days in advance and stored in an airtight container at room temperature. No-bake desserts that need to set in the fridge — like cheesecakes or mousse cups — are actually better made the night before because they need that full chill time to firm up properly. Cakes with frosting are best assembled the day of, but the layers can be baked ahead and wrapped tightly until you're ready.
How do I store leftover desserts so they stay fresh?
For most baked goods — cookies, brownies, blondies, bars — an airtight container at room temperature works for 3-4 days. Anything with cream cheese, whipped cream, or custard goes straight into the fridge and is best eaten within 2-3 days. For longer storage, most cookies and unfrosted cakes freeze really well. I wrap them individually in plastic wrap, then pop them into a zip-lock freezer bag. They thaw on the counter in about 30 minutes.
Are any of these desserts suitable for kids to help make?
Quite a few of them. No-bake recipes are the obvious choice since there's no hot oven involved — chocolate bark, energy balls, and no-bake cookies are all things my kids have made almost entirely on their own. For baked recipes, cookies are great because kids can scoop and roll the dough without needing a lot of precision. I'd save anything that involves a hot caramel or a water bath for when you're working alone, though — those steps need your full attention.
What if I don't have a mixer — can I still make these?
For most of these recipes, yes. A wooden spoon and a little patience handles brownies, cookies, bars, and most cake batters just fine. I don't own a stand mixer and I've made hundreds of desserts without one. The one place a hand mixer genuinely helps is whipping cream or making frosting — a hand mixer costs about $15-20 at Walmart and is worth having for those tasks. But if you don't have one, whipped cream can be done by hand with a whisk if you commit to it for about 5 minutes of vigorous whisking.





Comments
No Comments