
Cookie season in our house never really ends — but every few months I find myself staring at the pantry trying to figure out what to bake that isn't the exact same thing I made last time. I've got Saad asking for something chocolatey, Zainab holding out for something with icing, and my husband who will honestly eat any cookie that's still warm from the oven. So over the years I've built up a solid rotation of easy cookie recipes that cover everything: classic drop cookies, no-bake options, gluten-free versions, and a few wildcard flavors I never would have tried if I wasn't always looking for something new.
What I look for in a good cookie recipe is pretty simple: the ingredient list shouldn't require a special trip to three different stores, the method shouldn't take more than 30 minutes of active time, and the result should actually taste like something — not just sweet and flat. Texture matters a lot to me. I want crispy edges, chewy centers, and flavors that are intentional. If you want more baking ideas beyond cookies, I've got a full list of easy dessert recipes that follow the same principle: good ingredients, realistic steps, real results.
This list has 21 recipes and they genuinely cover a lot of ground. You've got the Salted Double Chocolate Peanut Butter Cookies for when you need something deeply indulgent, Lemon Sugar Cookies for when you want something bright and a little different, Biscoff Butter Cookies that have become a regular in my kitchen, and No Bake Samoa Cookies for the days when I refuse to turn on the oven. There are also gluten-free options, oatmeal cookies in a few different variations, and even a microwave cookie for genuine emergencies. I also have a roundup of chocolate chip cookie recipes if that's specifically what you're after, and a separate post on no-bake desserts that pairs well with a few recipes on this list.
Here are the 21 cookie recipes I keep coming back to — pick whichever one matches your mood or your pantry today.

21. White Chocolate Chip Cookies
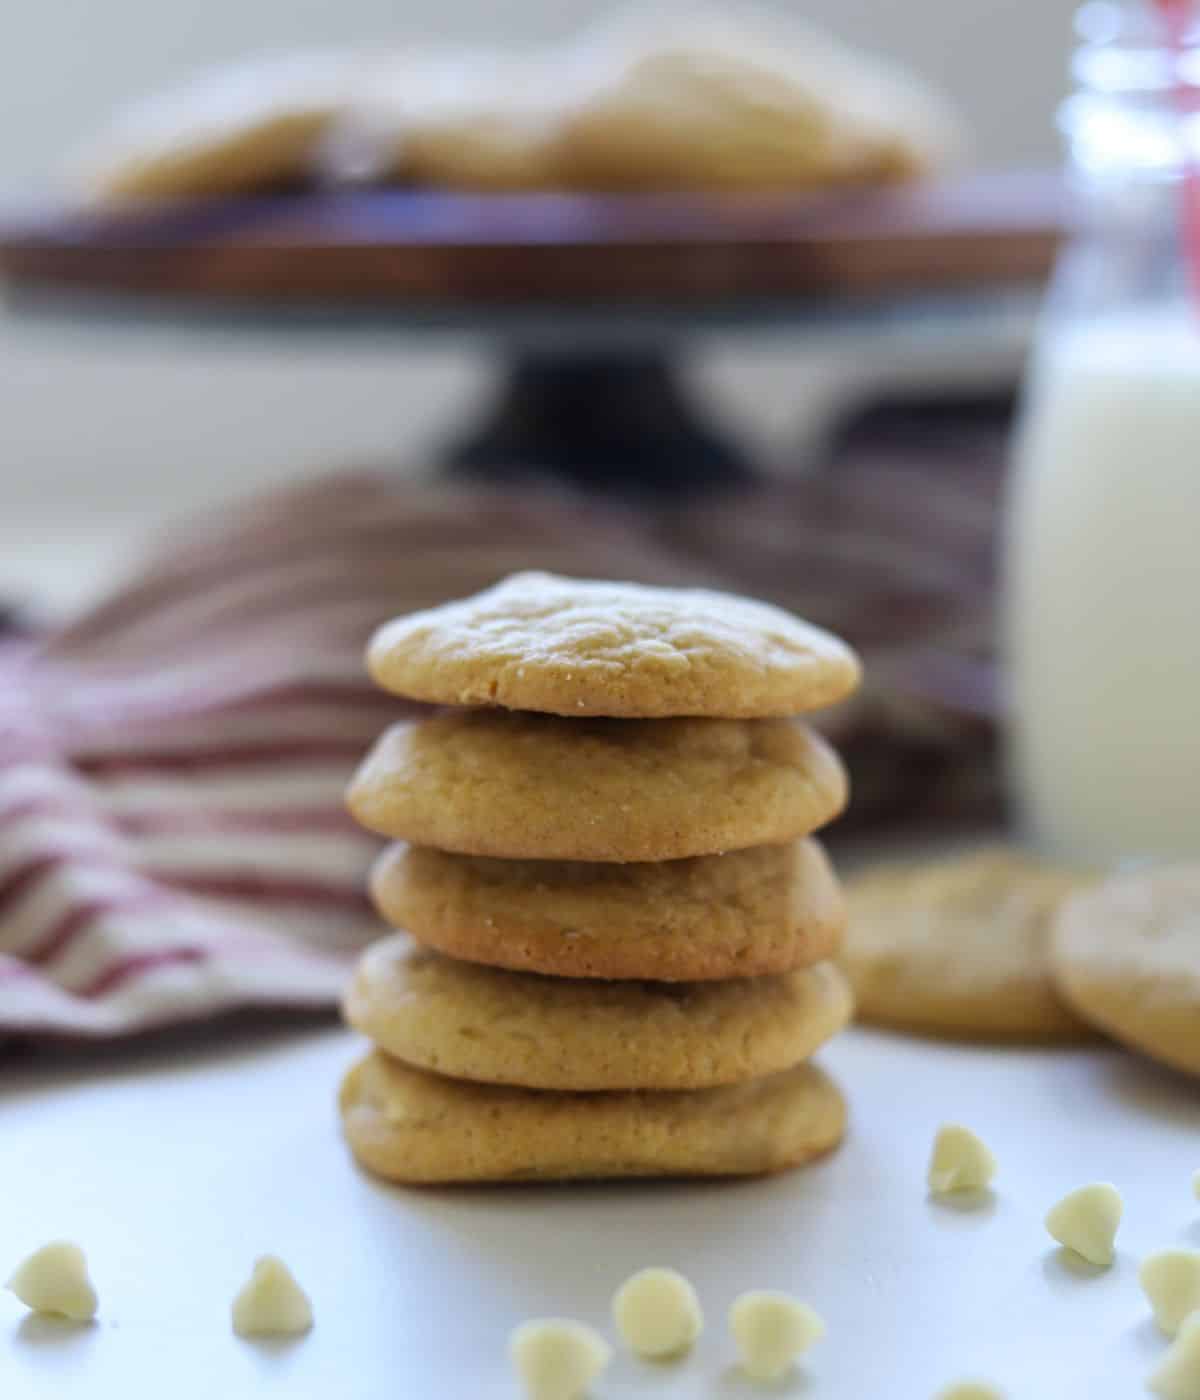
White chocolate chip cookies don't get nearly as much attention as their semi-sweet cousins, and I think that's a real shame. The white chips melt into pockets of sweet, creamy richness that pairs so well with a slightly golden, buttery base. I made a batch of these last December and they disappeared before I could even arrange them on the plate — my kids grabbed them straight off the cooling rack.
Ingredients
- 2 ¼ cups all-purpose flour
- 1 teaspoon baking soda
- ½ teaspoon salt
- 1 cup (2 sticks) unsalted butter, softened to room temperature
- ¾ cup granulated sugar
- ¾ cup packed light brown sugar
- 2 large eggs
- 2 teaspoons pure vanilla extract
- 2 cups white chocolate chips
Instructions
- Preheat your oven to 350°F and line two baking sheets with parchment paper.
- In a medium bowl, whisk together the flour, baking soda, and salt. Set aside.
- In a large bowl, beat the softened butter with both sugars until light and fluffy, about 2-3 minutes. Add eggs one at a time, then mix in the vanilla.
- Gradually stir the flour mixture into the wet ingredients until just combined, then fold in the white chocolate chips.
- Roll dough into balls about 1½ tablespoons each and place 2 inches apart on the prepared baking sheets. Bake for 13-15 minutes until the edges are just golden — the centers will look slightly underdone, but they firm up as they cool.
- Let cookies cool on the pan for 5 minutes before transferring to a wire rack.
Tips
- Tip: Make sure your butter is truly softened, not melted — soft butter gives you a thicker, chewier cookie rather than a flat, spread-out one.
- Tip: White chocolate chips can vary a lot in quality — the Ghirardelli ones from Walmart or Costco hold their shape better and taste less waxy than store-brand versions.
- Tip: Pull them out when they still look a tiny bit underbaked in the center — they carry over and set up perfectly on the hot pan.
20. Oatmeal Brown Sugar Rhubarb Cookies
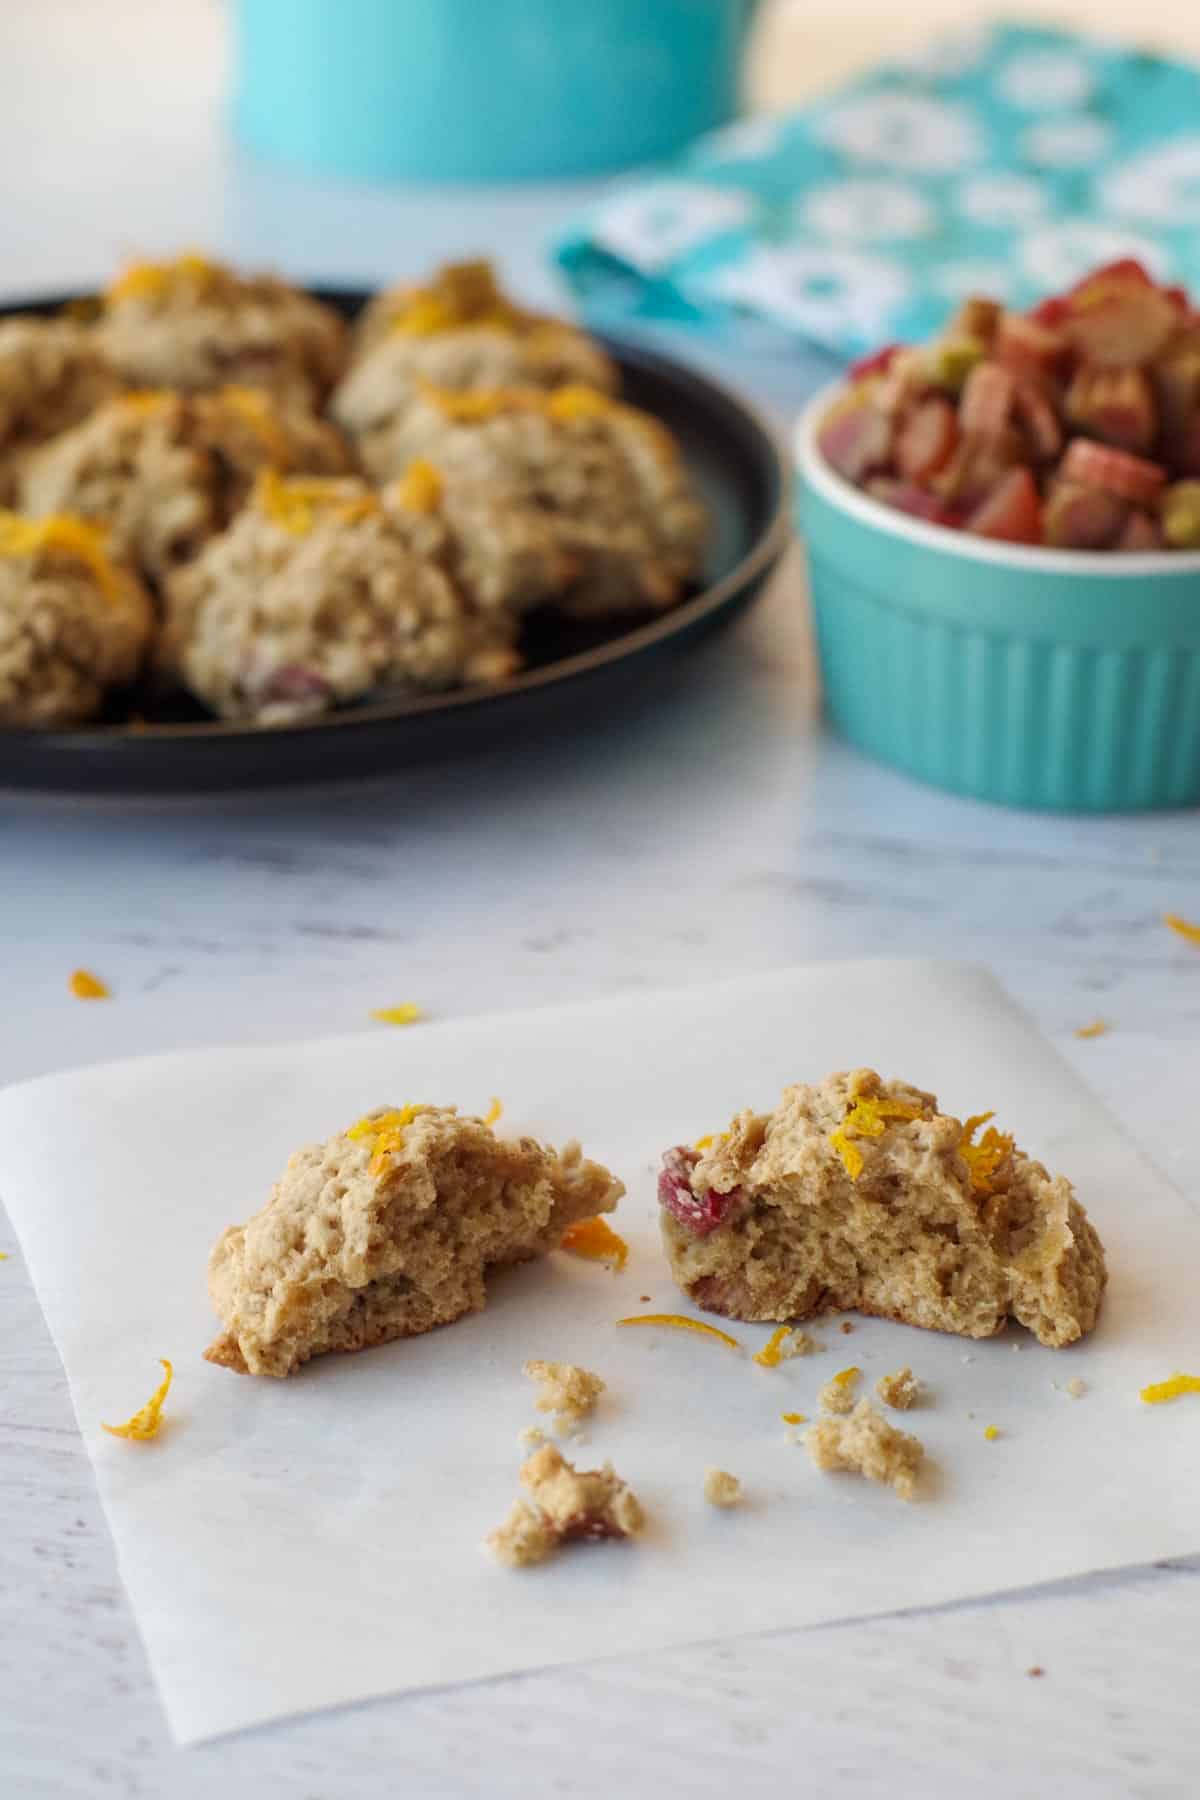
Rhubarb in a cookie was not something I grew up with — in Pakistan, we just didn't use it. But I spotted it at the grocery store one spring, grabbed a bunch, and ended up making these. The tart rhubarb against the brown sugar and oats is genuinely one of the more interesting flavor combinations I've landed on. They're chewy, slightly tangy, and feel like a proper spring cookie rather than just another oatmeal raisin variation.
Ingredients
- 1 ½ cups all-purpose flour
- 1 teaspoon baking soda
- ½ teaspoon cinnamon
- ¼ teaspoon salt
- ½ cup (1 stick) unsalted butter, softened
- 1 cup packed brown sugar
- 1 large egg
- 1 teaspoon vanilla extract
- 1 ½ cups old-fashioned rolled oats
- 1 cup fresh or frozen rhubarb, diced small (about ¼-inch pieces)
Instructions
- Preheat oven to 350°F and line baking sheets with parchment. If using frozen rhubarb, thaw it and pat it completely dry with paper towels — excess moisture makes the dough sticky and the cookies spread too much.
- Whisk together flour, baking soda, cinnamon, and salt in a medium bowl.
- Beat butter and brown sugar together until fluffy. Mix in the egg and vanilla.
- Stir in the flour mixture until just combined, then fold in the oats and rhubarb.
- Drop heaping tablespoons of dough onto the prepared baking sheets, spacing them about 2 inches apart. Bake for 16-18 minutes until the edges are set and lightly golden.
- Cool on the pan for 5 minutes before moving — they're fragile right out of the oven but firm up nicely.
Tips
- Tip: Dice the rhubarb small — larger chunks make the cookies fall apart when you pick them up.
- Tip: Use old-fashioned rolled oats, not quick oats — you want that chewy, slightly toothsome texture, not a mushy one.
- Tip: If you can't find rhubarb, dried cranberries work as a substitute and give a similar tartness without the moisture issue.
19. Best Chocolate Chip Bakery Style Cookies
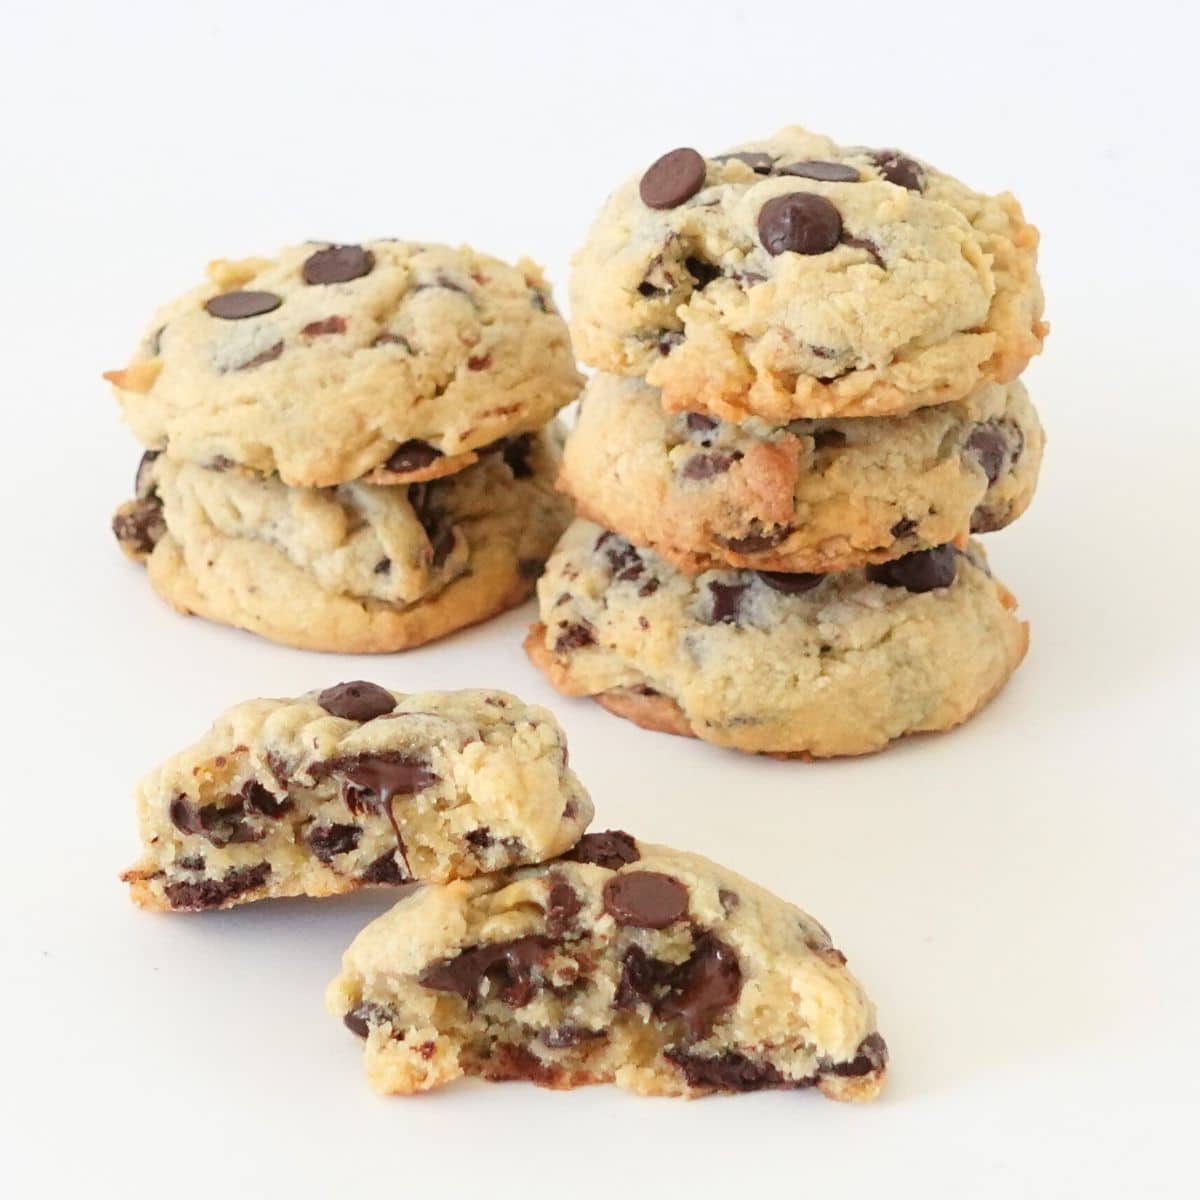
I've spent years trying to figure out what makes bakery cookies taste so different from homemade ones. The answer, it turns out, is mostly cold butter and more of it, plus a higher ratio of brown sugar. These cookies come out thick, with crisp edges and a dense, fudgy center — the kind that actually requires two hands to hold. Saad calls these "the real ones" whenever I make them, which I think is the highest praise a cookie can get.
Ingredients
- 2 ½ cups all-purpose flour
- 1 teaspoon baking soda
- 1 teaspoon baking powder
- 1 teaspoon salt
- 1 cup (2 sticks) cold unsalted butter, cut into small cubes
- 1 cup packed dark brown sugar
- ½ cup granulated sugar
- 2 large eggs, cold
- 2 teaspoons vanilla extract
- 2 cups semi-sweet chocolate chunks (not chips — chunks give better pockets of chocolate)
Instructions
- Preheat oven to 350°F and line baking sheets with parchment paper.
- Whisk flour, baking soda, baking powder, and salt together in a bowl. Set aside.
- Beat the cold butter cubes with both sugars on medium speed (or by hand with real effort) for about 3-4 minutes — it won't get fluffy like softened butter, but it will come together into a cohesive dough. This is the key to that thick bakery texture.
- Add eggs and vanilla and mix until just combined. Stir in the flour mixture, then fold in the chocolate chunks.
- Refrigerate the dough for 20 minutes — don't skip this, it helps the cookies hold their height in the oven.
- Portion into large balls (about 3 tablespoons each — these are meant to be big) and bake for 18-20 minutes until the edges are set and golden but the centers still look slightly soft. Cool on the pan for 10 minutes before serving.
Tips
- Tip: Cold butter is non-negotiable here — it's what keeps the cookies from spreading flat and gives you that tall, thick bakery shape.
- Tip: Dark brown sugar adds more molasses flavor than light brown sugar, which is why these taste like they came from an actual bakery — don't swap it out.
- Tip: You can refrigerate the dough overnight if you want to bake them fresh the next day — the flavor actually deepens the longer it sits.
18. Fruity Pebbles Cookies
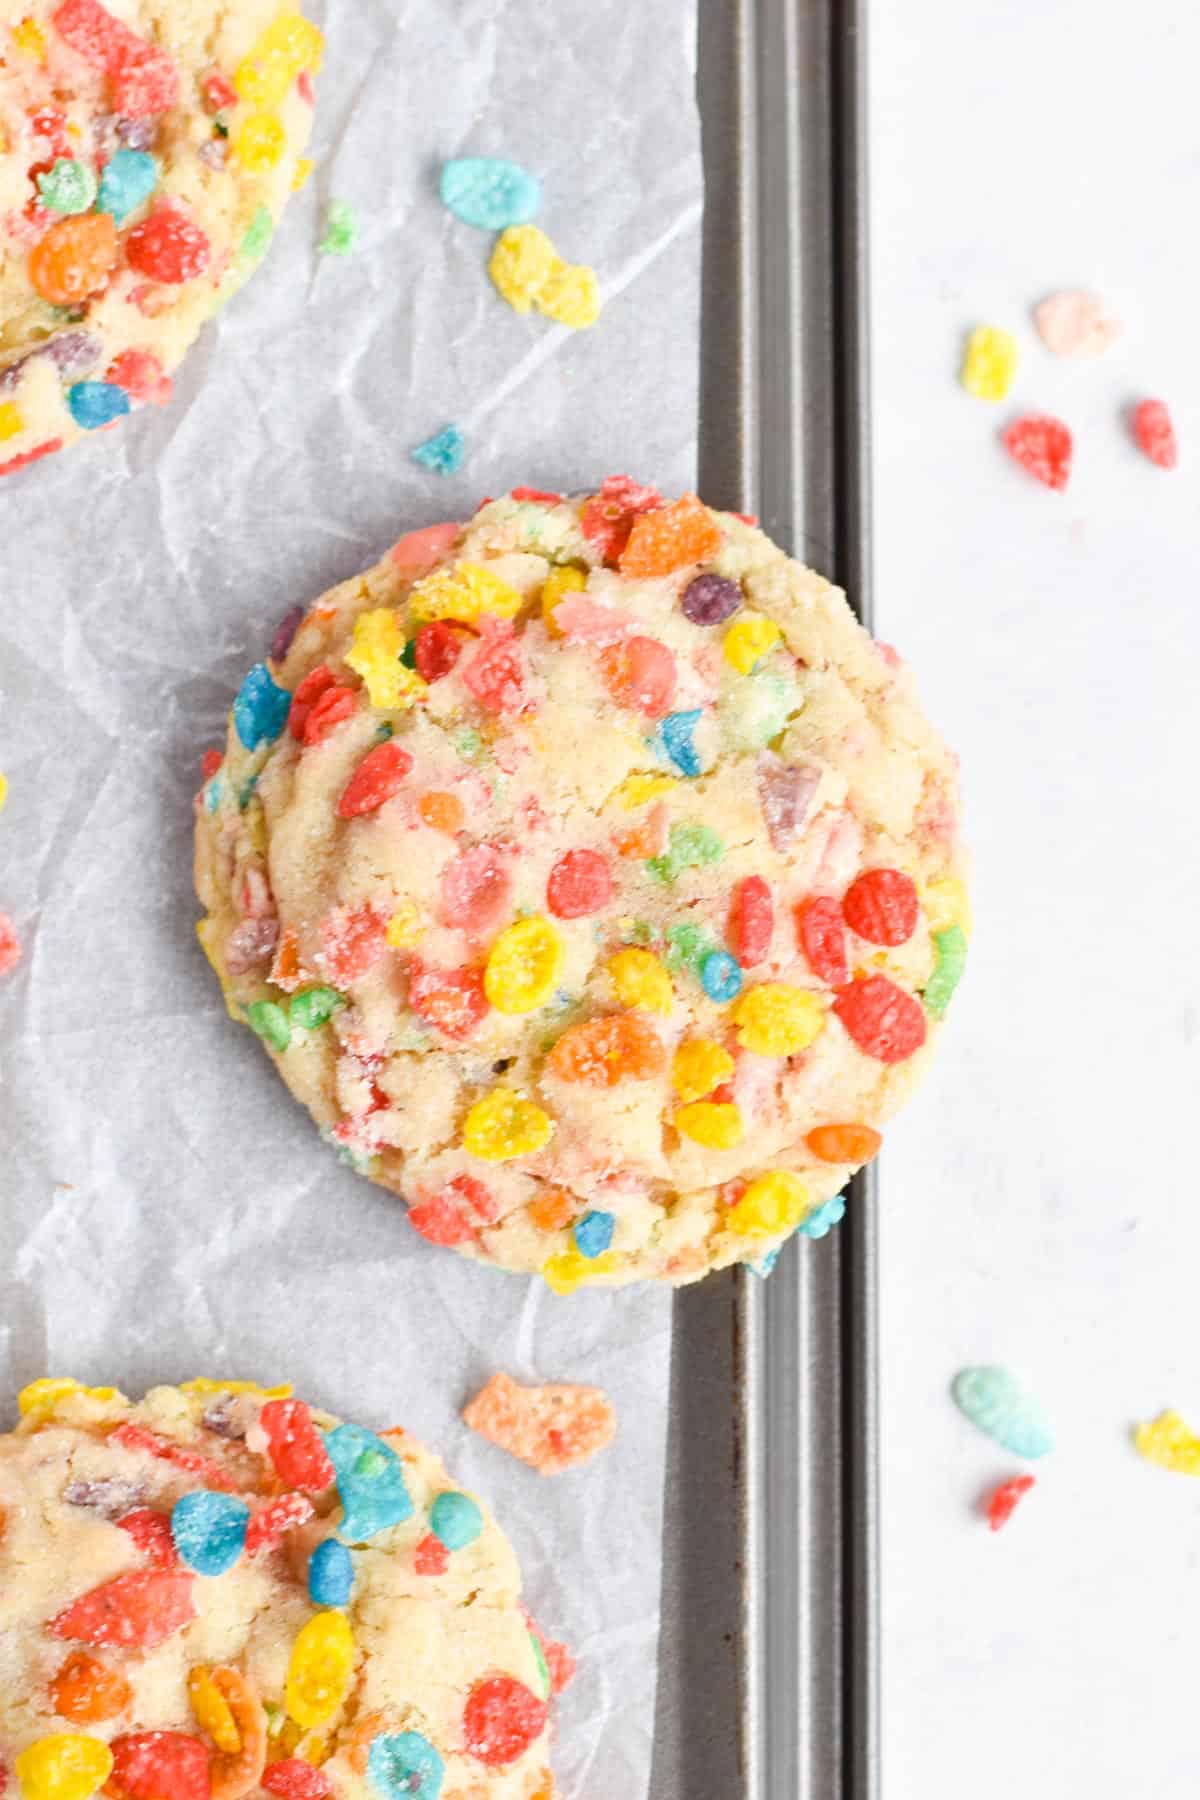
These are the cookies you bring to a kids' party and watch every adult reach for first. The base is a simple sugar cookie dough, and the Fruity Pebbles get rolled into the outside of each ball before baking, so you get a slightly crisp, colorful shell with a soft, chewy center. They look almost too fun to eat — almost. Fruity Pebbles are easy to find at Walmart or Costco, and they keep well in a sealed bag, so one box will cover several batches.
Ingredients
- 1 ½ cups all-purpose flour
- ½ teaspoon baking soda
- ¼ teaspoon salt
- ½ cup (1 stick) unsalted butter, softened
- ¾ cup granulated sugar, divided (½ cup for dough, ¼ cup for rolling)
- 1 large egg
- 1 teaspoon vanilla extract
- 1 teaspoon lemon zest (optional but adds a nice citrus brightness)
- 1 ½ cups Fruity Pebbles cereal
Instructions
- Preheat oven to 375°F and line baking sheets with parchment paper.
- Whisk flour, baking soda, and salt together in a bowl.
- Beat butter with ½ cup sugar until light and fluffy. Mix in the egg, vanilla, and lemon zest if using.
- Stir in the flour mixture until a soft dough forms.
- In a shallow bowl, mix the Fruity Pebbles with the remaining ¼ cup sugar. Roll each dough ball (about 1½ tablespoons) in the Fruity Pebbles mixture, pressing gently so the cereal sticks to the outside.
- Place on prepared baking sheets 2 inches apart and bake for 9-11 minutes until the edges are just set. They'll look slightly underdone — that's right. Cool on the pan for 5 minutes.
Tips
- Tip: Don't mix the Fruity Pebbles into the dough — keeping them on the outside is what gives you that distinct colorful crust and prevents them from getting soggy inside.
- Tip: These bake fast, so watch them closely after the 9-minute mark — Fruity Pebbles can scorch quickly if overbaked.
- Tip: Fruit Loops crushed slightly also work here if Fruity Pebbles aren't available — similar flavor, similar crunch.
17. Coconut Pecan Cookies

These taste like someone took a pecan pie and turned it into a cookie — in the best possible way. The shredded coconut adds chew and a faint sweetness, the pecans bring that warm, nutty crunch, and a pinch of cinnamon ties everything together. There's no chilling required, which I genuinely appreciate on a busy afternoon. The whole batch comes together in about 25 minutes from start to finish.
Ingredients
- 1 ¾ cups all-purpose flour
- ½ teaspoon baking soda
- ½ teaspoon cinnamon
- ¼ teaspoon salt
- ¾ cup (1½ sticks) unsalted butter, softened
- ¾ cup packed brown sugar
- ¼ cup granulated sugar
- 2 large eggs
- 1 ½ teaspoons vanilla extract
- 1 cup sweetened shredded coconut
- ¾ cup roughly chopped pecans
Instructions
- Preheat oven to 350°F and line baking sheets with parchment paper.
- In a medium bowl, whisk together flour, baking soda, cinnamon, and salt.
- Beat butter with both sugars until light and fluffy, about 2 minutes. Add eggs one at a time, then mix in the vanilla.
- Stir the flour mixture into the butter mixture until just combined, then fold in the shredded coconut and chopped pecans.
- Scoop heaping tablespoons of dough onto the prepared baking sheets, spacing about 2 inches apart. Bake for 10-12 minutes until the edges are golden but the centers still look soft.
- Cool on the pan for 5 minutes — the coconut and pecans hold heat and the centers need a few extra minutes to set properly before you move them.
Tips
- Tip: Toast the pecans in a dry skillet for 3-4 minutes before adding them to the dough — it deepens their flavor noticeably and is worth the extra step.
- Tip: Sweetened shredded coconut gives a softer, moister cookie than unsweetened — but either works depending on how sweet you want them.
- Tip: If you can't find pecans, walnuts are a solid substitute and give a slightly earthier flavor that works just as well with the coconut.
12. Microwave Cookies
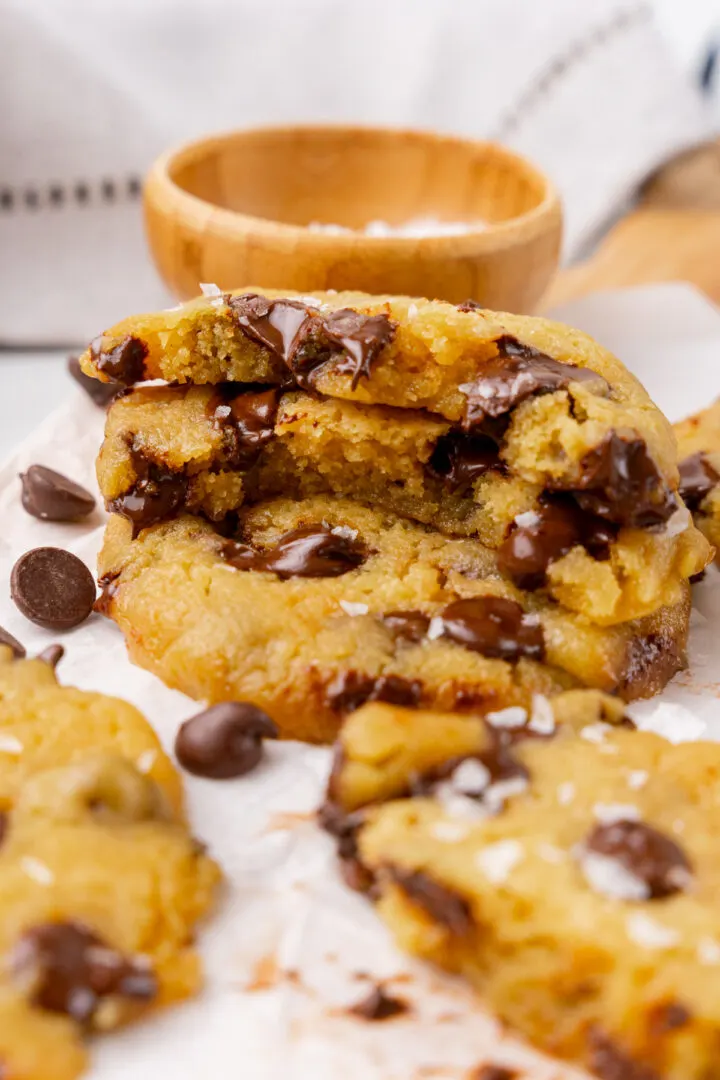
There are nights when everyone's already in bed and I realize I need something sweet immediately — this is that recipe. These microwave cookies come together in under 10 minutes with pantry staples, and the result is genuinely gooey and satisfying. No oven, no preheating, no waiting. Just melt, mix, and microwave. I'll be honest, I was skeptical the first time I tried this, but the texture surprised me — soft in the center, slightly set on the edges, warm chocolate chips throughout. It's not a bakery cookie, but for a late-night craving it's exactly what you need.
Ingredients
- 2 tablespoons unsalted butter
- 3 tablespoons granulated sugar
- 1 egg yolk
- ¼ teaspoon vanilla extract
- ¼ cup all-purpose flour
- Pinch of salt
- 2 tablespoons semi-sweet chocolate chips
Instructions
- Melt the butter in a microwave-safe mug or small bowl for about 20–30 seconds until fully melted.
- Stir in the sugar, egg yolk, and vanilla until combined.
- Add the flour and salt, mixing until a soft dough forms. Fold in the chocolate chips.
- Lightly grease a microwave-safe plate and drop the dough in small rounds, leaving space between each one.
- Microwave on high for 60–90 seconds, checking at 60 seconds — they should look just set on top. Let cool for 2 minutes before eating since they firm up as they cool.
Tips
- Tip: Every microwave runs differently — start checking at 60 seconds. Overcooking makes them rubbery, so err on the side of underdone and let carry-over heat do the rest.
- Tip: You can swap the chocolate chips for peanut butter chips or chopped nuts — both work well here.
- Tip: This recipe doubles easily if you need two servings, but cook them in separate batches rather than crowding one plate.
13. Lemon Sugar Cookies
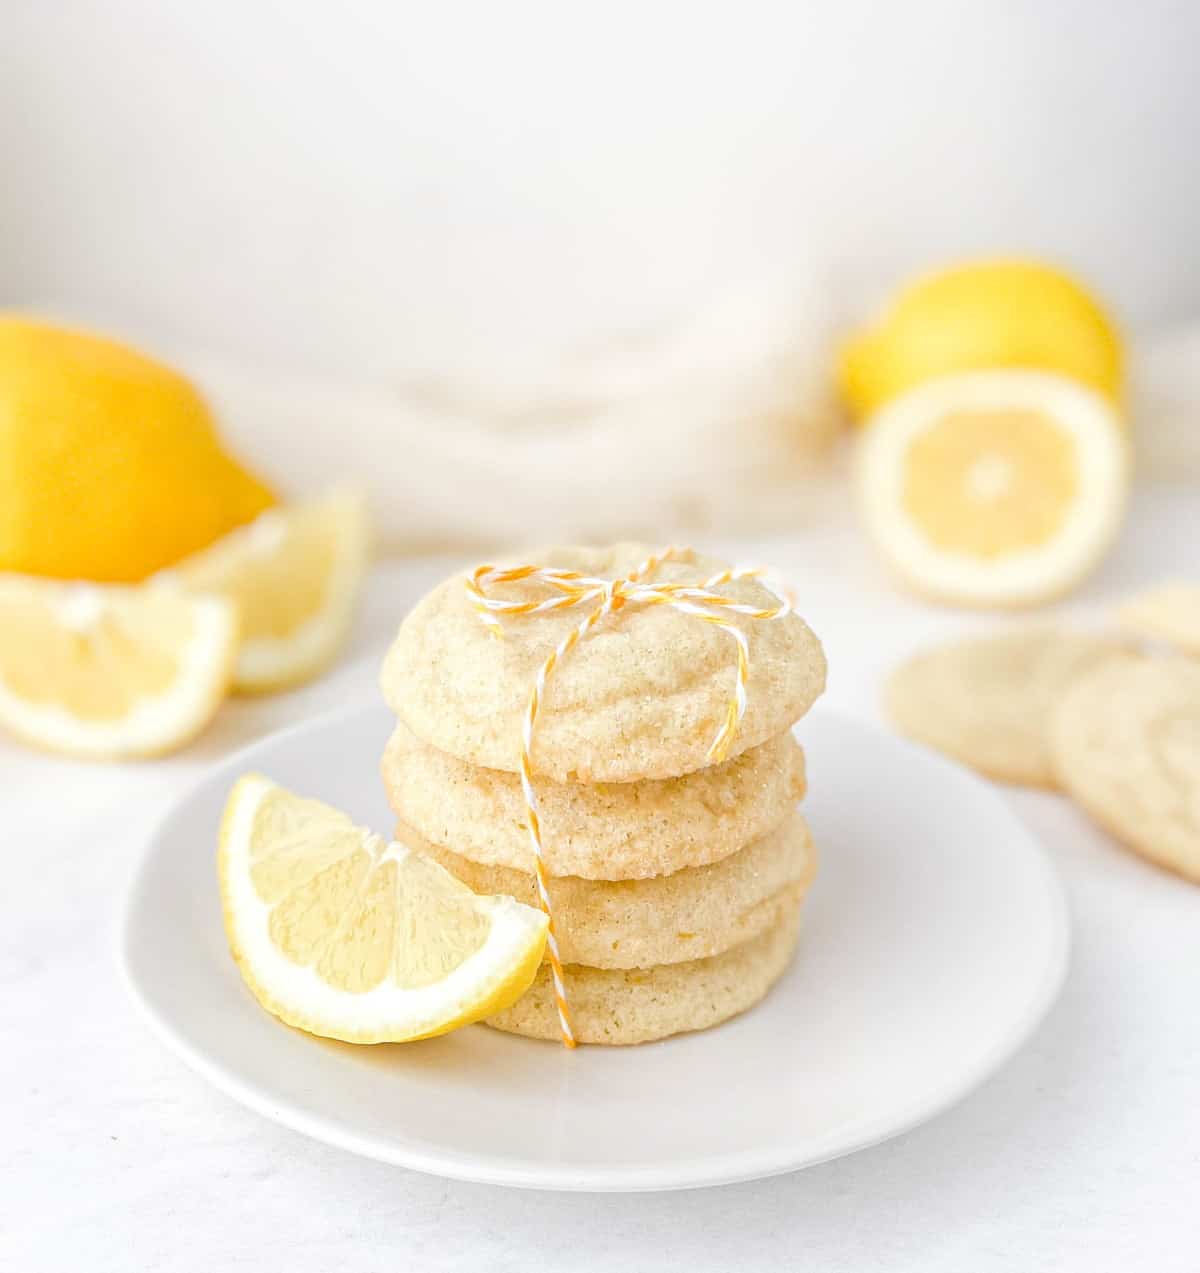
I make these when I want something that feels a little different from the usual chocolate situation — they're bright, citrusy, and have this satisfying crisp edge with a chewy center that I keep going back to. The trick is using both lemon zest and lemon extract (or lemon oil if you have it) so the flavor actually comes through instead of fading into a vaguely yellow cookie. Rolling them in sugar before baking gives that slight crunch on the outside that makes them feel finished. Zainab requests these specifically in spring, and honestly I make double batches because they disappear before I've even put the tray away.
Ingredients
- 2¼ cups all-purpose flour
- ½ teaspoon baking soda
- ½ teaspoon salt
- 1½ cups granulated sugar, divided (1¼ cups for dough, ¼ cup for rolling)
- Zest of 2 lemons
- ¾ cup (1½ sticks) unsalted butter, softened
- 2 large eggs
- 1 teaspoon lemon extract (or ¼ teaspoon lemon oil)
Instructions
- Whisk together flour, baking soda, and salt in a bowl and set aside.
- In a large bowl, rub the lemon zest into the 1¼ cups of sugar with your fingers until fragrant — this releases the oils and makes the lemon flavor much stronger.
- Beat the softened butter into the lemon sugar until light and fluffy, about 2 minutes. Add eggs one at a time, then the lemon extract.
- Gradually mix in the dry ingredients until just combined. Chill the dough for at least 30 minutes — this helps the cookies hold their shape.
- Preheat oven to 375°F. Scoop dough into balls, roll in the reserved ¼ cup of sugar, and place on a lined baking sheet about 2 inches apart.
- Bake for 7–9 minutes until the edges are just set and the tops look slightly underdone. Cool on the pan for 5 minutes before transferring.
Tips
- Tip: Don't skip the zest-rubbing step — it takes 30 seconds and genuinely makes the lemon flavor twice as strong.
- Tip: These freeze beautifully. Bake a full batch, cool completely, and freeze in a zip-lock bag for up to 2 months.
- Tip: If you pull them out while they still look slightly raw in the center, that's correct — they firm up as they cool and stay chewy rather than turning hard.
14. Buttermilk Cookies
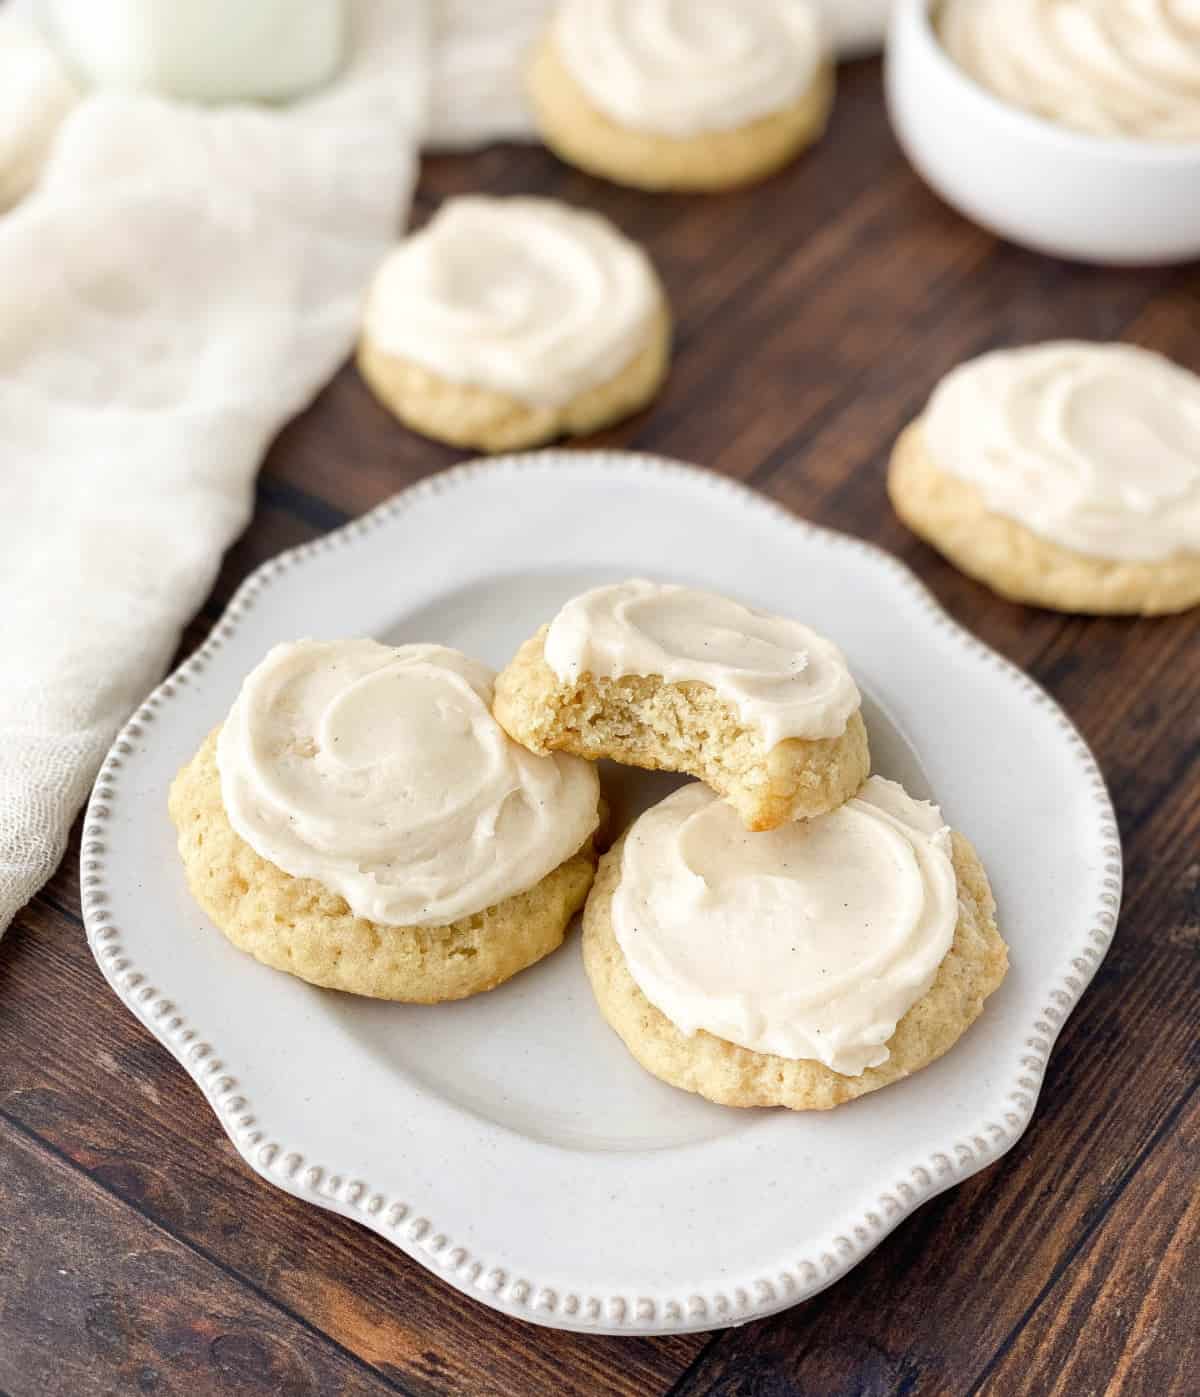
These are the soft, cakey kind of cookie — almost like a little pillow with a slight tang from the buttermilk. They're not crispy, they're not chewy in a dense way, they're genuinely soft all the way through, which makes them feel different from most cookies on this list. The first time I made them I expected something more like a standard drop cookie, but the texture is closer to a soft cake bite — in the best possible way. They're mild enough that a good vanilla buttermilk frosting on top takes them somewhere really special, but even plain they hold their own.
Ingredients
- 2½ cups all-purpose flour
- ½ teaspoon baking soda
- ½ teaspoon salt
- ½ cup (1 stick) unsalted butter, softened
- 1 cup granulated sugar
- 1 large egg
- 1 teaspoon vanilla extract
- ½ cup buttermilk (no buttermilk? add 1½ teaspoons white vinegar to ½ cup regular milk, stir, and wait 5 minutes)
Instructions
- Whisk together flour, baking soda, and salt in a bowl and set aside.
- Beat butter and sugar together until light and fluffy. Add the egg and vanilla and mix until combined.
- Alternate adding the dry ingredients and the buttermilk in two batches, starting and ending with flour. Mix until just combined — don't overwork it or the cookies toughen.
- Scoop dough onto lined baking sheets and refrigerate for 20 minutes — this keeps the cookies thick and soft rather than spreading flat.
- Preheat oven to 350°F. Bake for 10–12 minutes until the edges are just set and the tops are no longer shiny. Cool completely before frosting.
Tips
- Tip: The dough is soft and a little sticky — that's normal. Don't add more flour; just keep it chilled and it'll scoop fine.
- Tip: For a simple frosting, beat 1½ cups powdered sugar with 2 tablespoons buttermilk and ¼ teaspoon vanilla until smooth. Spread on cooled cookies.
- Tip: These stay soft for 3–4 days stored in an airtight container at room temperature — if anything, they get softer on day two.
15. Biscoff Butter Cookies
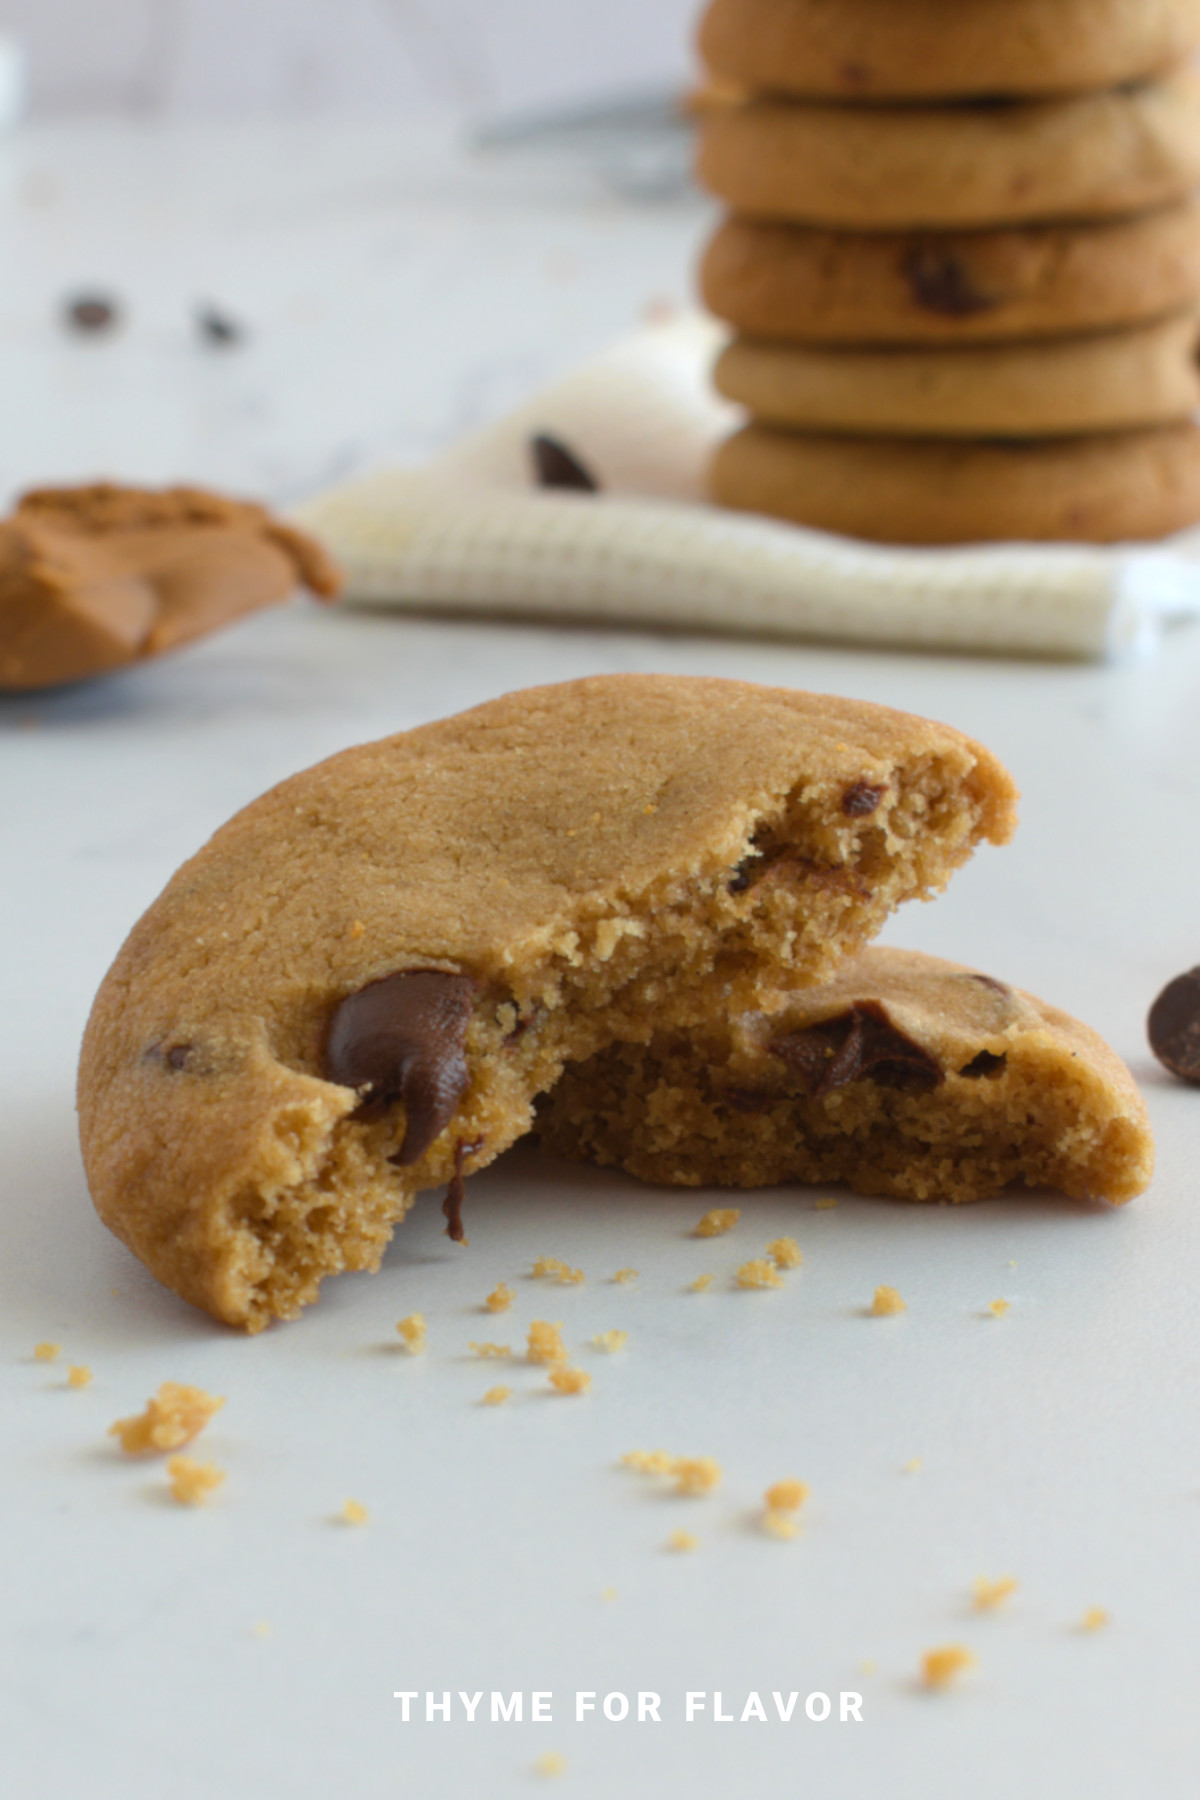
If you've ever eaten a Biscoff cookie straight from the packet and thought "I want MORE of this flavor," this recipe is where you land. Biscoff spread — the cookie butter you'll find at Trader Joe's, Walmart, or most grocery stores now — goes right into the dough, giving these cookies that warm, caramelized spice flavor all the way through. They bake up with slightly crisp edges and a softer center, and the chocolate chips add just enough richness to balance the sweetness. My husband, who usually reaches for the chocolate stuff, finished half the batch before I'd even started cleaning up.
Ingredients
- ½ cup (1 stick) unsalted butter, softened
- ½ cup Biscoff cookie spread (Lotus brand or store brand cookie butter)
- ¾ cup granulated sugar
- ¼ cup brown sugar, packed
- 1 large egg
- 1 teaspoon vanilla extract
- 1¾ cups all-purpose flour
- ½ teaspoon baking soda
- ¼ teaspoon cinnamon
- ¼ teaspoon salt
- ½ cup semi-sweet chocolate chips
Instructions
- Beat the softened butter, Biscoff spread, granulated sugar, and brown sugar together until smooth and creamy, about 2 minutes.
- Add the egg and vanilla and mix until combined.
- Whisk together flour, baking soda, cinnamon, and salt in a separate bowl, then add to the butter mixture and stir until a soft dough forms. Fold in the chocolate chips.
- Refrigerate the dough for at least 30 minutes — the Biscoff spread makes the dough soft, and chilling prevents the cookies from spreading too thin.
- Preheat oven to 350°F. Scoop dough into balls and place on a lined baking sheet 2 inches apart. Bake for 10–12 minutes until golden at the edges. Cool on the pan for 5 minutes before moving.
Tips
- Tip: Don't skip the refrigeration — I tried it once without chilling and got flat, crispy cookies instead of thick ones. Thirty minutes in the fridge makes a real difference.
- Tip: Press a few extra chocolate chips on top of each ball before baking if you want them to look more finished and bakery-style.
- Tip: Leaving out the chocolate chips entirely gives you a purer Biscoff flavor — both versions are worth making at least once.
16. Easy Chocolate Covered Oreos
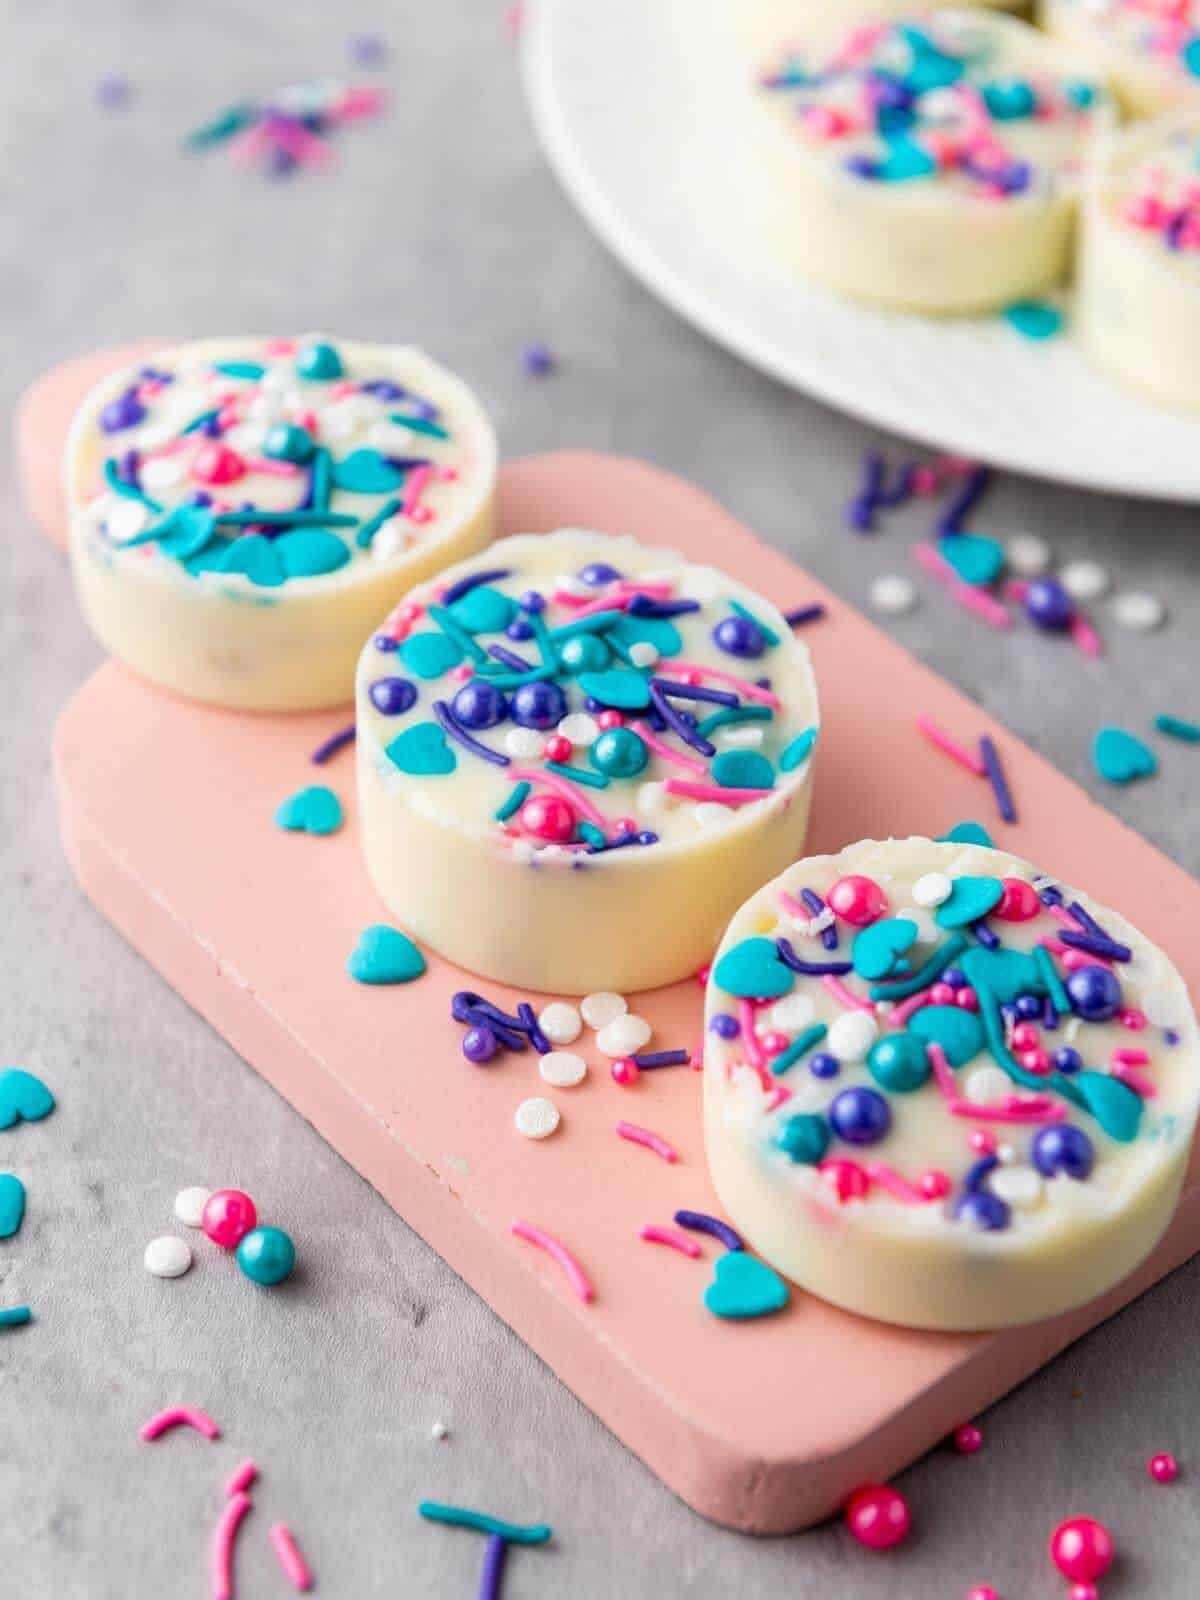
This is the one I make when I need something that looks impressive but takes almost no effort — just three ingredients and about 45 minutes total including the freezing time. You melt chocolate, set an Oreo in a mold or just dip it, cover completely, add whatever sprinkles you have on hand, and freeze until set. The result looks like something from a gift shop, but it came together in your kitchen in under an hour. I've made these for school events and the kids always want to know if I bought them somewhere. I don't correct them.
Ingredients
- 24 Oreo cookies (one standard package)
- 2 cups semi-sweet or white chocolate chips (or melting wafers — Ghirardelli or Wilton brand both work well)
- Sprinkles, crushed candy, or flaky sea salt for topping
Instructions
- Melt the chocolate chips in a microwave-safe bowl in 30-second intervals, stirring between each, until fully smooth — usually 2–3 rounds total. Don't rush this or the chocolate seizes.
- If using a chocolate mold: pour a thin layer of melted chocolate into each cavity, press an Oreo gently into the center, then spoon more chocolate over the top to cover completely. If no mold, dip each Oreo using a fork, let excess drip off, and place on a parchment-lined tray.
- Immediately add sprinkles or toppings while the chocolate is still wet so they stick.
- Freeze for 30 minutes until fully set, then pop out of molds or peel off the parchment. Store in a cool place or the fridge in an airtight container.
Tips
- Tip: Melting wafers (like Wilton Candy Melts, found at Walmart or Michaels) are easier to work with than chocolate chips because they melt smoother and set with a better snap — worth keeping a bag on hand.
- Tip: Add a teaspoon of coconut oil to the chocolate before melting if it seems too thick — it thins the chocolate just enough for clean, even coating.
- Tip: These work with any Oreo flavor — Golden Oreos dipped in dark chocolate are genuinely excellent and worth trying once you've done the classic version.
7. Iced Oatmeal Cookies
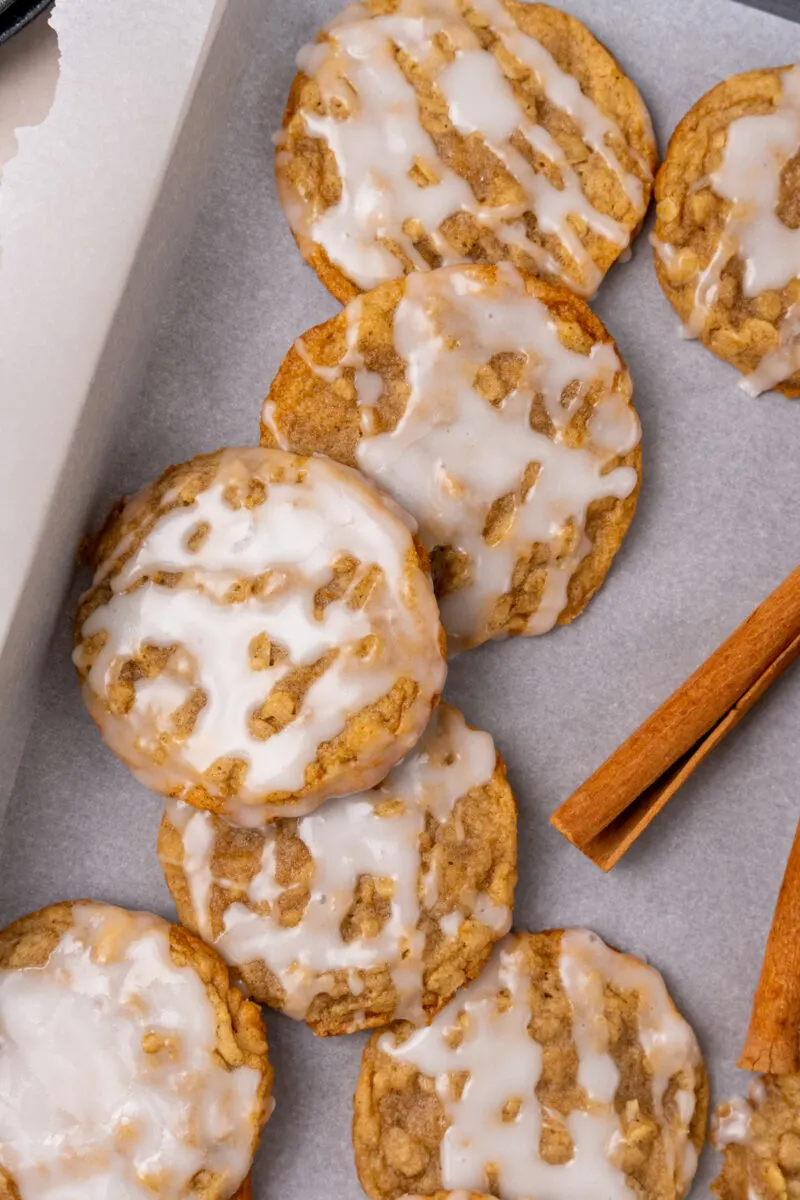
Iced oatmeal cookies are one of those things that look impressive but take almost no effort. The oats give them a slightly chewy, hearty texture, and the simple vanilla icing on top hardens just enough to give you that satisfying snap when you bite in. I make these when I want something that feels a little more put-together than a plain drop cookie — they look like you tried, even when you really didn't. The warm cinnamon and nutmeg in the dough make the whole kitchen smell like something good is happening.
Ingredients
- 1 cup (2 sticks) unsalted butter, softened
- ¾ cup granulated sugar
- ½ cup light brown sugar, packed
- 2 large eggs
- 1 teaspoon vanilla extract
- 1½ cups all-purpose flour
- 1 teaspoon baking soda
- 1 teaspoon cinnamon
- ¼ teaspoon nutmeg
- ½ teaspoon salt
- 3 cups old-fashioned rolled oats
- 1 cup powdered sugar + 2–3 tablespoons milk (for icing)
Instructions
- Preheat your oven to 350°F. Line two baking sheets with parchment paper.
- Beat the softened butter with both sugars until light and fluffy, about 2–3 minutes. Add the eggs and vanilla and mix until combined.
- Add the flour, baking soda, cinnamon, nutmeg, and salt to the butter mixture and stir until just combined. Fold in the rolled oats.
- Scoop rounded tablespoons of dough onto the prepared baking sheets, spacing them about 2 inches apart. Bake for 10–12 minutes until the edges are just set and the centers look slightly underdone — they firm up as they cool.
- Let cookies cool completely on the pan. Whisk together powdered sugar and milk to make a thick but pourable icing, then dip the top of each cookie in and let it set for about 20 minutes before stacking.
Tips
- Tip: Don't overbake — these cookies should look slightly soft in the center when you pull them from the oven. They set up fully as they cool and stay chewy for days.
- Tip: For a thicker icing that holds its shape better, add milk one tablespoon at a time and stop when it just barely drips off a spoon.
- Tip: Store in an airtight container at room temperature for up to 5 days, or freeze the uniced cookies for up to 3 months and ice them fresh when you need them.
8. No-Bake Samoa Cookies

If you've ever bought a box of Samoas from a Girl Scout and then immediately wished you had five more boxes — this one's for you. These no-bake versions use dates, toasted coconut, and chocolate to recreate that caramel-coconut-chocolate combination without turning on the oven at all. They come together in about 15 minutes and only need a stint in the fridge to firm up. I made a batch of these on a weeknight when I had absolutely no energy to bake, and they disappeared faster than anything I'd actually put effort into.
Ingredients
- 1 cup Medjool dates, pitted (about 10–12 dates)
- 1½ cups unsweetened shredded coconut, toasted
- ½ cup semi-sweet chocolate chips
- 1 tablespoon coconut oil
- 1 teaspoon vanilla extract
- Pinch of salt
Instructions
- Toast the shredded coconut in a dry skillet over medium-low heat, stirring constantly, for 3–4 minutes until golden. Watch it carefully — it goes from golden to burnt fast. Set aside to cool.
- Blend the pitted dates in a food processor until a sticky paste forms. Add the vanilla, salt, and 1 cup of the toasted coconut, then pulse until everything comes together. (No food processor? Chop the dates very finely by hand and mix with a fork — it takes longer but works.)
- Roll the mixture into small balls or press into round patties. Press the remaining toasted coconut onto the outside of each one.
- Melt the chocolate chips and coconut oil together in a microwave-safe bowl in 30-second intervals, stirring between each, until smooth. Drizzle over the cookies or dip the bottoms.
- Place on a parchment-lined tray and refrigerate for at least 30 minutes until the chocolate sets. Store in the fridge for up to 7 days.
Tips
- Tip: If your dates are dry and not blending well, soak them in warm water for 10 minutes first, then drain and pat dry before using.
- Tip: Toasting the coconut is not optional — it's what gives these that deep, nutty, caramel-like flavor that makes them taste like the real thing.
- Tip: These also freeze well. Freeze them on a tray first, then transfer to a bag — they'll keep for up to 2 months and thaw in about 10 minutes on the counter.
9. Rice Krispie Cookies
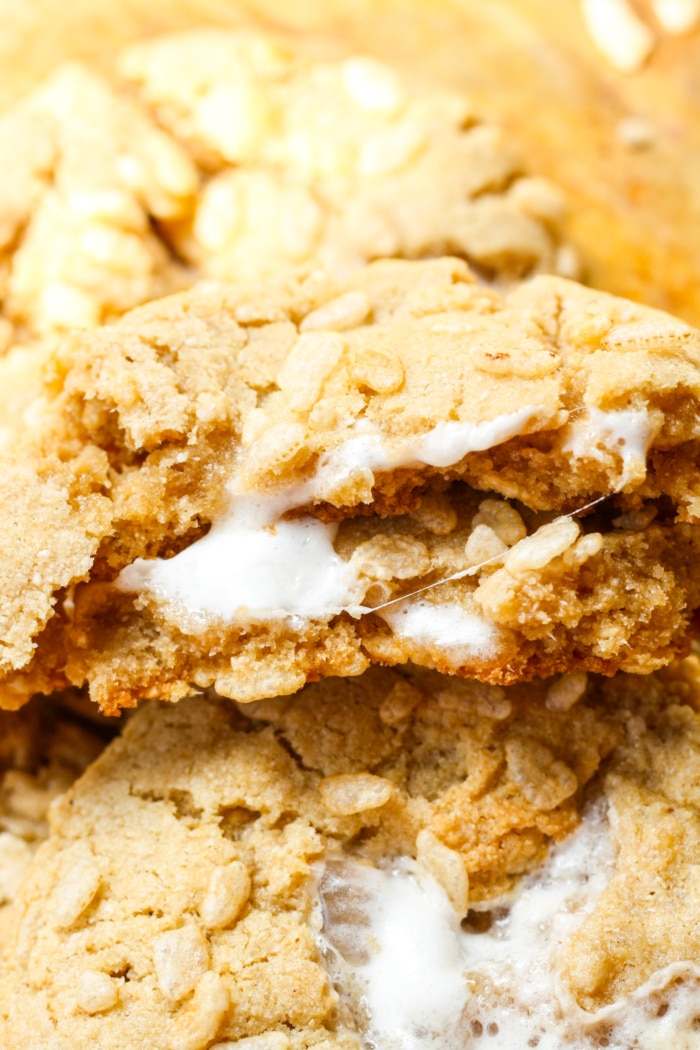
I wasn't sure about these the first time I saw them — Rice Krispies in a cookie dough felt like a gimmick. Then I tried one and understood immediately. The cereal adds this light, airy crunch to an otherwise soft and chewy cookie, and the contrast is genuinely fun to eat. Add mini marshmallows to the dough and you've got something that's halfway between a cookie and a rice crispy treat — which, if you ask Zainab, is basically the best thing possible. These come together fast and kids go completely wild for them.
Ingredients
- ½ cup (1 stick) unsalted butter, softened
- ½ cup granulated sugar
- ½ cup light brown sugar, packed
- 1 large egg
- 1 teaspoon vanilla extract
- 1¼ cups all-purpose flour
- ½ teaspoon baking soda
- ¼ teaspoon salt
- 1½ cups Rice Krispies cereal
- 1 cup mini marshmallows
- ½ cup semi-sweet chocolate chips (optional but worth it)
Instructions
- Preheat your oven to 350°F. Line a baking sheet with parchment paper.
- Beat the softened butter with both sugars until combined. Add the egg and vanilla and mix until smooth.
- Stir in the flour, baking soda, and salt until just combined — don't overmix or the cookies get tough.
- Gently fold in the Rice Krispies, mini marshmallows, and chocolate chips if using. The cereal is delicate so fold carefully to keep it from crushing.
- Scoop rounded tablespoons onto the prepared baking sheet, spacing 2 inches apart. Bake for 9–11 minutes until the edges are golden but the centers still look soft. Cool on the pan for 5 minutes before moving.
Tips
- Tip: Fold the Rice Krispies in last and as gently as possible — if you stir too aggressively they break down and you lose that crunch that makes these special.
- Tip: These are best the day they're made when the cereal is still crispy. By day two they soften a bit — still good, just different. Store loosely covered rather than in a sealed container to slow that down.
- Tip: You can swap the mini marshmallows for peanut butter chips or white chocolate chips if you want a different flavor profile entirely.
10. Almond Flour Cookies

Almond flour cookies have a texture that regular flour cookies just can't replicate — slightly dense, almost fudgy in the middle, with crisp edges and a subtle nuttiness underneath whatever you add to them. I started making these when a friend visiting couldn't eat gluten and I didn't want to make her feel like she was getting the sad alternative version. She asked for the recipe before she left. These use dark chocolate chips and come together in one bowl with no chilling required, which puts them firmly in the weeknight rotation.
Ingredients
- 2 cups blanched almond flour (not almond meal — the texture is different)
- ¼ teaspoon baking soda
- ¼ teaspoon salt
- 3 tablespoons coconut oil, melted (or unsalted butter)
- 3 tablespoons maple syrup or honey
- 1 large egg
- 1 teaspoon vanilla extract
- ½ cup dark chocolate chips
Instructions
- Preheat your oven to 350°F. Line a baking sheet with parchment paper.
- In a large bowl, whisk together the almond flour, baking soda, and salt. Add the melted coconut oil, maple syrup, egg, and vanilla, then stir until a soft dough forms.
- Fold in the dark chocolate chips. The dough will be slightly sticky — that's normal with almond flour.
- Scoop heaping tablespoons onto the prepared sheet and gently flatten each one slightly with your palm — almond flour cookies don't spread much on their own.
- Bake for 9–11 minutes until the edges are golden and the centers look just set. Let them cool on the pan for 10 minutes before moving — they firm up significantly as they cool.
Tips
- Tip: Use blanched almond flour specifically — it's made from skinless almonds and gives a much finer, smoother texture than regular almond meal. Bob's Red Mill and Trader Joe's both carry it.
- Tip: These cookies are fragile when hot — don't try to move them early. Give them the full 10 minutes on the pan and they'll hold together perfectly.
- Tip: Store in an airtight container at room temperature for up to 4 days, or refrigerate for up to a week. They actually taste even better cold from the fridge the next day.
11. Gluten-Free Kitchen Sink Cookies
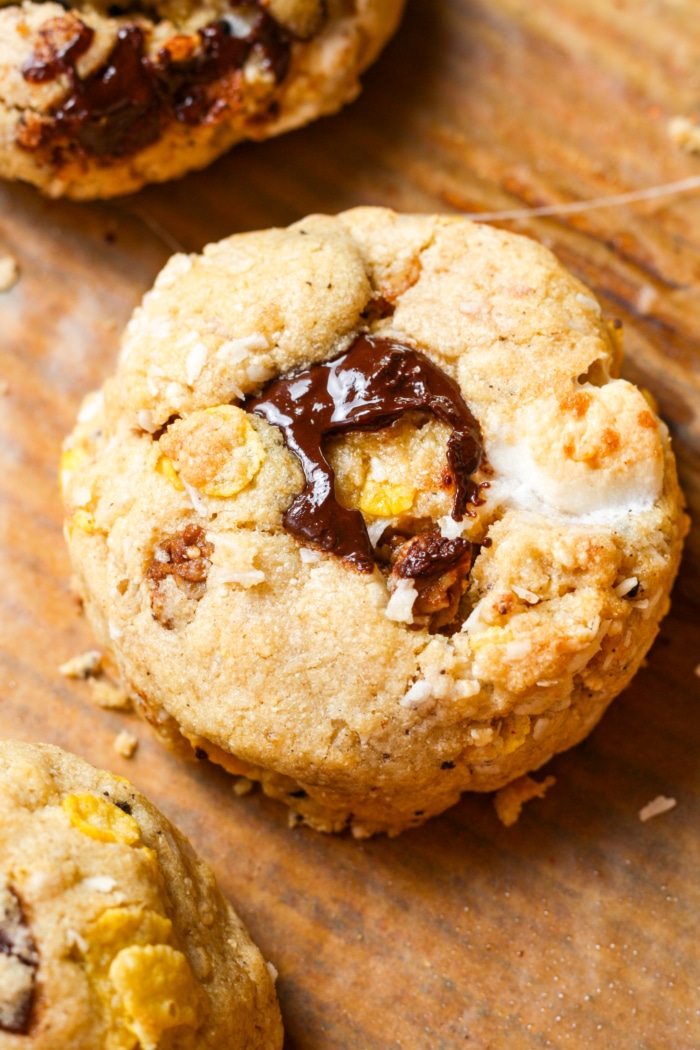
The name says everything — these are the cookies where you raid your pantry and throw in a little of everything. Chocolate chips, pretzels, toffee bits, dried fruit, nuts, coconut flakes — whatever you've got. The base is a solid gluten-free dough made with a 1:1 gluten-free flour blend, so the cookies stay thick, chewy, and completely satisfying even without regular flour. I love this recipe for the end of the week when I'm trying to use up random odds and ends in the pantry. Every batch is slightly different and somehow always good.
Ingredients
- ½ cup (1 stick) unsalted butter, softened
- ½ cup granulated sugar
- ½ cup light brown sugar, packed
- 1 large egg + 1 egg yolk
- 1½ teaspoons vanilla extract
- 1½ cups gluten-free 1:1 all-purpose flour blend (Bob's Red Mill or King Arthur work well)
- ½ teaspoon baking soda
- ½ teaspoon salt
- 2 cups mix-ins of your choice: chocolate chips, crushed pretzels, toffee bits, dried cranberries, chopped nuts, shredded coconut — any combination
Instructions
- Preheat your oven to 350°F. Line a baking sheet with parchment paper.
- Beat the butter with both sugars until light and fluffy. Add the egg, egg yolk, and vanilla and mix until well combined. The extra yolk adds richness and helps with that thick, chewy texture.
- Stir in the gluten-free flour blend, baking soda, and salt until a dough forms. It may look slightly different from regular cookie dough — that's fine, GF flour behaves differently.
- Fold in your chosen mix-ins. Don't hold back — 2 full cups sounds like a lot but these cookies can handle it.
- Scoop large balls of dough (about 2 tablespoons each) onto the baking sheet, spacing 2 inches apart. Bake for 10–12 minutes until the edges are set and golden. Cool on the pan for 5 minutes before transferring.
Tips
- Tip: Use a 1:1 gluten-free flour blend that already contains xanthan gum — this is what holds the cookies together and gives them structure. Check the label before buying.
- Tip: These cookies freeze beautifully. Scoop the dough into balls, freeze them on a tray, then transfer to a zip-lock bag. Bake straight from frozen — just add 2 extra minutes to the bake time.
- Tip: For the best mix-in combination, include at least one salty element (pretzels or salted nuts) alongside your sweet ones — that contrast is what makes kitchen sink cookies so addictive.
2. Honey Cookies
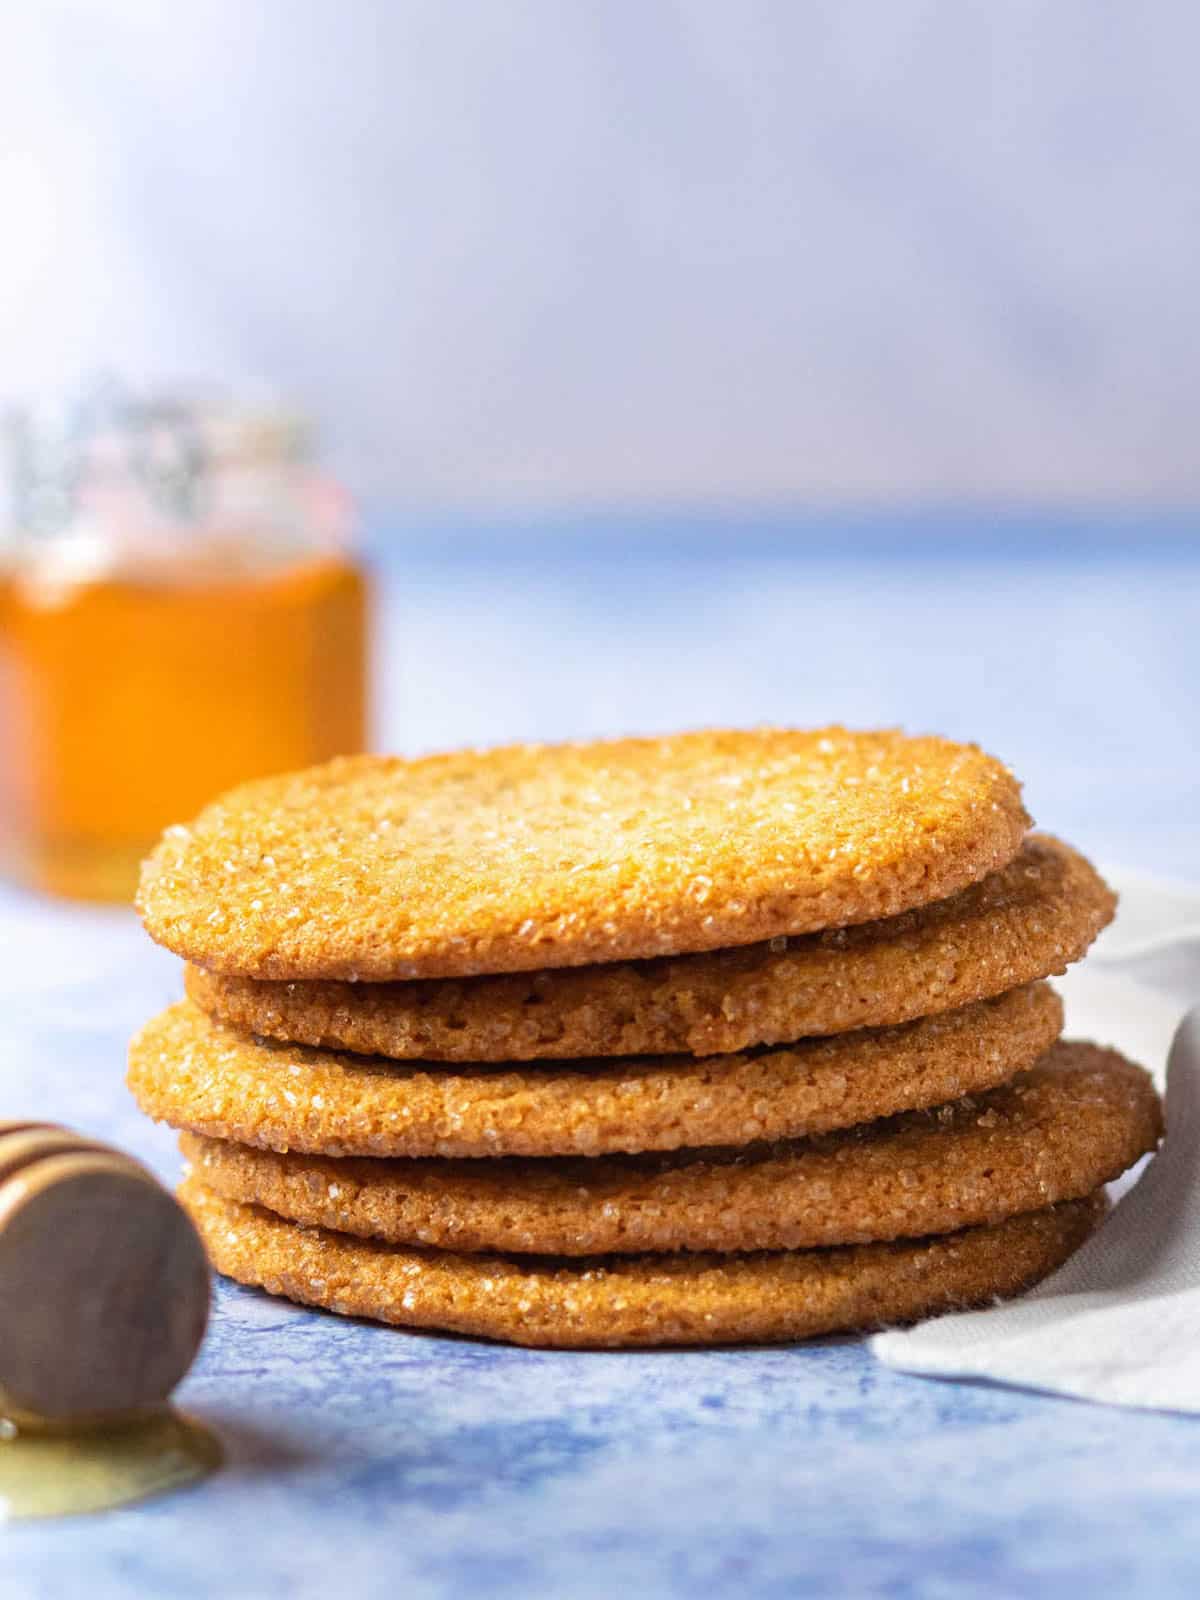
Honey cookies sound simple, and they are — but that's exactly what makes them so good. The honey adds a gentle floral sweetness that sugar alone just can't replicate, and when you layer in cinnamon, a pinch of nutmeg, and vanilla, the whole kitchen smells incredible while they bake. I made a batch on a cold Tuesday evening with no plan, just ingredients I already had, and they were gone before bedtime. These are the kind of cookies you make when you want something homemade without spending an hour in the kitchen.
Ingredients
- 2 ¼ cups all-purpose flour
- ½ teaspoon baking soda
- ½ teaspoon cinnamon
- ¼ teaspoon nutmeg
- ¼ teaspoon salt
- ½ cup (1 stick) unsalted butter, softened
- ½ cup granulated sugar
- ⅓ cup honey
- 1 large egg
- 1 teaspoon vanilla extract
Instructions
- Whisk together flour, baking soda, cinnamon, nutmeg, and salt in a bowl and set aside.
- Beat butter and sugar together until light and fluffy, about 2 minutes. Add the honey, egg, and vanilla and mix until combined.
- Stir the dry ingredients into the wet until a soft dough forms. Cover and refrigerate for at least 30 minutes — this prevents spreading and makes them easier to handle.
- Preheat oven to 350°F. Scoop rounded tablespoons of dough onto a lined baking sheet, spacing them 2 inches apart.
- Bake for 10-12 minutes until the edges are just golden. Let them cool on the pan for 5 minutes before transferring — they firm up as they cool.
Tips
- Tip: For a dairy-free version, swap the butter for refined coconut oil — the texture stays very similar and you won't taste the coconut.
- Tip: Don't skip the chill time. Honey-based doughs are stickier than regular cookie doughs, and 30 minutes in the fridge makes all the difference for clean scooping.
- Tip: These store well in an airtight container for up to 5 days, and the flavor actually deepens on day two — if they last that long.
3. Vegan Oatmeal Chocolate Chip Cookies
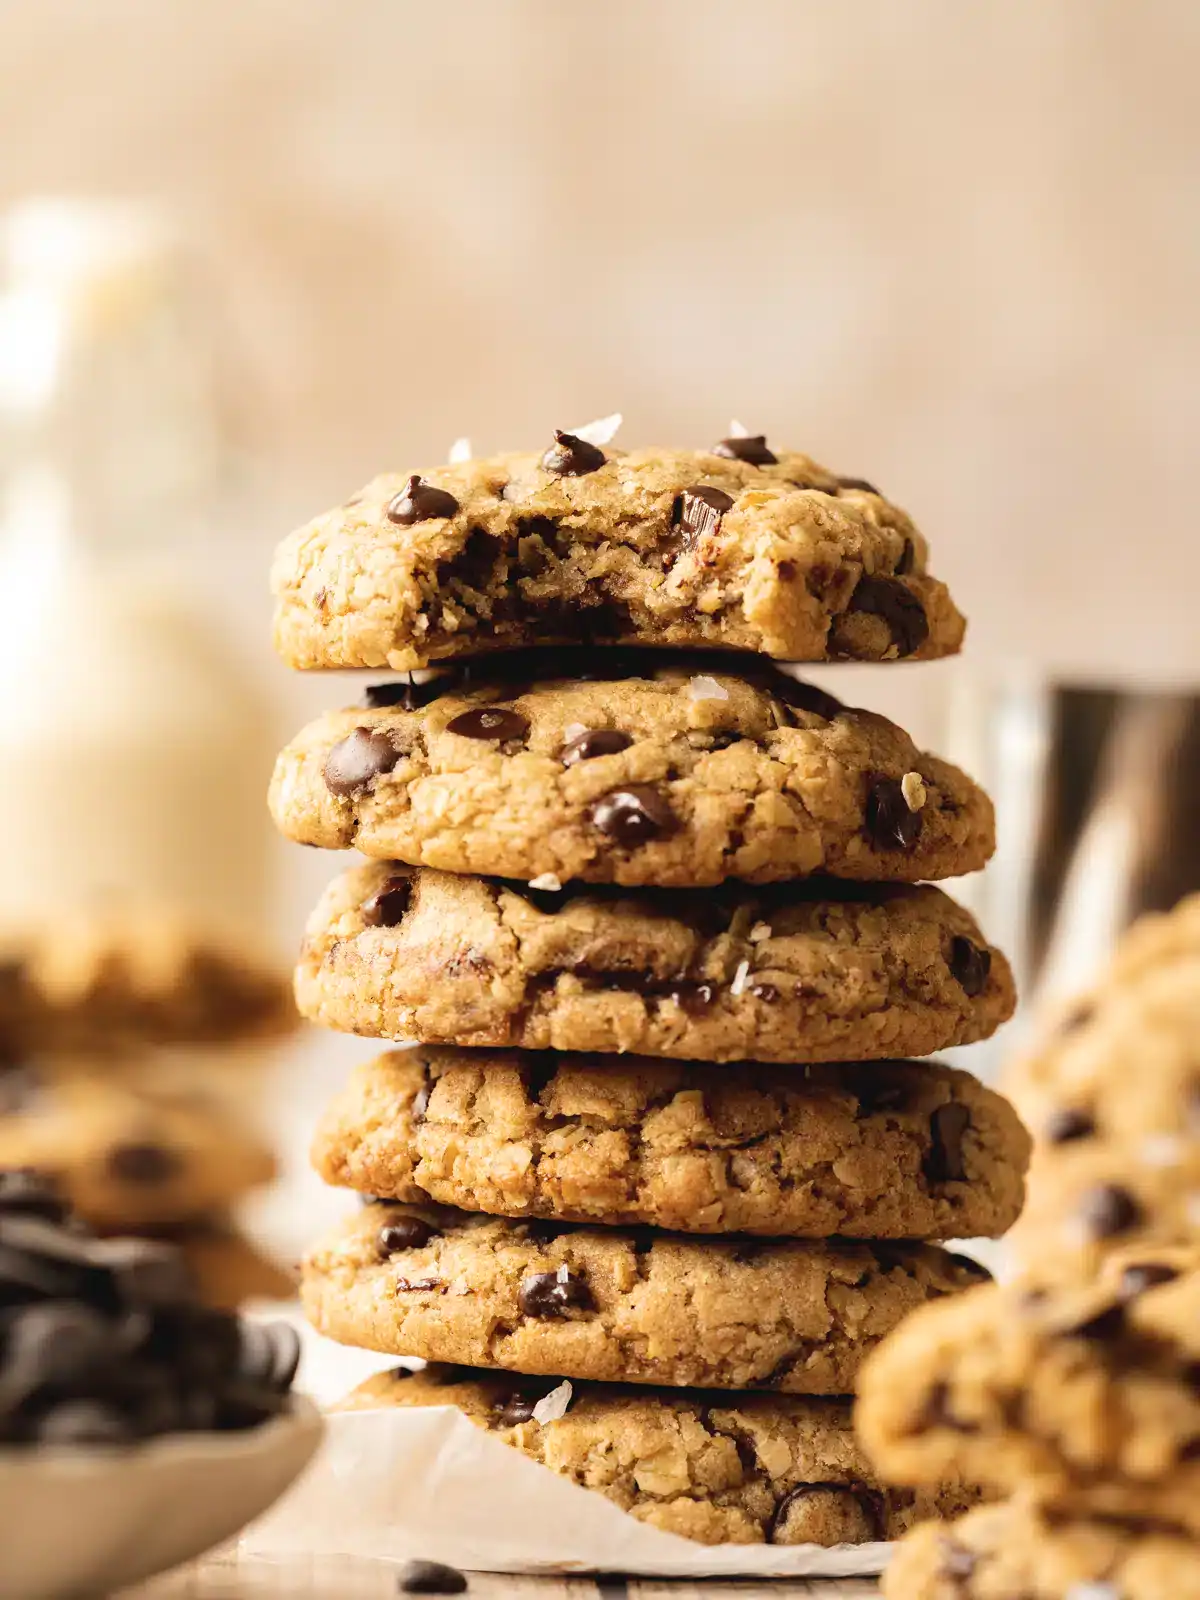
I was skeptical the first time I made vegan cookies — I kept thinking something would be off without the eggs and butter. I was wrong. These oatmeal chocolate chip cookies are thick, chewy, and deeply satisfying, and they come together in one bowl using things you probably already have in your pantry. No stand mixer, no special equipment, no complicated steps. Just real cookies that happen to be vegan.
Ingredients
- 1 ½ cups rolled oats
- 1 cup all-purpose flour (or oat flour for fully gluten-free)
- ½ teaspoon baking soda
- ½ teaspoon cinnamon
- ¼ teaspoon salt
- ⅓ cup coconut oil, melted (or neutral vegetable oil)
- ½ cup brown sugar, packed
- 1 flax egg (1 tablespoon ground flaxseed + 3 tablespoons water, rested 5 minutes)
- 2 tablespoons maple syrup
- 1 teaspoon vanilla extract
- ¾ cup dairy-free chocolate chips (Enjoy Life brand works well)
Instructions
- Make the flax egg first and let it sit for 5 minutes while you prep everything else — it needs time to gel and act as a binder.
- In a large bowl, mix the melted coconut oil, brown sugar, maple syrup, vanilla, and flax egg until smooth.
- Stir in the oats, flour, baking soda, cinnamon, and salt until a thick dough forms. Fold in the chocolate chips.
- Refrigerate the dough for 20 minutes. This step matters — it helps the cookies hold their shape instead of spreading flat.
- Preheat oven to 350°F. Scoop dough into balls (about 2 tablespoons each), place on a lined baking sheet, and press down slightly.
- Bake for 11-13 minutes. They'll look slightly underdone in the center — that's fine. Cool on the pan for 10 minutes before moving; they firm up beautifully.
Tips
- Tip: You can freeze the dough balls on a sheet pan, then transfer to a zip-lock bag. Bake from frozen at 350°F for an extra 2-3 minutes — fresh cookies whenever you want them.
- Tip: Add-ins are flexible here — chopped walnuts, dried cranberries, or shredded coconut all work well. Just keep the total mix-in amount to about ¾ cup so the dough doesn't get too chunky to hold together.
- Tip: If you don't have ground flaxseed, a mashed half banana works as a substitute egg — it adds a faint banana flavor, but with chocolate chips in the mix, nobody notices.
4. Crunchy Chocolate Chip and Hazelnut Oat Cookies

If soft and chewy is your usual, these cookies will remind you how good a genuinely crunchy cookie can be. Toasted hazelnuts, rolled oats, dark chocolate chips, and coconut sugar come together into something that has real snap when you bite into it — the kind of cookie that holds up next to a cup of tea or coffee without falling apart. The toasting step for the hazelnuts is non-negotiable; it takes five minutes and makes a serious difference in the depth of flavor you get.
Ingredients
- 1 cup rolled oats
- ¾ cup all-purpose flour
- ½ teaspoon baking soda
- ¼ teaspoon salt
- ½ cup hazelnuts, roughly chopped and toasted
- ½ cup dark chocolate chips
- ½ cup (1 stick) unsalted butter, melted
- ⅔ cup coconut sugar (or light brown sugar)
- 1 large egg
- 1 teaspoon vanilla extract
Instructions
- Preheat oven to 356°F (180°C). Toast the chopped hazelnuts in a dry skillet over medium heat for 4-5 minutes, stirring often, until fragrant and lightly golden. Set aside to cool.
- In a large bowl, whisk together the melted butter, coconut sugar, egg, and vanilla until smooth and slightly thickened.
- Stir in the oats, flour, baking soda, and salt until combined. Fold in the toasted hazelnuts and chocolate chips.
- Scoop rounded tablespoons of dough onto a lined baking sheet, spacing about 2 inches apart. Flatten each one slightly with your palm — these don't spread much on their own.
- Bake for 14-15 minutes until deep golden brown. Let cool completely on the pan — they crisp up fully as they cool, so resist moving them early.
Tips
- Tip: Can't find hazelnuts at your regular grocery store? Pecans or sliced almonds are a solid swap and give you a similar crunch without a special trip to the store.
- Tip: For maximum crunch, don't underbake. These cookies need to go a full 15 minutes — pull them when they look one shade darker than you'd expect, and they'll be perfectly crisp once cooled.
- Tip: Store in a tin rather than a plastic container — a tin keeps them crisper for longer by letting a tiny bit of air circulate. They stay crunchy for up to a week this way.
5. Snickerdoodle Cookies
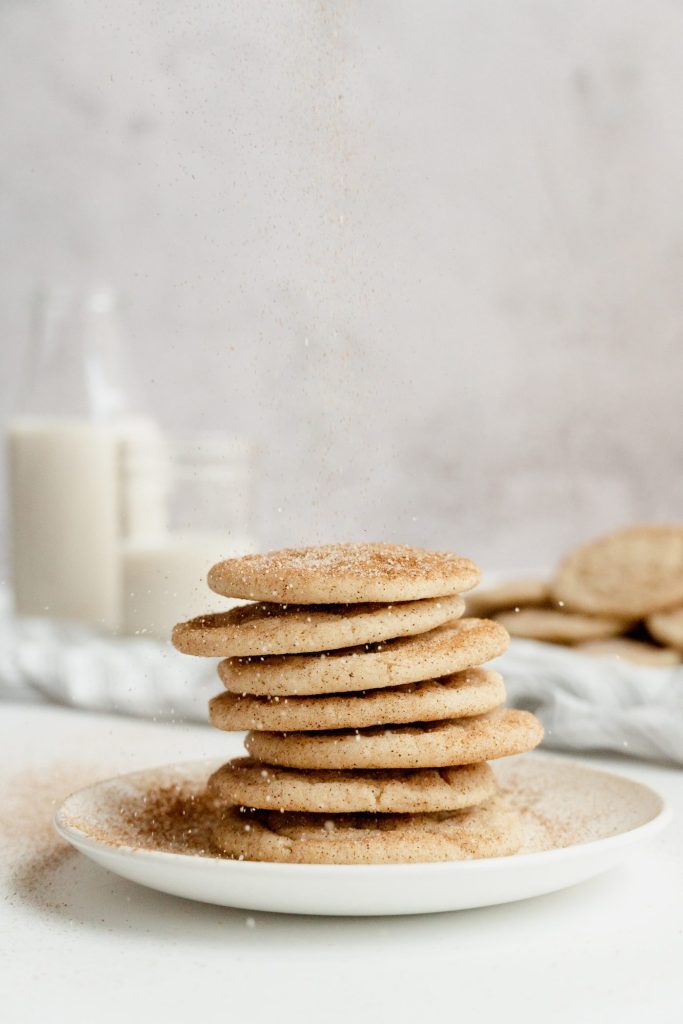
Snickerdoodles were one of those American cookies I'd heard about for years before I actually made them. The cream of tartar is what makes them distinctly snickerdoodle — it creates that characteristic slightly tangy, almost sour note underneath all the cinnamon sugar, and it's what separates them from a plain sugar cookie rolled in spice. Saad is the one who requests these most often in our house, and I always make a double batch because a single batch goes embarrassingly fast.
Ingredients
- 2 ¾ cups all-purpose flour
- 2 teaspoons cream of tartar
- 1 teaspoon baking soda
- ½ teaspoon salt
- 1 cup (2 sticks) unsalted butter, softened
- 1 ½ cups granulated sugar
- 2 large eggs
- 1 teaspoon vanilla extract
- For rolling: 3 tablespoons granulated sugar + 1 ½ teaspoons cinnamon, mixed together
Instructions
- Whisk together flour, cream of tartar, baking soda, and salt in a bowl. Set aside.
- Beat the softened butter and sugar together until pale and fluffy, about 3 minutes. Add eggs one at a time, then the vanilla, and mix until smooth.
- Stir in the flour mixture until just combined — don't overmix. Cover the dough and refrigerate for 30 minutes. This is the step that keeps them thick and prevents spreading.
- Preheat oven to 375°F. Mix the cinnamon and sugar together in a small bowl. Roll dough into 1 ½-inch balls and coat each one generously in the cinnamon sugar.
- Place on a lined baking sheet 2 inches apart. Bake for 6-8 minutes — pull them when the centers still look slightly underset and the edges are just barely set. They should not look golden. They firm up as they cool and stay soft for days.
Tips
- Tip: Cream of tartar is usually in the spice aisle at Walmart or any grocery store — it's inexpensive and lasts forever. Don't skip it or substitute baking powder; the flavor genuinely won't be the same.
- Tip: The 6-8 minute bake time feels alarmingly short, but trust it. If the edges look golden when you pull them out, they're already overbaked and will be crunchy instead of soft once they cool.
- Tip: These freeze beautifully as unbaked dough balls. Roll them in cinnamon sugar before freezing, then bake straight from frozen at 375°F for 10-11 minutes — nearly identical results to fresh dough.
6. Brown Butter Sugar Cookies
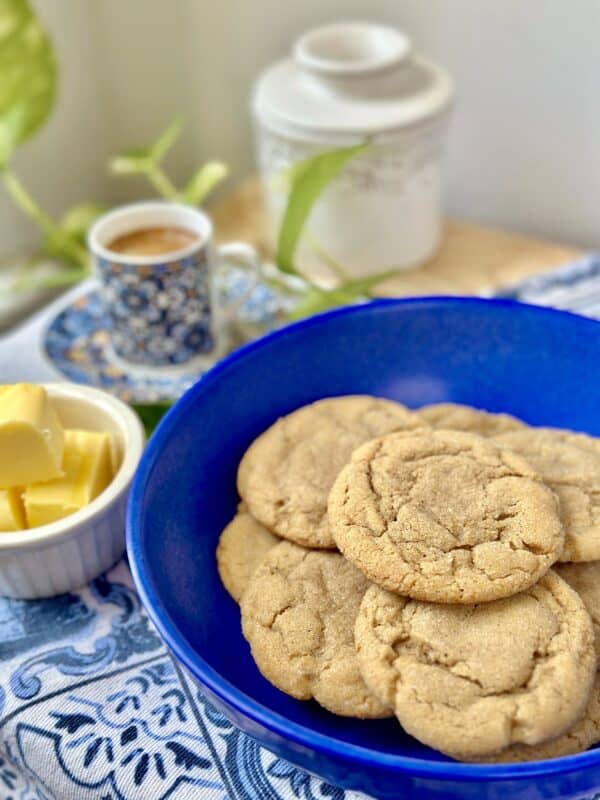
Brown butter is one of those techniques that sounds intimidating until you do it once, and then you want to put it in everything. It takes about five minutes — you melt butter in a pan, keep swirling it over medium heat until the milk solids turn golden and it smells like toasted nuts and caramel, and then you stop. That's it. What it does to a sugar cookie is remarkable; the whole flavor goes deeper, almost toffee-like, and it transforms what could be a plain cookie into something that makes people ask what's in it. Overnight chilling is worth it here — the dough develops more flavor and bakes up with better texture.
Ingredients
- 1 cup (2 sticks) unsalted butter
- 1 ½ cups granulated sugar
- 2 large eggs
- 1 teaspoon vanilla extract
- 2 ½ cups all-purpose flour
- 1 teaspoon baking soda
- ½ teaspoon baking powder
- ½ teaspoon salt
- ½ cup chopped walnuts or pecans (optional but recommended)
- For finishing (optional): granulated sugar for rolling, melted dark chocolate for dipping
Instructions
- Brown the butter: Melt butter in a light-colored saucepan over medium heat, swirling frequently. Cook for 5-7 minutes until the foam settles, the butter turns amber, and it smells nutty. Pour immediately into a large mixing bowl and let cool for 15 minutes.
- Whisk the sugar into the cooled brown butter, then add the eggs and vanilla and mix until smooth and slightly ribbony.
- Stir in the flour, baking soda, baking powder, and salt until just combined. Fold in the nuts if using. Cover the bowl and refrigerate overnight, or for a minimum of 2 hours.
- When ready to bake, preheat oven to 350°F. Scoop dough into balls and roll in granulated sugar if desired. Place on a lined baking sheet 2 inches apart.
- Bake for 9-10 minutes until the edges are set but the centers still look slightly soft. Cool on the pan for 5 minutes. Once cooled, dip half of each cookie in melted chocolate for a party-ready finish.
Tips
- Tip: Use a light-colored pan or stainless steel to brown the butter — it lets you see the color change clearly. Dark pans make it hard to tell when you've hit golden versus burnt, and burnt butter means starting over.
- Tip: The overnight chill is ideal, but if you're short on time, 2 hours in the freezer works. Cold dough = thicker cookies with chewy centers, so don't skip this step entirely.
- Tip: For the chocolate dip, melt about ½ cup of chocolate chips with 1 teaspoon of coconut oil — the oil keeps the chocolate fluid and gives it a slight sheen once it sets.
21. Salted Double Chocolate Peanut Butter Cookies
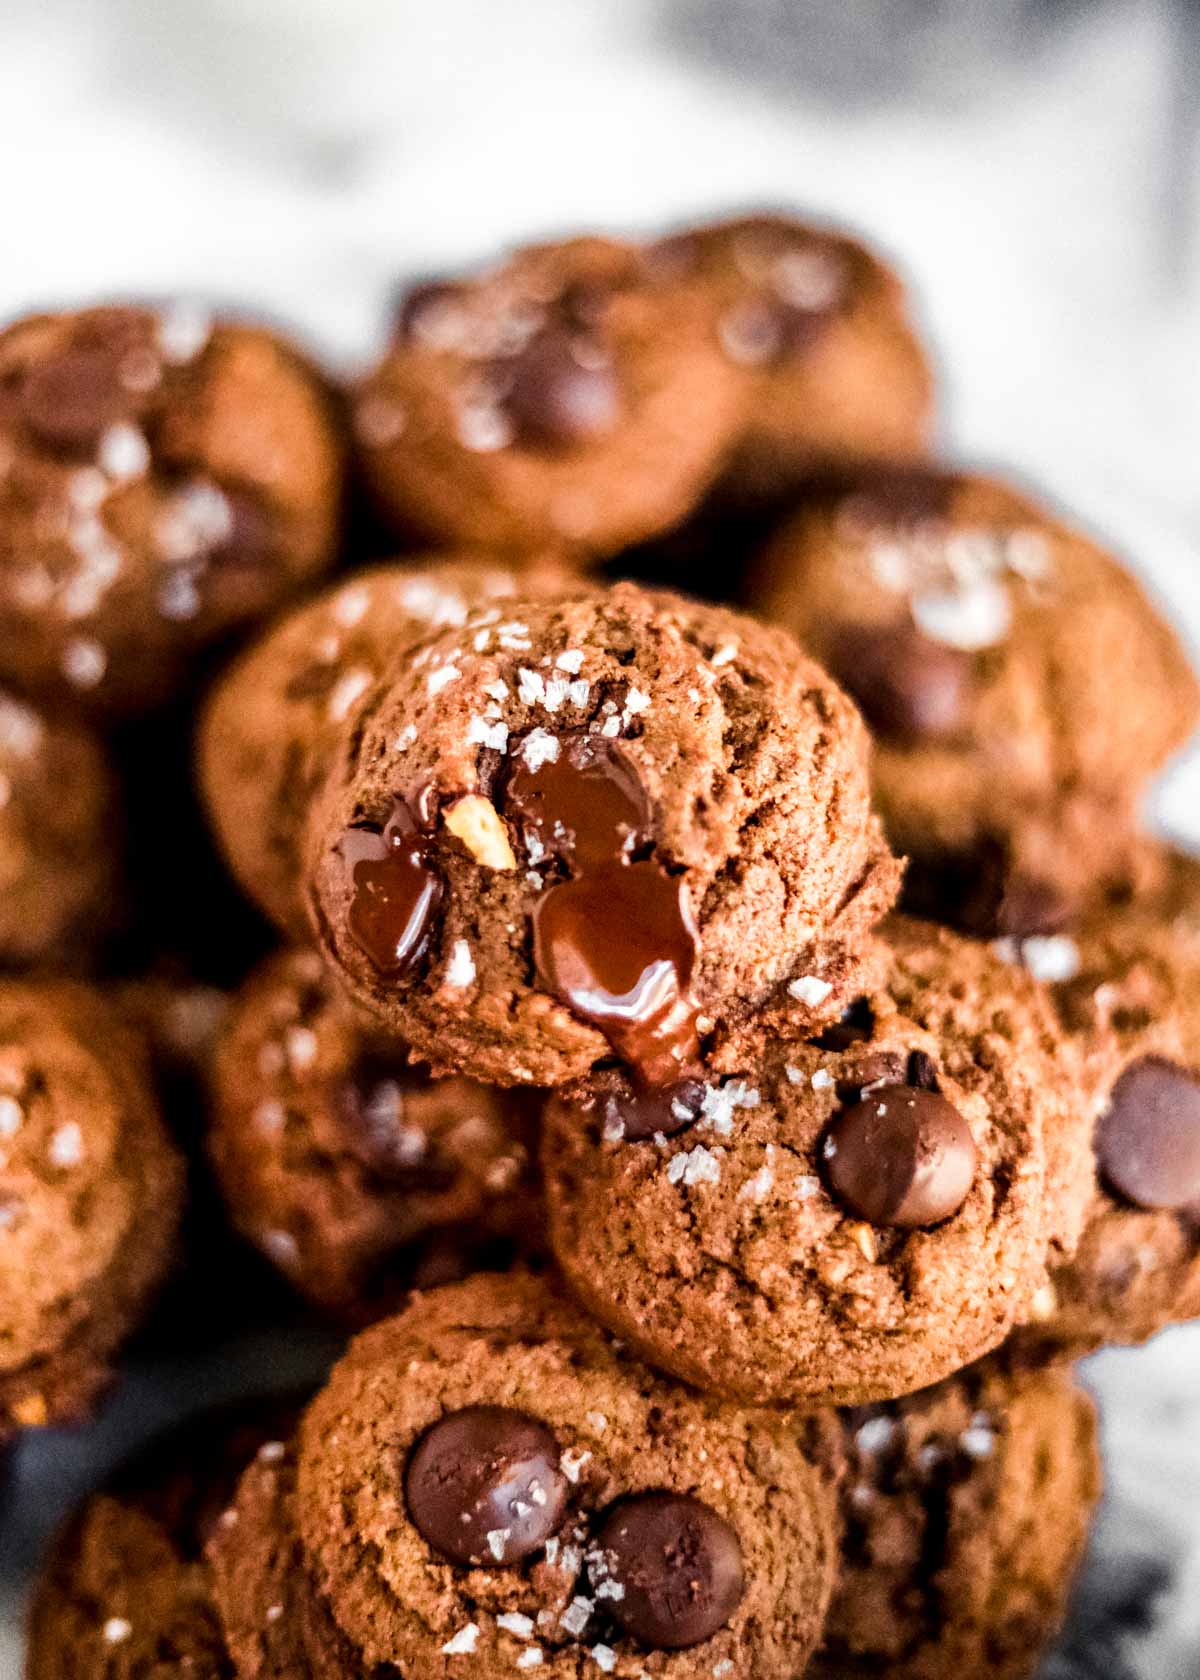
I saved this one for last because it's the kind of cookie that makes people stop mid-bite and ask what's in it. Peanut butter, two kinds of chocolate, and a pinch of flaky sea salt on top — it sounds like a lot but it all belongs together. Saad discovered these on a rainy afternoon when I was testing the recipe and he ate three before I could say anything. I've made them at least a dozen times since and they disappear every single time. If you only make one cookie from this entire list, make it this one.
Ingredients
- 1 cup creamy peanut butter (natural or regular both work)
- ½ cup (1 stick) unsalted butter, softened
- ¾ cup granulated sugar
- ½ cup packed brown sugar
- 2 large eggs, room temperature
- 1 teaspoon vanilla extract
- 1 cup all-purpose flour
- ⅓ cup unsweetened cocoa powder
- 1 teaspoon baking soda
- ¼ teaspoon fine salt
- 1 cup semi-sweet chocolate chips
- Flaky sea salt for topping (Maldon or any coarse flaky salt)
Instructions
- Preheat your oven to 350°F and line two baking sheets with parchment paper.
- In a large bowl, beat together the softened butter, peanut butter, granulated sugar, and brown sugar until smooth and combined, about 2 minutes by hand.
- Add the eggs one at a time, mixing after each, then stir in the vanilla extract.
- In a separate bowl, whisk together the flour, cocoa powder, baking soda, and fine salt. Add the dry ingredients to the wet and stir until just combined — don't overmix or the cookies will be tough.
- Fold in the chocolate chips. Scoop the dough into roughly 1.5-tablespoon balls and place them 2 inches apart on the prepared baking sheets.
- Sprinkle each cookie with a small pinch of flaky sea salt, then bake for 12–14 minutes until the edges are set but the centers still look slightly underdone. They firm up as they cool — pull them early and trust the process. Cool on the pan for 5 minutes before transferring.
Tips
- Tip: If you're using natural peanut butter, make sure it's fully stirred — the separated oil can throw off the dough texture and make the cookies spread too thin.
- Tip: The flaky salt on top is not optional in my opinion — it's what takes these from good to genuinely great. Maldon salt from Walmart or Costco works perfectly and a box lasts forever.
- Tip: These freeze beautifully. Roll the unbaked dough into balls, freeze them on a tray, then transfer to a zip-lock bag. Bake straight from frozen at 350°F for 14–16 minutes whenever you need a fresh cookie fast.
Twenty-one cookies is a lot of options, I know. But honestly, that's kind of the point — some weeks you want something fast and no-fuss, some weeks you want a project, and some days Saad asks for chocolate chip and Zainab asks for something with sprinkles and you need both on the table by 4pm. This list covers all of that. Whether you're baking for a school event, prepping a holiday tin, or just stress-baking on a Tuesday night (no judgment — I do it too), there's something here that fits.
The recipes I keep coming back to the most are the ones that don't require chilling the dough for 12 hours or sourcing ingredients I've never heard of. I want good cookies that work in a regular kitchen with regular pantry stuff. That was the whole criteria for putting this list together, and I stand by every single one on it. A few of them I've made so many times I could probably do them in my sleep at this point.
If you try any of these, I genuinely hope they turn out well for you the first time — though if they don't, just try again. Some of my best recipes came out of a failed first batch. Save the ones that catch your eye, bookmark this page, and come back whenever you need a cookie idea. That's what it's here for. 🍪✨🎉
More Recipes You Might Like
- Easy Brownie Recipes — if cookies aren't scratching the itch, these brownies usually do the trick
- Easy Cake Recipes — for when the occasion calls for something a little more than a cookie tin
- Christmas Cookie Recipes — a dedicated holiday list worth bookmarking well before December
- Easy Dessert Recipes — the full dessert roundup when you want to browse beyond cookies
- No-Bake Desserts — for the days when turning on the oven is simply not happening
Frequently Asked Questions
Can I make cookie dough ahead of time and freeze it?
Yes, and honestly I'd recommend it. Most drop cookie doughs — think chocolate chip, oatmeal, snickerdoodle — freeze really well as portioned balls on a sheet pan. Once frozen solid, transfer them to a zip-lock bag and keep them for up to 3 months. Bake straight from frozen, just add 2-3 minutes to your baking time.
How do I keep cookies soft after baking?
Store them in an airtight container at room temperature, and toss a slice of plain white bread in with them — it sounds odd but the cookies absorb the moisture from the bread and stay soft for days. I learned this from my mom and it actually works. Don't refrigerate soft cookies unless the recipe specifically says to, as cold air dries them out fast.
Which of these cookies is easiest for beginners?
No-bake cookies and drop cookies are where I'd start if you're new to baking. No-bake means zero oven stress, and drop cookies are exactly what they sound like — you scoop the dough and drop it on a pan. No rolling, no cutting, no chilling required. Start there, build your confidence, then move to the more fiddly stuff.
Can I substitute butter with oil in cookie recipes?
Sometimes, but it's not a straight swap and the texture will be different. Oil makes cookies denser and chewier, while butter gives that classic slightly crisp edge. If a recipe specifically calls for melted butter, you can sometimes substitute a neutral oil like vegetable or canola at a ¾:1 ratio — but I'd only do this if you're in a pinch, not as a regular substitution.
How long do homemade cookies last?
Most baked cookies last 4-5 days at room temperature in a sealed container. Crispy cookies like biscotti or shortbread last longer — up to 2 weeks if kept dry. If you want to stretch them further, freeze the baked cookies in a single layer, then move to a bag once solid. They reheat in the oven at 300°F for about 5 minutes and taste nearly fresh-baked.
Share This Post!
If this list helped you find a new cookie to try, pin it or share it with someone who'd use it — that's honestly the best thing you can do for a small food blog. 🍪📌
View More Recipes here Recipe Roundups





Comments
No Comments