
My husband grew up eating hummus on the regular because his family had close friends from Lebanon who would invite us over for huge spreads with fresh-baked pita, mountains of olives, multiple dips, and the smoothest creamiest hummus I'd ever tasted in my life. The first time I tried to make it at home, my version was grainy and chalky and tasted nothing like that silky bowl I remembered — and it took me 2 years of experimentation, asking the Lebanese auntie who introduced us to the dip her actual technique, and a lot of grainy failed batches before I finally figured out the peeled-chickpea trick that transforms ordinary hummus into restaurant-quality smooth. Saad calls it "the brown bean dip" (which is offensive to chickpeas everywhere, but he's young and we're working on his food vocabulary) and dips warm pita pieces into it nonstop. Zainab refuses hummus entirely because she eats only specific chickpea preparations (whole boiled chickpeas with salt — that's it, that's her chickpea repertoire), but she likes watching us assemble the spread.
The reason classic hummus works so beautifully is the balance of nutty chickpeas, rich tahini, bright lemon, sharp garlic, and the right amount of cold water to whip everything into a silky emulsion. Each ingredient plays a specific role — chickpeas provide the body and earthy nutty base, tahini adds richness and complexity, fresh lemon juice cuts through the heaviness with bright acidity, raw garlic adds sharp pungent warmth, olive oil contributes richness and that distinctive Mediterranean aroma, and cold water (added gradually while blending) is the secret that transforms thick paste into airy whipped texture. The proportions are critical — too much tahini and it becomes heavy and bitter, too little and the dip lacks richness; too much lemon and it tastes acidic, too little and it tastes flat; too much garlic and it overpowers everyone's breath for the next 12 hours, too little and the dip lacks character. My mother in Pakistan didn't make hummus specifically (chickpeas appear in her cooking as chana masala, chana chaat, and chana pulao instead), but her principle of "the balance is the recipe" applies universally — getting the proportions exactly right is what separates good hummus from forgettable hummus, and the difference is detectable in every bite.
This recipe serves 6-8 people generously as part of a larger spread, takes 15 minutes total from start to serving (5 minutes for the optional peel step + 10 minutes for blending), and costs about $5-6 for the entire batch using canned chickpeas. The hummus holds beautifully in the fridge for up to 5 days and actually improves in flavor over the first 24 hours as the garlic mellows and the flavors meld. For Mediterranean-themed dinners, mezze spreads, summer entertaining, lunchbox sandwiches, healthy snack prep, and any time you want a homemade dip that genuinely outperforms every store-bought brand at half the cost — this is the recipe that delivers. My husband requests this weekly because store-bought hummus disappoints him after he tasted the Lebanese-auntie version, and he now has the high-standards problem that comes with knowing what real hummus tastes like.
A practical note about the tahini. Use high-quality Middle Eastern tahini brands like Soom (American), Seed+Mill (American), Al Wadi (Lebanese), Karawan (Lebanese), or Ziyad (Lebanese) — NOT the cheap American grocery store tahini which is often bitter, separated, and chalky. Quality tahini should be smooth, pourable, slightly sweet-nutty, and never bitter. The price difference is real — quality tahini costs $9-14 for a 16 oz jar, cheap tahini costs $5-6 — but the flavor difference is enormous and worth every penny. If your tahini is bitter, your hummus will be bitter no matter what else you do right. Same principle my mother taught me about choosing the right oils — using cheap mustard oil in dishes that call for proper Pakistani mustard oil ruins the entire dish, regardless of how perfect the technique is. Specialty ingredients matter, and tahini is one of those ingredients where you absolutely cannot economize. Stock up on a quality jar once, and your hummus quality jumps immediately.
Why You'll Love This Recipe
- Genuinely better than every store-bought brand — restaurant-quality at home: The peeled-chickpea technique combined with proper tahini and the right ratio of cold water creates a silky, whipped, restaurant-quality texture that no major grocery store brand (Sabra, Trader Joe's, Cedar's, even Wholefoods organic) achieves. Once you taste homemade hummus made properly, store-bought becomes disappointingly grainy and one-note by comparison. My husband won't eat store-bought hummus anymore because the texture difference is so noticeable — which is the kind of recipe-quality endorsement that genuinely matters in real home kitchens.
- 15 minutes from start to serving — fast enough for weekday lunches: Active time is 15 minutes if you use canned chickpeas (5 for optional peeling, 10 for blending). The result is a fresh, vibrant, restaurant-quality dip that can be ready before lunch is over. For weekday meal prep, kids' lunchbox sandwiches, after-school snacks, and quick dinner sides, this is fast enough to be genuinely practical. The math: 15 minutes of work produces 5 days of hummus access, which is the kind of recipe efficiency that justifies the small effort.
- Healthier and cheaper than store-bought versions: Homemade hummus costs about $5-6 for a batch that produces 2.5-3 cups, compared to $5-7 for a 10 oz tub of store-bought (which is less than 1.5 cups). That's roughly half the cost per cup, with significantly better quality. Plus, you control the ingredients — no preservatives, stabilizers, citric acid, potassium sorbate, or sodium benzoate that store-bought versions add for shelf life. The cleaner ingredient list makes this a genuine health upgrade. For households that eat hummus regularly, the savings add up over a year while the quality improves dramatically.
- Endlessly customizable for different flavor profiles and occasions: Same base recipe accommodates infinite variations — roasted garlic for sweetness, sun-dried tomatoes for Mediterranean richness, beets for vibrant pink color, harissa for North African heat, smoked paprika for smoky depth, fresh herbs for bright lightness, avocado for extra creaminess, and Pakistani-American chaat masala for spice-forward variations. For mixed-occasion entertaining, you can produce 4-5 different hummus varieties from one base recipe in under an hour for a proper mezze spread.
- Versatile beyond dip applications — meal-prep workhorse: Use as a sandwich spread (replaces mayo or mustard), wrap filling for grilled vegetables and grilled chicken, sauce for grain bowls with quinoa or rice, topping for baked potatoes, base for hummus toast (the avocado-toast successor), filling for stuffed pita pockets, dressing thinner for salads, and dip for fresh vegetables. One batch easily transforms into a week of healthy lunches and snacks — which is the recipe math that justifies keeping a constant hummus supply in our fridge.
Ingredients
- For the Hummus Base:
- 2 (15 oz) cans chickpeas, drained and rinsed (about 3 cups cooked chickpeas total — reserve liquid for adjusting texture)
- ½ cup high-quality tahini (Soom, Seed+Mill, Al Wadi, Karawan, or Ziyad brand — NOT cheap grocery store tahini)
- ⅓ cup fresh lemon juice (about 2 large lemons — bottled won't work the same)
- 3-4 cloves garlic, peeled (adjust to taste — 3 for mild, 4 for assertive)
- ¾ teaspoon fine sea salt (or to taste)
- ½ teaspoon ground cumin
- 3-4 tablespoon ice-cold water (the secret ingredient for silky texture)
- 2 tablespoon extra virgin benefits of olive oil
- For Optional Peeling (the restaurant-quality secret):
- 1 teaspoon baking soda (for the boil method)
- Cold water (for ice bath)
- For Garnish:
- 2 tablespoon extra virgin olive oil (the good stuff — finishing oil)
- 1 teaspoon paprika or sumac (for color and flavor)
- 1 teaspoon za'atar (optional Middle Eastern spice blend)
- 2 tablespoon pine nuts, lightly toasted (optional but traditional)
- 2 tablespoon fresh parsley, finely chopped
- ¼ cup whole reserved chickpeas (set aside before blending)
- Pinch of red pepper flakes
- Lemon wedges for serving
- For Serving:
- Fresh warm pita bread or pita chips
- Lavash crackers or flatbread
- Naan triangles (Pakistani-American crossover)
- Sliced cucumber rounds
- Cherry tomatoes
- Carrot sticks, celery sticks, bell pepper strips
- Endive leaves and radicchio cups
- Olives (Kalamata, Castelvetrano, or mixed)
- Feta cheese cubes
- Falafel for the full Middle Eastern spread
Directions
- Step 1: Peel the chickpeas (the restaurant-quality secret — optional but transformative). This is the single trick that separates ordinary hummus from silky restaurant-quality hummus. Two methods: (Method A — Fast) Drain and rinse chickpeas, then rub them between two clean kitchen towels for 1-2 minutes — most of the loose skins will rub off. Pick out and discard the skins. (Method B — Best) Place drained chickpeas in a saucepan with cold water and 1 teaspoon baking soda. Bring to a boil, simmer 5 minutes (chickpeas will look slightly puffed and skins will be loose). Drain, transfer to a bowl of ice water, and rub between your hands — the skins will slip off easily. Pick out and discard skins. Yes, this step takes an extra 5-10 minutes, but it's the difference between grainy "homemade hummus" and silky "restaurant hummus." If you skip this step, your hummus will still be delicious, just slightly less silky. Worth doing for company; skip for everyday meal prep.
- Step 2: Blend tahini and lemon juice FIRST — this is the second secret. In a food processor, combine tahini and fresh lemon juice. Process for 1 full minute, scraping down the sides once. The mixture will look thick, pale, and creamy — almost frosting-like. This step "whips" the tahini and emulsifies it with the lemon juice, which creates the foundational creaminess that the entire dip is built on. Do NOT skip this step or combine all ingredients at once — the order matters significantly for the final texture.
- Step 3: Add garlic and salt. Add peeled garlic cloves, salt, and ground cumin to the tahini-lemon mixture. Process for 30-45 seconds until the garlic is completely pulverized and incorporated. Scrape down the sides. Letting the garlic process this long mellows its sharpness slightly while distributing it evenly throughout the dip.
- Step 4: Add half the chickpeas and blend. Add half of the peeled (or unpeeled) chickpeas to the food processor. Process for 1 minute, scraping down the sides. The mixture will look thick and slightly chunky.
- Step 5: Add remaining chickpeas and process until smooth. Add the remaining chickpeas (reserve ¼ cup whole chickpeas for garnish if desired). Process for 2-3 minutes total — the longer processing time is essential for creating the silky restaurant-quality texture. Don't stop at "looks combined" — go past that point to "looks whipped and creamy." Scrape down the sides 2-3 times during this step to ensure even processing.
- Step 6: Drizzle in ice-cold water while processor runs (the texture secret). With the food processor running on medium-high speed, slowly drizzle in 3-4 tablespoons of ice-cold water through the feed tube. Watch the hummus transform — it will become noticeably lighter, fluffier, and creamier as you add the water. This is the moment when "thick paste" becomes "airy whipped hummus." Add water gradually until the texture is to your liking — slightly fluffier than store-bought, silky smooth, holds its shape but moves slightly when scooped.
- Step 7: Drizzle in olive oil for richness. With the processor still running, drizzle in 2 tablespoons of extra virgin olive oil through the feed tube. Process for 30 more seconds to fully incorporate. The olive oil adds richness and that distinctive Mediterranean aroma.
- Step 8: Taste and adjust seasoning. Taste the hummus and adjust as needed — more salt for depth, more lemon juice for brightness, more garlic for assertiveness, more cumin for warmth, more water for fluffier texture. Process briefly after each adjustment. The taste-and-adjust step is what makes your hummus YOUR hummus rather than a generic version — trust your palate.
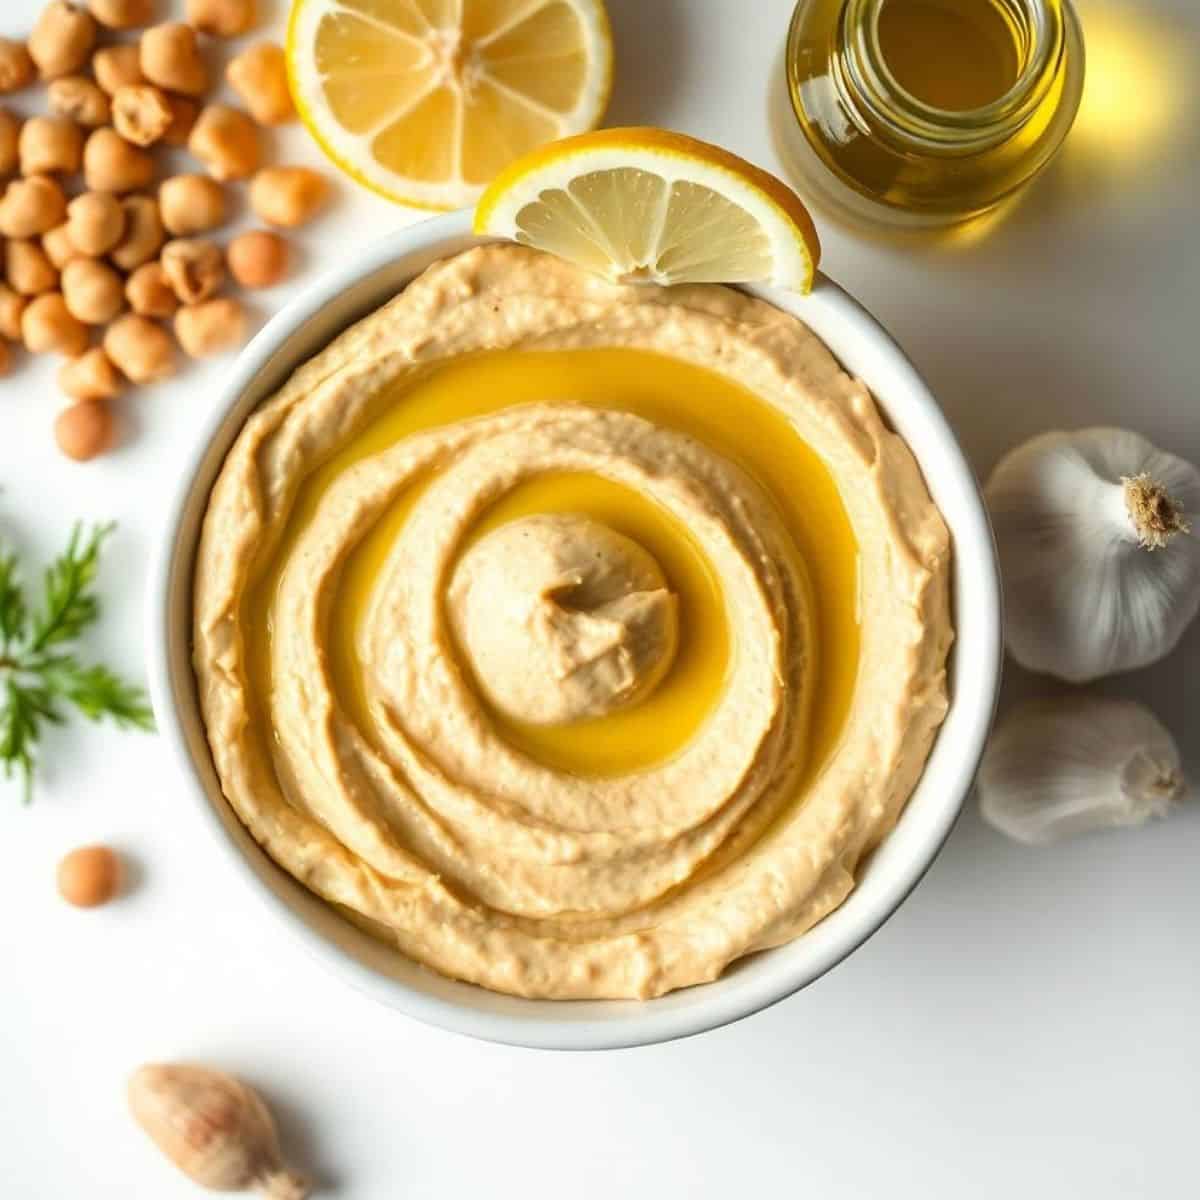
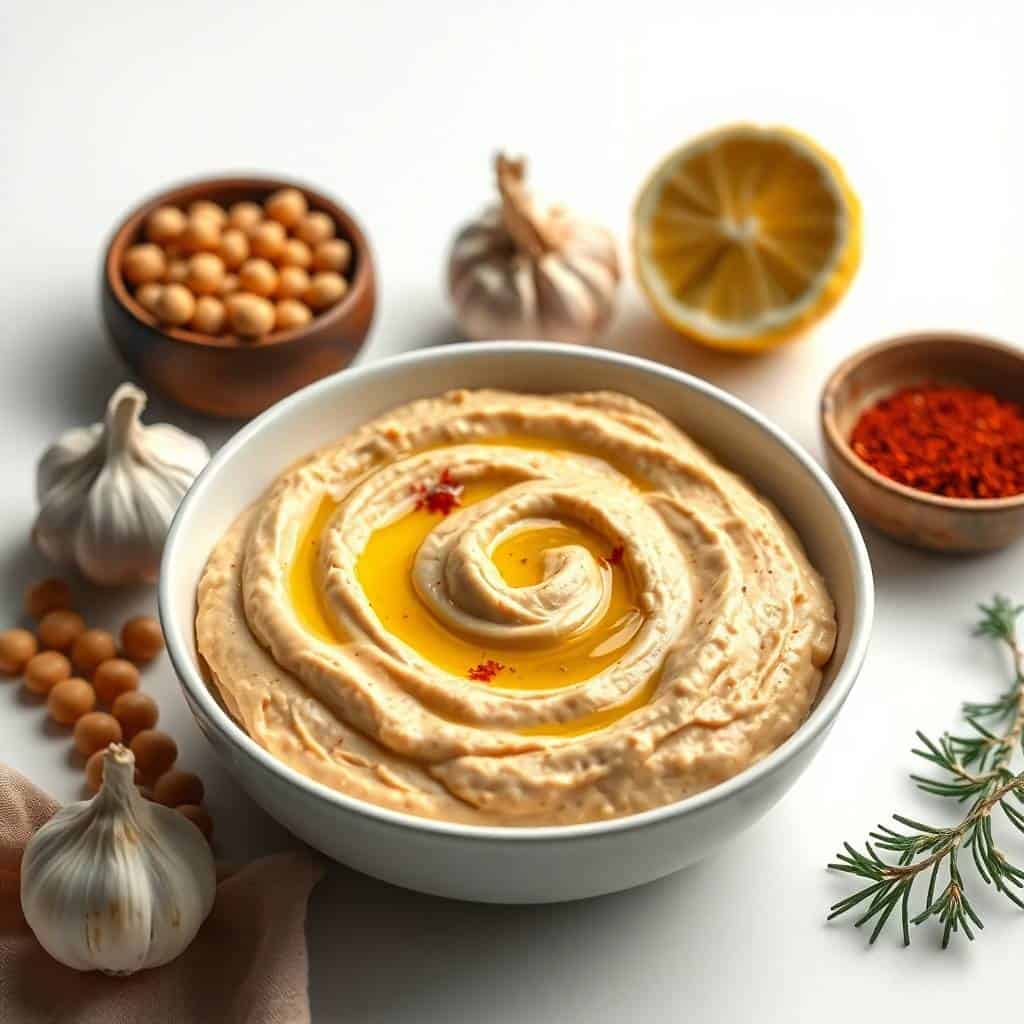
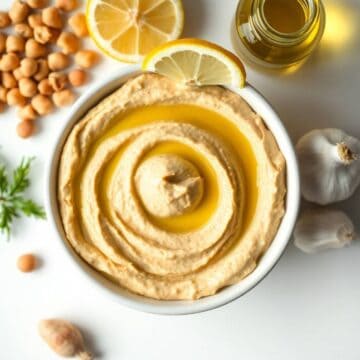
- Step 9: Transfer to serving bowl and create the swoosh. Spoon the hummus into a shallow serving bowl. Use the back of a spoon to create a circular swoosh in the center of the bowl, building up walls around the edges with a well in the middle — this is the classic Middle Eastern presentation that holds the olive oil and toppings.
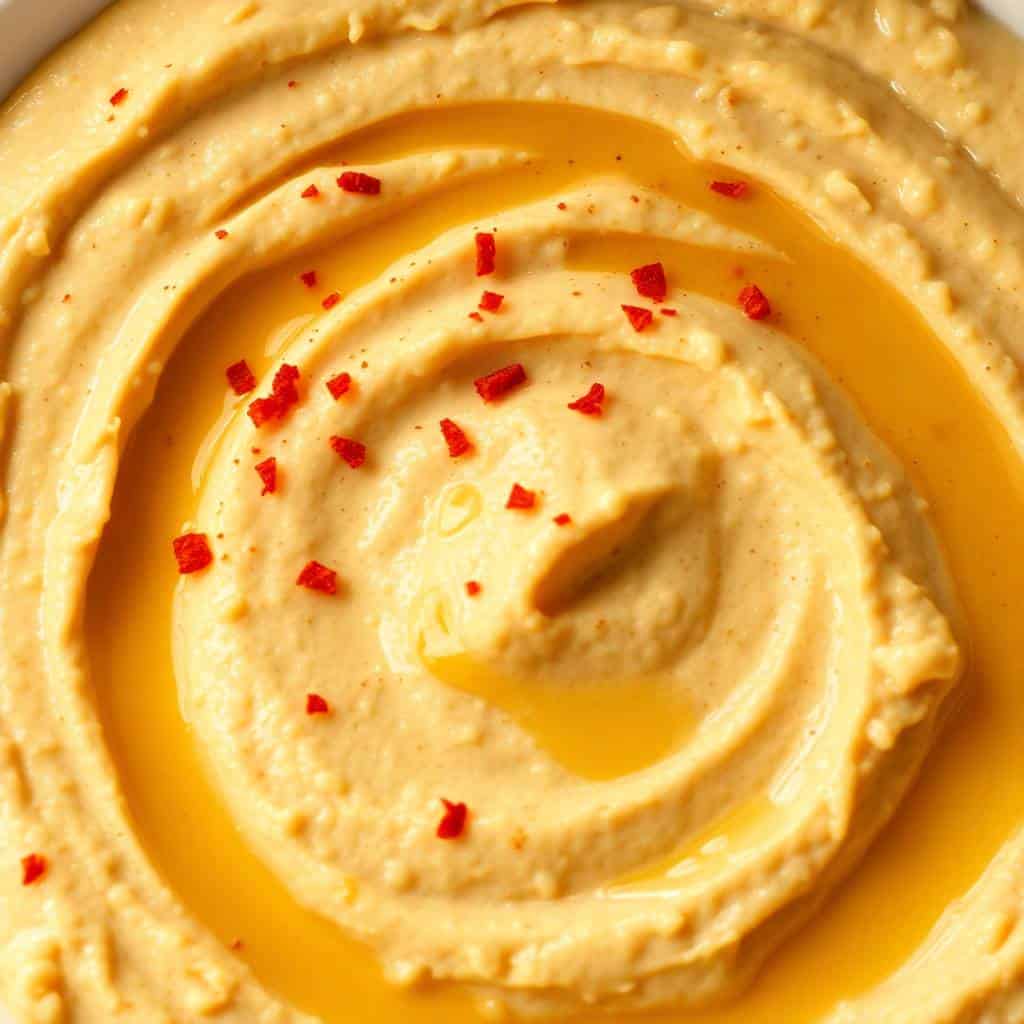
- Step 10: Garnish generously and serve. Drizzle the well with 2 tablespoons of good finishing olive oil. Sprinkle with paprika (or sumac for tangy-citrusy flavor), za'atar if using, scattered toasted pine nuts, fresh chopped parsley, and the reserved whole chickpeas. Add a pinch of red pepper flakes if you want gentle warmth. Set lemon wedges around the bowl. Serve with warm fresh pita bread (heated 30 seconds in microwave or 2 minutes in a 350°F oven), pita chips, lavash crackers, naan triangles, sliced cucumbers, cherry tomatoes, carrot sticks, and olives arranged on a large platter for the full Middle Eastern spread experience.
Tips for Success
- Use HIGH-QUALITY tahini — this is non-negotiable for great hummus. Quality tahini from Middle Eastern brands (Soom, Seed+Mill, Al Wadi, Karawan, Ziyad) costs $9-14 for 16 oz but transforms the hummus completely. Cheap American grocery store tahini is often bitter, separated, chalky, and produces disappointing hummus regardless of how perfect your technique is. The tahini is doing 40% of the flavor work in this recipe — economizing here ruins the result. Find a quality brand at Middle Eastern markets, Whole Foods, Trader Joe's, or order online. One jar lasts months of hummus baking. The quality difference is detectable in every bite.
- Peel the chickpeas — yes, it's annoying, yes, it's worth it for company. The peeled-chickpea technique is the single biggest texture upgrade for hummus. The thin papery skins on chickpeas don't blend down to silky smoothness; they create the slightly grainy texture that homemade hummus typically has. Removing the skins (either by rubbing in towels or boiling with baking soda then rubbing) takes 5-10 minutes but transforms the final texture from "good homemade hummus" to "restaurant-quality silky hummus." Worth doing for dinner parties; skip for everyday meal prep. Once you taste the difference, you'll never want to make hummus without peeling again.
- Blend tahini and lemon juice FIRST — order of operations matters. Most home cooks dump all ingredients into the food processor at once and blend. The proper technique processes tahini and lemon juice together first for 1 full minute until thick and creamy, THEN adds garlic and salt, THEN adds chickpeas, THEN adds water. This sequence creates better emulsification and silkier final texture than the dump-and-blend approach. The order seems pedantic but actually matters for the result. The Lebanese auntie who taught me this technique was emphatic about it — and now I understand why.
- Add ICE-COLD water — not room temperature water. The temperature of the water matters more than people realize. Ice-cold water creates a noticeably lighter, fluffier, whipped texture than room-temperature water — the cold temperature helps the emulsion lighten and aerate during blending. The difference is subtle but real, and it's the kind of detail that distinguishes "good" hummus from "restaurant-quality" hummus. Keep a small bowl of ice water on the counter while making hummus, and pull from it for the water additions. The 30-second extra step makes a visible texture difference.
- Process LONGER than feels right — at least 4-5 minutes total processing time. The single biggest reason home-made hummus is grainy is undermixing. Most home cooks stop at "looks combined and smooth" — but you need to keep going past that point to "looks whipped, fluffy, and almost airy." 4-5 minutes of total processing time (with scraping down the sides 2-3 times) is the right amount. The food processor doesn't get hot, the chickpeas don't break down too much, and the extended blending is what creates the silky restaurant texture. Be patient with the processor — the extra 2 minutes of blending is genuinely the difference.
Variations
- Roasted garlic hummus (mellower, sweeter version): Replace the raw garlic with 6-8 cloves of roasted garlic (roast a whole head of garlic at 400°F for 35-40 minutes wrapped in foil with olive oil until soft and golden). The roasted garlic adds sweetness and complexity without the sharp raw garlic bite, making the hummus more approachable for garlic-sensitive guests and kids. Saad eats this version more readily than the regular version because the assertive raw garlic is mellowed. Perfect for kid-friendly applications, dinner parties where guests may have garlic sensitivity, and anyone who finds standard hummus too garlicky.
- Pakistani-American chaat masala hummus (Sana's hybrid): Add 1 teaspoon chaat masala, ½ teaspoon ground coriander, ½ teaspoon Kashmiri red chili powder, and 1 tablespoon finely chopped fresh mint and cilantro to the hummus during the final blending step. Top the finished hummus with extra chaat masala, fresh pomegranate seeds, finely chopped mint, and a drizzle of mint chutney instead of olive oil. Serve with naan triangles, paratha pieces, and pita. The result is a Pakistani-American take on hummus — the chaat masala provides the spice-and-tang profile that's foundational to Pakistani street food, applied to the Lebanese-tradition base recipe. My husband requests this version when his Pakistani-American cousins visit, and the chaat masala pomegranate finish makes it feel like a proper Pakistani-Lebanese hybrid spread.
- Smoky red pepper hummus (Mediterranean-inspired): Add 1 large roasted red bell pepper (or 2 jarred roasted peppers, drained) to the food processor along with the chickpeas. Add 1 teaspoon smoked paprika and ½ teaspoon ground sumac. The result is a vibrant red-orange hummus with smoky-sweet pepper flavor that pairs beautifully with grilled meats, fish, and Mediterranean spreads. Perfect for summer entertaining and dinner parties where you want a more visually striking presentation than standard beige hummus.
- Beetroot hummus (vibrant pink, festive presentation): Add 1 medium roasted beet (or 1 vacuum-packed cooked beet) to the food processor. The hummus turns a stunning bright pink-magenta color that's incredibly photogenic for parties, holiday gatherings, and Instagram-worthy spreads. The slight earthy sweetness of beets complements the chickpeas beautifully, and the visual appeal is genuinely impressive. Perfect for Easter brunches, Valentine's Day dinners, baby showers, and any occasion where pink presentation is appropriate. Zainab actually tries this version because the color appeals to her — pink is currently her favorite color, which expands her hummus willingness slightly.
- Avocado hummus (extra creamy, modern twist): Add 1 ripe avocado to the food processor along with the chickpeas. The avocado adds extra creaminess, healthy fats, and a slightly green color. The result is a hybrid hummus-guacamole that works beautifully as a sandwich spread, salad dressing thinner, or topping for grain bowls. Best consumed within 2 days because the avocado oxidizes and browns — squeeze extra lemon juice over the surface and press plastic wrap directly onto the hummus before refrigerating to slow browning. Modern, trendy, and genuinely delicious for casual entertaining.
Serving and Storage
How to Serve
Serve at slightly cool room temperature for best flavor and texture — straight from the fridge is too cold, and fully room-temperature loses the proper consistency. Pull hummus out of the fridge 15-20 minutes before serving. Transfer to a shallow serving bowl, create a circular swoosh with the back of a spoon, drizzle the well with good finishing olive oil, and garnish with paprika or sumac, za'atar, toasted pine nuts, fresh chopped parsley, reserved whole chickpeas, a pinch of red pepper flakes, and lemon wedges around the bowl. For the full Middle Eastern mezze spread experience, serve alongside warm pita bread (heated 30 seconds in microwave or 2 minutes in a 350°F oven), pita chips, lavash crackers, naan triangles (Pakistani-American crossover), sliced cucumber rounds, cherry tomatoes, baby carrots, celery sticks, bell pepper strips, endive leaves, mixed olives (Kalamata, Castelvetrano), feta cheese cubes, falafel balls, dolmas (stuffed grape leaves), tabbouleh, fattoush salad, and labneh (Middle Eastern strained yogurt). For everyday meal applications: sandwich spread on pita wraps with grilled chicken or roasted vegetables, dressing thinner for grain bowls with quinoa or farro, topping for baked potatoes (yes, really — it's incredible), filling for stuffed bell peppers, dip for sweet potato fries, base for hummus toast (avocado-toast's successor), and sauce for chicken kebabs or kofta. For drinks: mint tea (classic Middle Eastern pairing), iced tea with lemon, sparkling water with cucumber and mint, white wine (Sauvignon Blanc), or rosé. The hummus is genuinely versatile across breakfast, lunch, dinner, and snack contexts.
How to Store
Store hummus in an airtight container in the refrigerator for up to 5 days. The flavor genuinely improves over the first 24 hours as the garlic mellows and the flavors meld — fresh-made hummus tastes good, but day-2 hummus tastes great. Cover the surface with a thin layer of olive oil and press plastic wrap directly onto the hummus (touching the surface) to prevent the top layer from drying out or developing a skin. To freeze: portion into freezer-safe containers (leave ½-inch headspace for expansion), drizzle olive oil on top, and freeze for up to 3 months. The texture changes slightly after thawing — slightly less silky, slightly more grainy — but the flavor remains excellent. Thaw overnight in the refrigerator, stir vigorously to restore as much smoothness as possible, and add 1-2 tablespoons of cold water if needed to loosen. For meal-prep applications, leftover hummus transforms into multiple meals through the week: lunch sandwich spread for pita wraps (replaces mayo), dressing thinner for grain bowls (add olive oil and lemon to convert to drizzle consistency), topping for baked potatoes (an incredible application most people don't know about), filling for stuffed bell peppers, dip for sweet potato fries, base for hummus toast (the new avocado toast), sauce for chicken kebabs and grilled vegetables, and quick snack with cucumber slices and crackers. One batch of homemade hummus easily transforms into 6-8 different meal applications across the week — which is the recipe math that justifies keeping a constant supply in our fridge. For my household specifically: my husband eats hummus on roti and paratha for breakfast 2-3 times a week, which is a Pakistani-American innovation we accidentally invented.
Related Recipes You Might Like
If you loved this classic hummus, here are more Mediterranean-inspired and party-friendly recipes from the site that pair beautifully with mezze spreads and Middle Eastern-style entertaining:
- 35 Easy Dip Recipes — more dip inspiration for any gathering
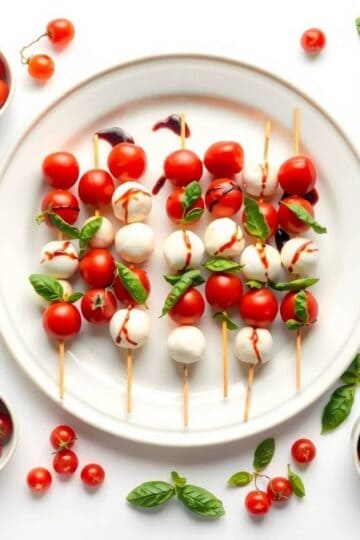
- Caprese Skewers 10-Minute Appetizer — fresh Mediterranean pairing
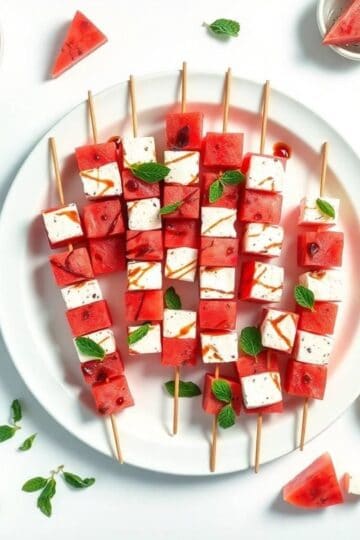
- Watermelon Feta Skewers — refreshing Middle Eastern-inspired appetizer
- 31 Best Salad Recipes — Mediterranean salad pairings for hummus spreads
- Best Memorial Day Pasta Salad — perfect side for summer party spreads
Frequently Asked Questions
Can I make hummus without tahini?
Technically yes, but the result isn't really hummus anymore — it's a chickpea dip. Tahini is THE defining ingredient that distinguishes hummus from other bean purees. The richness, depth, and subtle nuttiness come from tahini. Without it, the dip will be thinner, less rich, and noticeably blander. If you absolutely cannot use tahini, substitute with: (1) 3 tablespoons unsweetened smooth peanut butter or almond butter (closest in texture and richness, but adds a peanut/almond flavor), (2) Greek yogurt (creates a tangier lighter dip that's pleasant but different), or (3) extra olive oil (3 tablespoons additional) for richness. None of these recreate proper hummus, but they create acceptable chickpea dips. For real hummus, invest in a jar of quality tahini — it's the irreplaceable ingredient.
How do I make hummus extra smooth?
Four techniques work together for restaurant-quality smooth hummus. First, peel the chickpeas — either by rubbing them between kitchen towels for 1-2 minutes (fast method) or by boiling with baking soda for 5 minutes then rubbing the skins off in ice water (best method). The skins are the primary cause of grainy texture. Second, blend tahini and lemon juice FIRST for 1 full minute before adding anything else — this creates the foundational creaminess. Third, add ice-cold water gradually while the processor runs — cold temperature creates a fluffier whipped texture than room-temp water. Fourth, process LONGER than feels right — at least 4-5 minutes total processing time with scraping down the sides 2-3 times. The combination of these four techniques produces hummus indistinguishable from restaurant versions.
Is hummus healthy?
Yes — hummus is genuinely one of the healthiest dips you can make at home. Chickpeas provide plant-based protein (about 7g per ½ cup serving), fiber (6g per serving for digestive health), folate, iron, and complex carbohydrates that release energy slowly. Tahini contributes calcium (more per tablespoon than dairy), healthy fats (especially the monounsaturated and polyunsaturated types), and additional protein. Olive oil adds heart-healthy monounsaturated fats and antioxidants. Garlic has well-documented immune and cardiovascular benefits. Lemon juice provides vitamin C. The complete nutritional profile makes hummus a nutrient-dense food rather than an empty-calorie snack. The Mediterranean diet, which features hummus prominently, is consistently ranked as one of the healthiest dietary patterns in the world. Homemade is healthier than store-bought because you control ingredients and avoid preservatives. Eat it daily without guilt.
Can hummus be frozen?
Yes — hummus freezes acceptably for up to 3 months. Portion into freezer-safe containers (leaving ½-inch headspace for expansion), drizzle a thin layer of olive oil on top to protect from freezer burn, seal tightly, and freeze. To thaw: transfer to the fridge overnight, then stir vigorously when thawed. The texture changes slightly after thawing — slightly less silky, slightly more grainy than fresh — but the flavor remains excellent. Add 1-2 tablespoons of cold water and a fresh squeeze of lemon juice to restore as much smoothness as possible. For best fresh-quality results, fresh-made hummus is always superior, but frozen hummus is a genuine meal-prep option for households that want to batch-cook. For my household, I prefer to make smaller batches more frequently rather than freeze, but freezing is a valid option for bulk meal prep.
What can I serve with hummus?
The classic Middle Eastern pairings: warm fresh pita bread (heat 30 seconds in microwave or 2 minutes in a 350°F oven), pita chips, lavash crackers, naan triangles (the Pakistani-American crossover that works beautifully), sliced cucumber rounds, cherry tomatoes, baby carrots, celery sticks, bell pepper strips, endive leaves, radicchio cups, mixed olives (Kalamata, Castelvetrano), feta cheese cubes, falafel balls, dolmas (stuffed grape leaves), tabbouleh, fattoush salad, and labneh (strained yogurt). For sandwich and wrap applications, use as a spread on pita wraps with grilled chicken or roasted vegetables. For grain bowl applications, dollop on top of bowls with quinoa, farro, or rice. For dinner-party applications, build a full mezze spread with multiple hummus varieties, breads, olives, vegetables, cheeses, and falafel — this is the proper way to serve hummus in a meal context rather than just as a snack dip.
Should I use canned or dried chickpeas?
Both work, with tradeoffs. Canned chickpeas (the recommended choice for this recipe) are convenient, consistent, and produce excellent hummus when peeled properly. Quality matters — use a brand with whole intact chickpeas, not the cheap ones with broken or mushy chickpeas. Goya, Bush's, or Eden Foods are reliable options. Drain and rinse before using. Dried chickpeas (the traditional choice in Middle Eastern households) produce slightly more flavorful and slightly creamier hummus because of fresher cooking, but require soaking overnight and 1-1.5 hours of cooking — total time becomes 12-15 hours from start to finish. For weekday and meal-prep hummus, canned is the practical choice; for special occasions and dinner parties, dried chickpeas elevate the result slightly. The peeled-chickpea technique works with both — the difference between dried and canned is smaller than the difference between peeled and unpeeled.
This classic hummus earned its place in our regular rotation because of years of failed batches before I finally figured out the peeled-chickpea trick from the Lebanese auntie who introduced our family to proper Middle Eastern dips. Real-world apprenticeship to a Lebanese home cook is the highest credential any hummus recipe can earn, and 5 years after first learning the technique, this is still the recipe my husband requests weekly.
The meal-prep nature makes this especially valuable for actual real-life situations. One batch produces 2.5-3 cups of hummus that lasts 5 days in the fridge, and during that time it transforms into sandwich spreads, grain bowl sauces, baked potato toppings, dipping snacks, hummus toast bases, and breakfast spreads on roti — which is the recipe math that justifies the 15 minutes of weekly hummus-making.
Beyond just-eating-as-a-dip duty, this hummus transforms into multiple meal applications across the week — wrap fillings with grilled chicken and roasted vegetables, dressing thinner for grain bowls, sauce for chicken kebabs, topping for stuffed pita pockets, base for hummus toast, and dip for sweet potato fries. One batch easily becomes 6-8 different lunch and snack applications, which is the recipe efficiency that justifies keeping a constant hummus supply in our fridge.
The Pakistani-American chaat masala variation deserves special mention because it bridges the Lebanese-tradition base recipe with the spice-and-tang profile my mother in Pakistan would recognize from her own kitchen — chaat masala is the foundational Pakistani street-food seasoning, and applying it to a Middle Eastern dip creates a hybrid that feels deeply familiar across two distinct culinary traditions. Same chickpeas, completely different soul, and the pomegranate-mint-chaat-masala finish makes it feel like a proper Pakistani-Lebanese hybrid spread that earns its place at our table.
Classic Hummus Recipe (Smooth, Creamy, Authentic Middle Eastern Style)
Ingredients
- 1.5 cups cooked chickpeas canned or freshly cooked, drained and skins removed
- ¼ cup tahini pure sesame paste, well stirred before measuring
- 3 tablespoons fresh lemon juice about 1 large lemon
- 2 cloves garlic minced finely
- ¼ teaspoon ground cumin optional but recommended
- 2 tablespoons extra virgin olive oil plus more for drizzling on top
- ¼ teaspoon sea salt adjust to taste
- 2-3 tablespoons ice water add gradually for desired consistency
Instructions
- If using canned chickpeas, drain and rinse them well. Remove the thin papery brown skin from each chickpea by gently rubbing them between your fingers - this tedious step is absolutely crucial for achieving that silky smooth texture. If using freshly cooked dried chickpeas, let them cool slightly before removing the skins. You can do this in batches while watching television.
- Add the peeled chickpeas, tahini, lemon juice, minced garlic, cumin, and salt to a food processor. Pulse a few times to break down the chickpeas, then process continuously for 3-5 minutes, scraping down the sides as needed. The mixture will go from grainy to creamy as you blend.
- While the food processor is running, slowly drizzle in the olive oil through the feed tube. Continue processing until the hummus reaches a light, fluffy consistency - this usually takes another 2-3 minutes of blending. The texture should be like soft whipped butter.
- Add ice water one tablespoon at a time while processing, pausing between additions to check the consistency. The cold water helps create that incredibly smooth, creamy texture. Stop when you reach your preferred consistency - it should be thick enough to hold a swirl but thin enough to dip pita into easily.
- Taste and adjust seasonings - add more lemon juice for brightness, more salt for depth, or more garlic for punch. Transfer to a serving bowl and create a shallow well in the center with the back of a spoon. Drizzle generously with olive oil and sprinkle with a pinch of paprika, cumin, or fresh parsley if desired.
- Serve immediately with warm pita bread, fresh vegetables, or crispy pita chips. Hummus is best enjoyed fresh and still slightly cool from processing, though it keeps well in the refrigerator for several days.
Notes



Comments
No Comments