
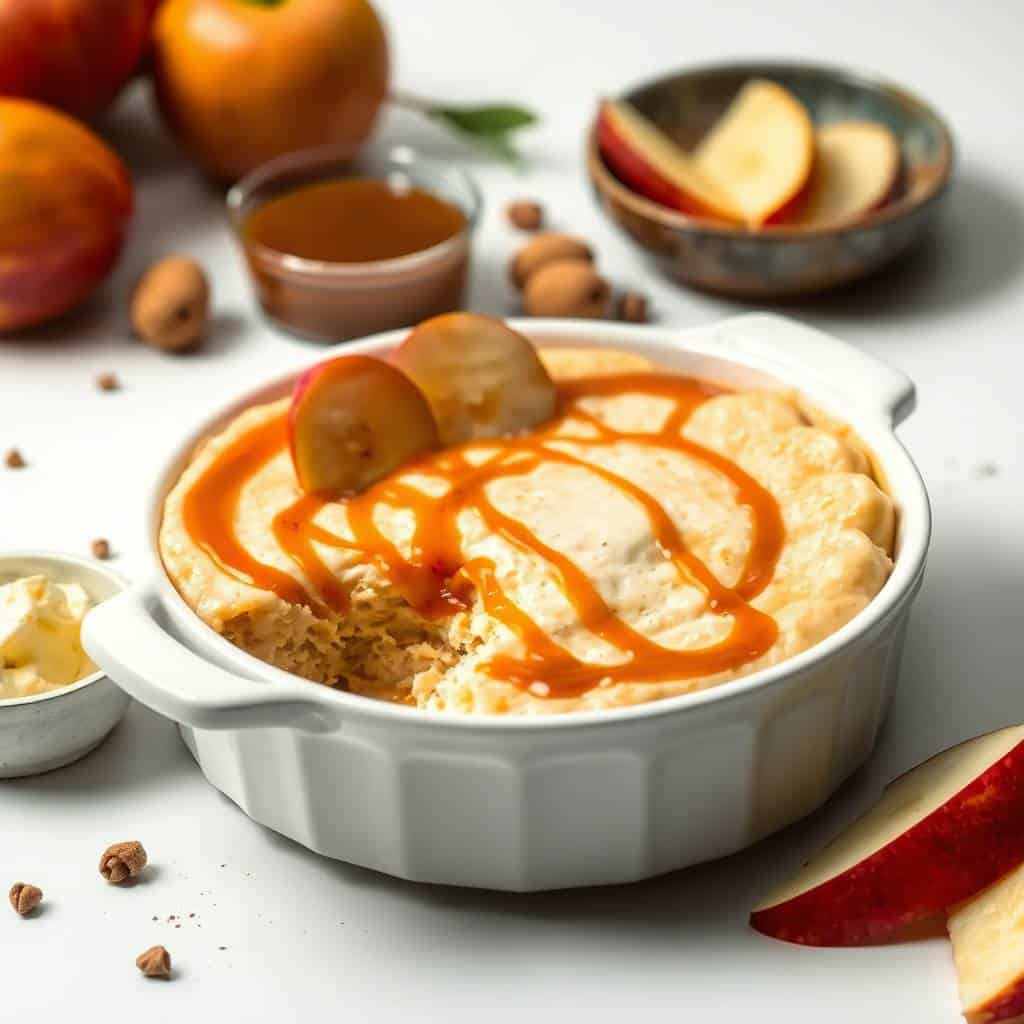
I made this baked caramel apple cheesecake dip for the first time on a rainy October evening when I had apples sitting on the counter and no plan for dessert. I wasn't even sure it would work — a warm, scoopable cheesecake dip felt almost too simple to be real. But it came out of the oven bubbling and golden at the edges, smelling like a caramel apple stand, and I knew immediately I'd be making it again.
What makes this recipe work is the fact that you cook the apples first in butter and brown sugar before layering them over the cream cheese base. The original version I tried used canned apple pie filling, which honestly felt a bit heavy and sweet in a way that competed with the caramel. Cooking fresh diced apples in a skillet for just a few minutes gives you something softer and more natural-tasting, and it takes maybe five extra minutes. It's worth it every time.
My husband asked for this three weekends in a row after I first made it. He likes to scoop it with those cinnamon sugar pita chips you can find at Aldi or Trader Joe's. Zainab goes straight for the apple slices as her dipper, which I love because at least someone is eating fruit. I've also brought this to two different gatherings and both times the dish came back empty — I always make a note to double the recipe when I'm feeding more than four people.
One thing to set expectations on: this is not a structured cheesecake. It's a dip — warm, loose, and meant to be scooped. If you want something sliceable, check out my Caramel Candy Cheesecake instead. But if you want something you can have on the table in under 40 minutes with almost no cleanup, this is the one.
Why You'll Love This Recipe
- Ready in under 40 minutes: From the moment you turn on the burner to the moment it comes out of the oven, this takes about 35 to 40 minutes total. That includes cooking the apples, assembling everything, and baking. On a busy weeknight or a spontaneous get-together, that kind of timeline actually matters.
- No special equipment needed: You need a skillet, a mixing bowl, and a small baking dish. I use a hand mixer to beat the cream cheese smooth, but if you've left the cream cheese out long enough to fully soften, a wooden spoon and some elbow grease works too. I've done it both ways.
- Feels like fall in a dish: There's something about warm cinnamon apples over creamy cream cheese with caramel pooling in the edges that just feels exactly right when the weather gets cold. I make this starting in September and keep making it through December, especially when I'm also putting together a batch of my Crock-Pot Cinnamon Roll Casserole for weekend mornings.
- Works with whatever you have for dipping: Graham crackers, apple slices, pretzels, vanilla wafers, cinnamon pita chips — basically anything in your pantry works here. I've even used leftover digestive biscuits from a UK brand I found at a specialty store, and those were great.
- Make-ahead friendly: I've assembled this the night before and just popped it in the oven the next day when people were arriving. The texture is actually fine — maybe even slightly better because everything has had time to settle together. You just add 3 to 5 extra minutes to the bake time if it's going in cold from the fridge.
Ingredients
- 8 oz cream cheese, softened (full-fat works best — leave it out for at least 30 minutes)
- ¼ cup granulated sugar
- 1 teaspoon vanilla extract
- 2 medium apples, peeled and diced (Granny Smith or Honeycrisp both work well)
- 2 tablespoons butter
- 2 tablespoons brown sugar
- ½ teaspoon ground cinnamon
- ½ cup caramel sauce, store-bought or homemade (plus more for drizzling on top)
- Optional: 2–3 tablespoons chopped pecans or walnuts for topping
- For serving: graham crackers, apple slices, pretzels, or cinnamon pita chips
Directions
- Preheat the oven: Set your oven to 350°F (175°C) and lightly grease a small baking dish or pie plate with non-stick spray. A 9-inch pie plate or an 8x8 baking dish both work — you want something shallow enough that the dip heats through quickly and gets those golden bubbling edges.
- Beat the cream cheese base: In a medium bowl, beat together the softened cream cheese, granulated sugar, and vanilla extract until completely smooth with no lumps. Cold cream cheese will fight you here — if yours isn't soft enough, the base will look smooth but have little white chunks hiding in it. Give it more time on the counter if you need to.
- Cook the apples: Melt the butter in a small skillet over medium heat. Add the diced apples, brown sugar, and cinnamon. Cook for 3 to 4 minutes, stirring occasionally, until the apples soften slightly and the sugar coats them in a light syrup. You're not trying to make applesauce — you want the pieces to hold their shape but lose the raw crunch.
- Assemble the layers: Spread the cream cheese mixture evenly into the bottom of your prepared baking dish. Spoon the cooked apples over the top, spreading them out so you get apple in every scoop. Drizzle the caramel sauce over the apple layer. If you want to be fancy about it, you can swirl a little caramel into the cream cheese layer before adding the apples — it looks beautiful and adds caramel in every bite.
- Add toppings and bake: Sprinkle chopped pecans or walnuts on top if you're using them. Place the dish in the oven and bake for 15 to 20 minutes, until the edges are bubbling and the top looks set and slightly golden. Don't push it past this point — overbaking dries out the cream cheese layer.
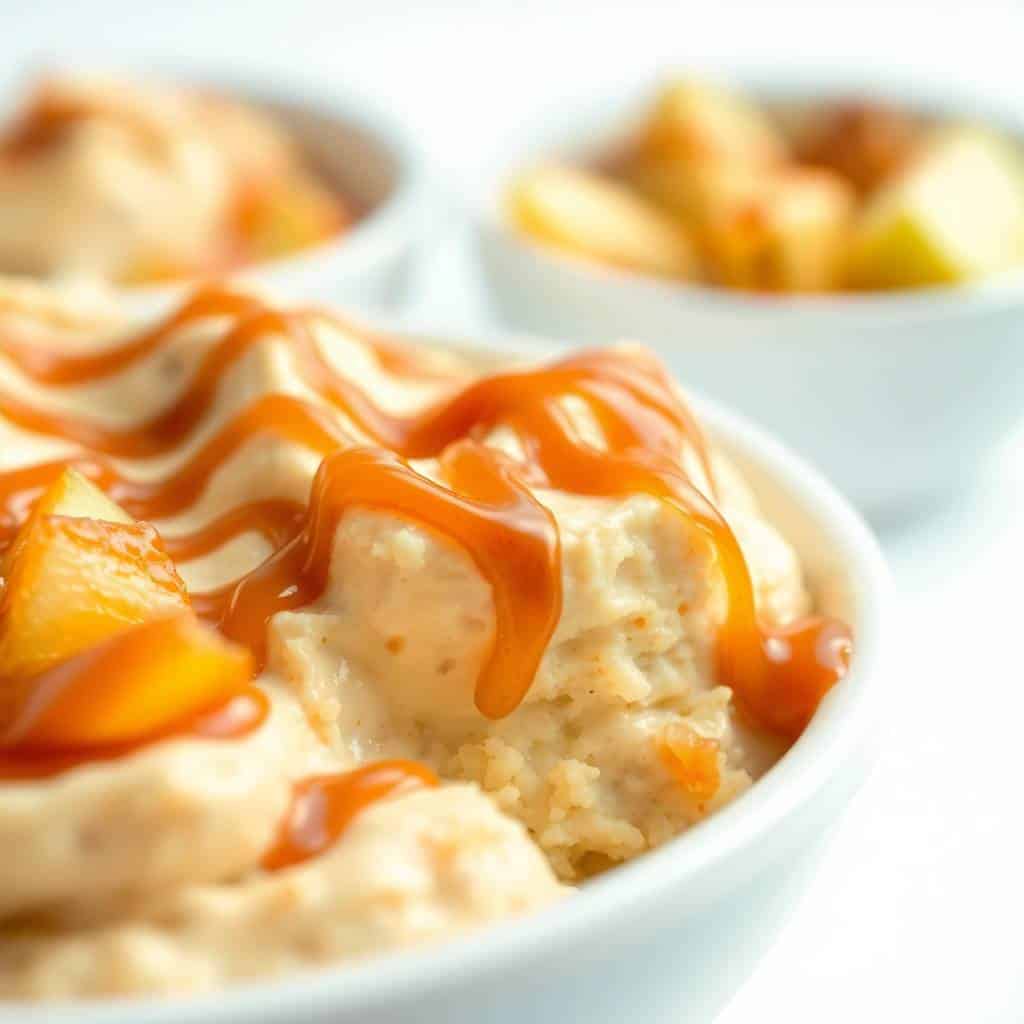
- Serve warm: Let the dip cool for 5 minutes before you set it out — it'll be very hot straight from the oven. Drizzle with a little extra caramel if you like, and serve with your dippers alongside. It's best eaten warm while the caramel is still gooey and the cream cheese is soft.
Tips for Success
- Let the cream cheese fully soften: I learned this the hard way on my first attempt — I was in a hurry and beat cold cream cheese, and the base had tiny lumps throughout. Once it bakes, those lumps don't disappear. Leave it out for a full 30 minutes, or even 45 if your kitchen is cold. You want it genuinely soft when you press it with a finger, not just slightly less firm.
- Dice your apples small and even: Chunks that are too large don't soften properly in the skillet in just 3 to 4 minutes, and then you get a few bites that still taste raw. I aim for pieces about the size of a large blueberry — small enough that they cook through quickly, big enough that they still have texture in the final dip.
- Don't skip the skillet step for the apples: I tried once using raw diced apples directly in the dip to save a dish. They didn't cook through properly in the oven in 20 minutes, and the raw apple texture sitting on top of warm cream cheese was strange. The 5 minutes in the skillet is not optional — it makes the whole thing work.
- Pull it out when it's bubbly, not brown: The cream cheese layer will start to crack and dry out if you overbake this. I set a timer for 15 minutes and then check. Once I see the edges bubbling and the center looks hot and slightly puffed, it's done. The color shouldn't darken much — you're not looking for browning on top.
- Use a good caramel sauce: I'm not saying you have to make your own from scratch — store-bought is completely fine. But there's a real difference between the thick jar caramel (like Smucker's or the kind from Trader Joe's) and the thin squeeze-bottle kind. The thicker sauce stays where you drizzle it and pools nicely into the dip. The thin stuff runs everywhere and can make the whole thing too sweet and liquid.
Variations
- Add toasted pecans on top: This is my husband's preferred version. He sprinkles a small handful of roughly chopped toasted pecans over the caramel before baking, and they come out of the oven slightly crispy against the gooey caramel. If you've never toasted nuts before baking, just throw them in a dry skillet for 2 minutes first — it makes a noticeable difference in flavor.
- Pumpkin spice twist: Mix ¼ cup of canned pumpkin puree into the cream cheese base along with ½ teaspoon of pumpkin spice. It makes the base slightly orange and pumpkin-flavored, which pairs really well with the cinnamon apples on top. I made this version for a Halloween gathering last year and it disappeared fast.
- Swap the apples for pears: Ripe Bartlett pears cooked the same way as the apples are softer and slightly more floral in flavor. The caramel works just as well with pears — maybe even better. This is a good option if you have pears that need using up and you don't want to make anything too complicated.
- Bake in individual ramekins: If you're serving this at a party and want individual portions, divide everything between 4 small ramekins instead of one big dish. Reduce the bake time to about 12 to 15 minutes. It looks nicer on a dessert table and people don't have to share a communal dip, which some people prefer. This would pair nicely alongside my Raspberry Cheesecake Balls if you're putting together a dessert spread.
- Salted caramel version: Use salted caramel sauce instead of regular, or just add a light pinch of flaky sea salt on top right before serving. The salt cuts through the sweetness and makes it taste more complex. I started doing this after a batch that felt slightly too one-note, and now I almost always add salt.
Serving and Storage
Serving
Serve this warm, ideally within 10 to 15 minutes of pulling it from the oven. Set the baking dish directly on a trivet or wooden board in the center of the table with a small basket of dippers alongside it. Graham crackers, apple slices, pretzels, and cinnamon pita chips all work well. I also like it with plain vanilla wafers when I want something lighter. If you're making this for a holiday gathering, it fits right in next to my Baked Cream Cheese Cranberry Dip on a fall dessert table — the two complement each other nicely without being repetitive.
Storage
Store any leftovers covered tightly with plastic wrap or in an airtight container in the refrigerator for up to 3 days. To reheat, either microwave individual portions for 30 to 45 seconds until warm, or cover the baking dish with foil and reheat in a 325°F oven for about 10 minutes. I wouldn't freeze this — the cream cheese texture turns grainy after thawing and it just doesn't recover well. It's better to make a fresh batch if you need it again.

Frequently Asked Questions
Can I make this ahead of time?
Yes, and I actually do this fairly often. Assemble the whole thing — cream cheese base, cooked apples, caramel — cover it tightly, and refrigerate for up to 24 hours. When you're ready to serve, bake it straight from the fridge. Add about 3 to 5 extra minutes to the baking time since it's going in cold.
Which apples work best for this recipe?
Granny Smith and Honeycrisp are my go-to choices. Granny Smith gives you a slight tartness that balances the sweet caramel really well. Honeycrisp is sweeter and holds its shape nicely after cooking. I'd avoid Red Delicious — they go mushy fast and the flavor isn't strong enough once cooked.
Can I serve this cold?
Technically yes, but it's a completely different experience cold. The cream cheese firms up, the caramel gets stiff, and it stops feeling like a dip. I've eaten it cold straight from the fridge the next morning (no shame), but for serving to guests, warm is the only way to go.
Is this recipe gluten-free?
The dip itself contains no gluten — it's just cream cheese, sugar, vanilla, apples, butter, and caramel sauce. Most store-bought caramel sauces are gluten-free, but always check the label to be sure. The gluten question really comes down to your dippers, so just use gluten-free graham crackers or apple slices and you're fine.
Can I freeze leftover caramel apple cheesecake dip?
I don't recommend it. Cream cheese doesn't freeze and thaw well in a baked dip — the texture becomes grainy and a little watery, and there's not much you can do to fix that once it happens. It keeps well in the fridge for 3 days, so I'd just plan to use it up within that window instead.
BAKED CARAMEL APPLE CHEESECAKE DIP
Ingredients
- 8 oz cream cheese softened
- ¼ cup granulated sugar
- 1 teaspoon vanilla extract
- 2 medium apples peeled and diced
- 2 tablespoons butter
- 2 tablespoons brown sugar
- ½ teaspoon cinnamon
- ½ cup caramel sauce store-bought or homemade
- Optional: chopped pecans or walnuts for topping
Instructions
- Preheat Oven: Preheat oven to 350°F (175°C). Lightly grease a small baking dish.
- Prepare Cream Base: Beat cream cheese, granulated sugar, and vanilla extract until smooth. Spread evenly into the baking dish.
- Cook Apples: In a skillet, melt butter. Add diced apples, brown sugar, and cinnamon. Cook for 3–4 minutes until softened.
- Assemble Dip: Spoon apples over cream cheese base. Drizzle caramel sauce on top. Sprinkle with nuts if desired.
- Bake: Bake for 15–20 minutes until bubbly and warm.
- Serve: Serve warm with graham crackers, pretzels, apple slices, or cookies for dipping.
Notes
- Make Ahead: Prepare dip up to 24 hours in advance and refrigerate. Bake just before serving.
- Flavor Variations: Try pears instead of apples, or drizzle with chocolate sauce for extra richness.
- Serving Suggestions: Great for fall gatherings, Thanksgiving, or family game nights.
- Storage Tips: Store leftovers covered in the refrigerator for up to 3 days. Reheat before serving.
This dip has become one of those recipes I reach for whenever the weather shifts and I want something warm and a little indulgent without spending all afternoon in the kitchen. The whole thing is done in under 40 minutes, and the cleanup is genuinely minimal — one skillet, one bowl, one baking dish. That matters to me on evenings when I still have to get Saad to finish his homework and figure out what's for dinner the next day.
If you're putting together a fall dessert spread, this pairs really well alongside my Christmas Punch for a festive gathering — the warm spiced dip with a cold, fruity drink is a combination that just works. And if you want to go all out on a cheesecake theme for the table, the Raspberry Cheesecake Balls are a great no-bake addition that takes zero oven time.
I make this every fall now, and I genuinely look forward to it. There's something satisfying about a dessert that sounds impressive, takes almost no time, and leaves people scraping the dish. If you try it, I hope your family likes it as much as mine does. 🍎🍮✨
If you liked this recipe, you'll probably enjoy these too:
- Caramel Candy Cheesecake — if you want a proper sliceable cheesecake with that same caramel flavor
- Baked Cream Cheese Cranberry Dip — another warm baked dip that's brilliant for the holidays
- Raspberry Cheesecake Balls — no-bake, fast, and great for a dessert board
- Crock-Pot Cinnamon Roll Casserole — fall mornings sorted, minimal effort required
-
{"@context":"https://schema.org","@type":"Article","headline":"BAKED CARAMEL APPLE CHEESECAKE DIP","description":"Baked caramel apple cheesecake dip is creamy, sweet, and topped with caramel and apples—perfect for parties, holidays, or cosy gatherings.","datePublished":"2025-10-07T08:54:35+00:00","dateModified":"2026-05-03T20:52:43+00:00","author":{"@type":"Person","name":"Sana Umer","url":"https://forfoodiefriends.com/about/","description":"Self-taught home cook with 10+ years of kitchen experience. Mom of two who develops every recipe in her own kitchen.","jobTitle":"Recipe Developer & Food Blogger","image":"https://forfoodiefriends.com/wp-content/uploads/sana-umer-author-photo.jpg"},"publisher":{"@type":"Organization","name":"For Foodie Friends","url":"https://forfoodiefriends.com/","logo":{"@type":"ImageObject","url":"https://forfoodiefriends.com/wp-content/uploads/forfoodiefriends-logo.png"}},"mainEntityOfPage":{"@type":"WebPage","@id":"https://forfoodiefriends.com/baked-caramel-apple-cheesecake-dip/"},"image":"https://forfoodiefriends.com/wp-content/uploads/2025/08/BAKED-CARAMEL-APPLE-CHEESECAKE-DIP.jpg"}





Comments
No Comments