
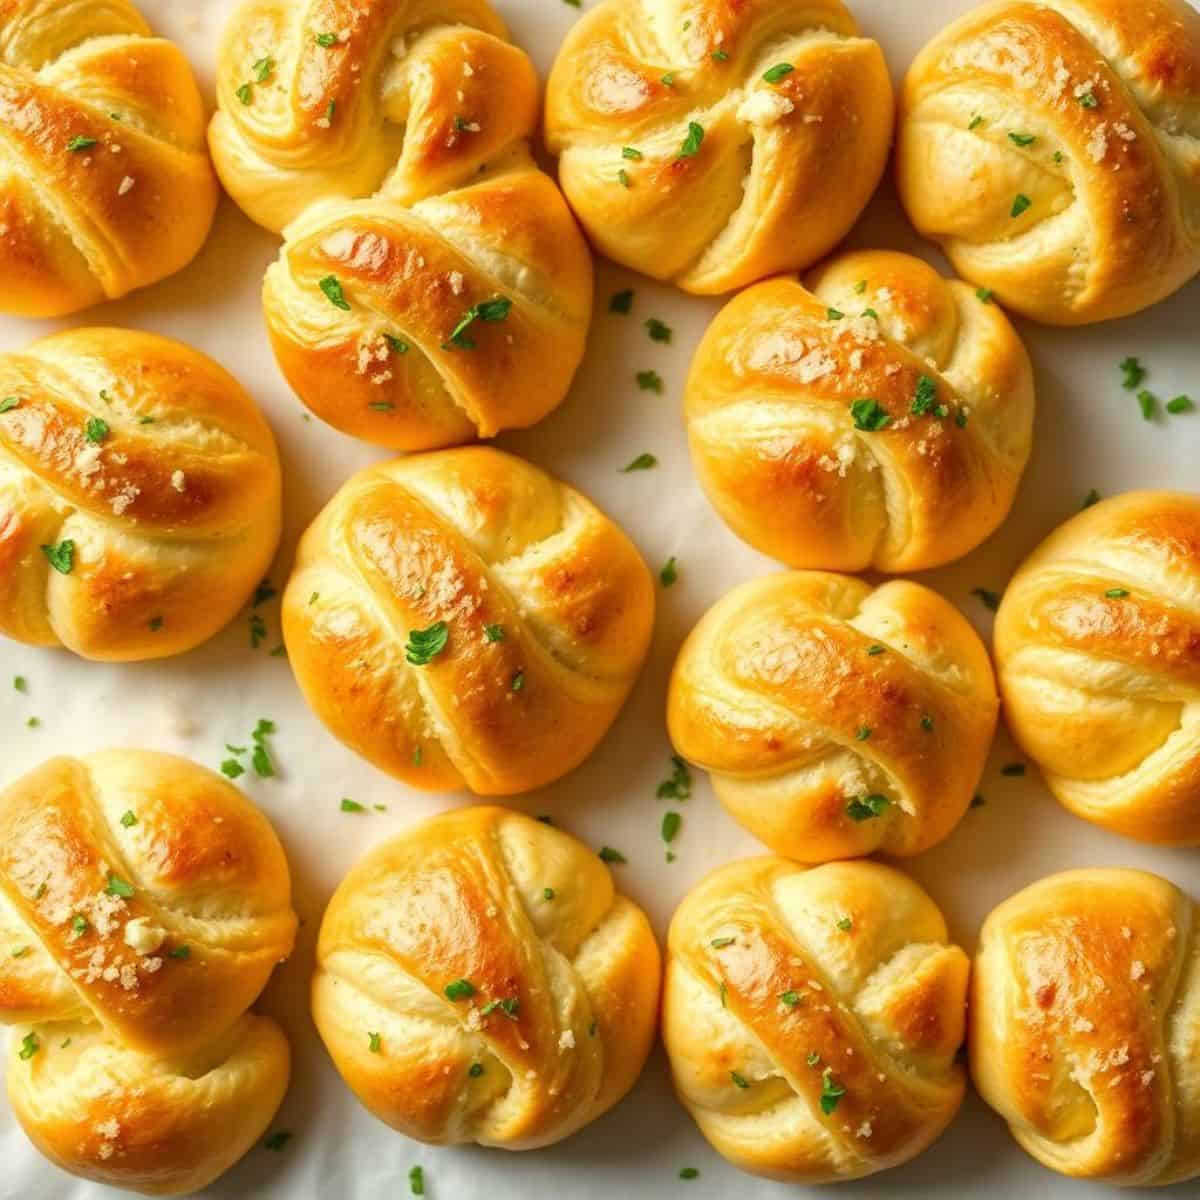
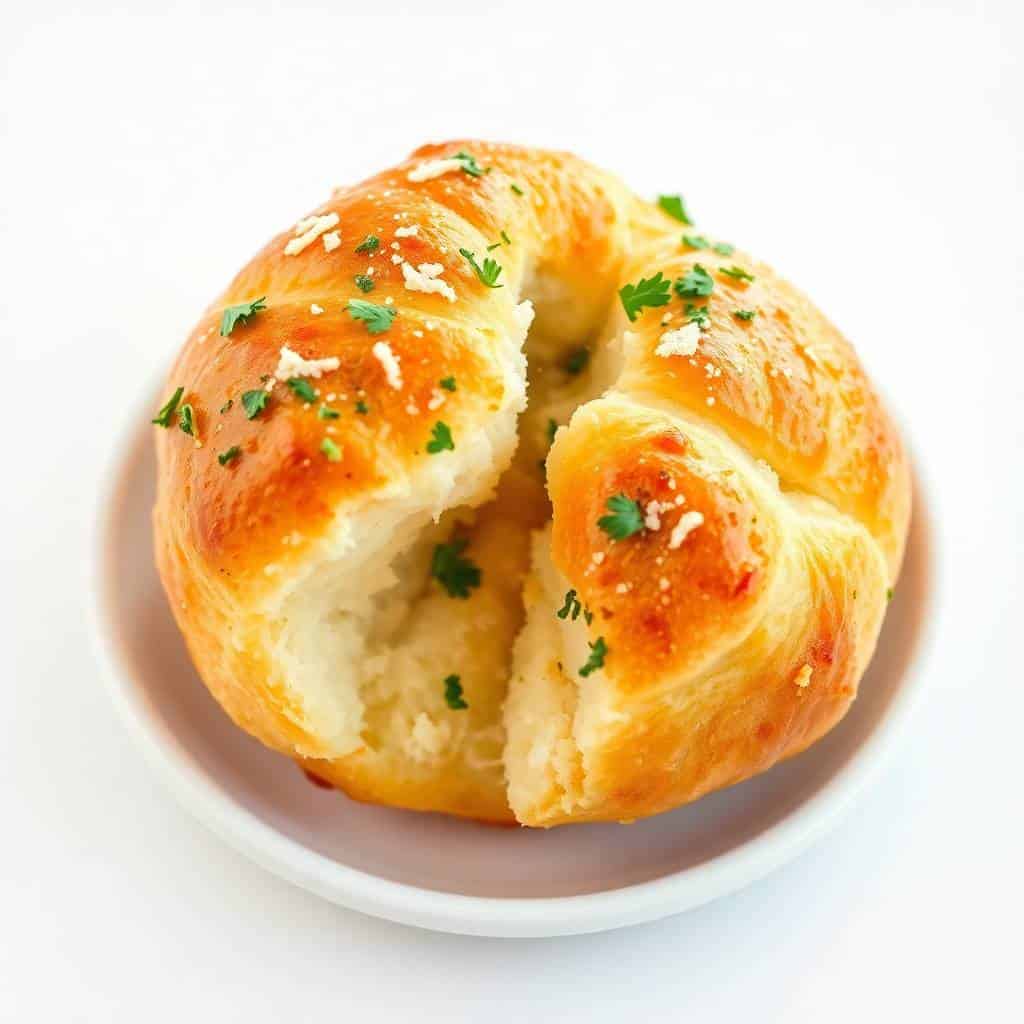
The bread that makes every person at the table reach for a second piece before they have finished the first — the one that fills the kitchen with the most irresistible combination of baking bread and garlic butter aromas, that produces a soft, pillowy interior inside a lightly golden crust, and that gets brushed twice with garlic butter so the flavor is present in the dough, in the crust, and in the fragrant pool of garlic and parsley visible on every knot — is these garlic knots: soft, leavened dough rolled into ropes, tied into loose knots, baked until golden, and brushed generously with a mixture of melted butter, fresh minced garlic, and chopped parsley both before and immediately after baking for a double layer of garlic butter flavor that no garlic bread alternative can match.
What makes garlic knots genuinely special rather than just another garlic bread vehicle is the specific combination of the knotted shape and the double garlic butter application. The knotted shape creates multiple layers of soft dough in each knot, with some sections slightly crispier from oven contact and others completely soft and pillowy from their position in the interior of the knot — every bite has a different textural quality from the last. And brushing with garlic butter before baking (so the butter bakes into the dough and creates a golden crust) and again immediately after baking (so the butter absorbs into the warm surface and creates a glossy, fragrant exterior) produces a depth of garlic butter flavor that a single application cannot achieve.
This post covers the classic garlic knot in full detail — yeast dough from scratch, the shaping technique, the double-butter method — plus seven variations including cheesy, spicy, herb lovers, dairy-free, sweet cinnamon sugar, stuffed, and garlic knot slider versions. Find more bread and appetizer inspiration in our marinara sauce, our garlic Parmesan potato wedges, and our garlic butter chicken bites with creamy Parmesan pasta.
Let's make the softest, most fragrant, most irresistible garlic knots your kitchen has ever produced!
WHY YOU WILL LOVE THIS RECIPE
- Soft, Fluffy Interior with a Lightly Crisp Golden Exterior: Properly made garlic knots have a specific textural quality that makes them genuinely different from any other bread product — the knotted shape creates multiple layers of soft, pillowy dough inside each knot, while the oven exposure creates a lightly golden, slightly firm exterior crust. The double garlic butter application creates a glossy, fragrant surface that is simultaneously slightly caramelized from the pre-bake brushing and soft and buttery from the post-bake brushing. Every element of the texture profile contributes to making each bite deeply satisfying.
- Fresh Garlic in the Butter Makes All the Difference: Fresh minced garlic sautéed briefly in butter produces a garlic butter with a depth and complexity that garlic powder-based versions simply cannot replicate — the sugars in the fresh garlic caramelize slightly during sautéing, producing a nutty, slightly sweet, deeply aromatic garlic flavor that is entirely different from the sharp, one-dimensional flavor of raw garlic or the flat, dusty flavor of dried garlic powder. The brief sauté also ensures the garlic is fully cooked rather than raw, which means the garlic butter has a mellow, warm flavor rather than a sharp, pungent one.
- Perfect with Everything — Pasta, Pizza, Soup, or as a Standalone Snack: Garlic knots are one of the most universally compatible bread accompaniments available — they work alongside any pasta dish (the garlic butter complements virtually every pasta sauce); alongside pizza (garlic knots and pizza is one of the great Italian-American combinations); alongside soup (for dipping into the broth); and as a standalone snack or appetizer with marinara sauce for dipping. The garlic flavor is universally appealing across all age groups and essentially all dinner menus.
- Store-Bought Dough Shortcut Makes These Accessible Any Night: While the homemade yeast dough version in this recipe produces the most flavorful, most satisfying garlic knots, store-bought refrigerated pizza dough from any supermarket works as a perfectly legitimate shortcut that reduces the total time to 25 minutes with no rise time required. The store-bought dough version is ideal for weeknights when fresh-baked garlic knots are wanted but a full dough-making session is not practical. Both versions produce genuinely excellent results.
- Freezer-Friendly — Bake Ahead and Reheat When Needed: Baked garlic knots freeze very well. Cool completely after baking and brushing, place in a single layer in a freezer bag, and freeze for up to 1 month. To serve, place frozen knots on a baking sheet and warm in a 350°F oven for 8–10 minutes until heated through, then brush with additional fresh garlic butter immediately before serving. The frozen-and-reheated version with fresh garlic butter is genuinely excellent and nearly indistinguishable from same-day fresh baked knots.
INGREDIENTS
- For the Dough:
- 2¼ teaspoons active dry yeast (1 packet)
- ¾ cup warm water (110°F / 45°C)
- 1 tablespoon granulated sugar
- 2 cups all-purpose flour
- 1 teaspoon salt
- 1 tablespoon olive oil
- For the Garlic Butter:
- ¼ cup unsalted butter, melted
- 3 cloves garlic, minced
- 1 tablespoon fresh parsley, chopped (or 1 teaspoon dried)
- ¼ teaspoon salt
- Grated Parmesan cheese, optional, for topping
- Marinara sauce, for dipping (optional)
DIRECTIONS
- Step No.1: Activate the yeast
In a small bowl, combine the warm water (110°F — warm but not hot enough to kill the yeast; it should feel comfortably warm on the inside of your wrist), granulated sugar, and active dry yeast. Stir briefly and allow to sit for 5–10 minutes until the mixture is foamy and bubbly on the surface — the foam indicates the yeast is active and the dough will rise properly. If the mixture does not foam after 10 minutes, the yeast may be expired or the water temperature was incorrect; start again with fresh yeast.
- Step No.2: Make and knead the dough
In a large bowl, combine the flour and salt. Add the foamy yeast mixture and the olive oil and mix until a rough dough forms — it will look shaggy and uneven at this stage. Turn the dough out onto a lightly floured surface and knead for 5–7 minutes until the dough is smooth, elastic, and slightly tacky without being sticky. The dough is properly kneaded when it springs back slowly when poked with a finger. If the dough is too sticky to handle, add flour one tablespoon at a time; if it is too dry and cracking, add water one teaspoon at a time.
- Step No.3: Rise and shape the knots
Place the kneaded dough in a lightly oiled bowl, cover with a clean kitchen towel or plastic wrap, and allow to rise at room temperature for 1 hour or until doubled in size. Once risen, punch the dough down to release the air. Divide the dough into 12 equal pieces. Roll each piece into a 6–8 inch rope on a lightly floured surface — the rope should be about the thickness of your thumb. Tie each rope into a loose knot, tucking the ends underneath. Place the shaped knots on a parchment-lined baking sheet with approximately 2 inches of space between each knot. If the dough is resistant and keeps springing back during rolling, let it rest for 10 minutes — the gluten needs time to relax before it will roll out smoothly.
- Step No.4: Make the garlic butter and bake
Preheat the oven to 375°F (190°C). In a small bowl, combine the melted butter, minced garlic, chopped parsley, and salt. Brush approximately half of this garlic butter mixture over the shaped knots before baking — the pre-bake brushing allows the butter to bake into the dough and creates a golden exterior with garlic flavor built into the crust. Bake at 375°F for 15–18 minutes until the knots are golden brown and puffed.
- Step No.5: Second butter brushing and serve
Immediately after removing the hot knots from the oven, brush the remaining garlic butter generously over every surface of every knot — the heat of the knots will melt the butter into the surface and the garlic and parsley will adhere to the warm exterior. Sprinkle with grated Parmesan if using. Serve immediately while still warm, alongside marinara sauce for dipping. The second butter brushing is the step that makes garlic knots genuinely extraordinary — the first brushing bakes in flavor; the second brushing delivers the fragrant, glossy finish that makes every bite taste like genuine Italian-American restaurant garlic bread.

TIPS FOR SUCCESS
- Use Fresh Garlic — Never Garlic Powder in the Butter: Fresh minced garlic in the garlic butter sauce gives these knots their authentic, deep garlic flavor that garlic powder simply cannot replicate. The brief time the butter spends near the heat (in the oven and from the hot knots) mellows the fresh garlic into something aromatic and warming rather than sharp. If garlic powder must be used as a substitute, use ½ teaspoon per 3 cloves of fresh garlic called for, and accept that the finished knots will taste notably different from the fresh garlic version.
- Do Not Overbake — Golden, Not Dark Brown: Garlic knots are at their best when they are a light, even golden-brown throughout — dark brown knots have a slightly hard, tough exterior that detracts from the soft, pillowy interior that makes these knots so appealing. Check the knots at 13 minutes and remove them when they are golden with no pale spots remaining. The second garlic butter brushing adds a visual gloss that makes even lightly baked knots look deeply appetizing.
- Let the Dough Rest If It Keeps Springing Back: If the pizza dough (store-bought or homemade) resists rolling and keeps contracting back to its original shape during the rope-rolling step, it simply needs more time to relax — the gluten strands are tight from recent kneading and need 10 minutes of rest to loosen enough to roll out smoothly. Cover the pieces with a kitchen towel and wait 10 minutes before trying again. Forcing tight dough produces misshapen, uneven ropes that bake into misshapen knots.
- Brush with Garlic Butter Both Before and Immediately After Baking: The pre-bake brushing bakes the butter flavor into the crust and produces a golden exterior; the post-bake brushing delivers the fresh, fragrant garlic and parsley to the surface of the warm knot where it adheres and absorbs immediately. Skipping the pre-bake brushing produces knots that have garlic butter only on the surface with no baked-in flavor. Skipping the post-bake brushing produces knots with baked-in flavor but no glossy, fresh-garlic finish. Both steps together produce the best possible garlic knot.
- Make a Double Batch — They Disappear Fast: Garlic knots are genuinely one of the fastest-disappearing foods I have ever served — a batch of 12 at a table of 4–6 people is gone before anything else, and requests for more are inevitable. I always make a double batch whenever I plan to serve garlic knots, keeping one batch warm in a 200°F oven while the first batch is served, because the disappointment of running out is reliably significant.
VARIATIONS
- Cheesy Garlic Knots: Before tying each dough rope into a knot, place a small piece of mozzarella (approximately 1 teaspoon) at the center of the rope, fold the dough around it, and then tie into the knot shape. The mozzarella melts during baking and creates a gooey, stretchy cheese center that makes each knot a genuinely exciting pull-apart experience. Scatter additional shredded mozzarella or Parmesan over the knots in the final 3 minutes of baking for a golden cheese crust on the outside as well.
- Spicy Garlic Knots: Add ½ teaspoon of crushed red pepper flakes to the garlic butter mixture before brushing. The heat from the red pepper flakes blooms in the warm butter and distributes evenly across every knot, providing a gentle warmth that builds pleasantly with each bite. For a more aggressive heat, add a teaspoon of sriracha to the garlic butter along with the red pepper flakes. The spicy version is particularly good served alongside a creamy dipping sauce like ranch or aioli.
- Herb Lovers' Garlic Knots: Add 1 teaspoon of dried rosemary, 1 teaspoon of dried thyme, and ½ teaspoon of dried oregano to the garlic butter mixture along with the parsley. The combination of multiple herbs produces a more complex, more aromatic garlic butter that complements Italian meals particularly beautifully. For an even more vibrant herb version, use all fresh herbs rather than dried — the fresh herb flavor is noticeably brighter and more fragrant when applied in the post-bake brushing.
- Dairy-Free Garlic Knots: Replace the unsalted butter in the garlic butter mixture with an equal quantity of high-quality vegan butter (Earth Balance or Miyoko's both work well) or extra-virgin olive oil. The dough recipe is already dairy-free as written — the only dairy in the recipe is the butter in the garlic butter sauce. The olive oil version produces a lighter, more Mediterranean-flavored garlic knot that is genuinely excellent in its own right rather than simply a substitution compromise.
- Garlic Knot Sliders: After baking, allow the knots to cool for 5 minutes, then slice each one in half horizontally. Use as mini buns for sliders — fill with pulled pork, a small burger patty, or Italian meatballs in marinara sauce for a creative, crowd-pleasing party food format. The garlic butter flavor in the bun complements virtually any savory filling. See our cinnamon sugar French toast muffins for another bun-adjacent sweet version inspiration.
SERVING AND STORAGE
Serving
Serve garlic knots warm — fresh from the oven is best, but keeping them in a 200°F oven for up to 20 minutes preserves their warmth and texture well. Arrange in a basket lined with a cloth napkin and serve alongside our marinara sauce for dipping. They pair beautifully with any pasta dish, any pizza, any soup, or as a standalone appetizer at parties and gatherings.
Storage
Store cooled garlic knots in an airtight container at room temperature for up to 2 days. Reheat in a 350°F oven for 5–7 minutes until soft and warm, then brush with a small amount of fresh garlic butter before serving — the reheat plus fresh butter application restores them very close to fresh-baked quality. To freeze, cool completely after baking and place in a freezer bag for up to 1 month. Reheat from frozen in a 350°F oven for 10–12 minutes and brush with fresh garlic butter.
FAQ
Yes — store-bought refrigerated or frozen pizza dough is a completely legitimate shortcut that reduces the total time dramatically. Thaw frozen dough overnight in the refrigerator and allow it to come to room temperature for 30 minutes before shaping — cold dough is too stiff to roll easily. Refrigerated store-bought dough can typically be used immediately. The homemade yeast dough version produces a slightly more flavorful, more tender result, but the store-bought shortcut is excellent and practical for weeknights.
The oven is the best method for reheating garlic knots — wrap loosely in foil and warm in a 350°F oven for 5–7 minutes until soft and heated through, then unwrap and brush with a small amount of fresh garlic butter for the final minute. The fresh garlic butter applied after reheating restores the fragrance and glossy finish that diminishes during storage. The microwave works but produces a softer, slightly steamed texture; it is acceptable for speed but produces a noticeably inferior result compared to the oven method.
Yes — two make-ahead approaches work well. Option 1: make the dough up to 24 hours ahead, place in a lightly oiled container after kneading (before the rise), and refrigerate overnight — the dough rises slowly in the refrigerator and is ready to shape the next day. Option 2: shape the knots, place on the baking sheet, cover tightly with plastic wrap, and refrigerate overnight before baking — allow 20 minutes at room temperature before baking. Both approaches produce knots that are indistinguishable from same-day made.
Yes — garlic knots freeze excellently. Cool completely after baking and brushing with garlic butter. Place in a single layer in a freezer-safe bag and freeze for up to 1 month. To serve, place the frozen knots directly on a baking sheet in a 350°F oven for 10–12 minutes until heated through and the exterior has regained its light crispness. Brush with fresh garlic butter immediately after removing from the oven for the best possible result.
Yes — garlic powder works as a substitute when fresh garlic is unavailable, but the finished garlic butter will taste noticeably different. Fresh minced garlic produces a warm, nutty, aromatic garlic flavor when cooked in butter; garlic powder produces a flatter, more one-dimensional garlic note without the complexity that cooking fresh garlic develops. Use ½ teaspoon of garlic powder per 3 cloves of fresh garlic called for. The garlic powder version produces a good garlic knot; the fresh garlic version produces an extraordinary one.
Garlic knots are the bread that makes every dinner feel like a special occasion and every casual gathering feel like an Italian restaurant — soft, fragrant, golden, and disappearing from the basket faster than you can make a second batch. Make them once and they will be on permanent request from everyone who eats at your table.
Try the cheesy version for the most indulgent pull-apart experience, the herb lovers' version for the most aromatic result, and always do the double garlic butter application — the second brushing is what makes these genuinely extraordinary. Pair with our marinara sauce, our garlic butter chicken bites with creamy Parmesan pasta, our garlic Parmesan potato wedges, and our garlic Parmesan spaghetti for the complete garlic collection. 🧄🍞✨
GARLIC KNOTS
Ingredients
For the Dough:
- 2 ¼ teaspoons active dry yeast 1 packet
- ¾ cup warm water 110°F / 45°C
- 1 tablespoon granulated sugar
- 2 cups all-purpose flour
- 1 teaspoon salt
- 1 tablespoon olive oil
For the Garlic Butter:
- ¼ cup unsalted butter melted
- 3 cloves garlic minced
- 1 tablespoon fresh parsley chopped (or 1 teaspoon dried)
- ¼ teaspoon salt
- Grated Parmesan cheese optional, for topping
Instructions
Activate Yeast:
- In a small bowl, mix warm water, sugar, and yeast. Let sit for 5–10 minutes until foamy.
Make the Dough:
- In a large bowl, combine flour and salt. Add yeast mixture and olive oil. Mix until a dough forms. Knead for 5–7 minutes until smooth and elastic.
Let Rise:
- Place dough in a lightly oiled bowl, cover, and let rise for 1 hour or until doubled in size.
Shape the Knots:
- Punch down dough and divide into 12 pieces. Roll each into a rope and tie into a knot. Place on a baking sheet lined with parchment paper.
Bake:
- Preheat oven to 375°F (190°C). Bake knots for 15–18 minutes, or until golden brown.
Make Garlic Butter:
- While knots bake, mix melted butter, garlic, parsley, and salt.
Brush and Serve:
- Brush warm knots with garlic butter. Sprinkle with Parmesan if desired. Serve immediately.
Notes
Custom Flavours: Add Italian seasoning or red pepper flakes to the butter.
Serving Suggestions: Serve with marinara, pasta, or soup.
Storage Tips: Store in an airtight container at room temperature for 2 days or freeze for up to 1 month.





Comments
No Comments