
The smell of garlic butter hitting a hot pan is what gets everyone in my house moving toward the kitchen before I've even called them for dinner. These garlic bread rolls have become one of those recipes I make more than I planned to — initially for a pasta night, then again for soup, then just because Saad asked for them three days in a row and I ran out of reasons to say no.
What I like about this recipe is that the garlic butter isn't just on top — it's tucked inside the dough too, so every bite has that rich, herby flavor all the way through. The dough itself is a soft, pillowy yeast dough that you knead by hand (I don't own a stand mixer, and I've never needed one for these). It takes a little time because of the two rises, but the actual hands-on work is maybe 20 minutes total.
I make these most often when I'm serving something saucy — a big pot of pasta, a bowl of soup, or sometimes alongside my marinated mushrooms as part of a spread. They also disappear fast at gatherings, which is why I started making a double batch and freezing half before baking. More on that in the Tips section.
One thing to know going in: the dough needs about an hour for the first rise and another 20–30 minutes after shaping. Plan around that and you won't feel rushed. If I'm making these for dinner, I usually start the dough around lunchtime, let it rise while the kids are at school, and shape them in the afternoon. By dinnertime they're golden and hot and the kitchen smells incredible.
Why You'll Love This Recipe
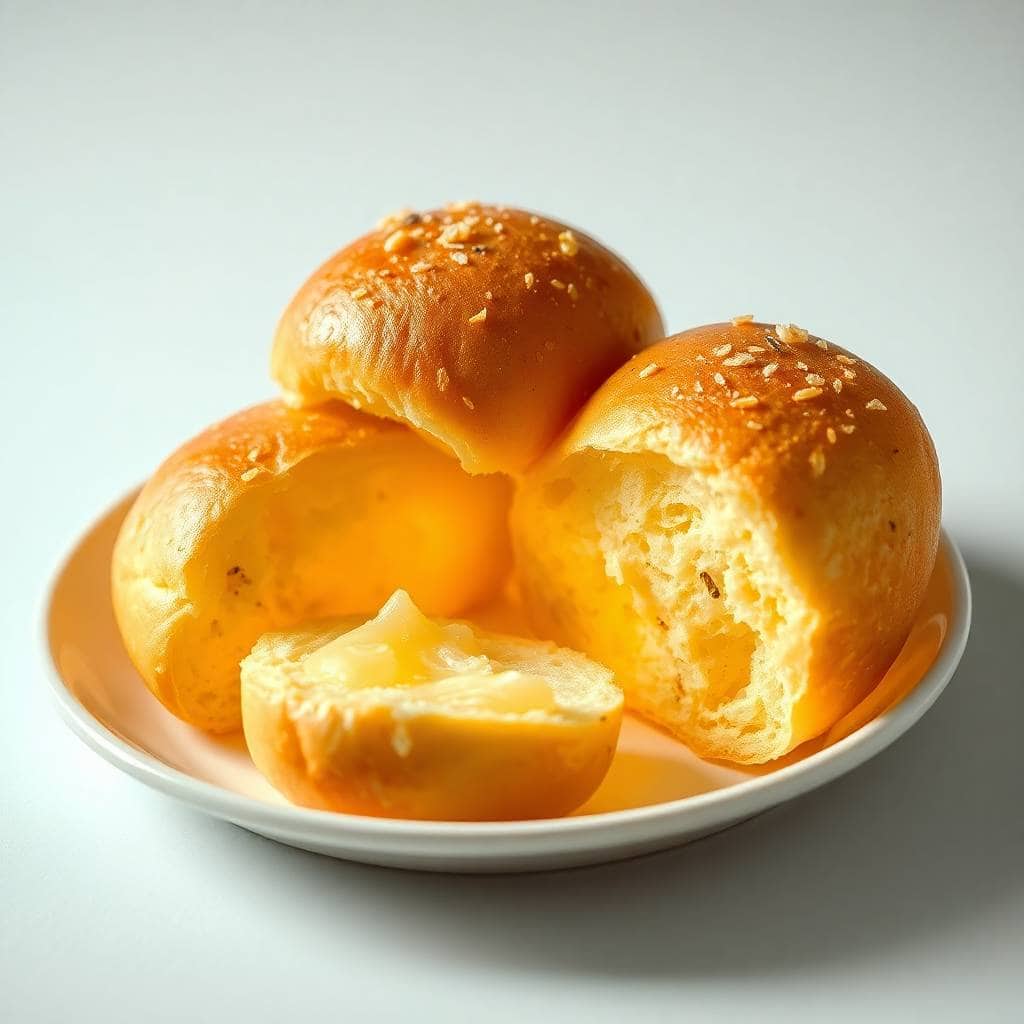
- The garlic butter goes inside AND on top: Most garlic bread just has butter brushed on the surface, which is fine but not very exciting. Here, you spoon some garlic-herb butter into the center of each roll before sealing it up, so it melts into the dough as it bakes. The outside gets another brush of garlic butter right when the rolls come out of the oven. It's a lot of garlic butter and I mean that as a compliment.
- No stand mixer needed: I knead this dough entirely by hand on a lightly floured counter. It takes about 8–10 minutes and it's honestly not that hard — the dough comes together quickly and you can feel when it's ready (smooth, slightly tacky, springs back when you poke it). If you don't have any fancy equipment, you don't need it here.
- They freeze beautifully: I shape the rolls, place them in the baking dish, cover tightly with plastic wrap, and freeze before the second rise. When I want to bake them, I pull the dish out, let the rolls thaw and puff up at room temperature (takes a couple of hours), then brush with garlic butter and bake. Fresh rolls on a weeknight with almost zero effort.
- Works with store-bought dough too: If you're short on time, pizza dough from the refrigerator section at any grocery store works. The texture is slightly different — a bit chewier — but the garlic butter filling more than makes up for it. I've done this on Tuesday nights when I didn't have time to make dough from scratch and it still came out great.
- Soft and pull-apart without being doughy: The two-rise method is what gives these rolls their texture. The first rise builds flavor in the dough, and the second rise after shaping makes them light and fluffy inside. Skip either rise and you'll get something dense. I know because I tried rushing it once when I was impatient, and those rolls were nothing like these.
Ingredients
- For the Dough:
- 3 cups all-purpose flour
- 2¼ teaspoons active dry yeast (1 standard packet)
- 1 tablespoon sugar
- 1 teaspoon salt
- ¾ cup warm milk (around 110°F — warm to the touch but not hot)
- ¼ cup warm water (also around 110°F)
- 3 tablespoons unsalted butter, softened
- For the Garlic Herb Butter:
- ¼ cup unsalted butter, melted
- 3 cloves garlic, minced (or ½ teaspoon garlic powder if that's what you have)
- 1 tablespoon fresh parsley, chopped (or 1 teaspoon dried parsley)
- 2 tablespoons grated Parmesan cheese, optional
- Pinch of salt
Directions
- Activate the yeast: In a small bowl, combine the warm milk, warm water, sugar, and yeast. Give it a quick stir and let it sit for 5–10 minutes. You're looking for it to go foamy and slightly bubbly on top — that tells you the yeast is alive and active. If nothing happens after 10 minutes, your water was probably too hot or the yeast is old, and it's worth starting over rather than wasting the flour.
- Make the dough: In a large bowl, whisk together the flour and salt. Pour in the yeast mixture and the softened butter. Stir until a shaggy dough forms, then turn it out onto a lightly floured counter and knead for 8–10 minutes until smooth and slightly tacky. It should spring back when you press a finger into it. If it's sticking to everything, add flour a tablespoon at a time — not too much or the rolls will be dense.
- First rise: Shape the dough into a ball and place it in a lightly oiled bowl. Cover with a clean kitchen towel or plastic wrap and set it somewhere warm — I use my oven with just the oven light on. Let it rise for about 1 hour, or until doubled in size.
- Make the garlic herb butter: While the dough rises, melt the butter in a small saucepan over low heat. Add the minced garlic and cook for about 1 minute, stirring — just long enough to take the raw edge off the garlic without burning it. Remove from heat, stir in the parsley and Parmesan (if using), and add a pinch of salt. Set aside.
- Shape the rolls: Punch down the risen dough and turn it onto a clean surface. Divide it into 12 equal pieces — I use a bench scraper but a knife works too. Flatten each piece into a small disc, spoon about ½ teaspoon of garlic butter into the center, then pinch the edges together firmly and roll into a smooth ball. Make sure it's properly sealed or the butter leaks out during baking.
- Second rise: Arrange the shaped rolls seam-side down in a greased 9x13 baking dish or on a parchment-lined sheet pan, close enough that they'll touch when they puff up. Cover and let them rise again for 20–30 minutes until noticeably puffy.
- Bake: Preheat your oven to 375°F (190°C). Brush the tops of the rolls with half the remaining garlic butter. Bake for 15–18 minutes, until the tops are golden brown. Pull them out, brush immediately with the rest of the garlic butter, and sprinkle with Parmesan if you're using it. Serve hot.
Tips for Success
- Check your milk temperature: This is the step I got wrong the first time I made yeast bread. I used milk that was too hot — I thought warmer would be faster — and it killed the yeast completely. The dough didn't rise at all and I had to throw the whole thing out. Aim for about 110°F, which feels warm on your wrist but not hot. If you don't have a thermometer, err on the cooler side rather than hotter.
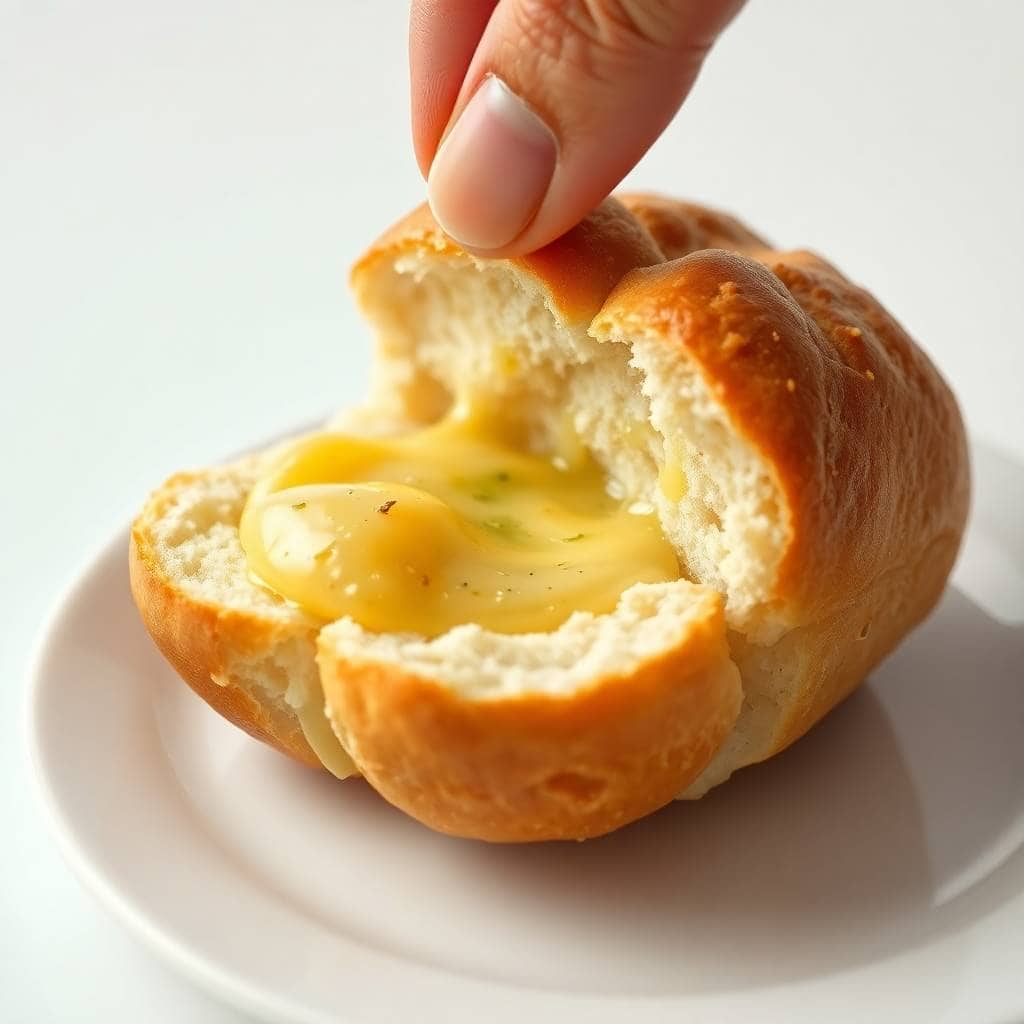
- Seal the rolls properly: The garlic butter inside is what makes these special, but it will leak out if the seam isn't closed tightly. After pinching the edges together, roll the dough ball firmly between your palms on an unfloured surface — the slight friction helps seal it. Place them seam-side down in the pan and they'll stay closed during baking.
- Don't skip the second brush of butter: Brushing the rolls while they're still warm (not just before baking) is the move that makes them look and taste like something from a bakery. The butter soaks into the surface when the rolls are hot. I use whatever garlic butter is left in the pan — every drop of it.
- For make-ahead, freeze before the second rise: After shaping the rolls and placing them in the dish, cover tightly and freeze. When you want to bake them, take the dish out of the freezer, loosely cover, and leave at room temperature for 2–3 hours until thawed and puffy. Then brush with garlic butter and bake as normal. I keep a batch in the freezer almost all winter — it means fresh rolls with basically no planning.
- Use fresh garlic, not garlic powder, if you can: Garlic powder is fine as a backup (use ½ teaspoon in the butter), but fresh minced garlic cooked briefly in butter has a depth that garlic powder just doesn't match. The 60 seconds it takes to cook the garlic in the butter matters — raw garlic inside the rolls can be harsh and sharp; briefly sautéed garlic is mellow and sweet.
Variations
- Cheesy garlic rolls: Tuck a small cube of mozzarella inside each roll along with the garlic butter before sealing. When you tear the roll open, there's a pull of melted cheese in the middle. Saad spotted this idea somewhere and asked me to try it — it's now his preferred version and honestly I don't blame him.
- Spicy herb butter: Add ¼ to ½ teaspoon of red pepper flakes to the garlic butter when you cook the garlic. My husband always reaches for the chili flakes at the dinner table anyway, so I sometimes just put them in the butter and save him the extra step. The heat is subtle — just enough warmth in the background.
- Rosemary and garlic: Swap the parsley for 1 teaspoon of finely chopped fresh rosemary. Rosemary and garlic butter together smells like a really good Italian restaurant. This is the version I make when I'm serving these with soup — it feels a little more wintery and cozy.
- Dairy-free version: Use oat milk or any unsweetened plant-based milk in the dough, and swap the butter for a good vegan butter (I've used the Walmart Great Value plant-based butter and it works fine). The rolls come out slightly less rich but still good. Just skip the Parmesan or use a dairy-free alternative.
- Whole wheat blend: Replace 1 cup of the all-purpose flour with whole wheat flour. Any more than that and the rolls get quite dense, so I wouldn't go higher. The flavor is slightly nuttier and the color of the baked rolls is a little darker, which I actually like.
Serving and Storage
Serving
Serve these straight from the oven while they're still warm and the butter is glistening on top. They go with almost anything saucy — pasta, a bowl of soup, or as part of a bigger spread. I've also put them out as a starter at dinner parties with a small bowl of marinara on the side for dipping, and they go fast. In Pakistan we'd tear bread and scoop with it, and these rolls work perfectly for that too — great for mopping up any sauce left on the plate.
Storage
Store leftover rolls in an airtight container at room temperature for up to 2 days, or in the fridge for up to 4 days. To reheat, wrap them loosely in foil and warm in a 300°F (150°C) oven for 5–7 minutes — they come back to life surprisingly well. For longer storage, freeze baked rolls in a zip-lock bag for up to 1 month. Reheat from frozen at 350°F for about 12–15 minutes. If you want to freeze them unbaked, shape the rolls, place in the dish, freeze until solid, then transfer to a zip-lock bag — this way they don't take up your baking dish in the freezer.

Frequently Asked Questions
Can I use store-bought dough instead of making it from scratch?
Yes, and it works really well. Refrigerated pizza dough from any grocery store is the easiest option — just let it come to room temperature for 20 minutes before shaping. The texture will be slightly chewier than homemade, but the garlic butter filling still does most of the heavy lifting. I've done this on nights when I just didn't have time, and nobody complained.
Can I freeze these rolls, and when is the best time to freeze them?
You can freeze them either before or after baking. I prefer freezing them unbaked (after shaping, before the second rise) because you get fresher-tasting rolls when you bake them later. Just shape them into the pan, wrap tightly, and freeze. When you're ready, let them thaw and rise at room temperature for 2–3 hours, then brush with garlic butter and bake normally. If freezing already-baked rolls, reheat at 350°F for 12–15 minutes from frozen.
My dough didn't rise — what went wrong?
Almost always it's the liquid temperature. If the milk or water was too hot (above 120°F), it kills the yeast before it gets a chance to work. If it was too cold, the yeast just sits there doing nothing. Aim for 110°F — it should feel comfortably warm on the inside of your wrist, like bath water. Also check your yeast packet expiration date; old yeast is the other common culprit.
How do I reheat leftover rolls without drying them out?
Wrap them in foil and heat at 300°F for 5–7 minutes. The foil traps the steam and keeps them soft. Microwaving works in a pinch — about 15 seconds per roll — but the texture isn't as good. If they've been in the fridge, let them sit at room temperature for 10 minutes before reheating so they warm through more evenly.
Can I make the dough the night before?
Yes — this is actually one of my favorite ways to do it. After the first rise, shape the rolls, place them in the greased baking dish, cover tightly with plastic wrap, and refrigerate overnight. The cold slows the second rise way down, so they'll puff slowly in the fridge. The next day, take them out about 30–45 minutes before baking to come back to room temperature and finish puffing, then brush with garlic butter and bake as normal.

GARLIC BREAD ROLLS
Ingredients
For the Dough:
- 3 cups all-purpose flour
- 2 ¼ teaspoons active dry yeast 1 packet
- 1 tablespoon sugar
- 1 teaspoon salt
- ¾ cup warm milk 110°F
- ¼ cup warm water 110°F
- 3 tablespoons unsalted butter softened
For the Garlic Butter Topping:
- ¼ cup unsalted butter melted
- 3 cloves garlic minced
- 1 tablespoon chopped parsley
- 2 tablespoons grated Parmesan cheese optional
- Pinch of salt
Instructions
Prepare the Dough:
- In a small bowl, mix warm milk, warm water, sugar, and yeast. Let sit for 5–10 minutes until foamy. In a large bowl, combine flour and salt. Add yeast mixture and butter. Knead until smooth, about 8–10 minutes.
First Rise:
- Cover and let the dough rise in a warm place for 1 hour or until doubled in size.
Shape the Rolls:
- Punch down the dough and divide into 12 balls. Place them in a greased baking dish or on a lined tray.
Second Rise:
- Let rise again for 20–30 minutes until puffy.
Preheat the Oven:
- Preheat oven to 375°F (190°C).
Prepare Garlic Butter:
- Stir together melted butter, minced garlic, parsley, Parmesan (if using), and salt.
Bake:
- Brush rolls with half the garlic butter. Bake for 15–18 minutes or until golden. Brush with remaining garlic butter while warm.
Notes
You can shape the rolls and refrigerate overnight. Bring to room temperature before baking. Customizing the Flavour:
Add shredded mozzarella or a cube of cheese inside each dough ball for cheesy garlic rolls. Serving Suggestions:
Serve warm with marinara sauce, pasta, soup, or use as a party snack. Allergy-Friendly Options:
Use dairy-free butter to make the recipe dairy-free. Storage Tips:
Store leftovers in an airtight container at room temperature for 2 days or freeze for up to 1 month.
These rolls have earned a permanent spot in my baking rotation, and I don't see that changing. They're the kind of thing where the ingredients are simple — flour, butter, garlic, yeast — but the result feels like you put in a lot more effort than you actually did. That's my kind of recipe. I make a double batch more often than not because a single batch of 12 disappears at dinner





Comments
No Comments